[Linux/Java SE] 反编译:查看JAR包内的类 | JAR 命令 | 反编译 | JD-GUI | JD-CORE
1 查看JAR包内的类
- 另一个思路: 解压JAR包
jar -xf <jarPath>
1-1 单JAR包
-t list table of contents for archive(列出存档内容表)
-f specify archive file name (指定存档文件名)
[root@sdc70 ~]# jar -tf catalina.jar | grep -i "HttpHeaderSecurityFilter"
org/apache/catalina/filters/HttpHeaderSecurityFilter$XFrameOption.class
org/apache/catalina/filters/HttpHeaderSecurityFilter.class
1-2 多JAR包
-
step1 将需要查找目标类名的JAR包放在同一目录下
-
step2 解析多JAR包的类及其路径,存放在1个临时文件中
find <-targetDir-> -name "*.jar" -exec jar -tf {} > ./tmpfile-multi-jar-classes.txt \;
- step3 从临时文件中查找是否存在目标类
# cat ./tmpfile-multi-jar-classes.txt | grep -i "<keyword>"

[root@sdc70 ~]# cat ./tmpfile-multi-jar-classes.txt | grep -i "HttpHeaderSecurityFilter"
org/apache/catalina/filters/HttpHeaderSecurityFilter$XFrameOption.class
org/apache/catalina/filters/HttpHeaderSecurityFilter.class
2 JAR命令说明
2-1 JAR命令详解
[root@sdc70 ~]# jar --help
Illegal option: -
Usage: jar {ctxui}[vfmn0PMe] [jar-file] [manifest-file] [entry-point] [-C dir] files ...
Options:
    -c  create new archive
    -t  list table of contents for archive (列出存档内容表)
    -x  extract named (or all) files from archive (从归档文件中提取已命名(或全部)文件)
    -u  update existing archive (更新现有的存档)
    -v  generate verbose output on standard output (在标准输出上生成详细输出)
    -f  specify archive file name (指定存档文件名)
    -m  include manifest information from specified manifest file
    -n  perform Pack200 normalization after creating a new archive
    -e  specify application entry point for stand-alone application bundled into an executable jar file (为绑定到可执行jar文件的独立应用程序指定应用程序入口点)
    -0  store only; use no ZIP compression
    -P  preserve leading '/' (absolute path) and ".." (parent directory) components from file names
    -M  do not create a manifest file for the entries (不为条目创建清单文件)
    -i  generate index information for the specified jar files (为指定的jar文件生成索引信息)
    -C  change to the specified directory and include the following file (更改到指定的目录并包含以下文件)
If any file is a directory then it is processed recursively.
The manifest file name, the archive file name and the entry point name are specified in the same order as the 'm', 'f' and 'e' flags.
(如果任何文件是一个目录,那么它将被递归处理。
清单文件名、存档文件名和入口点名称的指定顺序与'm'、'f'和'e'标志相同。)

Example 1: to archive two class files into an archive called classes.jar:
       jar cvf classes.jar Foo.class Bar.class
Example 2: use an existing manifest file 'mymanifest' and archive all the
           files in the foo/ directory into 'classes.jar':
       jar cvfm classes.jar mymanifest -C foo/ .
2-2 应用场景
case1: 解压指定的JAR包到当前目录
(注:JAR命令无法指定解压的目标目录)
jar -xf /root/test/catalina.jar
亦可利用WinRAR来实现。
case2: 运行JAR包(/Java类文件)的main方法

[方法1]java -jar ****.jar [args]
适用场景: 1)运行JAR包(需指定具体JAVA类); 2)JAR包内必须指定 META-INF/MANIFEST.MF:Main-Class;
否则,会报此异常: no main manifest attribute, in hello-jar-1.0-SNAPSHOT.jar(hello-jar-1.0-SNAPSHOT.jar中没有主清单属性)
解决此异常/配置
META-INF/MANIFEST.MF:Main-Class的方式:
- [#1 事后型] 直接编辑已有JAR包进行配置。利用WinRAR解压 JAR包;在其 META-INF/MANIFEST.MF 文件内配置 Main-Class;再利用WinRAR压缩为zip压缩包,重命名为jar即可
- [#2 事前型] 普通Maven项目: pom.xml中
<build>内配置maven的插件(maven-assembly-plugin),指定 mainClass属性值- [#3 事前型] SpringBoot的Maven项目: pom.xml中
<build>内配置maven的插件(spring-boot-maven-plugin)即可Main-Class: org.springframework.boot.loader.JarLauncher Start-Class: cn.johnnyzen.myBootApplication
java -jar myApp.jar arg_aaa arg_bbb
[方法2]java -classpath ****.jar ****.****.className [args]
适用场景: 1)运行JAR包(无需指定具体JAVA类); 2)JAR包内无需指定 META-INF/MANIFEST.MF:Main-Class
如果没有在JAR包内的META-INF/MANIFEST.MF中指定Main-Class配置时;
或者
如果JAR包中有多个main方法,运行时需指定某个特定的main方法
java -cp myApp.jar com.smbea.dubbo.bin.Console aaa bbb
-cp := -classpath
[方法3]java -Djava.ext.dirs=<多个jar包的目录> com.test.HelloWordMain
(如果用-cp,则需要写每个jar,很麻烦)
【风险】(方法3)
从结果来看,两者(-cp / -Djava.ext.dirs)的区别在于:-Djava.ext.dirs会覆盖JAVA本身的ext设置。
一般情况下程序运行并无差异,因为可以看到ext目录下也就几个jar;
但是如果使用java.security相关类时,就会发现-Djava.ext.dirs会导致library找不到进而报错。
(解决办法暂时想到2种:)
- 将相关lib复制到新的ext director。验证可行
- 配置多个director。可以使用冒号分隔(-Djava.ext.dirs=directoryA:directoryB)
case3 : 生成JAR压缩包(打包)
-
方式1 利用WinRAR对class文件 打JAR包
(详见本文第4章 WinRAR部分) -
方式2
jar cvf ./myJarName.jar ./
将当前目录下的所有文件打成jar包,jar包名为main.jar(放在工作目录下)
3 反编译: file.class → file.java
java 反编译 := java decompiler
需求场景
-
场景1
当项目已部署时,不确定已部署的war/jar包内某个类文件中是否是预期的内容。
此时,最低成本的做法或许是:直接反编译看看。 -
场景2
确认运行环境的JAR包指定类的源代码是否与开发环境的源代码一致
一般的,Java Web项目中,class文件在Tomcat的WEB应用此路径下:
C:xx/wepapps/xxxApp/WEB-INF/classes/.../Example.class
研究Java反编译的项目与组织
“Java反编译器项目”(java-decompiler.github.io) 【推荐】
- slogan
“Java反编译器项目”旨在开发工具,以反编译和分析Java 5“字节码”和以后的版本。
- java-decompiler.github.io
http://java-decompiler.github.io
Java反编译的顶级项目,其组织释出的得意之作:
jd-gui: GUI反编译工具。JD-GUI是一个独立的图形实用程序,显示“class”文件的Java源代码。您可以使用JD-GUI浏览重构的源代码,以便即时访问方法和字段。jd-eclipse: JD-Eclipse是用于Eclipse平台的插件。它允许您在调试过程中显示所有的Java源代码,即使您没有全部的源代码。jd-core: 支持嵌入到Java应用程序中的反编译依赖库。JD-Core是一个从一个或多个class文件重构Java源代码的库。可以使用JD-Core来恢复丢失的源代码和探索Java运行时库的源代码。支持Java 5的新特性,如注释、泛型或类型“enum”。JD-GUI和JD-Eclipse包括JD-Core库。
- 许可证/知识产权
JD-Core、 JD-GUI和JD-Eclipse是在GPLv3许可下发布的开源项目。
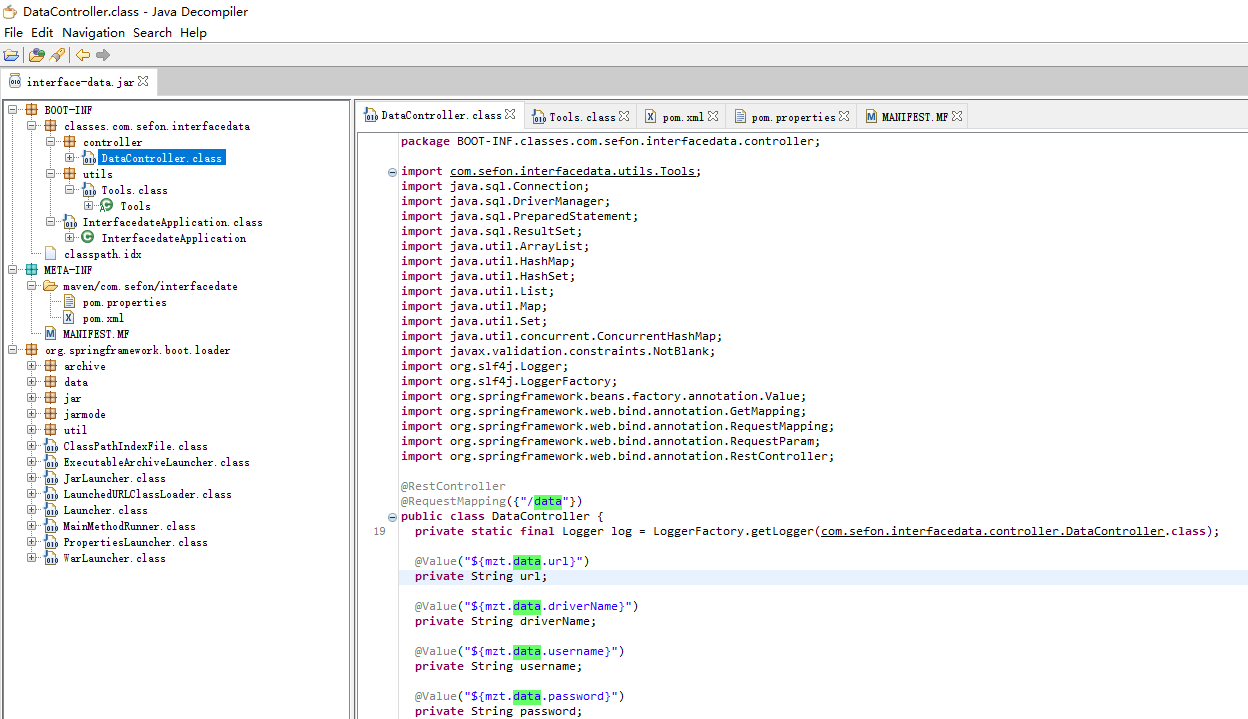
GUI反编译工具: jd-gui
- 简介
jd-gui的全称 : Java Decompiler-GUI- 作为“Java反编译器项目”(java-decompiler.github.io)组织释出的、最流行的(反编译)工具
- 适用场景:
- 能够把待反编译的jar包下载到本地电脑时
- 下载地址 - Github: http://java-decompiler.github.io/

命令行反编译工具: jad
- 简介
全称:JAD Java Decompiler
JAD 是一款老牌的、经典的、使用起来简单的 Java 反编译工具。
大家都知道,将源代码转换成二进制执行代码的过程叫“编译”,比如将 Java 源代码编译成 .class 字节码文件;那么把字节码文件转换成代码的过程就叫“反编译”。
- 官网
下载安装包的地址
https://varaneckas.com/jad/jad158g.win.zip
https://varaneckas.com/jad/jad158e.linux.intel.zip
- http://www.kpdus.com (原官网,已废止)
如果镜像的链接地址失效了,请使用下面这个链接下载: https://download.csdn.net/download/qing_gee/10921233
可到该博文处下载: Java 反编译工具几枚(class转java) - CSDN
亦可下载博主提供的: jad158g.win.zip - zip包 解压即安装 (安装包来源于:https://varaneckas.com/jad/)
- 安装
将 jad.zip 文件解压缩到硬盘驱动器上的任何适当目录中。这将创建两个文件:
- 可执行文件 “jad.exe”(Windows 9x / NT / 2000)或 “ jad”(UNIX)
- 自述文件 “Readme.txt”,其中包含简短的用户手册
对于 UNIX 用户:使 'jad' 成为可执行文件:
chmod a+x jad
无需进一步设置。
JAD_PATH=/root/jad

mkdir -p $JAD_PATH
cd $JAD_PATH
wget https://varaneckas.com/jad/jad158e.linux.intel.zip
unzip jad158e.linux.intel.zip
chmod +x jad
-
软件包:
jad.zip -
jad 命令解析
-o:覆盖旧文件,而且不用提示确认。
-r:重新加载生成包结构。
-s (java):定义输出文件的扩展名。jad为默认扩展名,咱们反编译后,当然是要.java源文件了。
-d:输出文件的目录。src表示反编译后的所有文件都放在src目录下。
- 试验0:反编译
未亲测
JAD_PATH=/root/jad
mkdir -p $JAD_PATH/classes

# step1 解压jar包为 class 文件集合

JAR_APP_NAME=xxl-xxx-app
JAR_APP_CLASSES_PATH=$JAD_PATH/classes/$JAR_APP_NAME
mkdir -p $JAR_APP_CLASSES_PATH

# unzip <dirName/compressedFile>.zip -d <targetDir>
unzip /opt/xxx/$JAR_APP_NAME.jar -d $JAR_APP_CLASSES_PATH
# 或 使用 JDK的 jar 命令将 jar 包解压到指定的 classes 目录: jar -xvf xx.jar -C classes-path

ls -l $JAR_APP_CLASSES_PATH

cd $JAR_APP_CLASSES_PATH


JAR_APP_SRC_PATH=$JAD_PATH/src/$JAR_APP_NAME
mkdir -p $JAR_APP_SRC_PATH

# step2 反编译
# 把指定class路径及其子目录下所有的 .class 文件反编译,输出到 `-d`参数指定的目录
$JAD_PATH/jad -o -r -s java -d $JAR_APP_SRC_PATH 'org/**/*.class'
- 试验1:反编译
step1 切换到jad.exe的目录下
step2 jad -o -r -s java -d src xx/wepapps/xxxApp/WEB-INF/classes/.../Example.class
      (执行完毕后,jad的当前目录下会生成1个名为src的子目录,其内会存在反编译后的java文件: Example.java)

- 试验2:反编译
- 源代码 :
Cmower3.java
package com.cmower.java_demo.fourteen;
public class Cmower3 {
	public static void main(String[] args) {
  String cmowers = "";
  for (int i = 0; i < 10; i++) {
  	cmowers += "沉默王二";
  }
  System.out.println(cmowers);
	}
}
- 编译 :
Cmower3.java=>Cmower3.class
- 反编译
打开 CMD,进入该文件所在的路径(如果之前未编译,请先使用javac进行编译,生成 class 文件),输入以下命令:
jad Cmower3.class
如果提示信息如下,则证明反编译成功。
Parsing Cmower3.class... Generating Cmower3.jad
与此同时,Cmower3.class 所在的文件夹下会多出来一个新的文件 Cmower3.jad,用文本编辑器打开即可查看
// Decompiled by Jad v1.5.8g. Copyright 2001 Pavel Kouznetsov.
// Jad home page: http://www.kpdus.com/jad.html
// Decompiler options: packimports(3)
// Source File Name:   Cmower3.java
package com.cmower.java_demo.fourteen;
import java.io.PrintStream;
public class Cmower3
{
    public Cmower3()
    {
    }
    public static void main(String args[])
    {
        String s = "";
        for(int i = 0; i < 10; i++)
            s = (new StringBuilder()).append(s).append("\u5A0C\u5910\u7CAF\u941C\u5B29\u7C29").toString();
        System.out.println(s);
    }
}
和
JD-GUI的不同之处?需要注意的是:JAD 不是 JD-GUI,两者都是反编译工具,但并不相同。
比如上面这段代码,JD-GUI 反编译后的结果如下所示:

可以看得出来,
JD-GUI显示的是最原始的 Java 源代码。而JAD显示的是更贴近事实的源代码:例如,
+号操作符在编译的时候其实是会转成StringBuilder的。
这特别的关键,如果你想知道编译器的工作内容,就可以使用JAD。就像javap一样,只不过更加的清晰明了,javap一般人看不太懂,如下:
D:\program\java.git\java_demo\src\main\java\com\cmower\java_demo\fourteen>javap -c Cmower3
警告: 二进制文件Cmower3包含com.cmower.java_demo.fourteen.Cmower3
Compiled from "Cmower3.java"
public class com.cmower.java_demo.fourteen.Cmower3 {
  public com.cmower.java_demo.fourteen.Cmower3();
    Code:
       0: aload_0
       1: invokespecial #1                  // Method java/lang/Object."<init>":()V
       4: return
  public static void main(java.lang.String[]);
    Code:
       0: ldc           #2                  // String
       2: astore_1
       3: iconst_0
       4: istore_2
       5: iload_2
       6: bipush        10
       8: if_icmpge     37
      11: new           #3                  // class java/lang/StringBuilder
      14: dup
      15: invokespecial #4                  // Method java/lang/StringBuilder."<init>":()V
      18: aload_1
      19: invokevirtual #5                  // Method java/lang/StringBuilder.append:(Ljava/lang/String;)Ljava/lang/StringBuilder;
      22: ldc           #6                  // String 娌夐粯鐜嬩簩
      24: invokevirtual #5                  // Method java/lang/StringBuilder.append:(Ljava/lang/String;)Ljava/lang/StringBuilder;
      27: invokevirtual #7                  // Method java/lang/StringBuilder.toString:()Ljava/lang/String;
      30: astore_1
      31: iinc          2, 1
      34: goto          5
      37: getstatic     #8                  // Field java/lang/System.out:Ljava/io/PrintStream;
      40: aload_1
      41: invokevirtual #9                  // Method java/io/PrintStream.println:(Ljava/lang/String;)V
      44: return
}
Java源码实现反编译
方案1:基于org.jd:jd-core构建 【推荐】
引入依赖
<!-- 通过java代码,将jar或class反编译为java文件的四种方式 | https://blog.csdn.net/weixin_44005802/article/details/138280565 -->
<!-- https://mvnrepository.com/artifact/org.jd/jd-core -->
<!-- 如果下载不下来,可使用华为镜像:https://repo.huaweicloud.com/repository/maven/org/jd/jd-core/1.1.3/jd-core-1.1.3.pom-->
<dependency>
	<groupId>org.jd</groupId>
	<artifactId>jd-core</artifactId>
	<version>1.1.3</version>
</dependency>

<!-- java 第三方元组库(可选,本身与反编译无关) -->
<dependency>
	<groupId>org.javatuples</groupId>
	<artifactId>javatuples</artifactId>
	<version>1.2</version>
</dependency>
反编译工具类 : JDCoreDecompiler
import lombok.SneakyThrows;
import lombok.extern.slf4j.Slf4j;
import org.apache.commons.lang3.StringUtils;
import org.javatuples.Pair;
import org.jd.core.v1.ClassFileToJavaSourceDecompiler;
import org.jd.core.v1.api.loader.Loader;
import org.jd.core.v1.api.printer.Printer;

import java.io.ByteArrayOutputStream;
import java.io.File;
import java.io.IOException;
import java.io.InputStream;
import java.nio.file.Files;
import java.nio.file.Path;
import java.nio.file.Paths;
import java.util.Enumeration;
import java.util.HashMap;
import java.util.Optional;
import java.util.function.Function;
import java.util.jar.JarFile;
import java.util.zip.ZipEntry;
import java.util.zip.ZipFile;

/**
 * @update-time 2025-04-29 12:28 AM
 */
@Slf4j
public class JDCoreDecompiler {
    private ClassFileToJavaSourceDecompiler decompiler = new ClassFileToJavaSourceDecompiler();
    // 存放字节码
    /**
     * 存放字节码
     * @key class path | eg : "com/xxx/common/http/OkHttpClientConfig.class"
     * @value clazz bytes | eg: [-54,-2,-70,-66,0,0, ... ]
     */
    private HashMap<String,byte[]> classByteMap = new HashMap<>();

	public static void main(String[] args) throws Exception {
		ParameterTool paraTool = ...; // org.apache.flink.api.java.utils.ParameterTool

        //反编译目标class
        String jarPath = paraTool.get("debug.jarPath", null);
        String decompilerClass = paraTool.get("debug.decompilerClass", null);
        String destinationDirectory = paraTool.get("debug.destinationDirectory", null);
        if(StringUtils.isNotEmpty(jarPath) && StringUtils.isNotEmpty(decompilerClass)){
            String clazz = decompilerClass.replace("/", ".").replace(".class", "");//"com/example/MyClass.class" => "com.example.MyClass"
            ClassLoader classLoader = Class.forName(clazz).getClassLoader();
            //clazz: "com/ververica/cdc/connectors/mysql/table/MySqlTableSource.class" => "sun.misc.Launcher$AppClassLoader@18b4aac2"
            log.info("target class's class loader: {}", classLoader.toString());
            decompile(jarPath, decompilerClass, destinationDirectory);
        }
	}

    /**
     * 反编译指定的类
     * @param jarPath eg: "/usr/local/huaweijre-8/lib/rt.jar"
     * @param decompilerClass eg: "java/lang/String.class"
     * @param destinationDir eg: "./"
     */
    @SneakyThrows
    public static void decompile(@Nullable String jarPath,@Nullable String decompilerClass, @Nullable String destinationDir){
        log.warn("Start to decompile! jarPath:{}, decompilerClass:{}, destinationDirectory:{}", jarPath, decompilerClass, destinationDir);

        /**
         * 反编译
         * 1. for ParquetFileSink#getMainStreamSink : ts / DAY_MILLIS + "/" + (Math.abs(deviceId.hashCode() % partitions) + 10000) | deviceId := String.class
         *   运行日志 : JobManager 日志 / TaskManager 日志 : ...
         * 3. java.lang.String at JRE({JAVA_HOME}\jre\lib\rt.jar)
         */
        //step3 反编译
        JDCoreDecompiler jdCoreDecompiler = new JDCoreDecompiler();

        //String jarFilePath = "C:\\Users\\xxxx\\Desktop\\xxx-service-common-1.1.24-SNAPSHOT.jar";
        //$JAVA_HOME/jre/lib/rt.jar
        //String jarFilePath = Optional.ofNullable(jobParameterTool.get("jarPath")).orElse("/usr/local/huaweijre-8/lib/rt.jar");
        String jarFilePath = Optional.ofNullable(jarPath).orElse("/usr/local/huaweijre-8/lib/rt.jar");
        log.info("jarFilePath:{}", jarFilePath);
        //String clazz = "com.xx.xx.common.App";//path + File.separator + "JDCore" = E:\source_code\Demo-Projects\local-demos-parent\local-demo\target\JDCore//
        //String clazz = "com.xx.xx.common/App.class";
        //String clazz = Optional.ofNullable(jobParameterTool.get("decompilerClass")).orElse("java/lang/String.class");
        String clazz = Optional.ofNullable(decompilerClass).orElse("java/lang/String.class");
        String destinationDirectory = Optional.ofNullable(destinationDir).orElse("./"); //"C:\\Users\\xxxxxx\\Desktop\\decompiler";

        //执行命令,查看 JAVA_HOME 目录的情况
        String javaHome = System.getenv("JAVA_HOME");
        String osName = System.getProperties().getProperty("os.name"); // "Windows 10"
        String command = null;
        String charset = null;
        //ProcessBuilder processBuilder = null;
        if(osName.toLowerCase().contains("windows")){
            //processBuilder = new ProcessBuilder("cmd.exe /c");
            command = "cmd.exe /c dir " + javaHome; // "%JAVA_HOME%"
            charset = "GBK";
        } else {//unix / linux / ...
            command = "ls -la "+ javaHome; // "$JAVA_HOME"
            charset = "UTF-8";
        }

        //解析
        HashMap<String,byte[]> archiveJarClasses = jdCoreDecompiler.archive(jarFilePath);

        //判断目标类是否存在于目标 JAR 包
        Boolean existsClass = false;
        existsClass = jdCoreDecompiler.existsClass(archiveJarClasses, clazz);//判断指定的类是否存在
        log.info("existsClass | {} : {}", clazz, existsClass);
        log.info("");

        //反编译 + 输出到目标目录
        if(existsClass){
            //Function<Pair<String, byte []>, Optional> decompiledClassFunction = JDCoreDecompiler.getDecompiledClassConsumerAsSaveAllClassesToDirectory(destinationDirectory);

            //Function<Pair<String, byte []>, Optional> decompiledClassFunction = JDCoreDecompiler.getDecompiledClassConsumerAsCaptureTargetClass(clazz);
            //HashMap<String,Pair<byte[], Optional>> decompiledClasses = jdCoreDecompiler.decompile(archiveJarClasses, decompiledClassFunction);//将反编译结果持久化到本地文件系统
            //Pair<byte[], Optional> targetClassPair = decompiledClasses.get(clazz);
            //log.info("targetClassPair.sourceCode:\n{}", targetClassPair.getValue1().get());

            String decompiledClass = jdCoreDecompiler.decompile(clazz);
            log.info("decompiledClass:\n{}", decompiledClass);
        }
        log.warn("Success to decompile!");
    }

    /**
     * 将解析结果反编译,并持久化到本地文件系统
     * @reference-doc
     *  [1] JavaTuples 使用教程 - CSDN - https://blog.csdn.net/gitblog_00718/article/details/142269439
     * @note
     *  注意:没有考虑一个 Java 类编译出多个 Class 文件的情况。
     *  Consumer : 无返回值的函数接口
     *  Function<I, O> : 有返回值的函数接口
     * @param archiveJarClasses
     * @param decompiledClassFunction
     * @return
     * @throws Exception
     */
    //public HashMap<String,byte[]> decompile(HashMap<String,byte[]> archiveJarClasses, String targetClass, Consumer<Pair<String, byte[]>> decompiledClassConsumer) throws Exception {
    public HashMap<String,Pair<byte[], Optional>> decompile(HashMap<String,byte[]> archiveJarClasses, Function<Pair<String, byte[]>, Optional> decompiledClassFunction) throws Exception {
        HashMap<String, Pair<byte[], Optional>> decompileJarClasses = new HashMap<>();//反编译后的JAR
        Long startTime = System.currentTimeMillis();
        for (String className : archiveJarClasses.keySet()) {
            //[1] 对当前类反编译
            String context = null;
            context = decompile(className);

            //[2] 执行消费函数 或 持久化
            byte [] decompiledClassContentBytes = context.getBytes();
            Pair<byte[], Optional> pair = null;
            if(decompiledClassFunction != null){
                Pair<String, byte[]> decompiledClassPair = new Pair<>(className, decompiledClassContentBytes);//二元元组
                //decompiledClassConsumer.accept(decompiledClassPair);
                Optional functionResult = decompiledClassFunction.apply(decompiledClassPair);
                pair = new Pair<>(context.getBytes(), functionResult);
            } else {
                pair = new Pair<>(context.getBytes(), Optional.empty() );
                log.warn("decompiledClassFunction is empty!className : {}, decompiledClassContent:\n{}", className, new String(decompiledClassContentBytes) );
            }
            decompileJarClasses.put(className, pair);
        }
        long endTime = System.currentTimeMillis();
        //log.debug("Success to decompiler the jar!sourceJar:{}, timeConsuming:{}ms", sourceJar, (endTime-startTime));
        log.debug("Success to write the decompiled classes!timeConsuming:{}ms", (endTime-startTime));
        return decompileJarClasses;
    }

    /**
     * 对指定的类,反编译
     * @param targetClass
     * @return
     */
    @SneakyThrows
    public String decompile(String targetClass){
        try {
            this.decompiler.decompile(loader, printer, targetClass);
        } catch(Exception exception) {
            log.error("Fail to decompile for the target archive jar class!targetClass:{}", targetClass, exception);
        }
        String context = printer.toString();
        if(log.isDebugEnabled()){
            log.info("targetClass:{}, context:{}", targetClass, context);
        }
        return context;
    }

    /**
     * 获得输出到本地文件目录的反编译类消费函数
     * @note 将反编译的类,保存到指定目录
     * @note 本方法,作为 JDCoreDecompiler#decompile(java.util.HashMap, java.lang.String, java.util.function.Consumer) 入参 Consumer 的默认实现
     * @param destinationDirectory
     * @return 固定返回 Optional.empty()
     */
    public static Function<Pair<String, byte []>, Optional> getDecompiledClassConsumerAsSaveAllClassesToDirectory(String destinationDirectory){
        return decompiledClassPair -> {
            String outputDirectory = destinationDirectory;
            String className = decompiledClassPair.getValue0();

            //[1] 对 className 预处理
            //className | eg : "com/xxx/common/http/OkHttpClientConfig.class"
            //path | eg : "com/xxx/common/http"
            String currentClassPath = JDCoreDecompiler.substringBeforeLast(className, "/");
            //name | eg : "OkHttpClientConfig.class"
            String currentClassName = JDCoreDecompiler.substringAfterLast(className, "/");
            if (JDCoreDecompiler.contains(currentClassName, "$")) {
                currentClassName = JDCoreDecompiler.substringAfterLast(currentClassName, "$");
            }
            currentClassName = StringUtils.replace(currentClassName, ".class", ".java");

            //[2] 输出到文件
            Path targetPath = Paths.get(outputDirectory + "/" + currentClassPath + "/" + currentClassName);
            if (!Files.exists(Paths.get(outputDirectory + "/" + currentClassPath))) {
                try {
                    Files.createDirectories(Paths.get(outputDirectory + "/" + currentClassPath));
                } catch (IOException e) {
                    throw new RuntimeException(e);
                }
            }
            try {
                Files.deleteIfExists(targetPath);
            } catch (IOException e) {
                throw new RuntimeException(e);
            }
            try {
                Files.createFile(targetPath);
            } catch (IOException e) {
                throw new RuntimeException(e);
            }
            try {
                Files.write(targetPath, decompiledClassPair.getValue1());
            } catch (IOException e) {
                throw new RuntimeException(e);
            }
            log.debug("Success to write the class to the path({})!", targetPath);

            return Optional.empty();
        };
    }

    /**
     * 捕获目标Class类的反编译类消费函数
     * @param targetClass
     * @return
     *  IF 存在目标类 then : return 反编译后的java源码
     *  IF 不存在目标类 then : return Optional.empty()
     */
    public static Function<Pair<String, byte []>, Optional> getDecompiledClassConsumerAsCaptureTargetClass(String targetClass){
        return decompiledClassPair -> {
            String className = decompiledClassPair.getValue0();
            byte [] decompiledClassContentBytes = decompiledClassPair.getValue1();
            if(className.equalsIgnoreCase(targetClass)){
                String decompiledClassContent = new String(decompiledClassContentBytes);
                return Optional.of(decompiledClassContent);
            } else {
                return Optional.empty();
            }
        };
    }

    /**
     * 目标类是否存在JAR包中
     * @param archiveJarClasses
     * @param targetClass
     * @return
     */
    public Boolean existsClass(HashMap<String,byte[]> archiveJarClasses, String targetClass) {
        byte [] clazzBytes = null;
        clazzBytes = archiveJarClasses.get(targetClass);
        return clazzBytes==null?false:true;
    }


    /**
     * 解压、反编译指定的JAR包
     * @param sourceJarPath | eg :  "C:\\Users\\xxx\\Desktop\\xxx-common-1.1.24-SNAPSHOT.jar";
     * @throws IOException
     */
    public HashMap<String,byte[]> archive(String sourceJarPath) throws IOException {
        try (ZipFile archive = new JarFile(new File(sourceJarPath))) {
            Enumeration<? extends ZipEntry> entries = archive.entries();
            while (entries.hasMoreElements()) {
                ZipEntry entry = entries.nextElement();
                if (!entry.isDirectory()) {
                    String name = entry.getName();
                    if (name.endsWith(".class")) {
                        byte[] bytes = null;
                        try (InputStream stream = archive.getInputStream(entry)) {
                            bytes = toByteArray(stream);
                        }
                        classByteMap.put(name, bytes);
                    }
                }
            }
        }
        log.debug("Success to archive the jar! sourceJarPath : {}, classByteMap.size:{}", sourceJarPath, classByteMap.size());
        return classByteMap;
    }

    private Loader loader = new Loader() {
        @Override
        public byte[] load(String internalName) {
            return classByteMap.get(internalName);
        }
        @Override
        public boolean canLoad(String internalName) {
            return classByteMap.containsKey(internalName);
        }
    };

    private Printer printer = new Printer() {
        protected static final String TAB = "  ";
        protected static final String NEWLINE = "\n";
        protected int indentationCount = 0;
        protected StringBuilder sb = new StringBuilder();
        @Override public String toString() {
            String toString = sb.toString();
            sb = new StringBuilder();
            return toString;
        }
        @Override public void start(int maxLineNumber, int majorVersion, int minorVersion) {}
        @Override public void end() {}
        @Override public void printText(String text) { sb.append(text); }
        @Override public void printNumericConstant(String constant) { sb.append(constant); }
        @Override public void printStringConstant(String constant, String ownerInternalName) { sb.append(constant); }
        @Override public void printKeyword(String keyword) { sb.append(keyword); }
        @Override public void printDeclaration(int type, String internalTypeName, String name, String descriptor) { sb.append(name); }
        @Override public void printReference(int type, String internalTypeName, String name, String descriptor, String ownerInternalName) { sb.append(name); }
        @Override public void indent() { this.indentationCount++; }
        @Override public void unindent() { this.indentationCount--; }
        @Override public void startLine(int lineNumber) { for (int i=0; i<indentationCount; i++) sb.append(TAB); }
        @Override public void endLine() { sb.append(NEWLINE); }
        @Override public void extraLine(int count) { while (count-- > 0) sb.append(NEWLINE); }
        @Override public void startMarker(int type) {}
        @Override public void endMarker(int type) {}
    };


    /**
     * Represents a failed index search.
     */
    public static final int INDEX_NOT_FOUND = -1;

    /**
     * The empty String {@code ""}.
     */
    public static final String EMPTY = "";

    public static String substringBeforeLast(final String str, final String separator) {
        if (isEmpty(str) || isEmpty(separator)) {
            return str;
        }
        final int pos = str.lastIndexOf(separator);
        if (pos == INDEX_NOT_FOUND) {
            return str;
        }
        return str.substring(0, pos);
    }

    /**
     * Checks if a CharSequence is empty ("") or null.
     * @param cs
     * @return
     */
    public static boolean isEmpty(final CharSequence cs) {
        return cs == null || cs.length() == 0;
    }


    /**
     * Checks if CharSequence contains a search CharSequence, handling {@code null}.
     * This method uses {@link String#indexOf(String)} if possible.
     * @param seq
     * @param searchSeq
     * @return
     */
    public static boolean contains(final CharSequence seq, final CharSequence searchSeq) {
        if (seq == null || searchSeq == null) {
            return false;
        }
        return indexOf(seq, searchSeq, 0) >= 0;
    }

    /**
     * Used by the indexOf(CharSequence methods) as a green implementation of indexOf.
     * @param cs
     * @param searchChar
     * @param start
     * @return
     */
    static int indexOf(final CharSequence cs, final CharSequence searchChar, final int start) {
        if (cs instanceof String) {
            return ((String) cs).indexOf(searchChar.toString(), start);
        }
        if (cs instanceof StringBuilder) {
            return ((StringBuilder) cs).indexOf(searchChar.toString(), start);
        }
        if (cs instanceof StringBuffer) {
            return ((StringBuffer) cs).indexOf(searchChar.toString(), start);
        }
        return cs.toString().indexOf(searchChar.toString(), start);
    }


    /**
     * Gets the substring after the last occurrence of a separator.
     * The separator is not returned.
     * @param str
     * @param separator
     * @return
     */
    public static String substringAfterLast(final String str, final String separator) {
        if (isEmpty(str)) {
            return str;
        }
        if (isEmpty(separator)) {
            return EMPTY;
        }
        final int pos = str.lastIndexOf(separator);
        if (pos == INDEX_NOT_FOUND || pos == str.length() - separator.length()) {
            return EMPTY;
        }
        return str.substring(pos + separator.length());
    }


    public static byte[] toByteArray(InputStream inputStream) throws IOException {
        ByteArrayOutputStream outputStream = new ByteArrayOutputStream();
        byte[] buffer = new byte[4096];
        int bytesRead;

        while ((bytesRead = inputStream.read(buffer)) != -1) {
            outputStream.write(buffer, 0, bytesRead);
        }
        return outputStream.toByteArray();
    }
}
使用示范
- 解压JAR包、判断目标CLASS类是否在指定JAR包内、反编译指定的CLASS类
String jarFilePath = Optional.ofNullable(jobParameterTool.get("jarPath")).orElse("/usr/local/huaweijre-8/lib/rt.jar");
log.info("jarFilePath:{}", jarFilePath);

//String clazz = "com/xxx/ds/common/App.class";
String clazz = Optional.ofNullable(jobParameterTool.get("decompilerClass")).orElse("java/lang/String.class");
//String destinationDirectory = "./"; //"C:\\Users\\xxxxxx\\Desktop\\decompiler";


JDCoreDecompiler jdCoreDecompiler = new JDCoreDecompiler();

//解析
HashMap<String,byte[]> archiveJarClasses = jdCoreDecompiler.archive(jarFilePath);

//判断目标类是否存在于目标 JAR 包
Boolean existsClass = false;
existsClass = jdCoreDecompiler.existsClass(archiveJarClasses, clazz);//判断指定的类是否存在
log.info("existsClass | {} : {}", clazz, existsClass);
log.info("");

//反编译 + 输出到目标目录
if(existsClass){
	//Function<Pair<String, byte []>, Optional> decompiledClassFunction = JDCoreDecompiler.getDecompiledClassConsumerAsSaveAllClassesToDirectory(destinationDirectory);

	//Function<Pair<String, byte []>, Optional> decompiledClassFunction = JDCoreDecompiler.getDecompiledClassConsumerAsCaptureTargetClass(clazz);
	//HashMap<String,Pair<byte[], Optional>> decompiledClasses = jdCoreDecompiler.decompile(archiveJarClasses, destinationDirectory, decompiledClassFunction);//将反编译结果持久化到本地文件系统
	//Pair<byte[], Optional> targetClassPair = decompiledClasses.get(clazz);
	//log.info("targetClassPair.sourceCode:\n{}", targetClassPair.getValue1().get());

	String decompiledClass = jdCoreDecompiler.decompile(archiveJarClasses, clazz);
	log.info("decompiledClass:\n{}", decompiledClass);
}
方案2:基于org.benf:cfr构建
引入依赖
<!-- https://mvnrepository.com/artifact/org.benf/cfr -->
<dependency>
	<groupId>org.benf</groupId>
	<artifactId>cfr</artifactId>
	<version>0.151</version>
</dependency>
代码实现
未亲测,参考自: https://blog.csdn.net/weixin_44005802/article/details/138280565
package com.demo.decompile.cfr;

import org.benf.cfr.reader.api.CfrDriver;
import org.benf.cfr.reader.util.getopt.OptionsImpl;
import org.springframework.util.ResourceUtils;

import java.io.File;
import java.io.IOException;
import java.nio.file.Path;
import java.nio.file.Paths;
import java.util.ArrayList;
import java.util.HashMap;
import java.util.List;

/**
 * @Author: huangzh
 * @Date: 2024/3/5 19:43
 **/
public class CFRDemo {
    public static void main(String[] args) throws IOException {

        String sourceJar = "D:/xx/xx/xx.jar";
        Path sourceJarPath = Paths.get(sourceJar);
        String sourceJarFileName = sourceJarPath.getFileName().toString().replaceFirst("[.][^.]+$", "");

        File file = ResourceUtils.getFile("classpath:");
        String relativePath = file.getPath();
        String path = relativePath.substring(0, relativePath.lastIndexOf(File.separatorChar));
        String outputPath = path + File.separator + "cfr" + File.separator + sourceJarFileName;

        Long time = cfr(sourceJar, outputPath);
        System.out.println(String.format("decompiler time: %dms, outputPath: %s", time, outputPath));
    }

    public static Long cfr(String source, String targetPath) throws IOException {
        Long start = System.currentTimeMillis();
        // source jar
        List<String> files = new ArrayList<>();
        files.add(source);

        // target dir
        HashMap<String, String> outputMap = new HashMap<>();
        outputMap.put("outputdir", targetPath);

        OptionsImpl options = new OptionsImpl(outputMap);
        CfrDriver cfrDriver = new CfrDriver.Builder().withBuiltOptions(options).build();
        cfrDriver.analyse(files);
        Long end = System.currentTimeMillis();
        return (end - start);
    }
}
方案3:基于procyon.jar构建
jar下载
procyon-decompiler-0.6.0.jar的下载地址https://github.com/mstrobel/procyon/releases/tag/v0.6.0
下载后可存放于合适的位置,如:src/main/resources/procyon/procyon-decompiler-0.6.0.jar
src/main/resources
	/procyon/procyon-decompiler-0.6.0.jar
    /application.properties
代码实现
未亲测,参考自:https://blog.csdn.net/weixin_44005802/article/details/138280565
package com.demo.decompile.procyon;

import org.springframework.util.ResourceUtils;

import java.io.*;
import java.nio.file.Path;
import java.nio.file.Paths;

/**
 * @Author: huangzh
 * @Date: 2024/3/7 11:46
 **/
public class ProcyonJarDemo {
    public static void main(String[] args) throws FileNotFoundException {
        String sourceJar = "D:/xx/xx/xx.jar";
        Path sourceJarPath = Paths.get(sourceJar);
        String sourceJarFileName = sourceJarPath.getFileName().toString().replaceFirst("[.][^.]+$", "");

        File file = ResourceUtils.getFile("classpath:");
        String relativePath = file.getPath();
        String path = relativePath.substring(0, relativePath.lastIndexOf(File.separatorChar));
        String outputPath = path + File.separator + "procyon" + File.separator + sourceJarFileName;

        String[] command = {
                "java",
                "-jar",
                "src/main/resources/procyon/procyon-decompiler-0.6.0.jar",
                "-jar",
                sourceJar,
                "-o",
                outputPath
        };

        try {
            Process process = new ProcessBuilder(command).start();

            InputStream inputStream = process.getInputStream();
            BufferedReader reader = new BufferedReader(new InputStreamReader(inputStream));
            String line;
            while ((line = reader.readLine()) != null) {
                System.out.println("info: " + line);
            }

            InputStream inputStreamErr = process.getErrorStream();
            BufferedReader readerErr = new BufferedReader(new InputStreamReader(inputStreamErr));
            String lineErr;
            while ((lineErr = readerErr.readLine()) != null) {
                System.out.println("error: " + lineErr);
            }

            // waiting for command execution to complete
            int exitCode = process.waitFor();
            System.out.println("decompile completed,exit code: " + exitCode);
            System.out.println("output dir: " + outputPath);
        } catch (IOException | InterruptedException e) {
            e.printStackTrace();
        }
    }
}
方案4:基于org.jboss.windup.decompiler:decompiler-procyon 构建
引入依赖
<!-- https://mvnrepository.com/artifact/org.jboss.windup.decompiler/decompiler-procyon -->
<dependency>
	<groupId>org.jboss.windup.decompiler</groupId>
	<artifactId>decompiler-procyon</artifactId>
	<version>5.1.4.Final</version>
</dependency>
代码实现
package com.demo.decompile.procyon;

import org.jboss.windup.decompiler.api.DecompilationFailure;
import org.jboss.windup.decompiler.api.DecompilationListener;
import org.jboss.windup.decompiler.api.DecompilationResult;
import org.jboss.windup.decompiler.api.Decompiler;
import org.jboss.windup.decompiler.procyon.ProcyonDecompiler;
import org.springframework.util.ResourceUtils;

import java.io.File;
import java.io.IOException;
import java.nio.file.Path;
import java.nio.file.Paths;
import java.util.Iterator;
import java.util.List;

/**
 * @Author: huangzh
 * @Date: 2024/3/5 18:42
 **/
public class ProcyonDemo {
    public static void main(String[] args) throws IOException {

        String sourceJar = "D:/xx/xx/xx.jar";
        Path sourceJarPath = Paths.get(sourceJar);
        String sourceJarFileName = sourceJarPath.getFileName().toString().replaceFirst("[.][^.]+$", "");

        File file = ResourceUtils.getFile("classpath:");
        String relativePath = file.getPath();
        String path = relativePath.substring(0, relativePath.lastIndexOf(File.separatorChar));
        String outputPath = path + File.separator + "procyon" + File.separator + sourceJarFileName;

        Long time = procyon(sourceJar, outputPath);
        System.out.println(String.format("decompiler time: %dms", time));
    }

    /**
     * 解析存在问题,不推荐
     *
     * @param source
     * @param targetPath
     * @return
     * @throws IOException
     */
    public static Long procyon(String source, String targetPath) throws IOException {
        long start = System.currentTimeMillis();
        Path archive = Paths.get(source);
        Path outDir = Paths.get(targetPath);
        Decompiler dec = new ProcyonDecompiler();
        DecompilationResult res = dec.decompileArchive(archive, outDir, new DecompilationListener() {
            public void decompilationProcessComplete() {
                System.out.println("decompilationProcessComplete");
            }

            public void decompilationFailed(List<String> inputPath, String message) {
                System.out.println("decompilationFailed");
            }

            public void fileDecompiled(List<String> inputPath, String outputPath) {
            }

            public boolean isCancelled() {
                return false;
            }
        });

        if (!res.getFailures().isEmpty()) {
            StringBuilder sb = new StringBuilder();
            sb.append("Failed decompilation of " + res.getFailures().size() + " classes: ");
            Iterator failureIterator = res.getFailures().iterator();
            while (failureIterator.hasNext()) {
                DecompilationFailure dex = (DecompilationFailure) failureIterator.next();
                sb.append(System.lineSeparator() + "    ").append(dex.getMessage());
            }
            System.out.println(sb);
        }
        System.out.println("Compilation results: " + res.getDecompiledFiles().size() + " succeeded, " + res.getFailures().size() + " failed.");
        dec.close();
        Long end = System.currentTimeMillis();
        return end - start;
    }
}
4 使用WinRAR: 查看/修改/删除| 解压/生成 JAR压缩包
- 使用WinRAR 解压/生成 JAR 压缩包
[解压]
step1 选中目标JAR包,右键
step2 (选择WinRAR)解压到当前目录

[生成/压缩]
step1 选中待压缩的目录(一般含:com / META-INF 2个目录),右键
step2 (选择WinRAR)"添加到压缩文件",选择压缩格式为"zip"【必须是zip格式】
step3 重命名zip后缀为jar,即可
- 使用WinRAR 查看/修改JAR包
step1 打开WinRAR软件
step2 WinRAR>打开压缩文件>(选中目标JAR包)>(查看/修改/删除)
X 参考与推荐文献
- http://java-decompiler.github.io/
- https://varaneckas.com/jad/
- jar 查找多jar包中类的办法 - 博客园
- 使用 JAR文件 - CSDN
- jad(java decomplier) - varaneckas.com
- Java 反编译工具几枚(class转java) - CSDN
- java的class文件批量反编译成java - CSDN
- https://files.cnblogs.com/files/johnnyzen/jad158g.win.zip
- https://i.cnblogs.com/files
- 如何将多个java源文件打包成可执行jar包 - CSDN
- maven项目常用的打包方式 (有依赖与无依赖等情况) - CSDN
- 通过java代码,将jar或class反编译为java文件的四种方式 - CSDN 【推荐】
- 强烈推荐的一款 Java 反编译工具:JAD - Aliyun 【推荐】
- Java反编译工具 jad安装及使用的指南 - CSDN

本文链接: https://www.cnblogs.com/johnnyzen
关于博文:评论和私信会在第一时间回复,或直接私信我。
版权声明:本博客所有文章除特别声明外,均采用 BY-NC-SA 许可协议。转载请注明出处!
日常交流:大数据与软件开发-QQ交流群: 774386015 【入群二维码】参见左下角。您的支持、鼓励是博主技术写作的重要动力!

 浙公网安备 33010602011771号