
第十五周运维作业
1、编写脚本,支持让用户自主选择,使用mysqldump还是xtraback全量备份。
安装数据库mariadb并 开启epel源及安装 xtrabackup
[root@centos7 ~]# yum install percona-xtrabackup-24-2.4.12-1.el7.x86_64.rpm
#!/bin/bash
PS3="请按数字选择:"
select num in mysqldump xtrabackup quit; do
case $num in
mysqldump)
echo "您选择了mysqldump,请稍等"
mysqldump -A > /all.sql 2> /dev/null
if [ "$?" -eq 0 ]; then
echo "mysqldump已执行完毕"
exit 0
else
echo "mysqldump执行出错,请检查"
exit 1
fi
;;
xtrabackup)
echo "您选择了xtrabackup,请稍等..."
which xtrabacup &>/dev/null
#yum安装xtrabackup,需要开启epel源
[ "$?" -eq 0 ] &>/dev/null
xtrabackup --backup --target-dir=/BACKUP_XTRA &> /dev/null
if [ "$?" -eq 0 ]; then
echo "xtrabackup已执行完毕"
exit 0
else
echo "xtrabackup执行出错,请检查"
exit 2
2、配置Mysql主从同步
基于mysql5.5
master:192.168.47.7
slave:192.168.47.17
两台主机分别安装mariadb数据库 mariadb-5.5.60-1.el7_5.x86_64
[root@centos7 ~]# yum install mariadb-server
[root@centos7 ~]# mysql < hellodb_innodb.sql 在master主机中导入hellodb 数据库
[root@centos7 /]# mysql
MariaDB [(none)]> show databases;
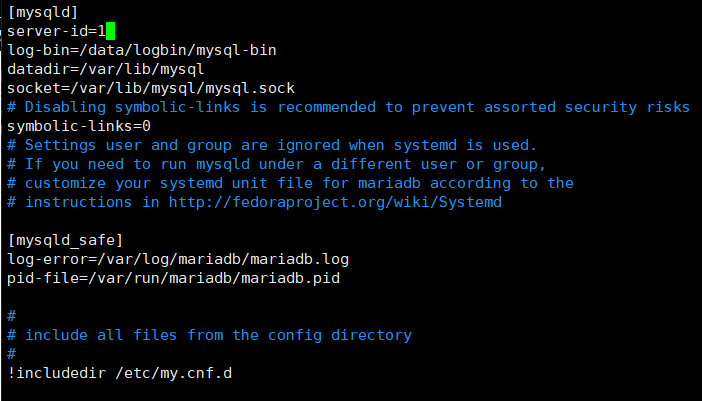
在master主机中启用二进制日志、设置唯一ID号
[root@centos7 ~]# mkdir /data/logbin/ 创建二进制日志目录
[root@centos7 ~]# vim /etc/my.cnf
[root@centos7 ~]# systemctl restart mariadb
在slave主机中设置唯一ID号并添加read_only=on
[root@centos7 ~]# vim /etc/my.cnf
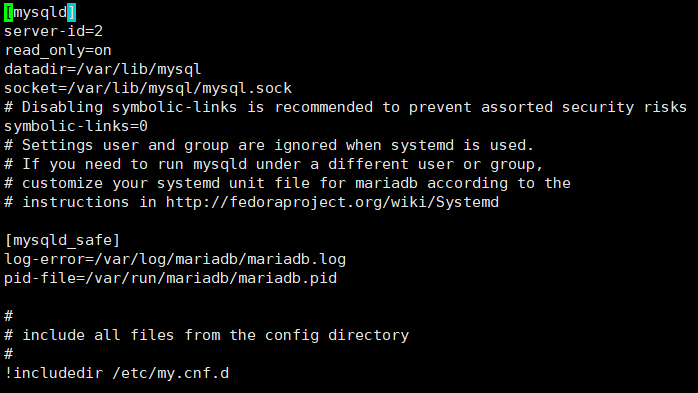
[root@centos7 ~]# systemctl restart mariadb
在master主机中创建参与复制的用户
MariaDB [(none)]> grant replication slave on *.* to 'repluser'@' 192.168.47.%' identified by 'centos';
MariaDB [(none)]> show master logs; 查看复制的位置
+------------------+-----------+
| Log_name | File_size |
+------------------+-----------+
| mysql-bin.000001 | 245 |
| mysql-bin.000002 | 245 |
| mysql-bin.000003 | 264 |
| mysql-bin.000004 | 403 |
+------------------+-----------+
在slave 主机中登录mysql,执行change master to,可以参考MariaDB [(none)]> help change master to
MariaDB [(none)]> CHANGE MASTER TO
-> MASTER_HOST='192.168.47.7',
-> MASTER_USER='repluser',
-> MASTER_PASSWORD='centos',
-> MASTER_PORT=3306,
-> MASTER_LOG_FILE='mysql-bin.000004 ',
-> MASTER_LOG_POS=403;
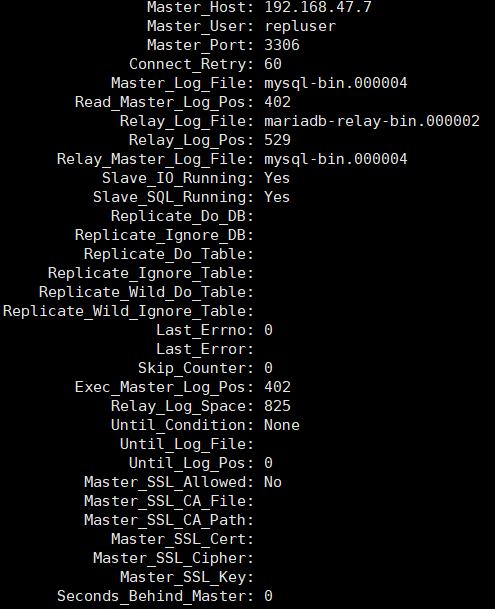
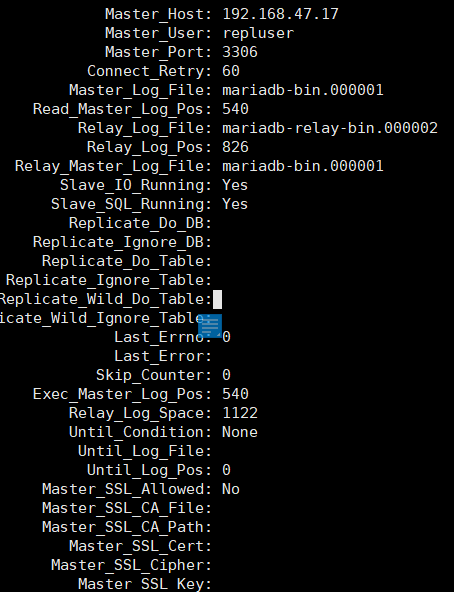
MariaDB [(none)]> show slave status\G
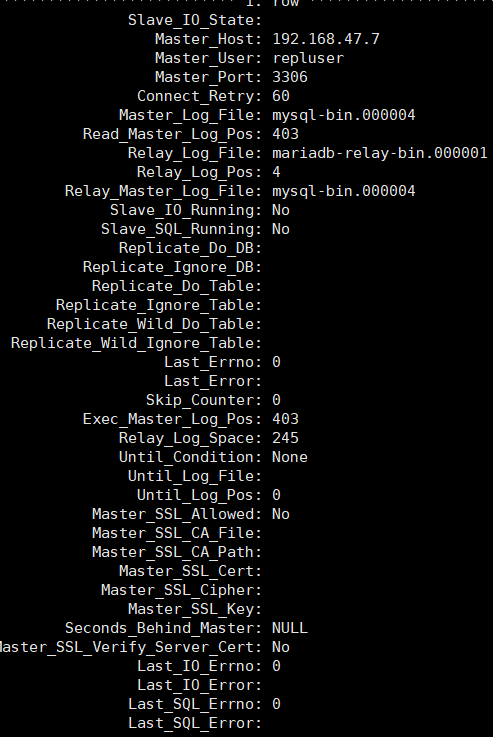
MariaDB [(none)]> start slave;
测试
在master主机上创建数据库
MariaDB [(none)]> create db1 databases;
在slave主机上查看是否存在新建的数据库
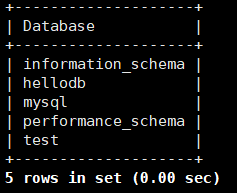
MariaDB [(none)]> show databases;
+--------------------+
| Database |
+--------------------+
| information_schema |
| db1 |
| mysql |
| performance_schema |
| test |
+--------------------+
5 rows in set (0.00 sec)
3、使用MHA实现Mysql高可用
准备1台机器安装MHA(192.168.47.7)和准备3台机器分别安装mariadb192.168.47.17;192.168.47.27;192.168.47.37
第一步:搭建MYSQL的主从
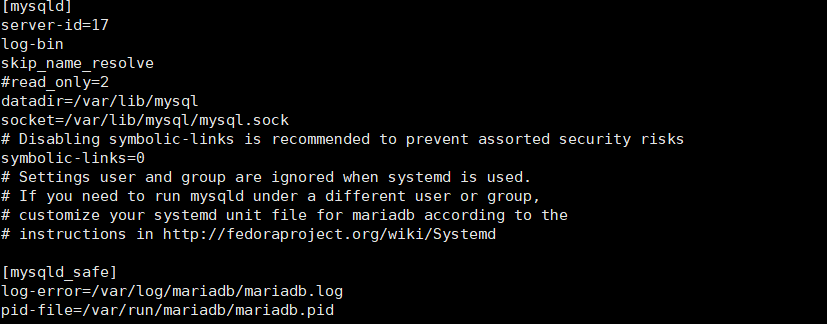
配置主节点192.168.47.17
安装mariadb-server
[root@centos7 ~]# vim /etc/my.cnf 设置主配置文件
[root@centos7 ~]# systemctl restart mariadb
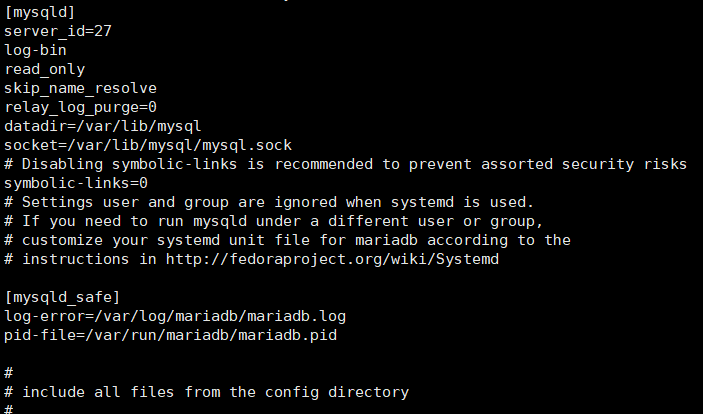
设置从节点配置 192.168.47.27
安装mariadb
[root@centos7 misc]# vim /etc/my.cnf
[root@centos7 ~]# systemctl restart mariadb
配置从节点设置192.168.47.37
[root@centos7 misc]# vim /etc/my.cnf
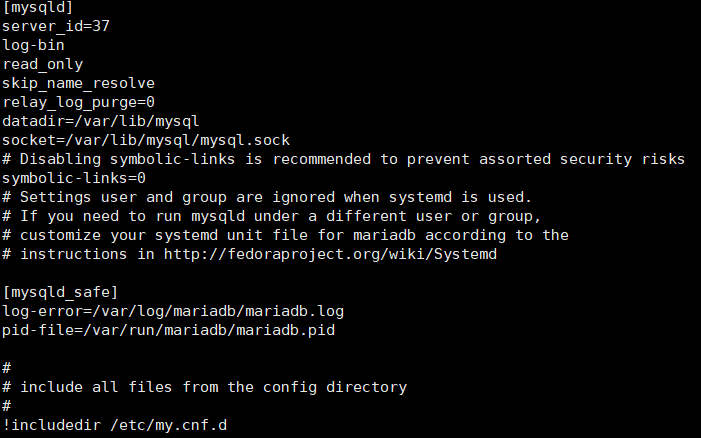
[root@centos7 ~]# systemctl restart mariadb
在主节点创建账号
MariaDB [(none)]> grant replication slave on *.* to repluser@'192.168.47.%' identified by 'centos';
在主节点(192.168.47.17)创建管理节点
MariaDB [(none)]> grant all on *.* to mhauser@'192.168.47.%' identified by 'centos';
在从节点(192.168.47.27)执行如下命令:
MariaDB [(none)]> CHANGE MASTER TO
-> MASTER_HOST='192.168.47.17',
-> MASTER_USER='repluser',
-> MASTER_PASSWORD='centos',
-> MASTER_PORT=3306,
-> MASTER_LOG_FILE='mariadb-bin.000001',
-> MASTER_LOG_POS=245;
Query OK, 0 rows affected (0.01 sec)
MariaDB [(none)]> show slave status\G

MariaDB [(none)]> start slave;
Query OK, 0 rows affected (0.00 sec)
在192.168.47.37从节点上进行以下步骤
MariaDB [(none)]> CHANGE MASTER TO
-> MASTER_HOST='192.168.47.17',
-> MASTER_USER='repluser',
-> MASTER_PASSWORD='centos',
-> MASTER_PORT=3306,
-> MASTER_LOG_FILE='mariadb-bin.000001',
-> MASTER_LOG_POS=245;
Query OK, 0 rows affected (0.01 sec)
MariaDB [(none)]> start slave;
Query OK, 0 rows affected (0.00 sec)
MariaDB [(none)]> show slave status\G
第二步:在1921.68.47.7主机上安装MHA ---管理节点
下载 mha4mysql-manager-0.56-0.el6.noarch、mha4mysql-node-0.56-0.el6.noarch

安装mha 包
[root@centos7 ~]# yum install mha*.rpm -y
在主从节点上分别安装mha4mysql-node-0.56-0.el6.noarch包
192.168.47.17主节点上
[root@centos7 ~]# yum install mha4mysql-node-0.56-0.el6.noarch.rpm
192.168.47.27从节点上
[root@centos7 ~]# yum install mha4mysql-node-0.56-0.el6.noarch.rpm
192.168.47.37从节点生
[root@centos7 ~]# yum install mha4mysql-node-0.56-0.el6.noarch.rpm
在管理节点192.168.47.7上配置key验证
[root@centos7 ~]# ssh-keygen
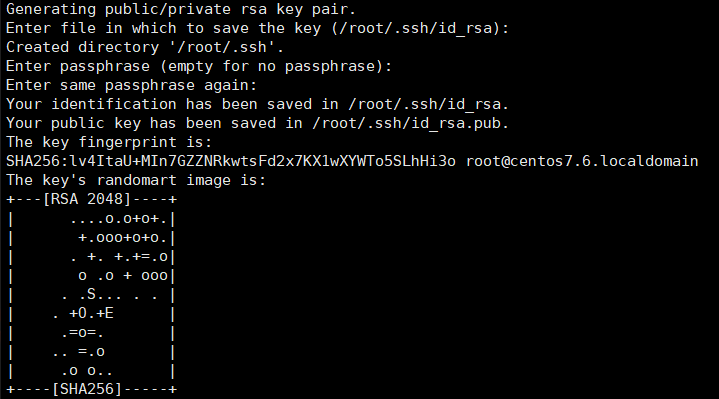
[root@centos7 ~]# ls -a .ssh

[root@centos7 ~]# ssh-copy-id 192.168.47.7

[root@centos7 ~]# cd .ssh
[root@centos7 .ssh]# cat authorized_keys

[root@centos7 ~]# scp -r .ssh 192.168.47.17:/root/

[root@centos7 ~]# scp -r .ssh 192.168.47.27:/root/
[root@centos7 ~]# scp -r .ssh 192.168.47.37:/root/
[root@centos7 ~]# mkdir /etc/mha/ 在管理节点上创建mha文件夹及建立配置文件
[root@centos7 ~]# vim /etc/mha/app1.cnf
[server default]
user=mhauser
password=centos
manager_workdir=/data/mastermha/app1/
manager_log=/data/mastermha/app1/manager.log
remote_workdir=/data/mastermha/app1/
ssh_user=root
repl_user=repluser
repl_password=centos
ping_interval=1
[server1]
hostname=192.168.47.17
candidate_master=1
[server2]
hostname=192.168.47.27
[server3]
hostname=192.168.47.37
candidate_master=1
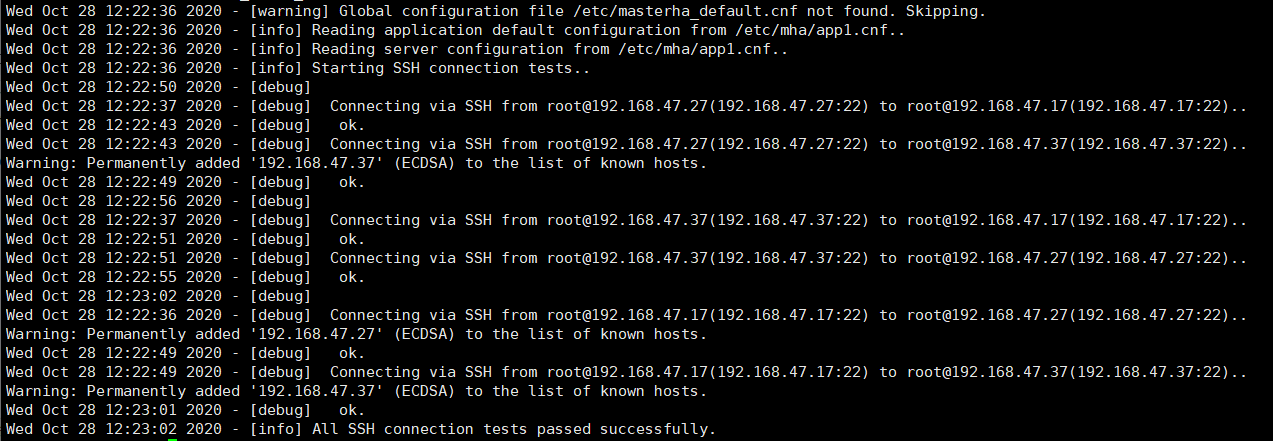
[root@centos7 ~]# masterha_check_ssh --conf=/etc/mha/app1.cnf 检查ssh配置
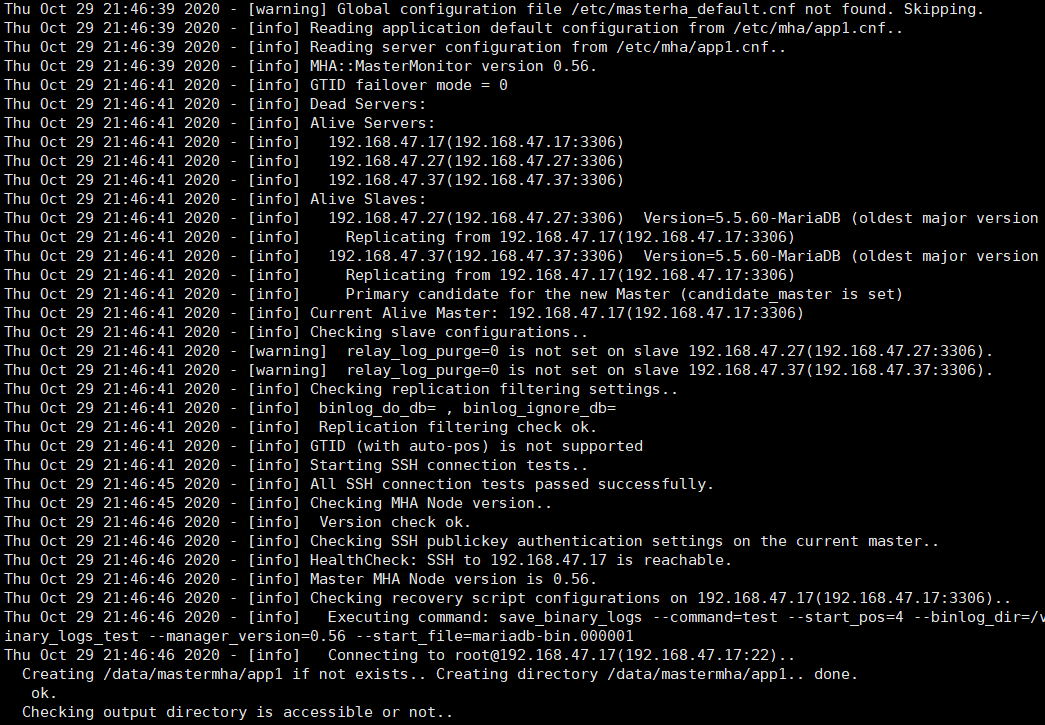
[root@centos7 ~]# masterha_check_repl --conf=/etc/mha/app1.cnf 检查复制状况
[root@centos7 ~]# masterha_manager --conf=/etc/mha/app1.cnf 启动mha服务

[root@centos7 ~]# tail -f /data/mastermha/app1/manager.log

说明:mha将对主从节点进行实时监控,一但发生down机故障,就会把从节点变主节点
第三步:测试,在主节点192.168.47.17上运行一个脚本看其效果
MariaDB [(none)]> show databases;
MariaDB [(none)]> use test;
MariaDB [test]> delimiter $$
MariaDB [test]>
MariaDB [test]> create procedure sp_testlog()
-> begin
-> declare i int;
-> set i = 1;
-> while i <= 100000
-> do insert into testlog(name,age) values (concat('wang',i),i);
-> set i = i +1;
-> end while;
-> end$$
Query OK, 0 rows affected (0.00 sec)
MariaDB [test]>
MariaDB [test]> delimiter ;
MariaDB [test]>
进入从节点192.168.47.27进行验证
MariaDB [(none)]> use test;
MariaDB [test]> show tables;
+----------------+
| Tables_in_test |
+----------------+
| testlog |
+----------------+
1 row in set (0.00 sec)
在虚拟机上关闭主节点192.168.47.17
查看192.168.47.7的管理节点已经退出

[root@centos7 ~]# tail -f /data/mastermha/app1/manager.log 可查看日志
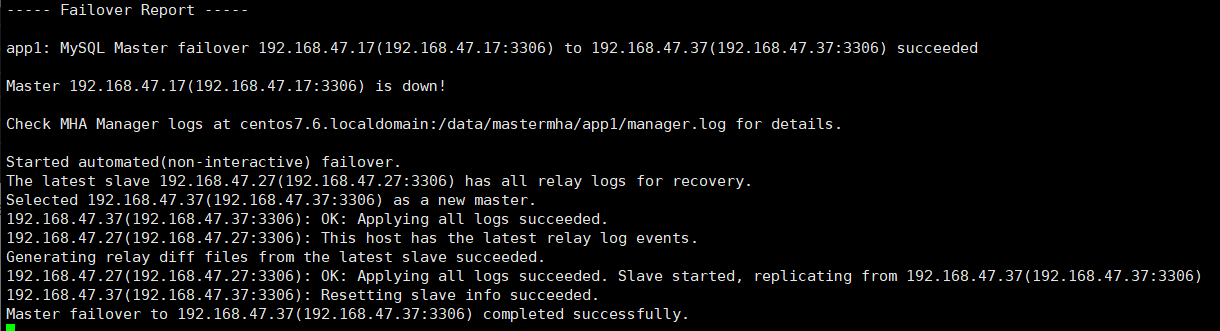
说明:以上图中原从节点192.168.47.37变为主节点

 浙公网安备 33010602011771号