
安装thymeleaf插件以及实现用户注册的请求
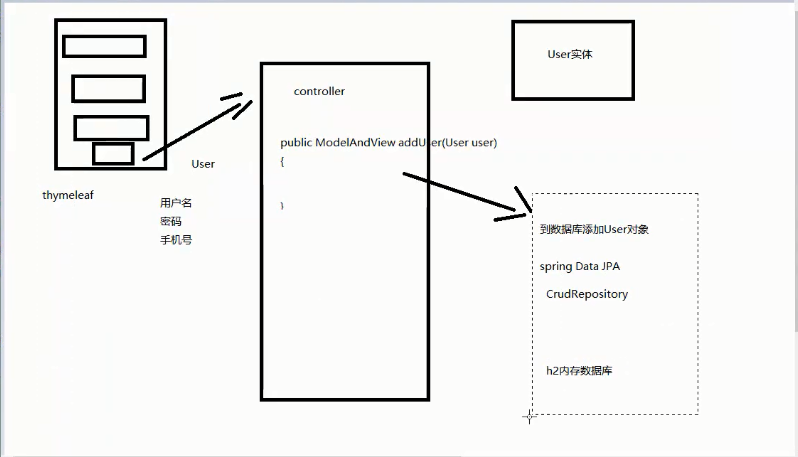
分析用户的注册以及使用的技术:
使用thymeleaf代替jsp进行提交表单,进行书写user的实体,并且到数据库中进行添加user对象,使用spring Data JPA与jpa进行整合,需要使用CrudRepository接口
使用Thymeleaf修改html页面
导入Thymeleaf:
<html xmlns:th="http://www.thymeleaf.org" xmlns:layout="http://www.ultrag.net.nz/thymeleaf/layout">
需在application.properties中进行声明一下:
#Tymeleaf 编码
spring.thymeleaf.encoding=UTF-8
#热部署静态文件
spring.thymeleaf.cache=false
#使用HTML5的标准
spring.thymeleaf.mode=HTML5
安装Thymeleaf插件
在help的下拉列表中点击Eclipse MarketPlace,搜索thymeleaf即可点击install进行安装该插件

安装完成后重启Eclipse ,即可安装成功
在html中需要引入thymeleaf

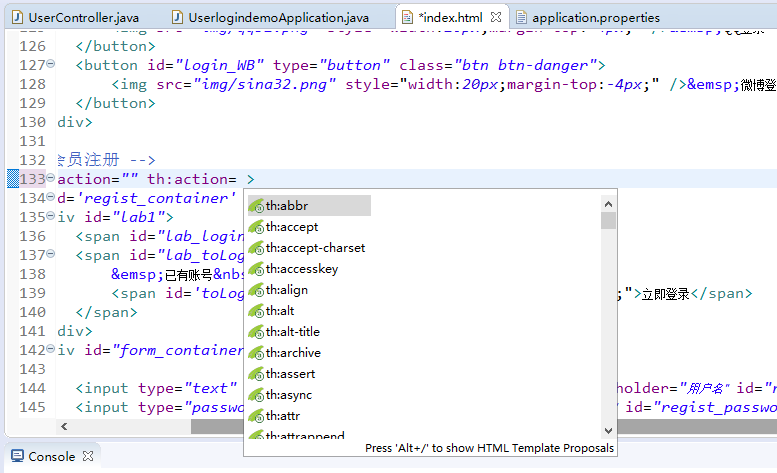
安装成功后就可以在form表单中输入th:Alt+/ 会出现很多相应的提示:
 thyemele
<form action="" th:action="@{~/user/register}" method="post">
其中"@{~/user/register}"相当于是这样:
${ pageContext.request.context}/user/register
实现用户注册请求
首先修改用户注册的HTML:
<!-- 会员注册 -->
<form action="" th:action="@{~/user/register.action}" method="post">
<div id='regist_container' style="display: none;">
<div id="lab1">
<span id="lab_login">会员注册</span>
<span id="lab_toLogin">
 已有账号
<span id='toLogin' style="color: #EB9316;cursor: pointer;">立即登录</span>
</span>
</div>
<div id="form_container2" style="padding-top: 25px;">
<input type="text" class="form-control" value="admin" placeholder="用户名" id="regist_account"/>
<input type="password" class="form-control" placeholder="密码" id="regist_password1" />
<input type="password" class="form-control" placeholder="确认密码" id="regist_password2" />
<input type="text" class="form-control" placeholder="手机号" id="regist_phone" />
<input type="text" class="form-control" placeholder="验证码" id="regist_vcode" />
<!--<button id="getVCode" type="button" class="btn btn-success" >获取验证码</button>-->
<input id="getVCode" type="button" class="btn btn-success" value="点击发送验证码" onclick="sendCode(this)" />
</div>
<input type="submit" value="注册" class="btn btn-success" id="regist_btn" />
</div>
</form>
在UserController.java中加入:
@RequestMapping("/user/register.action")

    public ModelAndView  register() {
        System.out.println("register函数已经运行!!");


        return new ModelAndView("redirect:/index.action");//使用了重定向进行返回到index.html


    }
在浏览器中的显示效果以及在console的输出:


 浙公网安备 33010602011771号