【深入学习linux】CentOS 7 最小化安装后程序必须安装的组件
centos平台编译环境使用如下指令
安装make:
yum -y install gcc automake autoconf libtool make
安装g++:
yum install gcc gcc-c++
Nginx安装参考https://blog.csdn.net/jiangxiaobo666/article/details/90404020
Python
CentOS 7.2 默认安装了python2.7.5 因为一些命令要用它比如yum 它使用的是python2.7.5。
使用 python -V 命令查看一下是否安装Python
然后使用命令 which python 查看一下Python可执行文件的位置

可见执行文件在/usr/bin/ 目录下,切换到该目录下执行 ll python* 命令查看

python 指向的是python2.7
2.开始编译安装python3
先安装相关包
yum install zlib-devel bzip2-devel openssl-devel ncurses-devel sqlite-devel readline-devel tk-devel gcc make
不能忽略相关包,我之前就没有安装readline-devel导致执行python模式无法使用键盘的上下左右键;
3.7版本需要一个新的包libffi-devel,安装此包之后再次进行编译安装即可。
yum install libffi-devel -y
因为我们要安装python3版本,所以python要指向python3才行,目前还没有安装python3,先备份
mv /usr/bin/python /usr/bin/python.bak
因为执行yum需要python2版本,所以我们还要修改yum的配置,执行:
vi /usr/bin/yum
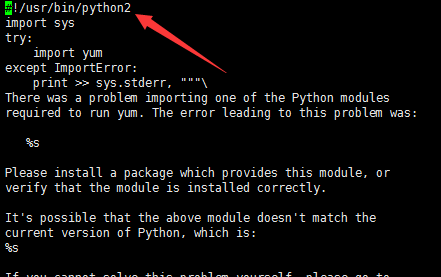
同理 vi /usr/libexec/urlgrabber-ext-down 文件里面的#! /usr/bin/python 也要修改为#! /usr/bin/python2
python安装
下载地址:https://www.python.org/ftp/python/3.7.4/
下面是把 python 安装到 /usr/local/lnmp/python374/ 目录下的详细步骤:
cd /usr/local/src/lnmp/
wget https://www.python.org/ftp/python/3.7.4/Python-3.7.4.tgz
tar -zxvf Python-3.7.4.tgz
cd Python-3.7.4

./configure --prefix=/usr/local/lnmp/python374

make
make install
查看是否安装成功
[root@localhost Python-3.7.4]# /usr/local/lnmp/python374/bin/python3 -V
Python 3.7.4
对于centos7系统里面本来存在python命令,是yum需要的2.7.5的版本,这里不能进行删除或者覆盖,不然yum就用不起了。
[root@localhost Python-3.7.4]# which python
/usr/bin/python
解决方案:
安装完毕,/usr/local/lnmp/python374/bin/目录下就会有python3了,因此我们可以添加软链到执行目录下/usr/bin
ln -s /usr/local/lnmp/python374/bin/python3 /usr/bin/python
测试安装成功了没,执行
python -V 看看输出的是不是python3的版本
执行python2 -V 看到的就是python2的版本
建立pip3的软链接
ln -s /usr/local/lnmp/python374/bin/pip3 /usr/bin/pip3
升级pip3命令:
pip3 install --upgrade pip
给python3安装django和uwsgi以及配置启动项目的ini(或者xml)文件
pip3 install django 或者 pip3 install django==2.2.5
pip3 install uwsgi
建立软连接
ln   -s   /usr/local/lnmp/python374/bin/django-admin /usr/bin/django-admin

ln   -s  /usr/local/lnmp/python374/bin/uwsgi       /usr/bin/uwsgi
如果下面这行命令输出了一个版本号,证明你已经安装了此版本的 Django;如果你得到的是一个“No module named django”的错误提示,则表明你还未安装。
python -m django --version
创建一个Django项目,打开命令行,cd 到一个你想放置你代码的目录,然后运行以下命令:
django-admin startproject mysite
这里我在根目录新建了 web 目录(mkdir -p /home/webcode/django),然后 cd /home/webcode/django,执行 django-admin startproject testweb,发现生成了testweb 。
[root@localhost django]# django-admin startproject testweb
[root@localhost django]# ls
testweb
测试运行:
python manage.py runserver
或者
python manage.py runserver 8080
或者
python manage.py runserver 0:8080
python manage.py runserver 0.0.0.0:8080
发现出现异常错误:
exception:django.core.exceptions.ImproperlyConfigured: SQLite 3.8.3 or later is required (found 3.7.17).
翻译下就是当前sqlite3的版本是3.7.17,但是需要sqlite3.8.3以后的版本才可以启动。如果不需要使用sqlite可以忽略,比如我直接使用mysql。
将配置使用mysql数据库:
DATABASES = {
    'default': {
        'ENGINE': 'django.db.backends.mysql',
        'NAME': 'xx',
        'USER': 'x',
        'PASSWORD': 'xxx',
        'HOST': 'xxx',
        'PORT': 'xx'
    }
}
发现出现异常错误:
django.core.exceptions.ImproperlyConfigured: Error loading MySQLdb module.
Did you install mysqlclient?
那么可以查询当前安装哪些模块?
[root@localhost testweb]# python
Python 3.7.4 (default, Oct 24 2019, 20:27:49)
[GCC 4.8.5 20150623 (Red Hat 4.8.5-39)] on linux
Type "help", "copyright", "credits" or "license" for more information.
>>> help()

Welcome to Python 3.7's help utility!

If this is your first time using Python, you should definitely check out
the tutorial on the Internet at https://docs.python.org/3.7/tutorial/.

Enter the name of any module, keyword, or topic to get help on writing
Python programs and using Python modules.  To quit this help utility and
return to the interpreter, just type "quit".

To get a list of available modules, keywords, symbols, or topics, type
"modules", "keywords", "symbols", or "topics".  Each module also comes
with a one-line summary of what it does; to list the modules whose name
or summary contain a given string such as "spam", type "modules spam".

help> modules
Please wait a moment while I gather a list of all available modules...

__future__          _weakref            heapq               selectors
_abc                _weakrefset         hmac                setuptools
_ast                _xxtestfuzz         html                shelve
_asyncio            abc                 http                shlex
_bisect             aifc                idlelib             shutil
......
发现没有mysql相关模块,那么只能进行安装了:
pip3 install pymysql
非常顺利的就安装成功了,然而Django并不认这个外来的和尚,咋办呢,也好办,找到mysite/mysite/__init__.py,在里面输入以下内容并保存:
import pymysql
pymysql.install_as_MySQLdb()
然后我再运行python manage.py runserver时,又爆了一个错误:
django.core.exceptions.ImproperlyConfigured: mysqlclient 1.3.13 or newer is required; you have 0.9.3.
别急,这主要是django2.2内部的一个版本限制在作怪
处理方案
1.修复源码
按照文中配置,报错django.core.exceptions.ImproperlyConfigured: mysqlclient 1.3.13 or newer is required; you have 0.9.3.
原因:django2.2和pymysql版本不匹配。mysqldb不支持python3.
具体:
解决方案:
1、raise ImproperlyConfigured(‘mysqlclient 1.3.13 or newer is required; you have %s.’ % Database.version)
  django.core.exceptions.ImproperlyConfigured: mysqlclient 1.3.13 or newer is required; you have 0.9.3.
解决办法:
C:\Python37\Lib\site-packages\django\db\backends\mysql(python安装目录)打开base.py,注释掉以下内容:
if version < (1, 3, 13):           raise ImproperlyConfigured(‘mysqlclient 1.3.13 or newer is required; you have %s.’ % Database.version)
2、File “C:\Python37\lib\site-packages\django\db\backends\mysql\operations.py”, line 146, in last_executed_query
query = query.decode(errors=‘replace’)
AttributeError: ‘str’ object has no attribute ‘decode’
解决办法:
打开此文件把146行的decode修改为encode
找到安装python的这个位置
cd /usr/local/lnmp/python374/lib/python3.7/site-packages/django/db/backends/mysql

vim base.py
然后进行修改35行,进行注释:
#if version < (1, 3, 13):
#    raise ImproperlyConfigured('mysqlclient 1.3.13 or newer is required; you have %s.' % Database.__version__)
错误:AttributeError: 'str' object has no attribute 'decode' 然后进行修改
cd /usr/local/lnmp/python374/lib/python3.7/site-packages/django/db/backends/mysql
vim operations.py
然后进行修改146行,将 decode 改成 encode:
        query = getattr(cursor, '_executed', None)
        if query is not None:
            query = query.encode(errors='replace')
        return query
然后我再运行python manage.py runserver 0:8000时,又爆了一个提示:
You have 17 unapplied migration(s). Your project may not work properly until you apply the migrations for app(s): admin, auth, contenttypes, sessions.
Run 'python manage.py migrate' to apply them.
当然这个提示并不影响自带服务器的运行,这时候我们访问http://xxxx:8000,会看到成功提示:
DisallowedHost at /
Invalid HTTP_HOST header: '192.168.182.129:8000'. You may need to add '192.168.182.129' to ALLOWED_HOSTS.
在我们创建的项目里修改setting.py文件
ALLOWED_HOSTS = [‘*‘] #在这里请求的host添加了*,表示任意地址都可以访问
当然了,对于前面那个警告提示,我当然看着不爽,而且他也告诉我怎么做可以解决他,当然要处理啦!我飞快的复制一下内容到命令行中:
python manage.py makemigrations
python manage.py migrate
然后在重启服务,就很正常啦!
django-nginx-uwsgi 搭建
在 /etc/ 目录下创建一个 uwsgi9090.ini 文件
vim /etc/uwsgi9090.ini

[uwsgi]
master = true

processes = 4
pythonpath = /home/webcode/django/testweb

module = testweb.wsgi

socket = 127.0.0.1:9090

logto = /tmp/uwsgi9090.log
# pid文件,用于下面的脚本启动、停止该进程
pidfile = /var/run/uwsgi9090.pid
找到nginx的安装目录(如:/usr/local/lnmp/nginx-1.4.2/),打开vim nginx.conf文件,修改server配置:
location / {
            include uwsgi_params;
            # 必须和uwsgi中的设置一致
            uwsgi_pass 127.0.0.1:9090;
        }
你可以阅读 Nginx 安装配置 了解更多内容。
这里也需要设置下静态文件:
# 静态文件
        location /static/ {
            alias /home/webcode/django/testweb/staticfiles/;
            index  index.html index.htm;
        }
设置完成后,在终端运行:
先后台运行 uwsgi
uwsgi --ini /etc/uwsgi9090.ini &

然后在运行 nginx:/usr/local/lnmp/nginx-1.4.2/nginx
/usr/bin/nginx142 -> /usr/local/lnmp/nginx-1.4.2/nginx
在浏览器输入:http://xxxx,访问正常。
nginx和uwsgi还可以配置更多的东西,这里配置的都是最简单需要的内容
这里列出 nginx 和 uwsgi 关闭和开启
ps -ef | grep uwsgi
root       1658   1268  2 15:26 pts/0    00:00:00 uwsgi --ini /etc/uwsgi9090.ini
root       1659   1658  0 15:26 pts/0    00:00:00 uwsgi --ini /etc/uwsgi9090.ini
root       1660   1658  0 15:26 pts/0    00:00:00 uwsgi --ini /etc/uwsgi9090.ini
root       1661   1658  0 15:26 pts/0    00:00:00 uwsgi --ini /etc/uwsgi9090.ini
root       1662   1658  0 15:26 pts/0    00:00:00 uwsgi --ini /etc/uwsgi9090.ini
root       1664   1268  0 15:26 pts/0    00:00:00 grep --color=auto uwsgi

kill -INT 1658 杀死所有进程
kill -9 1658 杀死某个进程
参考地址:https://www.jianshu.com/p/c060448b3e78
centos7 安装mysql5.6 https://www.cnblogs.com/lulin9501/p/11069093.html
1 卸载系统自带的Mariadb
[root@localhost ~]# rpm -qa | grep mariadb
mariadb-libs-5.5.64-1.el7.x86_64
[root@localhost ~]# rpm -e --nodeps mariadb-libs-5.5.64-1.el7.x86_64
[root@localhost ~]# rpm -qa | grep mariadb
[root@localhost ~]#
2 下载mysql,
cd /usr/local/src/lnmp

wget  http://dev.mysql.com/get/Downloads/MySQL-5.6/mysql-5.6.23.tar.gz
3 安装软件包:
yum install gcc gcc-c++ cmake ncurses-devel bison
创建mysql数据存放的文件
[root@localhost mysql]# mkdir -p /usr/local/lnmp/mysql/data
4 安装mysql
tar -zxvf mysql-5.6.45.tar.gz
[root@localhost ~]# cd /usr/local/src/lnmp/mysql-5.6.45
cmake . \
-DCMAKE_INSTALL_PREFIX=/usr/local/lnmp/mysql \
-DINSTALL_DATADIR=/usr/local/lnmp/mysql/data \
-DDEFAULT_CHARSET=utf8 \
-DDEFAULT_COLLATION=utf8_general_ci \
-DEXTRA_CHARSETS=all \
-DENABLED_LOCAL_INFILE=1

参数说明:

-DCMAKE_INSTALL_PREFIX=/usr/local/lnmp/mysql        //安装目录

-DINSTALL_DATADIR=/usr/local/lnmp/mysql/data         //数据库存放目录

-DDEFAULT_CHARSET=utf8                        //使用utf8字符

-DDEFAULT_COLLATION=utf8_general_ci            //校验字符

-DEXTRA_CHARSETS=all                            //安装所有扩展字符集

-DENABLED_LOCAL_INFILE=1                        //允许从本地导入数据


编辑安装mysql,大概需要30 分钟

make

make install
5 初始化数据库,配置mysql的配置文件
这里需要添加一个mysql组和一个mysql用户:
groupadd mysql

useradd -g mysql mysql

注::-g 所属组 -d 家目录 -s 所用的SHELL
还可以参考:https://www.cnblogs.com/nyfz/p/8557137.html
cd /usr/local/lnmp/mysql

./scripts/mysql_install_db --user=mysql
其他配置
1、在 etc 下新建配置文件my.cnf,并在该文件中添加一下代码:
当然,也有简单方式:直接copy一份my.cnf文件到/etc下,然后再修改即可。
e g:copy一份/usr/local/lnmp/mysql/support-files/下的my-default.cnf文件到/etc下
命令为:[root@localhost support-files]# cp my-default.cnf /etc/my.cnf
然后,配置/etc目录下的my.cnf文件
[root@localhost support-files]# vim /etc/my.cnf
通过vim编辑器编辑my.cnf代码如下:
[mysql]
# 设置mysql客户端默认字符集
default-character-set=utf8
socket=/var/lib/mysql/mysql.sock

[mysqld]
skip-name-resolve
# 设置3306端口
port = 3306
socket=/var/lib/mysql/mysql.sock
# 设置mysql的安装目录
basedir=/usr/local/lnmp/mysql
# 设置mysql数据库的数据的存放目录
datadir=/usr/local/lnmp/mysql/data
# 允许最大连接数
max_connections=200
# 服务端使用的字符集默认为8比特编码的latin1字符集
character-set-server=utf8
# 创建新表时将使用的默认存储引擎
default-storage-engine=INNODB
lower_case_table_name=1
max_allowed_packet=16M
6、配置MySQL
1、授予my.cnf最大权限
[root@localhost ~]# chmod 777 /etc/my.cnf
设置开机自启动服务控制脚本:
2、复制启动脚本到资源目录
[root@localhost mysql]# cp ./support-files/mysql.server /etc/rc.d/init.d/mysqld
3、增加mysqld服务控制脚本执行权限
[root@localhost mysql]# chmod +x /etc/rc.d/init.d/mysqld
4、将mysqld服务加入到系统服务
[root@localhost mysql]# chkconfig --add mysqld
5、检查mysqld服务是否已经生效
[root@localhost mysql]# chkconfig --list mysqld
命令输出类似下面的结果:
mysqld 0:off 1:off 2:on 3:on 4:on 5:on 6:off
表明mysqld服务已经生效,在2、3、4、5运行级别随系统启动而自动启动,以后可以使用service命令控制mysql的启动和停止
命令为:service mysqld start和service mysqld stop
6、启动mysqld
[root@localhost mysql]# service mysqld start
启动时候报错:
[root@localhost ~]# service mysqld start
Warning: World-writable config file '/etc/my.cnf' is ignored
Starting MySQL.Warning: World-writable config file '/etc/my.cnf' is ignored
Warning: World-writable config file '/etc/my.cnf' is ignored
Logging to '/usr/local/lnmp/mysql/data/localhost.localdomain.err'.
 ERROR! The server quit without updating PID file (/usr/local/lnmp/mysql/data/localhost.localdomain.pid).
首先添加一个Mysql用户:
groupadd mysql     //创建mysql组
useradd -g mysql mysql //创建mysql用户添加到mysql组
解决办法有下面这几种:
cd /usr/local/lnmp/mysql/
chown -R mysql.mysql .
su - mysql
cd /usr/local/lnmp/mysql/

scripts/mysql_install_db
Warning: World-writable config file '/etc/my.cnf' is ignored
Installing MySQL system tables...Warning: World-writable config file '/etc/my.cnf' is ignored
2019-10-26 10:52:25 0 [Warning] TIMESTAMP with implicit DEFAULT value is deprecated. Please use --explicit_defaults_for_timestamp server option (see documentation for more details).
2019-10-26 10:52:25 0 [Note] Ignoring --secure-file-priv value as server is running with --bootstrap.
2019-10-26 1

/usr/local/lnmp/mysql/bin/mysqld_safe --user=mysql &

/etc/rc.d/init.d/mysql status
Warning: World-writable config file '/etc/my.cnf' is ignored
 SUCCESS! MySQL running (1932)
然后再重新启动:
service mysqld start
或者
/etc/rc.d/init.d/mysql start
Warning: World-writable config file '/etc/my.cnf' is ignored
出现这个警告是说:/etc/my.cnf的权限太高了。任意用户都写操作。
7、将mysql的bin目录加入PATH环境变量,编辑 ~/.bash_profile文件
[root@localhost mysql]# vim ~/.bash_profile
在文件最后添加如下信息:
export PATH=$PATH:/usr/local/lnmp/mysql/bin
然后按ESC键
继续 shift键加冒号打出来=> :
接下来输入wq回车即可
执行下面的命令是修改的内容立即生效:
[root@localhost mysql]# source ~/.bash_profile
8、以root账户登录mysql,默认是没有密码的
[root@localhost mysql]# mysql -uroot -p
要输入密码的时候直接回车即可。
9、设置root账户密码为root(也可以修改成你要的密码)
mysql>use mysql;
mysql>update user set password = PASSWORD('root') WHERE user = 'root'

mysql>flush privileges;
如果忘记密码:请在配置文件加上
[mysqld]
# 忘记密码请解开下面注释
# skip-grant-tables
密码修改后,将这行配置注释掉重启就可以了。
10、设置远程主机登录,注意下面的your username 和 your password改成你需要设置的用户和密码
mysql>GRANT ALL PRIVILEGES ON *.* TO 'your username'@'%' IDENTIFIED BY 'your password' WITH GRANT OPTION;
host xxx is not allowed to connect to this MYSQL server关于细节请查看:https://www.cnblogs.com/lizm166/p/7838862.html
你想root使用123456从任何主机连接到mysql服务器的话,代码如下:
GRANT ALL PRIVILEGES ON *.* TO 'root'@'%' IDENTIFIED BY '123456' WITH GRANT OPTION;

如果你想允许用户root从ip为192.168.1.3的主机连接到mysql服务器,并使用123456作为密码,代码如下:
GRANT ALL PRIVILEGES ON *.* TO ‘root’@’192.168.1.3′ IDENTIFIED BY ’123456′ WITH GRANT OPTION;

 Mysql> flush privileges
11. 如果自己想建立MYSQL用户:
【如果记得root的账号密码,就可以不设置这步】设置跳过密码登陆root用户
vim /etc/my.cnf

[mysqld]
# 忘记密码请解开下面注释
# skip-grant-tables
登陆
mysql -u root -p
完成以上流程就实现了一个基本的用户生成并配置权限,如果需要控制用的CURD操作更改相关的权限即可
1、创建用户:CREATE USER 'username'@'host' IDENTIFIED BY 'password';

username:用户名;

host:指定在哪个主机上可以登录,本机可用localhost,%通配所有远程主机;

password:用户登录密码;

举例:
CREATE USER 'test'@'%' IDENTIFIED BY 'I6FVIavxZl8Dkjhn';


2、授权:GRANT ALL PRIVILEGES ON  *.* TO 'username'@'%' IDENTIFIED BY 'password’;

格式:grant 权限 on 数据库名.表名 to 用户@登录主机 identified by "用户密码";

*.* 代表所有权;

@ 后面是访问MySQL的客户端IP地址(或是 主机名) % 代表任意的客户端,如果填写 localhost 为本地访问(那此用户就不能远程访问该mysql数据库了)。

举例:
GRANT ALL PRIVILEGES ON *.* TO 'test'@'%' IDENTIFIED BY 'I6FVIavxZl8Dkjhn'; #任意客户端可以,但是本地是不能连接的,所以还需要一句
GRANT ALL PRIVILEGES ON *.* TO 'test'@'localhost' IDENTIFIED BY 'I6FVIavxZl8Dkjhn'; #执行这两句话,才能让test用户即可以在不同客户端和本地进行使用MYSQL
3、刷新权限:FLUSH PRIVILEGES;
最后再建立几个快捷shell文件:
1. 进入 /root/exec_shell 目录,建立第一个 nginx.sh 文件,内容如下:
vim nginx.sh

#!/bin/sh
action=$1
if [ $action -a $action = "start" ]
then
        echo "starting"
        /usr/local/lnmp/nginx-1.4.2/nginx
        echo "start successful"
elif [ $action -a $action = "stop" ]
then
        echo "stoping"
        /usr/bin/kill -INT `cat /usr/local/lnmp/nginx-1.4.2/nginx.pid`
        echo "stop successful"
elif [ $action -a $action = "restart" ]
then
        echo "restarting"
        #/usr/bin/kill -USR2 `cat /usr/local/lnmp/nginx-1.4.2/nginx.pid`
        /usr/bin/kill -HUP `cat /usr/local/lnmp/nginx-1.4.2/nginx.pid`
        echo "restart successful"
else
        echo "start,stop,restart"
fi
然后一定要对该文件赋予可执行的权限:
chmod 755 ./nginx.sh
2. 建立 vim uwsgi.sh:
#!/bin/sh
action=$1
if [ $action -a $action = "start" ]
then
        echo "starting"
        /usr/bin/uwsgi --ini /etc/uwsgi9090.ini &
        echo "start successful"
elif [ $action -a $action = "stop" ]
then
        echo "stoping"
        /usr/bin/kill -INT `cat /var/run/uwsgi9090.pid`
        echo "stop successful"
elif [ $action -a $action = "restart" ]
then
        echo "restarting"
        #/usr/bin/kill -USR2 `cat /var/run/uwsgi9090.pid`
        #kill -HUP PID 该命令让Linux和缓的执行进程关闭,然后立即重启。
        #在配置应用程序的时候,这个命令很方便,
        #在对配置文件修改后需要重启进程时就可以执行此命令
        #/usr/bin/kill -HUP `cat /var/run/uwsgi9090.pid`
        #先关闭,在启动
        /usr/bin/kill -INT `cat /var/run/uwsgi9090.pid`
        sleep 3
        /usr/bin/uwsgi --ini /etc/uwsgi9090.ini &
        echo "restart successful"
else
        echo "start,stop,restart"
fi
# ps -ef | grep uwsgi
3. 第三个 nginx_uwsgi.sh:
#!/bin/sh
action=$1
if [ $action -a $action = "start" ]
then
        echo "uwsgi starting"
        /usr/bin/uwsgi --ini /etc/uwsgi9090.ini &
        echo "uwsgi start successful"
        sleep 3
        echo "nginx starting"
        /usr/local/lnmp/nginx-1.4.2/nginx
        echo "nginx start successful"
elif [ $action -a $action = "stop" ]
then
        echo "uwsgi stoping"
        /usr/bin/kill -INT `cat /usr/local/lnmp/nginx-1.4.2/nginx.pid`
        echo "uwsgi stop successful"
        sleep 3
        echo "nginx stoping"
        /usr/bin/kill -INT `cat /var/run/uwsgi9090.pid`
        echo "nginx stop successful"
elif [ $action -a $action = "restart" ]
then
        echo "uwsgi restarting"
        #/usr/bin/kill -HUP `cat /var/run/uwsgi9090.pid`
        /usr/bin/kill -INT `cat /var/run/uwsgi9090.pid`
        sleep 3
        /usr/bin/uwsgi --ini /etc/uwsgi9090.ini &
        echo "uwsgi restart successful"
        sleep 3
        echo "nginx restarting"
        #/usr/bin/kill -USR2 `cat /usr/local/lnmp/nginx-1.4.2/nginx.pid`
        #/usr/bin/kill -USR2 `cat /var/run/uwsgi9090.pid`
        /usr/bin/kill -HUP `cat /usr/local/lnmp/nginx-1.4.2/nginx.pid`
        echo "nginx restart successful"
else
        echo "start,stop,restart"
fi
然后就可以执行:
# 开启nginx,停止nginx,重启nginx
/root/exec_shell/nginx.sh start
/root/exec_shell/nginx.sh stop
/root/exec_shell/nginx.sh restart


# 开启uwsgi,停止uwsgi,重启uwsgi
/root/exec_shell/uwsgi.sh start
/root/exec_shell/uwsgi.sh stop
/root/exec_shell/uwsgi.sh restart


# 同时开启nginx+uwsgi,停止nginx+uwsgi,重启nginx+uwsgi
/root/exec_shell/nginx_uwsgi.sh start
/root/exec_shell/nginx_uwsgi.sh stop
/root/exec_shell/nginx_uwsgi.sh restart

 浙公网安备 33010602011771号