
【springboot和vue3搭建前后端分离项目并部署到linux服务器上】
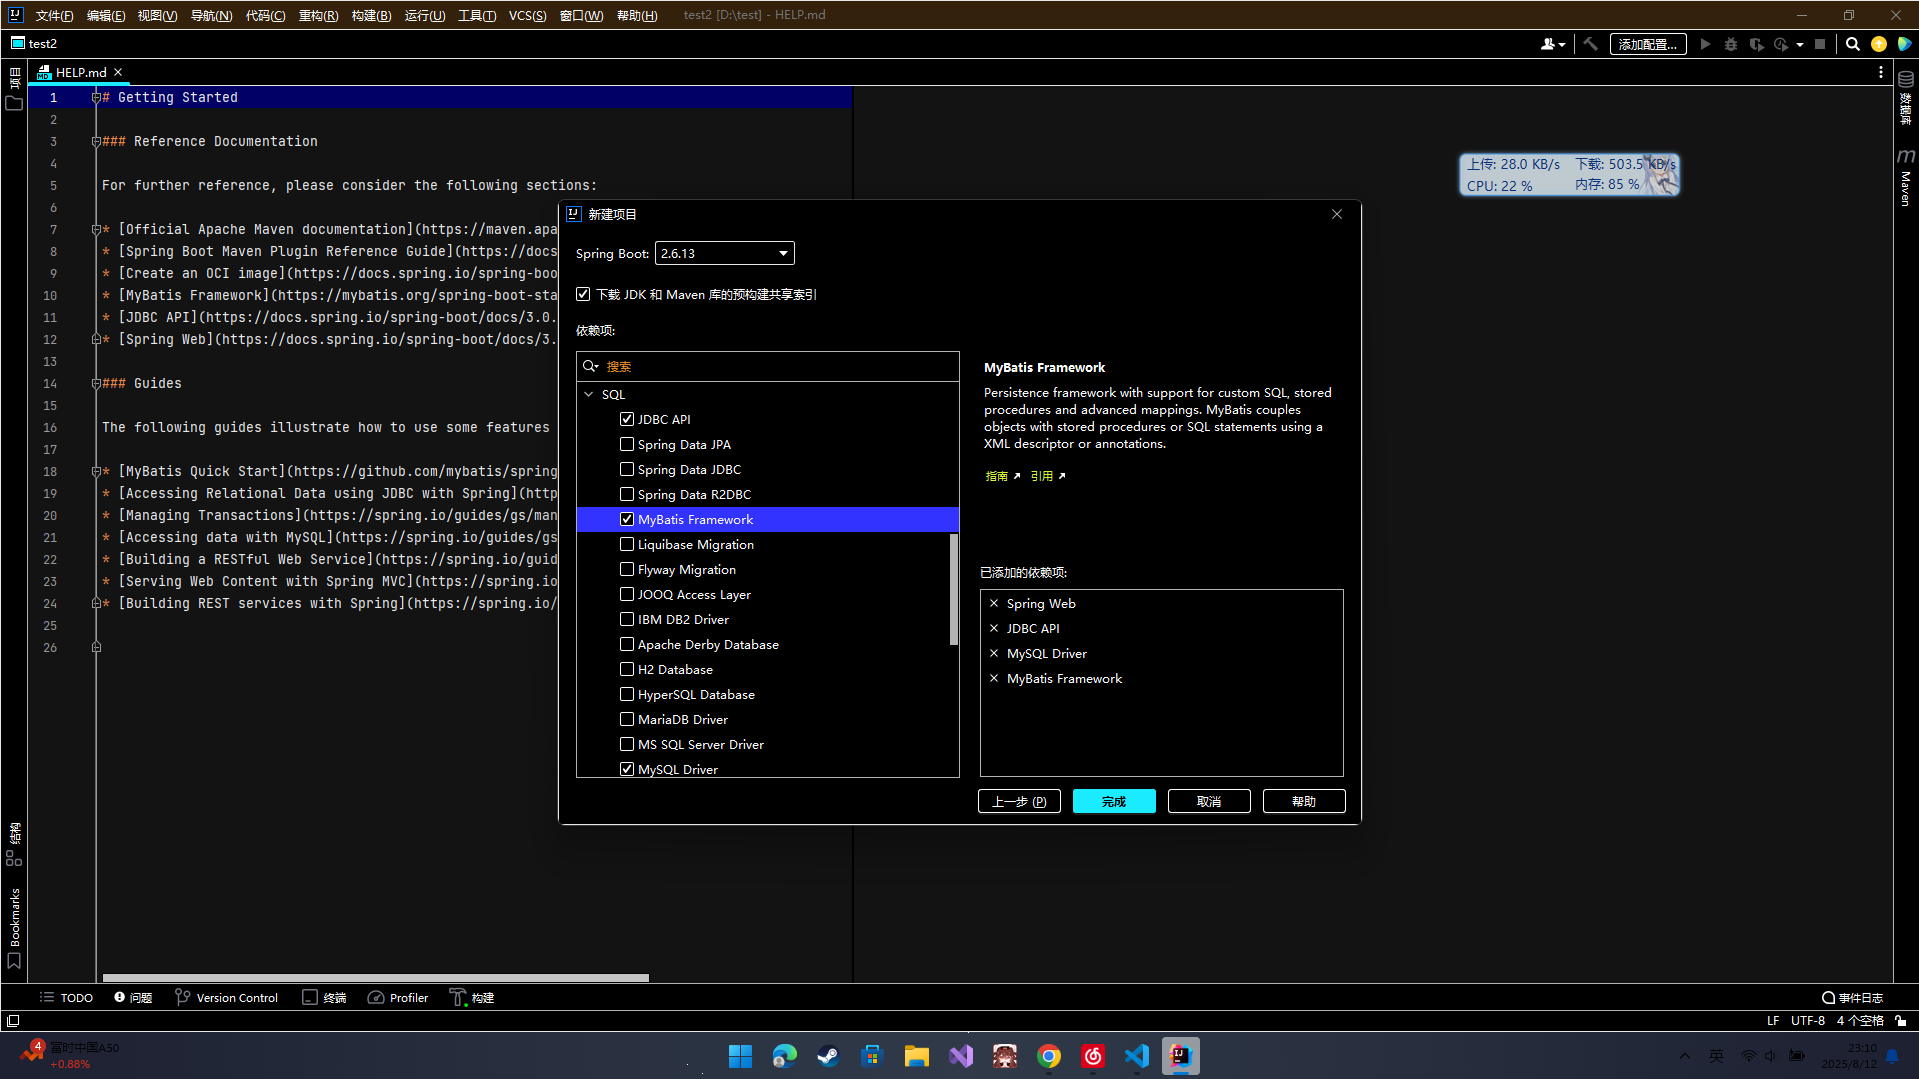
一、首先创建springboot项目,在项目依赖选择springweb(默认使用tomcat服务器),mybatis,jdbc,mysql驱动。如下图
新创建的项目一定是运行不了的,因为选择了mysql驱动但是没有配置mysql,导致后端连接不上mysql,所以运行不了,在application.yml中配置即可。注意默认配置文件后缀不同,修改成yml即可。
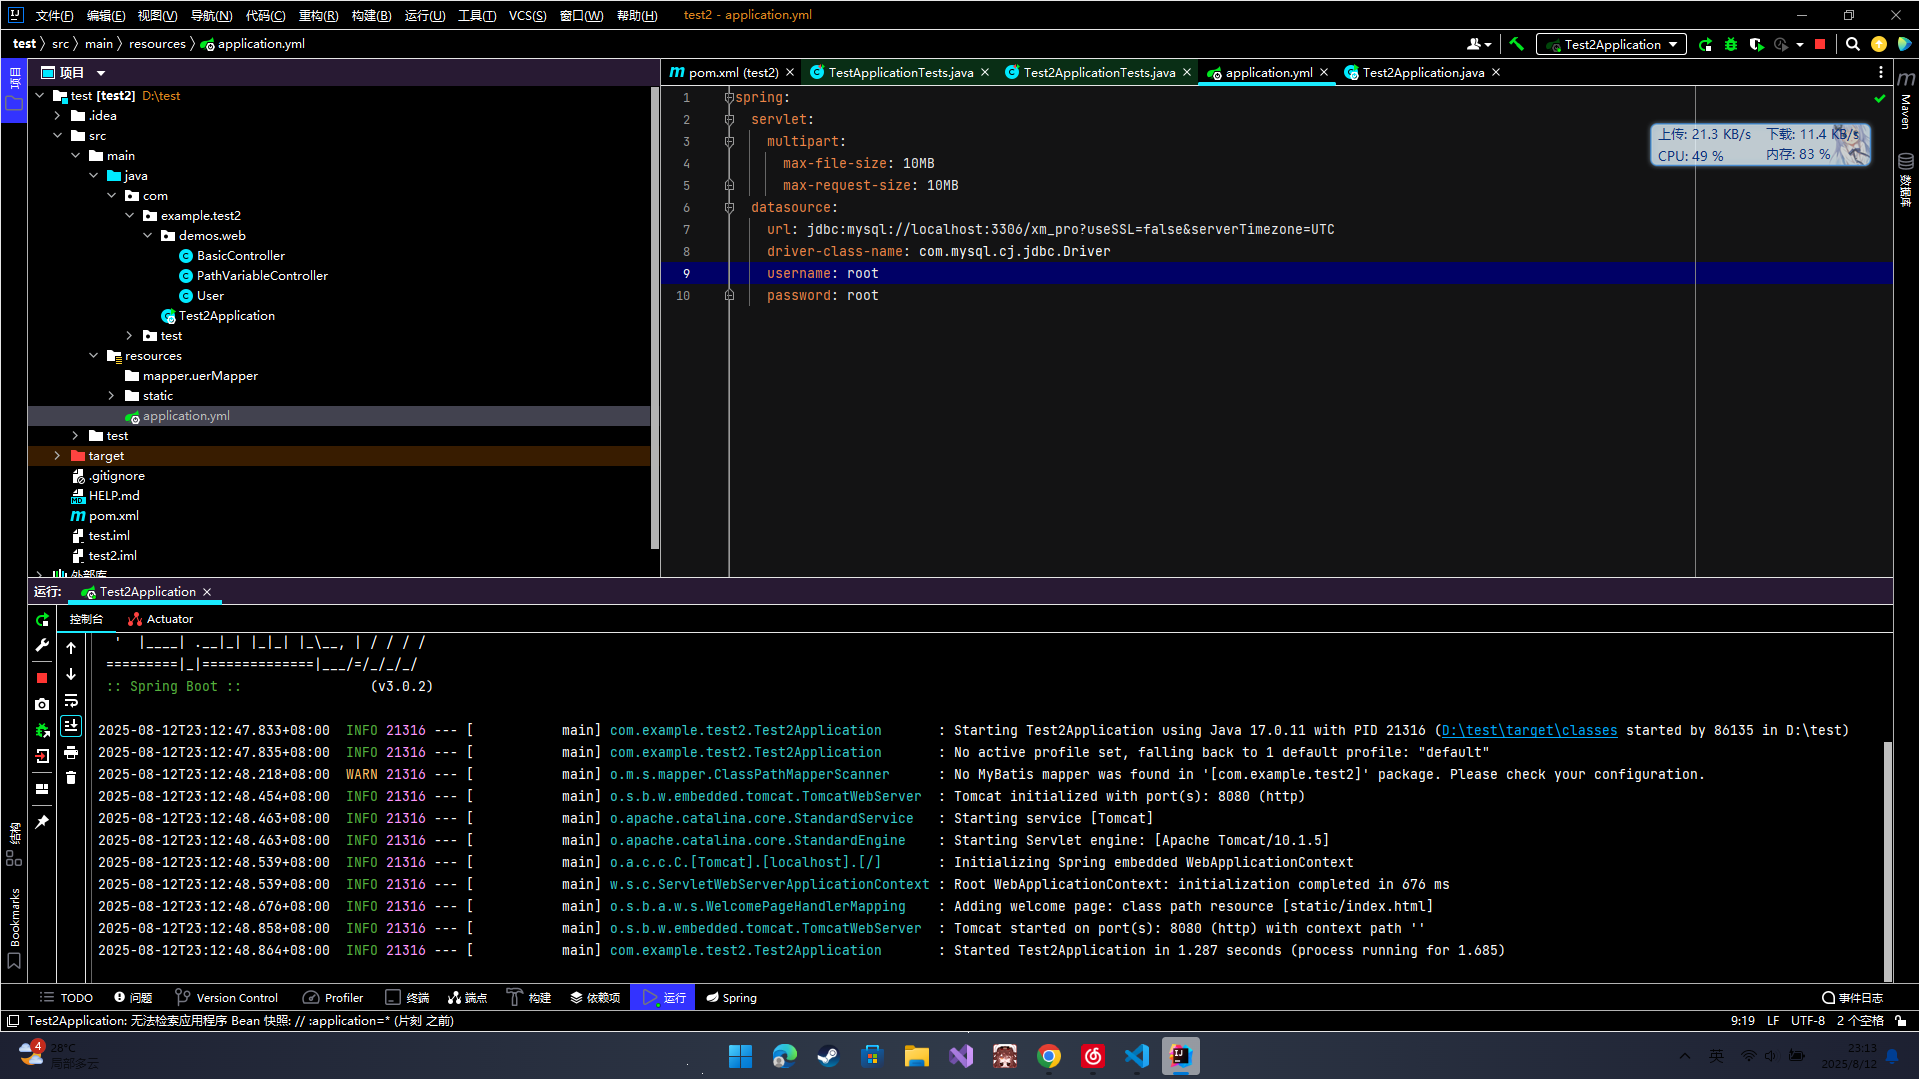
配置好后,简单的后端的项目就能运行了。之后,对项目进行打包,将maven版本调整至和项目一致。
配置好后,将pom.xml中的
<skip>true</skip>删除,它使得打包的项目没有依赖
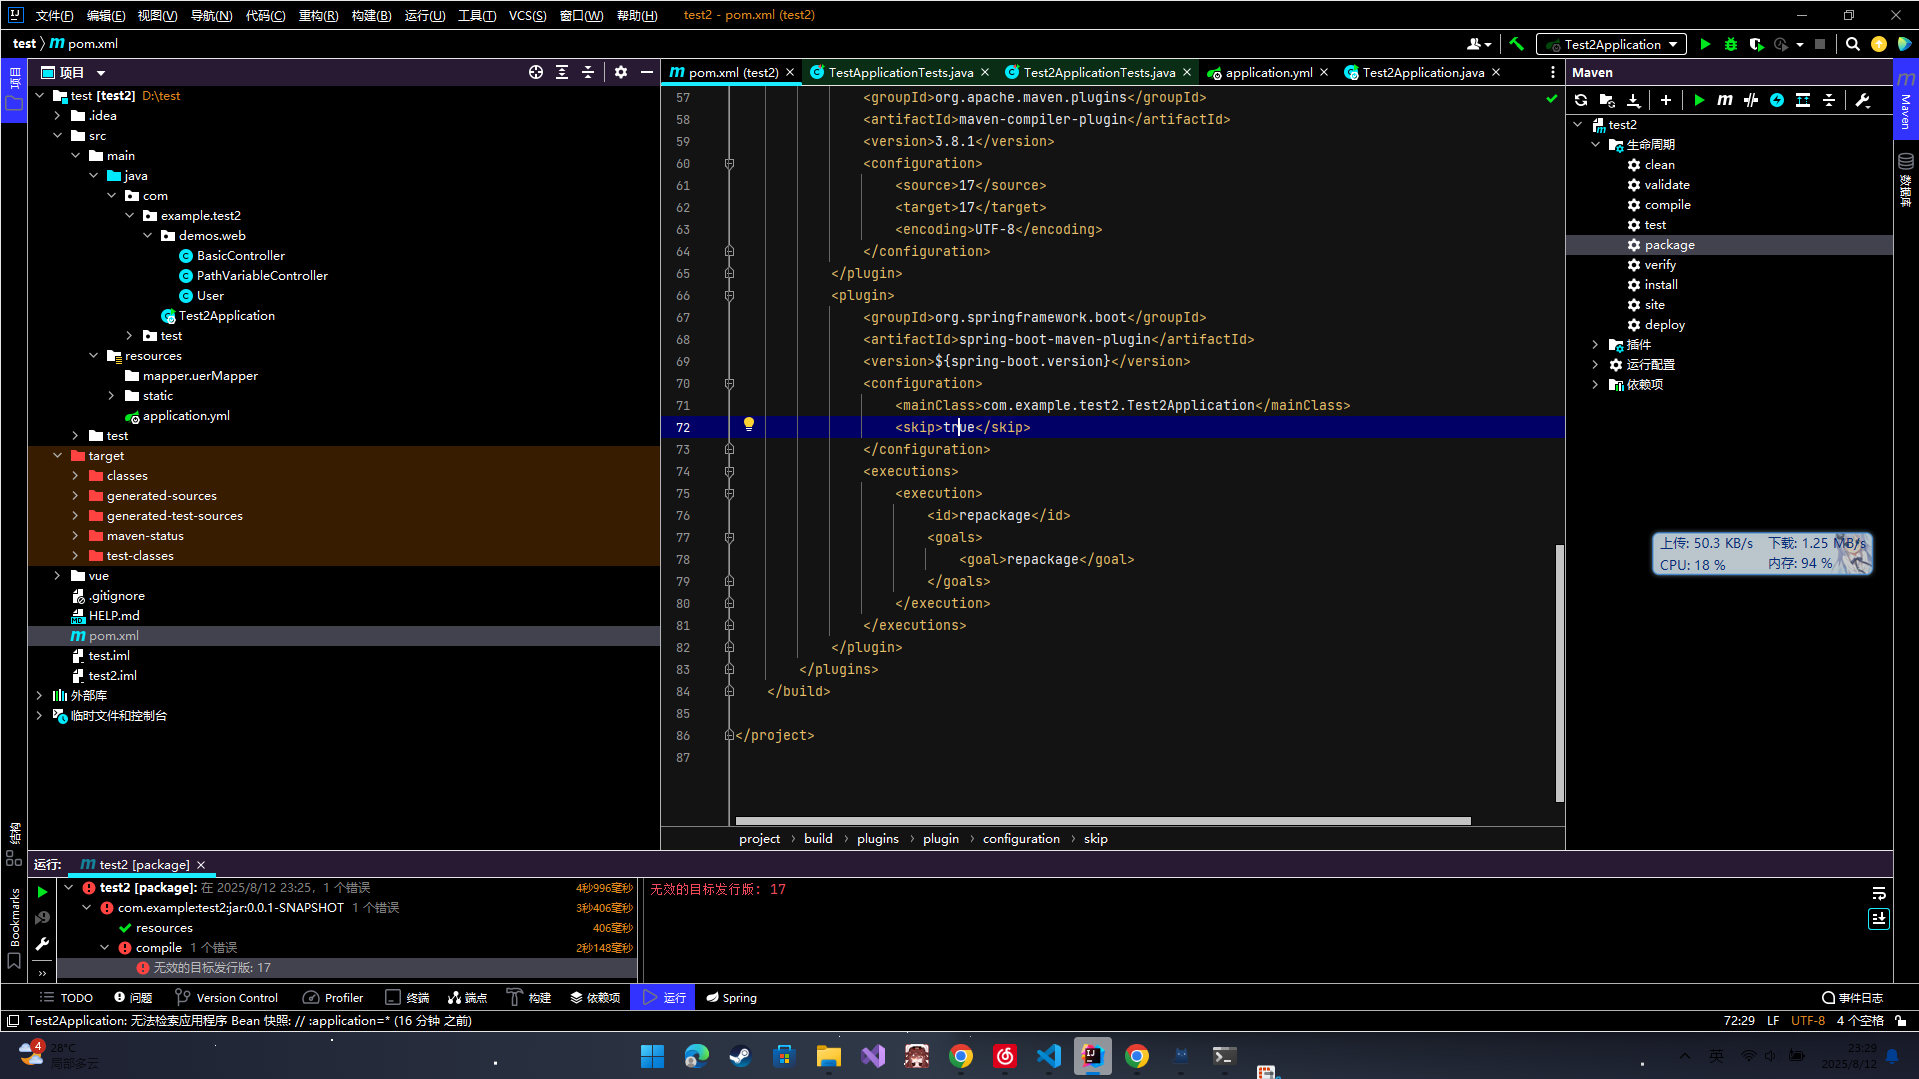
打包后有个target目录,下面的jar包就是项目。
二、简单前端项目搭建
首先下载nodejs,魔法上网后直接去官网下载即可。
定位到想搭建的文件目录,在目录输入cmd定位。后输入npm create vite@latest使用 vite脚手架创建vue项目。
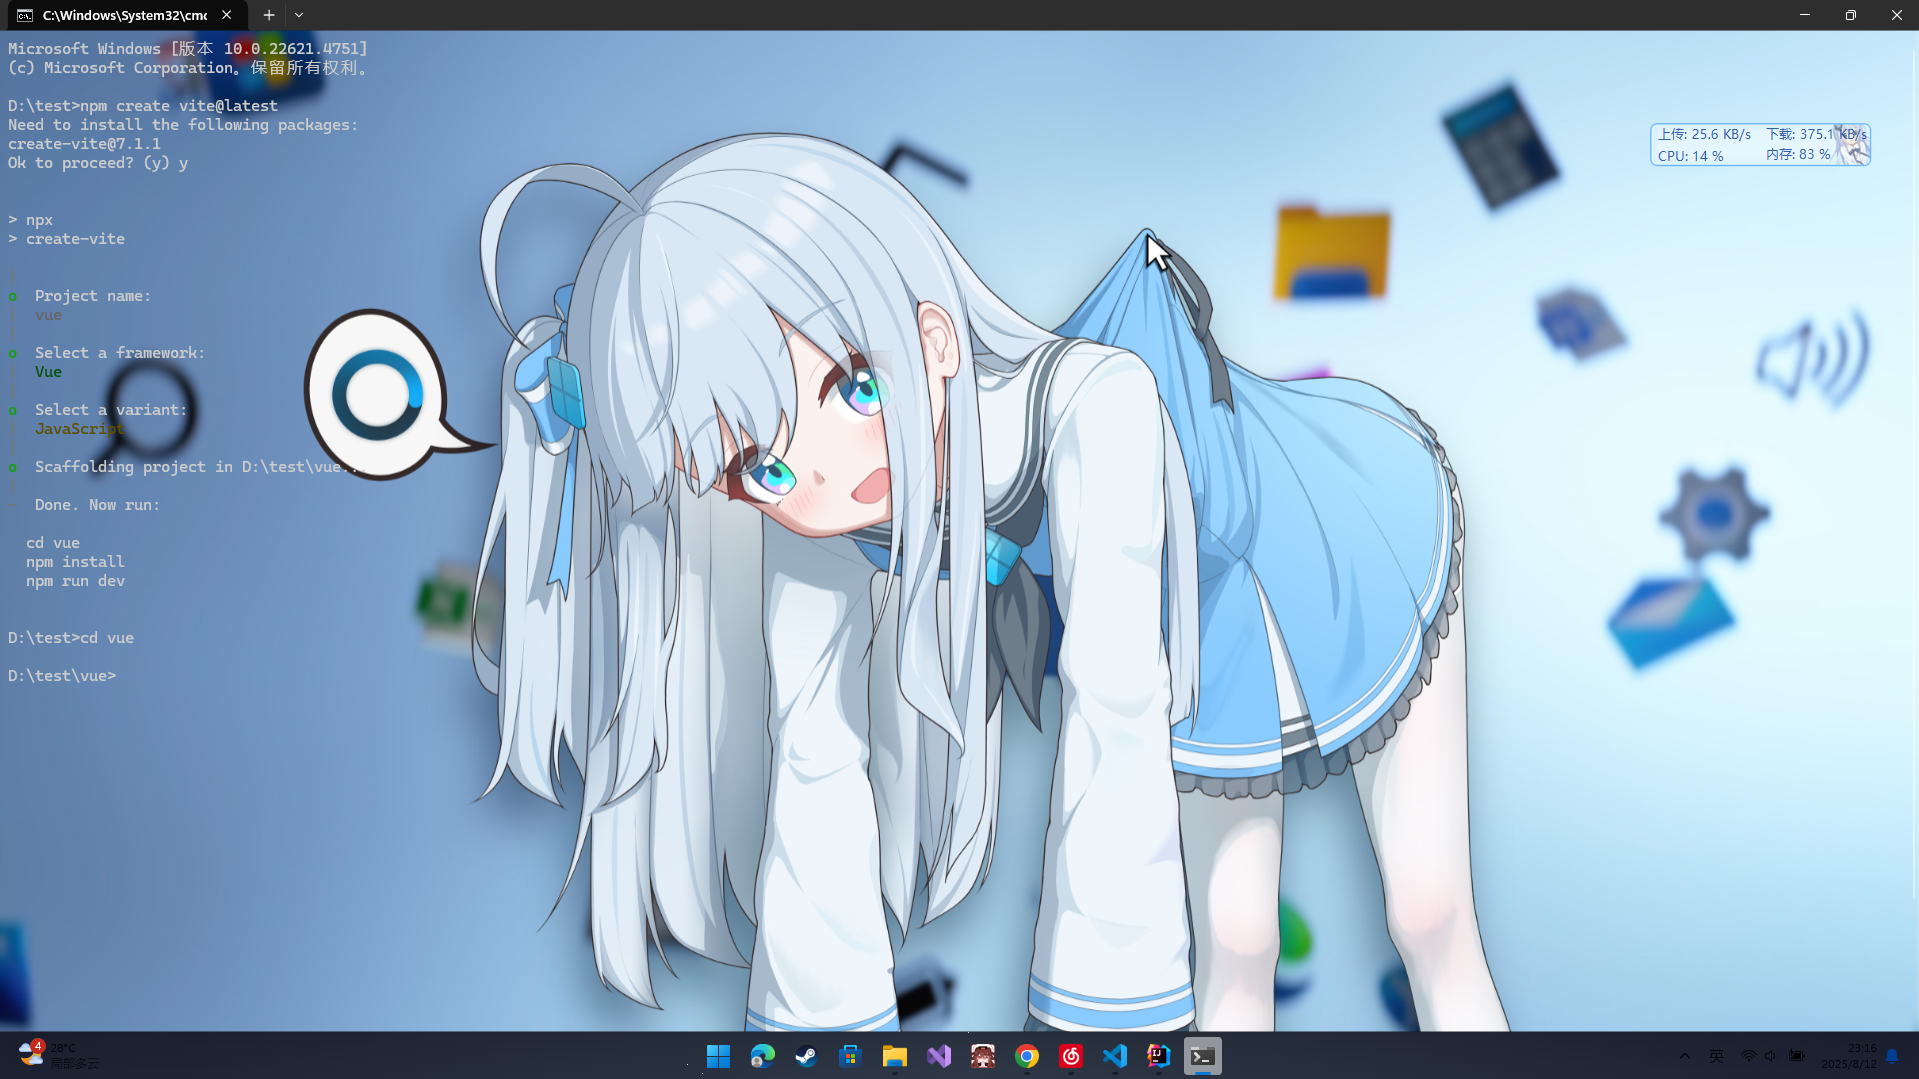
创建完成后连续输入提示的cd vue,npm install,npm run dev即可创建前端项目。

再运行npm run build打包项目可以找到dist
三、前后端联通
项目运行成功后,前后端由于浏览器CROS的原因,不能直接联通,能直接联通的只有
1,ip或域名一致
2,端口一致
3,协议一致
的http请求
只有当三个条件都满足,才能直接进行联通。在开发环境中,一般使用vite代理服务器转发请求,由于vite端口和前端端口一致,所以不会有cros。由于要部署到服务器,所以在vite.config.js中配置,后面就能直接在nginx服务器配置

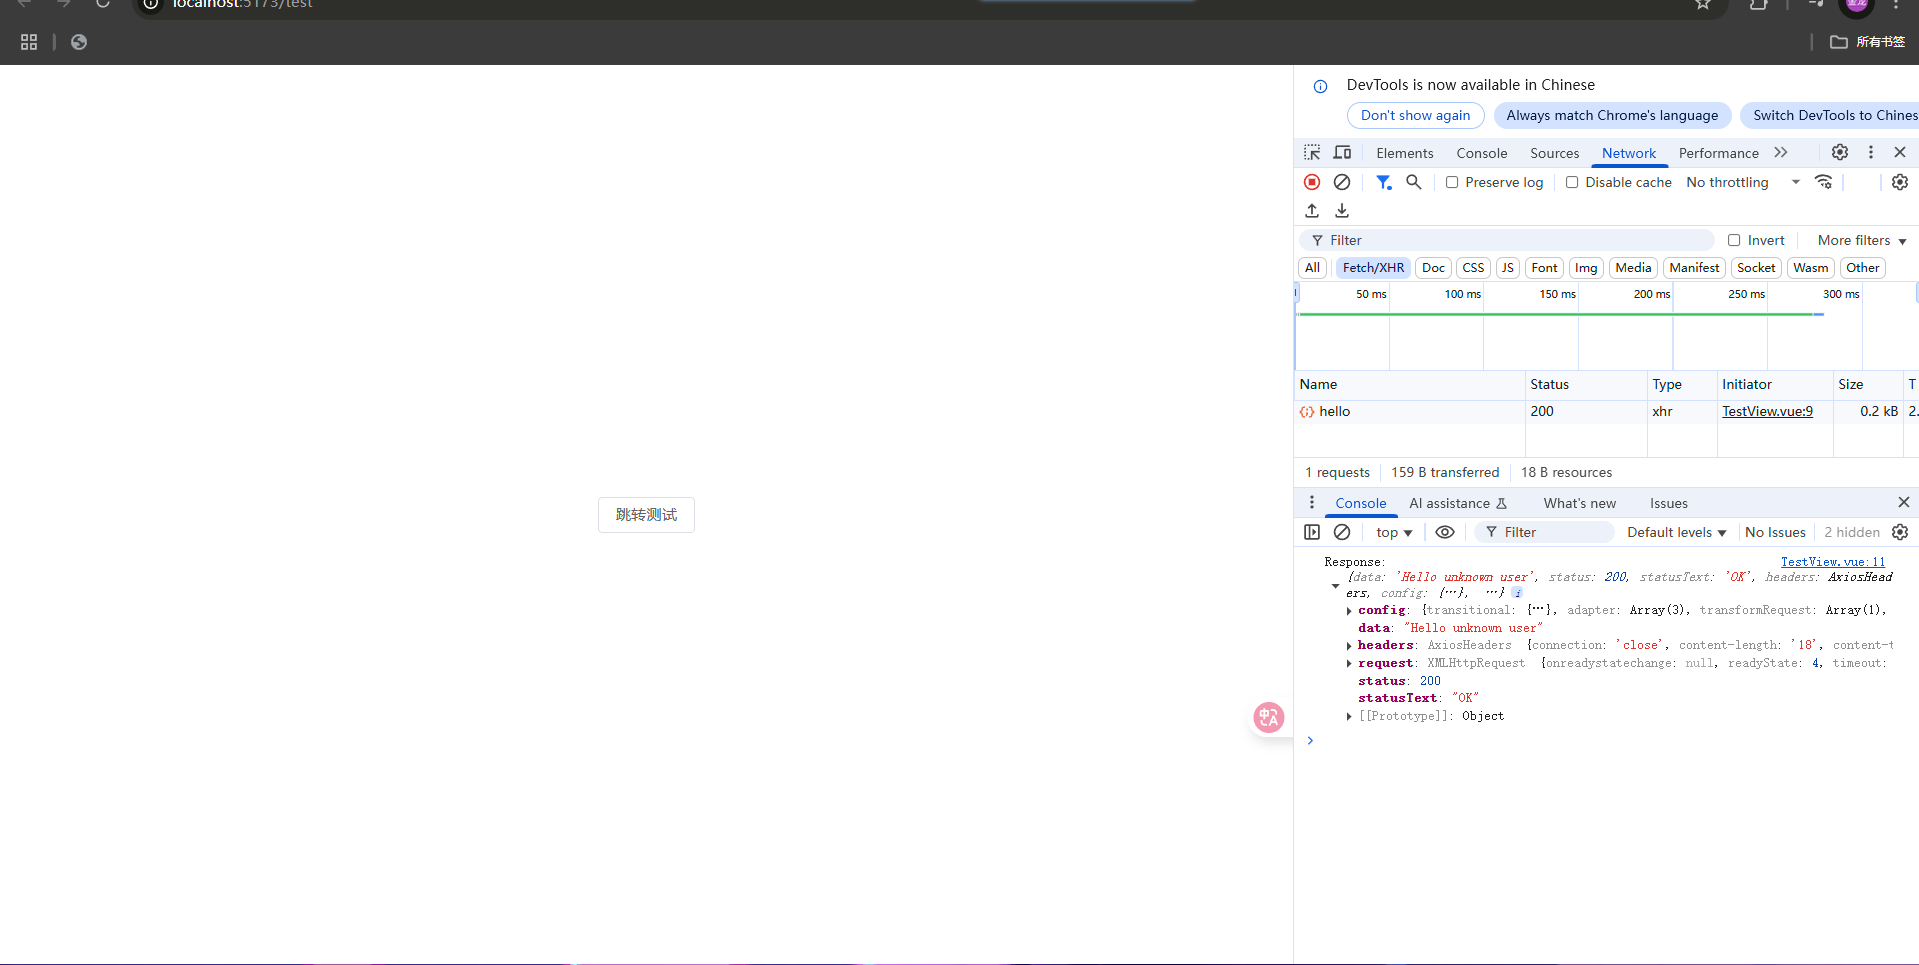
最重要是proxy代理,将请求转发到后端。写个测试页面测试前后端联通情况。
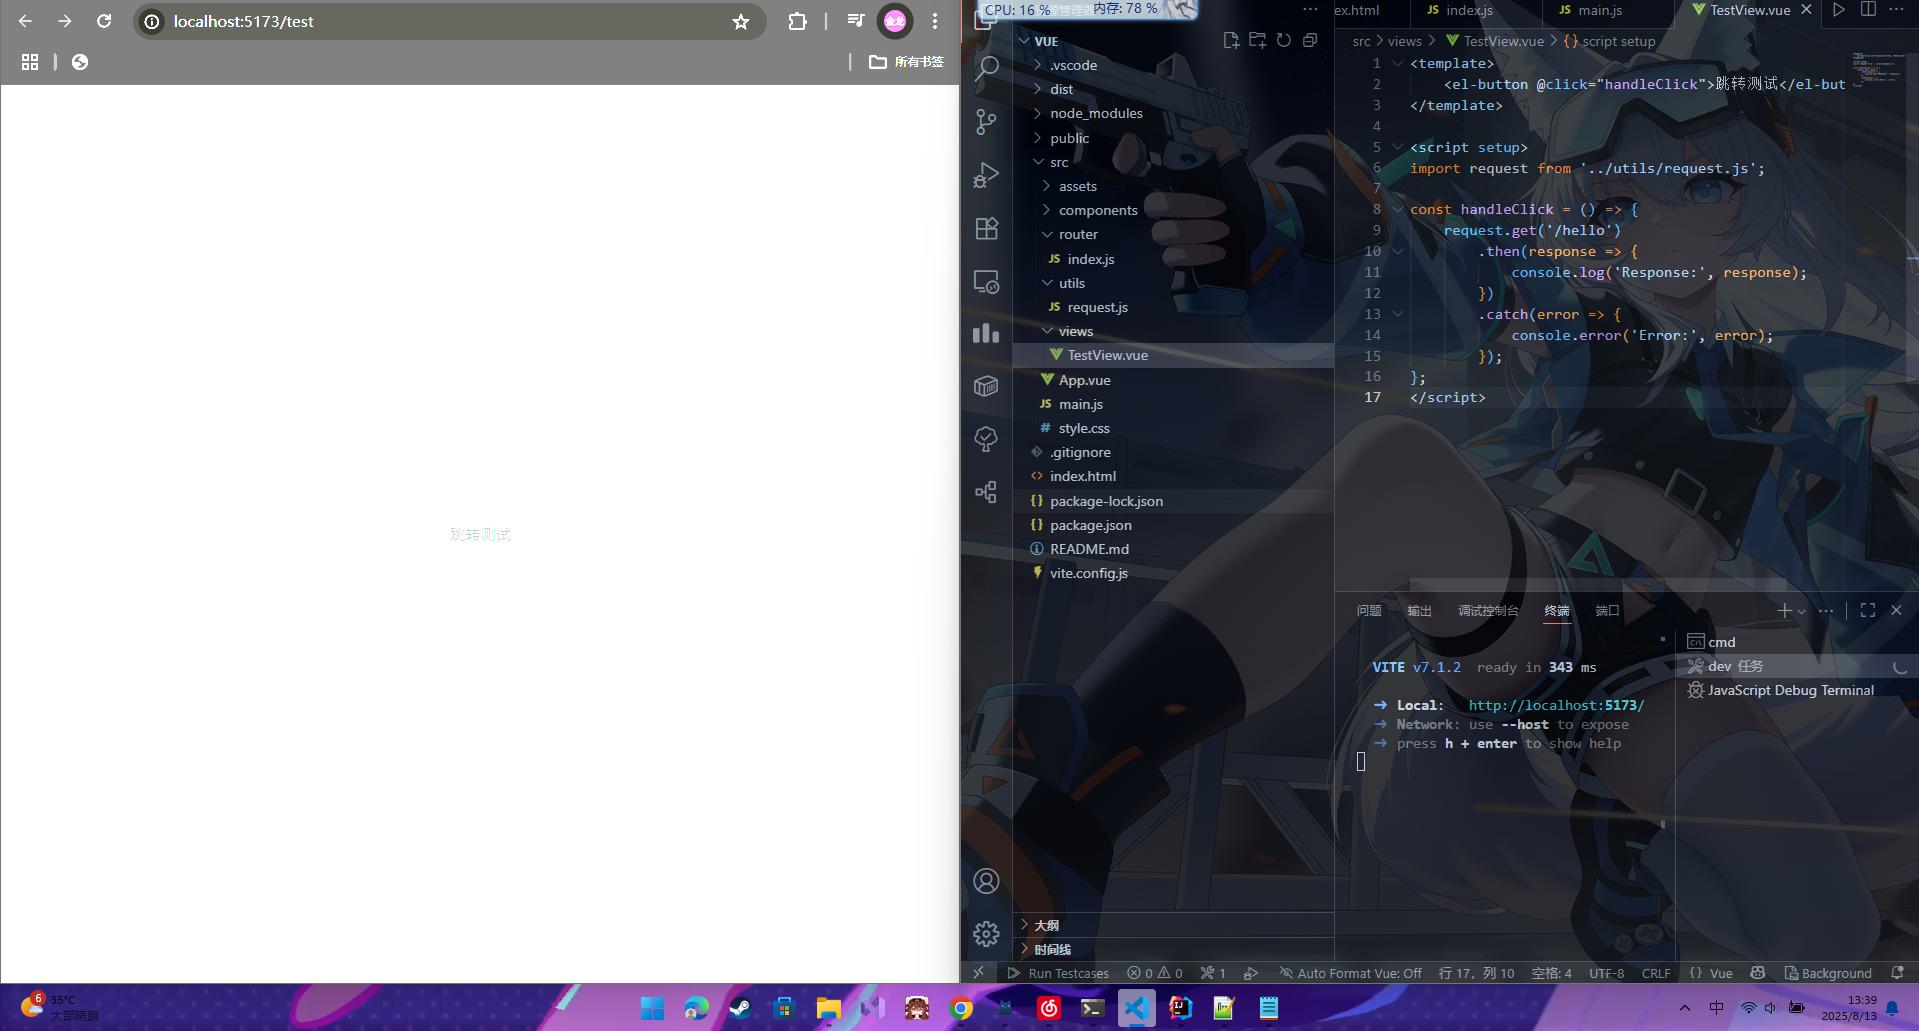
request.js配置如下
import router from "../router";
import axios from "axios";

const request = axios.create({
    baseURL: '/api',
    timeout: 3000,
})


export default request
点击测试,没问题。
四、部署到服务器上
首先,安装nginx,运行
sudo apt-get install nginx
安装好后,可以运行
sudo nginx -t
查看配置文件,t是测试的意思。运行以上指令得到
nginx: the configuration file /etc/nginx/nginx.conf syntax is ok
nginx: configuration file /etc/nginx/nginx.conf test is successful
去往目录后,使用
cat nginx.conf
查看配置文件nginx.conf
user root;
worker_processes auto;
pid /run/nginx.pid;
error_log /var/log/nginx/error.log;
include /etc/nginx/modules-enabled/*.conf;

events {
        worker_connections 1024;
        # multi_accept on;
}

http {

        ##
        # Basic Settings
        ##

        sendfile on;
        tcp_nopush on;
        types_hash_max_size 2048;
        # server_tokens off;

        # server_names_hash_bucket_size 64;
        # server_name_in_redirect off;

        include /etc/nginx/mime.types;
        default_type application/octet-stream;

        ##
        # SSL Settings
        ##

        ssl_protocols TLSv1 TLSv1.1 TLSv1.2 TLSv1.3; # Dropping SSLv3, ref: POODLE
        ssl_prefer_server_ciphers on;

        ##
        # Logging Settings
        ##

        access_log /var/log/nginx/access.log;

        ##
        # Gzip Settings
        ##

        gzip on;

        # gzip_vary on;
        # gzip_proxied any;
        # gzip_comp_level 6;
        # gzip_buffers 16 8k;
        # gzip_http_version 1.1;
        # gzip_types text/plain text/css application/json application/javascript text/xml application/xml application/xml+rss text/javascript;

        ##
        # Virtual Host Configs
        ##

        include /etc/nginx/conf.d/*.conf;
        include /etc/nginx/sites-enabled/*;
}


#mail {
#       # See sample authentication script at:
#       # http://wiki.nginx.org/ImapAuthenticateWithApachePhpScript
#
#       # auth_http localhost/auth.php;
#       # pop3_capabilities "TOP" "USER";
#       # imap_capabilities "IMAP4rev1" "UIDPLUS";
#
#       server {
#               listen     localhost:110;
#               protocol   pop3;
#               proxy      on;
#       }
#
#       server {
#               listen     localhost:143;
#               protocol   imap;
#               proxy      on;
#       }
#}
看起来很多,实际上只有三大块,第一块是
user root;
worker_processes auto;
pid /run/nginx.pid;
error_log /var/log/nginx/error.log;
include /etc/nginx/modules-enabled/*.conf;
用来配置子进程用户(我配成了root懒得调文件权限)
worker_processes表示子进程个数,auto自动设置成服务器核心数
其他的直接翻译。
第二块是
events {
        worker_connections 1024;
        # multi_accept on;
}
配置每个进程处理的请求数量
http {

        ##
        # Basic Settings
        ##

        sendfile on;
        tcp_nopush on;
        types_hash_max_size 2048;
        # server_tokens off;

        # server_names_hash_bucket_size 64;
        # server_name_in_redirect off;

        include /etc/nginx/mime.types;
        default_type application/octet-stream;

        ##
        # SSL Settings
        ##

        ssl_protocols TLSv1 TLSv1.1 TLSv1.2 TLSv1.3; # Dropping SSLv3, ref: POODLE
        ssl_prefer_server_ciphers on;

        ##
        # Logging Settings
        ##

        access_log /var/log/nginx/access.log;

        ##
        # Gzip Settings
        ##

        gzip on;

        # gzip_vary on;
        # gzip_proxied any;
        # gzip_comp_level 6;
        # gzip_buffers 16 8k;
        # gzip_http_version 1.1;
        # gzip_types text/plain text/css application/json application/javascript text/xml application/xml application/xml+rss text/javascript;

        ##
        # Virtual Host Configs
        ##

        include /etc/nginx/conf.d/*.conf;
        include /etc/nginx/sites-enabled/*;
}
注意到 include /etc/nginx/conf.d/*.conf;
include /etc/nginx/sites-enabled/*;
接下来的配置文件就是去这两文件夹。
首先去到
cd \etc\nginx\sites-available
看见里面有defaut
我们查看defaut
cat defaut
可以看到
##
# You should look at the following URL's in order to grasp a solid understanding
# of Nginx configuration files in order to fully unleash the power of Nginx.
# https://www.nginx.com/resources/wiki/start/
# https://www.nginx.com/resources/wiki/start/topics/tutorials/config_pitfalls/
# https://wiki.debian.org/Nginx/DirectoryStructure
#
# In most cases, administrators will remove this file from sites-enabled/ and
# leave it as reference inside of sites-available where it will continue to be
# updated by the nginx packaging team.
#
# This file will automatically load configuration files provided by other
# applications, such as Drupal or Wordpress. These applications will be made
# available underneath a path with that package name, such as /drupal8.
#
# Please see /usr/share/doc/nginx-doc/examples/ for more detailed examples.
##

# Default server configuration
#
server {
    listen 80 default_server;
    listen [::]:80 default_server;

    # SSL configuration
    #
    # listen 443 ssl default_server;
    # listen [::]:443 ssl default_server;
    #
    # Note: You should disable gzip for SSL traffic.
    # See: https://bugs.debian.org/773332
    #
    # Read up on ssl_ciphers to ensure a secure configuration.
    # See: https://bugs.debian.org/765782
    #
    # Self signed certs generated by the ssl-cert package
    # Don't use them in a production server!
    #
    # include snippets/snakeoil.conf;

    root /var/www/html;

    # Add index.php to the list if you are using PHP
    index index.html index.htm index.nginx-debian.html;

    server_name _;

    location / {
        # First attempt to serve request as file, then
        # as directory, then fall back to displaying a 404.
        try_files $uri $uri/ =404;
    }

    # pass PHP scripts to FastCGI server
    #
    #location ~ \.php$ {
    #    include snippets/fastcgi-php.conf;
    #
    #    # With php-fpm (or other unix sockets):
    #    fastcgi_pass unix:/run/php/php7.4-fpm.sock;
    #    # With php-cgi (or other tcp sockets):
    #    fastcgi_pass 127.0.0.1:9000;
    #}

    # deny access to .htaccess files, if Apache's document root
    # concurs with nginx's one
    #
    #location ~ /\.ht {
    #    deny all;
    #}
}


# Virtual Host configuration for example.com
#
# You can move that to a different file under sites-available/ and symlink that
# to sites-enabled/ to enable it.
#
#server {
#    listen 80;
#    listen [::]:80;
#
#    server_name example.com;
#
#    root /var/www/example.com;
#    index index.html;
#
#    location / {
#        try_files $uri $uri/ =404;
#    }
#}
首先将defaut复制到我们自己的配置中
sudo cp defaut test.conf
完成后,删除defaut
sudo rm defaut
删除掉多余文件并配置test.conf后
server {
    listen 80 default_server;
    listen [::]:80 default_server;
    root /home/jjl/test/dist;

    # Add index.php to the list if you are using PHP
    index index.html;

    server_name _;

    location / {
        try_files $uri $uri/ /index.html;

    }
    location /api/ {
        proxy_pass http://localhost:8080/;
        proxy_set_header Host $host;
        proxy_set_header X-Real-IP $remote_addr;
    }

}
再将test.conf软连接到sites-enabled
sudo ln -s /etc/nginx/sites-available/vue.conf /etc/nginx/sites-enabled/
完成后,启动服务器,运行jar包
java -jar test2-0.0.1-SNAPSHOT.jar
然后,访问localhost,看到页面出来,大功告成
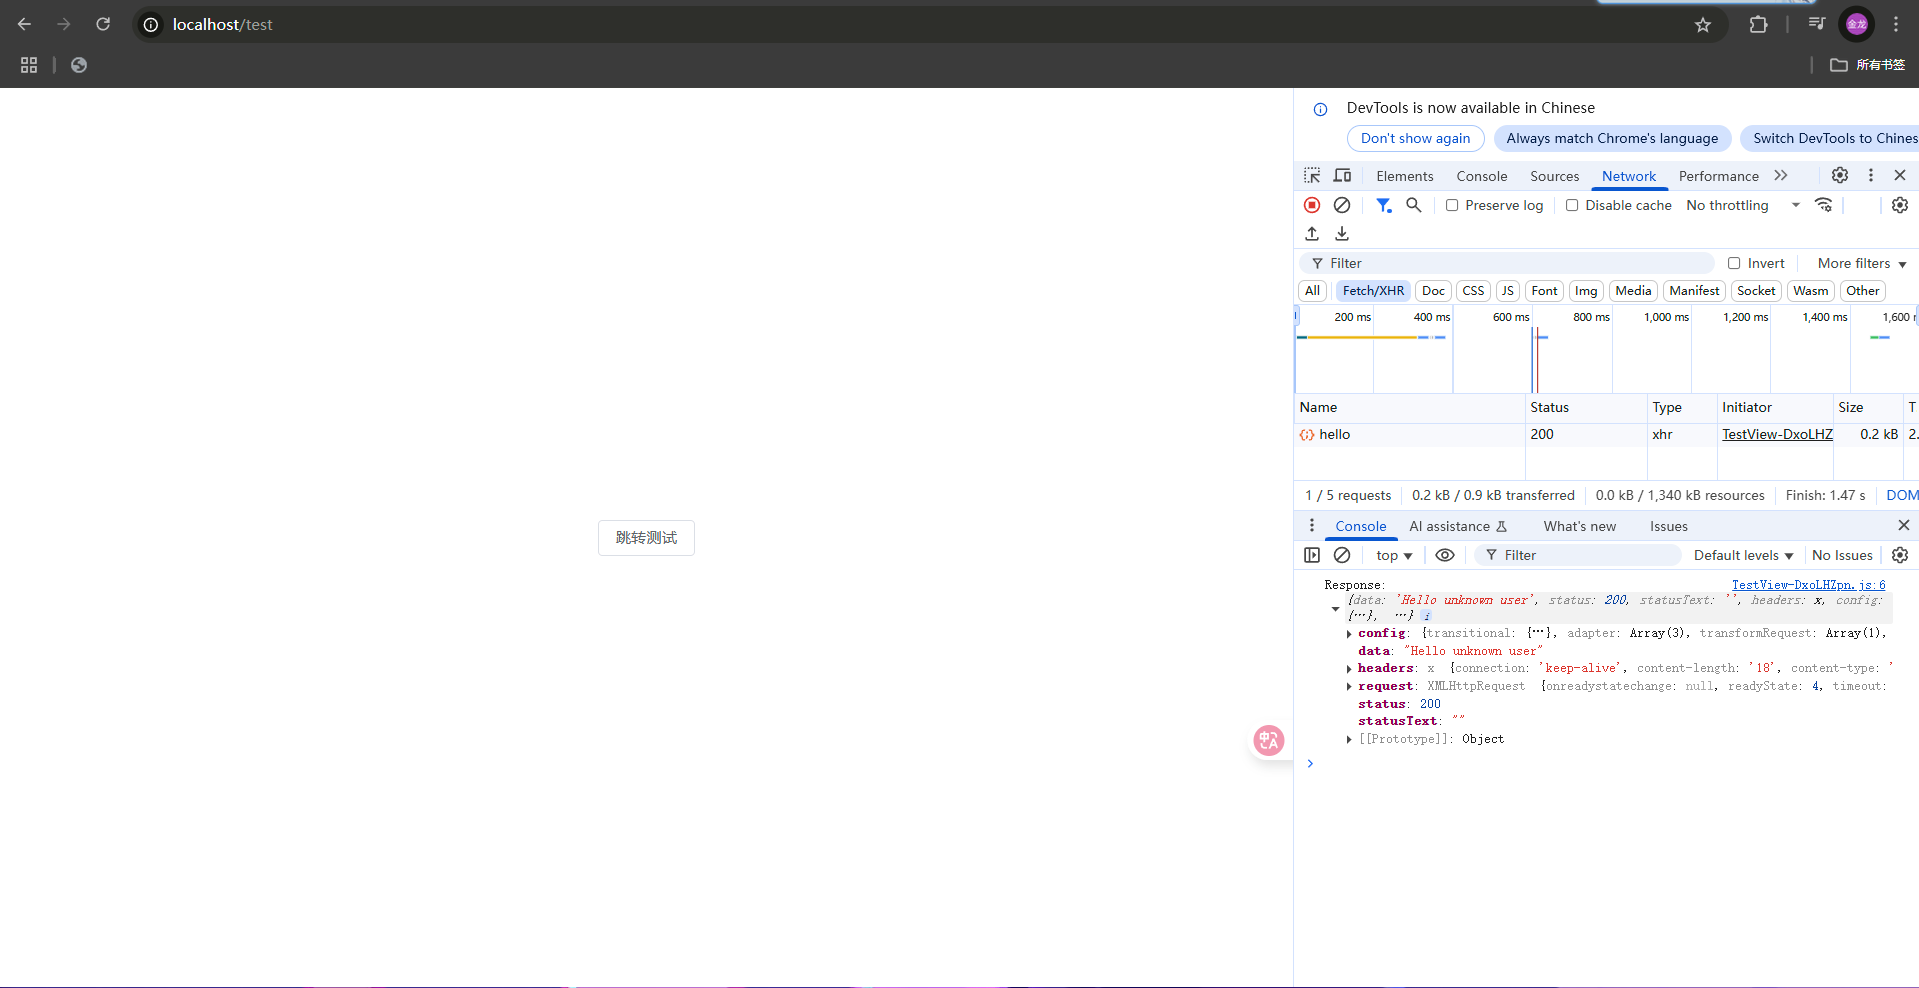
以上就是springboot+vue3部署到linux的nginx服务器流程了

 浙公网安备 33010602011771号