
Android AIDL- Android Interface Define Language:直译 安卓接口定义语言
AIDL 是什么?
- AIDL 全拼如标题所写,为安卓接口定义语言。是一种为了解决进程间通信的工具。但是也可以用于Service与Activity通信。
AIDL 如何使用?
(1)在Android的Project A工程目录下,右键选择FOLDER,选择AIDL FOLDER。AS会自动生成一个AIDL文件夹,然后在AIDL中新建一个package,名称com.learn。
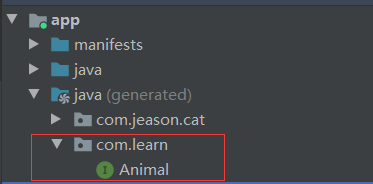
(2)在com.learn的package中新建一个AIDL文件,取名Animal,(可以按需进行命名)。Android Studio 会默认给我们生成如下形式的文件。
// Animal.aidl
package com.jeason.cat;

// Declare any non-default types here with import statements

interface Animal {
    /**
     * Demonstrates some basic types that you can use as parameters
     * and return values in AIDL.
     * 翻译:这个方法的参数类型是可以直接在AIDL使用的基本类型,除此之外的其他类型都必须经过处理,实现Parcelable接口
     */
    void basicTypes(int anInt, long aLong, boolean aBoolean, float aFloat,
            double aDouble, String aString);
}
(3)删除原有的basicTypes方法,加入自己的方法。build一下工程。
  // Animal.aidl
package com.learn;

// Declare any non-default types here with import statements

interface Animal {
    /**
     * Demonstrates some basic types that you can use as parameters
     * and return values in AIDL.
     */
    int sendMsg(int msgType);

    String getResponse();
}
(4)Android 会自动生成一个完整的AIDL.java文件。在下图所示的文件夹中。(代码比较长,就不贴了)
该文件为一个Java类,名为Animal。
- 这个Animal 实现了接口andorid.os.IInterface
- 其中有一个static abstract class,为Stub类,extends了Binder类,并implements了接口Animal,
- 其中有一个Default类,也实现了Animal接口,并且很简单的实现了我们在Animal接口中定义的方法。(后面会说到它的作用)
- 其中有一个Proxy类,也实现了Animal接口,并且很复杂的实现了我们在Animal接口中定义的方法。(后面会说到它的作用)
(5)之后在另外一个Project B里面,重复以上的操作,定义并构建生成AIDl文件。
(6)在Project A里面定义一个Service为TalkService,在其中声明一个内部类继承自Animal.Stub类,然后实现其中的方法。注意在AndroidManifest.xml文件中声明exported为true
package com.jeason.cat

import android.app.Service
import android.content.Intent
import android.os.IBinder
import com.learn.Animal

class TalkService:Service() {

    override fun onCreate() {
        super.onCreate()
        println("Talk Service created!")
    }

    override fun onBind(intent: Intent?): IBinder? {
        return MyBinder()
    }

    override fun onDestroy() {
        super.onCreate()
        println("Talk Service destroyed!")
    }

    class MyBinder: Animal.Stub() {

        var msgType:Int = 0

        override fun sendMsg(msgType: Int): Int {
            this.msgType = msgType
            return msgType
        }

        override fun getResponse(): String {
            val result: String = when(msgType) {
                0 -> "zero"
                1 -> "one"
                2 -> "two"
                else -> "default"
            }
            println(result)
            return result
        }
    }
}
(7)切换到Project B,在其中的DogActivity类中,定义两个按钮分别绑定和解绑TalkService,注意Android 5.0以上bindService的限制。
package com.jeason.dog

import android.content.ComponentName
import android.content.Intent
import android.content.ServiceConnection
import androidx.appcompat.app.AppCompatActivity
import android.os.Bundle
import android.os.IBinder
import android.view.View
import com.learn.Animal

class DogActivity : AppCompatActivity(), ServiceConnection {

    private lateinit var talkServiceIntent: Intent

    private  var myBinder: Animal? = null

    private var isRegistered: Boolean = false

    override fun onCreate(savedInstanceState: Bundle?) {
        super.onCreate(savedInstanceState)
        setContentView(R.layout.activity_dog)

        var index: Int = 0

        talkServiceIntent = Intent()
        talkServiceIntent.component = ComponentName("com.jeason.cat", "com.jeason.cat.TalkService")

        findViewById<View>(R.id.startService).setOnClickListener {
            startService(talkServiceIntent)
        }

        findViewById<View>(R.id.stopService).setOnClickListener {
            stopService(talkServiceIntent)
        }

        findViewById<View>(R.id.bindService).setOnClickListener {
            isRegistered = bindService(talkServiceIntent, this, BIND_AUTO_CREATE)
        }


        findViewById<View>(R.id.UnbindService).setOnClickListener {
            if (isRegistered) {
                unbindService(this)
                isRegistered = false
            }
        }

        findViewById<View>(R.id.sendMsg).setOnClickListener {
            myBinder?.sendMsg(++index)
            println(myBinder?.response)
            if (index > 3 )
                index = 0
        }


    }

    override fun onServiceConnected(name: ComponentName?, service: IBinder?) {
        myBinder = Animal.Stub.asInterface(service)
        println(name)
    }

    override fun onServiceDisconnected(name: ComponentName?) {
        println("disconnected")
        myBinder = null
    }

    override fun onDestroy() {
        super.onDestroy()
        stopService(talkServiceIntent)
        if (isRegistered) {
            unbindService(this)
        }
    }
}
(8)完成以上步骤,启动两个App,Project A和B。就可以通信了。
Default类和Proxy类的作用
- Default类,当B请求和A的Service进行通信,但是A没有启动,其Service没有办法被绑定。此时默认以Default类来给出回应。
- Proxy类,当B去请求A的Service时,实际上和B通信的不是Service类,而是Proxy代理类,是它代替我们请求的对象给出的回应。

 浙公网安备 33010602011771号