
SpringMVC之环境搭建第一个程序
一、创建Dynamic Web Project。
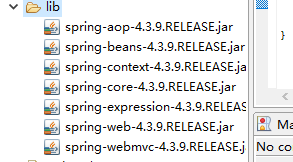
导入jar包:

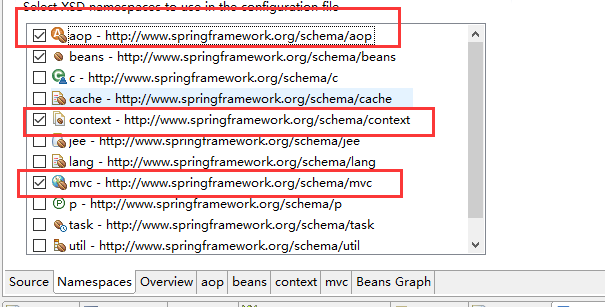
二、创建bean配置文件:springmvc.xml文件:
并添加命名空间:
三、

那么如何告知程序,让springmvc介入程序呢?
在web.xml进行配置:
<?xml version="1.0" encoding="UTF-8"?>
<web-app xmlns:xsi="http://www.w3.org/2001/XMLSchema-instance" xmlns="http://java.sun.com/xml/ns/javaee" xsi:schemaLocation="http://java.sun.com/xml/ns/javaee http://java.sun.com/xml/ns/javaee/web-app_2_5.xsd" id="WebApp_ID" version="2.5">
<display-name>SpringMVCProject</display-name>
<welcome-file-list>
<welcome-file>index.html</welcome-file>
<welcome-file>index.htm</welcome-file>
<welcome-file>index.jsp</welcome-file>
<welcome-file>default.html</welcome-file>
<welcome-file>default.htm</welcome-file>
<welcome-file>default.jsp</welcome-file>
</welcome-file-list>
<servlet>
<servlet-name>springDispatcherServlet</servlet-name>
<servlet-class>org.springframework.web.servlet.DispatcherServlet</servlet-class>
<init-param>
<param-name>contextConfigLocation</param-name>
<param-value>classpath:springmvc.xml</param-value>
</init-param>
<!-- 配置文件自动加载 -->
<load-on-startup>1</load-on-startup>
</servlet>
<servlet-mapping>
<servlet-name>springDispatcherServlet</servlet-name>
<!-- 拦截所有请求 -->
<url-pattern>/</url-pattern>
</servlet-mapping>
</web-app>
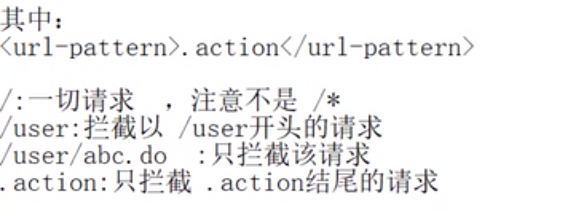
<url-pattern>/</url-pattern>拦截一切用户请求。交给mvc处理。

创建class文件:
SpringMVCController.java:
package org.ruangong.controller;

import org.springframework.stereotype.Controller;
import org.springframework.web.bind.annotation.RequestMapping;

@Controller
public class SpringMVCController {
	@RequestMapping("welcome")
	public String welcome(){
		return "success";
	}
}
通过注解让普通java类变成功能类,但是在SpringMVC.xml中必须加扫描器。
创建jsp:
添加标签:
<a href="welcome">first springmvc</a>
@RequestMapping(“welcome”)可以接受jsp的请求。
在springmvc.xml中添加:
<?xml version="1.0" encoding="UTF-8"?>
<beans xmlns="http://www.springframework.org/schema/beans"
	xmlns:xsi="http://www.w3.org/2001/XMLSchema-instance"
	xmlns:aop="http://www.springframework.org/schema/aop"
	xmlns:context="http://www.springframework.org/schema/context"
	xmlns:mvc="http://www.springframework.org/schema/mvc"
	xsi:schemaLocation="http://www.springframework.org/schema/mvc http://www.springframework.org/schema/mvc/spring-mvc-4.3.xsd
		http://www.springframework.org/schema/beans http://www.springframework.org/schema/beans/spring-beans.xsd
		http://www.springframework.org/schema/context http://www.springframework.org/schema/context/spring-context-4.3.xsd
		http://www.springframework.org/schema/aop http://www.springframework.org/schema/aop/spring-aop-4.3.xsd">


		<!-- 扫描器 -->
		<context:component-scan base-package="org.ruangong.controller"></context:component-scan>
		<!-- 配置视图解析器 -->
		<bean class="org.springframework.web.servlet.view.InternalResourceViewResolver">
			<property name="prefix" value="/views/"></property>
			<property name="suffix" value=".jsp"></property>
		</bean>
</beans>
prefix:(前缀)指的是文件前缀。
suffix:(后缀)指的是网页后缀。
创建file文件:views,在文件中创建success.jsp。
requestMapping接受请求。
重定向到网页:/views/+success+.jsp。

 浙公网安备 33010602011771号