初识React Native的组件
react学习第一节。
一、什么是react native的组件
react的组件让你将UI分割成独立的,可重用的一些碎片或部分,这些部分都是相互独立的。
二、初始化项目
react-native run-android
因为我们在windows上面运行的,所以只能运行android。由于react-native本事是兼容两端的。因此初始化配置,让android和ios执行同一部分代码,打开的页面是同一个页面,具体的配置:
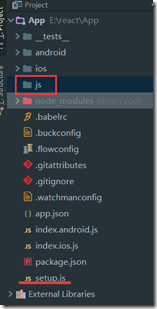
1、首先在项目中创建一个js文件 setup.js和js文件夹。
2、复制index.android.js文件的内容到setup.js下,然后修改:
/**
 * Sample React Native App
 * https://github.com/facebook/react-native
 * @flow
 */

import React, { Component } from 'react';
import {
  AppRegistry,
  StyleSheet,
  Text,
  View
} from 'react-native';

export default class setup  extends Component {
  render() {
    return (
      <View style={styles.container}>
        <Text style={styles.welcome}>
          Welcome to React Native!
        </Text>
        <Text style={styles.instructions}>
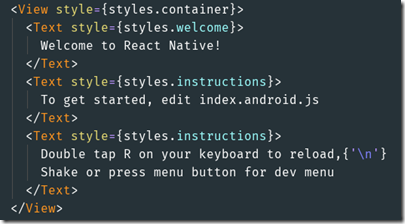
          To get started, edit index.android.js
        </Text>
        <Text style={styles.instructions}>
          Double tap R on your keyboard to reload,{'\n'}
          Shake or press menu button for dev menu
        </Text>
      </View>
    );
  }
}

const styles = StyleSheet.create({
  container: {
    flex: 1,
    justifyContent: 'center',
    alignItems: 'center',
    backgroundColor: '#F5FCFF',
  },
  welcome: {
    fontSize: 20,
    textAlign: 'center',
    margin: 10,
  },
  instructions: {
    textAlign: 'center',
    color: '#333333',
    marginBottom: 5,
  },
});
说明:
修改了class的类名为setup,删除了 registerComponent 所在的代码。
3、修改index.android.js和index.ios.js文件的内容:
/**
 * Sample React Native App
 * https://github.com/facebook/react-native
 * @flow
 */

import React, { Component } from 'react';
import {
  AppRegistry,
  StyleSheet,
  Text,
  View
} from 'react-native';

import setup from './setup';


AppRegistry.registerComponent('App', () => setup);
说明:
android和ios的代码是一样的。都是首先导入setup.js。然后将 registerComponent 执行setup。
二、创建组件的三种方式
- ES6方式创建组件
- ES5方式创建组件
- 函数式定义的无状态组件
1、ES6方式
在js文件下创建一个HelloComponent.js的文件。
- 首先我们使用ES6,这个文件中代码必须先引入有react提供的React和component组件。
import React, { Component } from 'react';然后编写类:
import React, { Component } from 'react';
import {
  AppRegistry,
  StyleSheet,
  Text,
  View
} from 'react-native';

export default class HelloComponent extends Component {
  render() {
    return (
      <Text style={{fontSize:20,backgroundColor:'red'}}>Hello</Text>
    );
  }
}
说明:
1、代码中improt导入的react的代码很关键。
2、同时将我们创建的类export default前加上这2个关键字也是很关键的,这样才能保证方法被其他实例调用。
3、类中render(),也是个关键,组件的类中必须有这个。
4、<Text></Text>定义的是文本标签。虽然这里样式是写在标签上的,其实是可以通过样式引出的。
样式的定义:
const styles = StyleSheet.create({
  container: {
    flex: 1,
    justifyContent: 'center',
    alignItems: 'center',
    backgroundColor: '#F5FCFF',
  },
  welcome: {
    fontSize: 20,
    textAlign: 'center',
    margin: 10,
  },
  instructions: {
    textAlign: 'center',
    color: '#333333',
    marginBottom: 5,
  },
});
外部样式在标签上的用法:
然后在setup.js导入HelloComponent.js,并使用组件。
import React, { Component } from 'react';
import {
  AppRegistry,
  StyleSheet,
  Text,
  View
} from 'react-native';

import HelloComponent from './js/HelloComponent';


export default class setup extends Component {
  render() {
    return (
      <HelloComponent/>
    );
  }
}
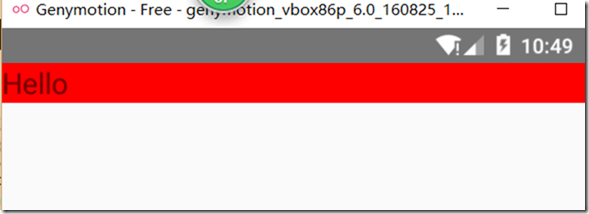
刷新模拟器,看结果:
推荐:
ES6的方式是我们推荐的。
2、ES5方式
import React, { Component } from 'react';
import {
  AppRegistry,
  StyleSheet,
  Text,
  View
} from 'react-native';

var HelloComponent = React.createClass({
    render() {
        return (
            <Text style={{fontSize: 20, backgroundColor: 'red'}}>Hello</Text>
        );
    }
})

module.exports = HelloComponent;
注意:
1、在ES5中定义了组件,必须要将组件导出,不然组件不可能被别人调用。
2、其中module.exports就是个关键。
3、同时定义的变量是通过React.createClass()方法创建的。
4、方法中render()方式也是必不可少的。
3、函数式定义的无状态组件
函数式,故名思意就是通过函数,但是这个无状态式怎么回事那?
/*函数式*/
function HelloComponent() {
    return <Text style={{fontSize:20,backgroundColor:'red'}}>Hello</Text>;
}
// 导出函数
module.exports = HelloComponent;
怎样理解无状态那?
1、在这个函数内部是无法使用 this 的,因为没有 this 的指针。
2、也没有完整意义的生命周期。本身是方法,也没周期而言。
函数式定义组件接收属性
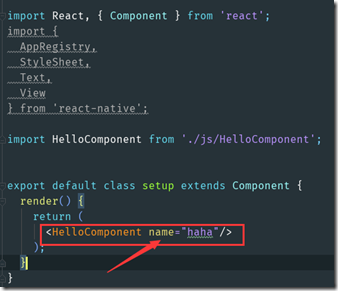
使用组件的时候,在标签上定义属性:
然后在函数式定义的方法中获取:
结果:
ES6方式接收属性
获取定义在当前组件上的属性。


 浙公网安备 33010602011771号