springboot-数据库访问之mybatis
选中mysqldirver,数据库驱动器
选中jdbc ,帮我们配置数据源,连接数据库
选中mybatis,持久层
<!--        这个不是springboot官方出来的,是mybatis为了设备springboot出品的-->
        <dependency>
            <groupId>org.mybatis.spring.boot</groupId>
            <artifactId>mybatis-spring-boot-starter</artifactId>
            <version>2.1.3</version>
        </dependency>
依赖图:

引入了mybtatis-spring-boot-starter依赖之后,我们可以不引入
我们不是用springboot tomcat内置的数据源,所以加入依赖:
     <dependency>
            <groupId>com.alibaba</groupId>
            <artifactId>druid</artifactId>
            <version>1.1.22</version>
        </dependency>
前期准备:
1创建数据库mybatis
2创建两个数据表:
CREATE TABLE `employee` (
  `id` int(11) NOT NULL AUTO_INCREMENT,
  `lastName` varchar(255) DEFAULT NULL,
  `email` varchar(255) DEFAULT NULL,
  `gender` int(2) DEFAULT NULL,
  `d_id` int(11) DEFAULT NULL,
  PRIMARY KEY (`id`)
) ENGINE=InnoDB DEFAULT CHARSET=utf8;


CREATE TABLE `department` (
  `id` int(11) NOT NULL AUTO_INCREMENT,
  `departmentName` varchar(255) DEFAULT NULL,
  PRIMARY KEY (`id`)
) ENGINE=InnoDB AUTO_INCREMENT=8 DEFAULT CHARSET=utf8;
配置相关数据源信息:
spring:
  datasource:
    #   数据源基本配置
    username: root
    password: 1997
    driver-class-name: com.mysql.cj.jdbc.Driver
    url: jdbc:mysql://192.168.1.101:3306/mybatis
    type: com.alibaba.druid.pool.DruidDataSource
    #   数据源其他配置
    initialSize: 5
    minIdle: 5
    maxActive: 20
    maxWait: 60000
    timeBetweenEvictionRunsMillis: 60000
    minEvictableIdleTimeMillis: 300000
    validationQuery: SELECT 1 FROM DUAL
    testWhileIdle: true
    testOnBorrow: false
    testOnReturn: false
    poolPreparedStatements: true
    #   配置监控统计拦截的filters,去掉后监控界面sql无法统计,'wall'用于防火墙
    filters: stat,wall,log4j
    maxPoolPreparedStatementPerConnectionSize: 20
    useGlobalDataSourceStat: true
    connectionProperties: druid.stat.mergeSql=true;druid.stat.slowSqlMillis=500
编写实体类:
Department
package com.quan.springbootmybatis.bean;

public class Department {
    private Integer id;
    private String departmentName;

    public Integer getId() {
        return id;
    }

    public void setId(Integer id) {
        this.id = id;
    }

    public String getDepartmentName() {
        return departmentName;
    }

    public void setDepartmentName(String departmentName) {
        this.departmentName = departmentName;
    }
}
Employee
package com.quan.springbootmybatis.bean;

public class Employee {
    private Integer id;
    private  String lastName;
    private Integer gender;
    private String email;
    private Integer dId;

    public Integer getId() {
        return id;
    }

    public void setId(Integer id) {
        this.id = id;
    }

    public String getLastName() {
        return lastName;
    }

    public void setLastName(String lastName) {
        this.lastName = lastName;
    }

    public Integer getGender() {
        return gender;
    }

    public void setGender(Integer gender) {
        this.gender = gender;
    }

    public String getEmail() {
        return email;
    }

    public void setEmail(String email) {
        this.email = email;
    }

    public Integer getdId() {
        return dId;
    }

    public void setdId(Integer dId) {
        this.dId = dId;
    }
}
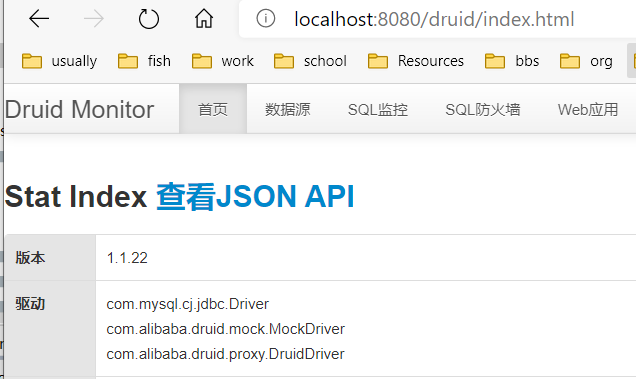
配置一下Druid:
package com.quan.springbootmybatis.config;

import com.alibaba.druid.pool.DruidDataSource;
import com.alibaba.druid.support.http.StatViewServlet;
import com.alibaba.druid.support.http.WebStatFilter;
import org.springframework.boot.context.properties.ConfigurationProperties;
import org.springframework.boot.web.servlet.FilterRegistrationBean;
import org.springframework.boot.web.servlet.ServletRegistrationBean;
import org.springframework.context.annotation.Bean;
import org.springframework.context.annotation.Configuration;

import javax.sql.DataSource;
import java.util.Arrays;
import java.util.HashMap;
import java.util.Map;

@Configuration
public class DruidConfig {
    @ConfigurationProperties(prefix = "spring.datasource")
    @Bean
    public DataSource druid(){
        return new DruidDataSource();
    }

    //配置Druid监控
    //配置管理后台Servlet
    @Bean
    public ServletRegistrationBean statViewServlet(){
        ServletRegistrationBean bean =new ServletRegistrationBean(new StatViewServlet(),"/druid/*");
        Map<String,String> initParams = new HashMap<>();
        //下面的参数都是 StatViewServlet extends ResourceServlet两个累里面的属性
        initParams.put("loginUsername","admin");
        initParams.put("loginPassword","admin");
        initParams.put("allow","");//默认允许所有
        initParams.put("deny","129.204.3.132");
        bean.setInitParameters(initParams);
        return bean;
    }

    //配置一个Web监控的Filter
    @Bean
    public FilterRegistrationBean webStatFilter(){
        FilterRegistrationBean bean = new FilterRegistrationBean();
        bean.setFilter(new WebStatFilter());

        Map<String,String> initParams = new HashMap<>();
        initParams.put("exclusions","*.js,*.css");
        bean.setInitParameters(initParams);
        bean.setUrlPatterns(Arrays.asList("/*"));
        return bean;
    }

}
可以启动访问一下druid数据源有没有起来:
注解版详解:
编写一个处理sql的接口:
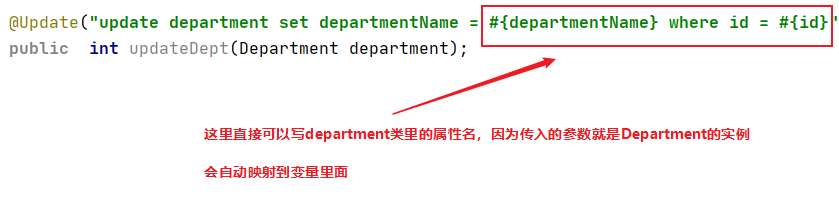
package com.quan.springbootmybatis.mapper;


import com.quan.springbootmybatis.bean.Department;
import org.apache.ibatis.annotations.*;

//指定这个操作数据库的mapper
@Mapper
public interface DepartmentMapper {
    @Select("select * from department where id = #{id}")
    public Department getDepartmentById(Integer id);

    @Delete("delete from department where id = #{id}")
    public int deleteDeptById(Integer id);

    @Insert("insert into department(departmentName) values(#{departmentName})")
    public int insertDept(Department department);


    @Update("update department set departmentName = #{departmentName} where id = #{id}")
    public  int updateDept(Department department);

}
其中@Mapper指定这个接口mapper接口
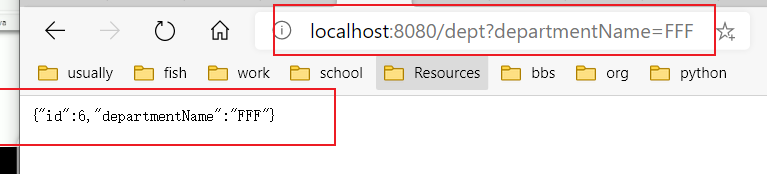
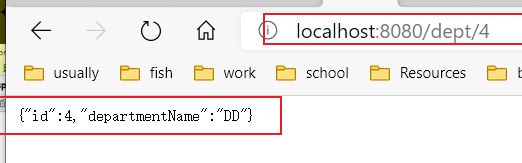
我们编写一个Controller进行测试一下:‘
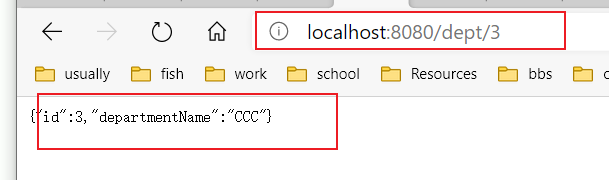
import com.quan.springbootmybatis.mapper.DepartmentMapper;
import com.quan.springbootmybatis.mapper.EmployeeMapper;
import org.springframework.beans.factory.annotation.Autowired;
import org.springframework.web.bind.annotation.GetMapping;
import org.springframework.web.bind.annotation.PathVariable;
import org.springframework.web.bind.annotation.RestController;

//不过返回页面数据直接返回json书
@RestController
public class DeptController {

    @Autowired
    DepartmentMapper departmentMapper;

    @GetMapping("/dept/{id}")
    public Department getDepartment(@PathVariable("id") Integer id){
        return  departmentMapper.getDepartmentById(id);
    }
    //http://localhost:8080/dept/1

    @GetMapping("/dept")
    public Department insertDept(Department department){
        departmentMapper.insertDept(department);
        return department;
    }
    //http://localhost:8080/dept?departmentName=CCC
结果:
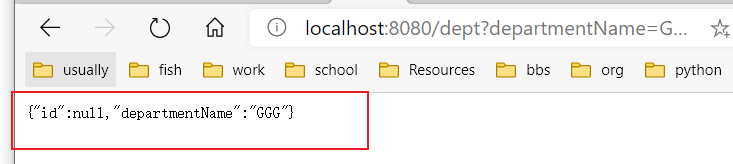
由于我们的id是自增主键,所以如果默认不设置什么东西,是插入的时候是不会取到主键的值的,所以我们要进行下面的设置:
在mapper接口方法中加入多一个注解@Options
    @Options(useGeneratedKeys = true,keyProperty = "id")
    @Insert("insert into department(departmentName) values(#{departmentName})")
    public int insertDept(Department department);
/*
在接口里面加入options
是否使用自动生成的主键,用keyproperty指定主键是对应department属性
 */
结果就可以得到主键的值了
存在的问题1:如果数据库的列名改为department_name 而department的属性值一样是departmentName不变的时候
是不能匹配到值的,这个时候我们就需要开启自定义的mybatis配置规则
就是需要给容器中加入ConfigurationCustomizer;
所以编写一个配置类取进行配置
@org.springframework.context.annotation.Configuration
public class MybatisConfig {
    @Bean
    public ConfigurationCustomizer configurationCustomizer(){
//        匿名函数
        return new ConfigurationCustomizer() {
            @Override
            public void customize(Configuration configuration) {
                configuration.setMapUnderscoreToCamelCase(true);
            }
        };
    }
}
这个只针对注解 生效的,如果是使用mapper映射文件的就需要使用配置文件取开启
问题2,如果我们@mapper的数量很多的时候,我们需要每个都要加,麻烦!!!!
解决:往配置类,或者主配置类里面注上注解@MapperScan
@MapperScan(value = "com.quan.springbootmybatis.mapper")
@SpringBootApplication
public class SpringbootmybatisApplication {

    public static void main(String[] args) {
        SpringApplication.run(SpringbootmybatisApplication.class, args);
    }

}
去掉之前mapper文件夹里面的所有@mapper

查询结果还是一样的;
这就是使用MapperScan批量烧苗所有的Mapper接口
###############################################################################
配置文件版
创建两个配置文件:
mybatis-config.xml
EmployeeMapper.xml
创建一个接口:
package com.quan.springbootmybatis.mapper;

import com.quan.springbootmybatis.bean.Employee;

//无论是配置文件还是注解版都需要将接口扫描到我们的容器中
//使用@Mapper或者@MapperScan
public interface EmployeeMapper {

    public Employee getEmpById(Integer id);

    public void insertEmp(Employee employee);
}
注:因为上面的注解版的时候加了@MapperScan注解了,所以这里可以不用加
根据接口编写mapper映射文件:
<?xml version="1.0" encoding="UTF-8"?>
<!DOCTYPE mapper
        PUBLIC "-//mybatis.org//DTD Mapper 3.0//EN"
        "http://mybatis.org/dtd/mybatis-3-mapper.dtd">
<!--namespace必须和mapper接口的全限定类名绑定-->
<mapper namespace="com.quan.springbootmybatis.mapper.EmployeeMapper">

<!--    public Employee getEmpById(Integer id);-->
<select id="getEmpById" resultType="com.quan.springbootmybatis.bean.Employee">
    SELECT  * FROM employee WHERE  id = #{id}
</select>

<!--    public void insertEmp(Employee employee);-->
    <insert id="insertEmp">
        INSERT INTO employee(lastName,email,gender,d_id) VALUES (#{lastName},#{email},#{gender},#{dId})
    </insert>

</mapper>
注:文件的头部信息可以取官网查看,直接百度进入mybatis
由于实体类和数据库列的名字不一样,一个是dId 一个是d_id
所以需要在mybatis主配置文件里面加入配置规则模式:
<?xml version="1.0" encoding="utf-8"?>
<!DOCTYPE configuration PUBLIC "-//mybatis.org//DTD Config 3.0//EN"
        "http://mybatis.org/dtd/mybatis-3-config.dtd">
<configuration><!-- 配置 -->
    <settings>
        <setting name="mapUnderscoreToCamelCase" value="true"/>
    </settings>
</configuration>
开启驼峰模式规则
修改springboot主配置文件:
需要让程序知道映射文件
核心要点就是要在springboot配置文件当中指定mybatis著配置文件和mapper文件的位置:
#mybatis 全局配置文件的位置
mybatis:
  config-location: classpath:mybatis/mybatis-config.xml
#  mapper映射文件的位置
  mapper-locations: classpath:mybatis/mapper/*.xml
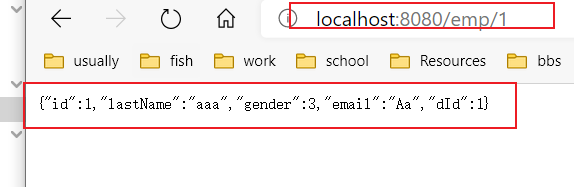
往之前的DeptControler文件加入测试:
    @Autowired
    EmployeeMapper employeeMapper;

    @GetMapping("/emp/{id}")
    public Employee getEmp(@PathVariable("id") Integer id){
        return employeeMapper.getEmpById(id);
    }

 浙公网安备 33010602011771号