
转载于:https://www.cnblogs.com/light-train-union/p/11290545.html
1 、搭建自己的Apollo配置中心(服务器) (参考官方文档 https://github.com/ctripcorp/apollo/wiki/Quick-Start )
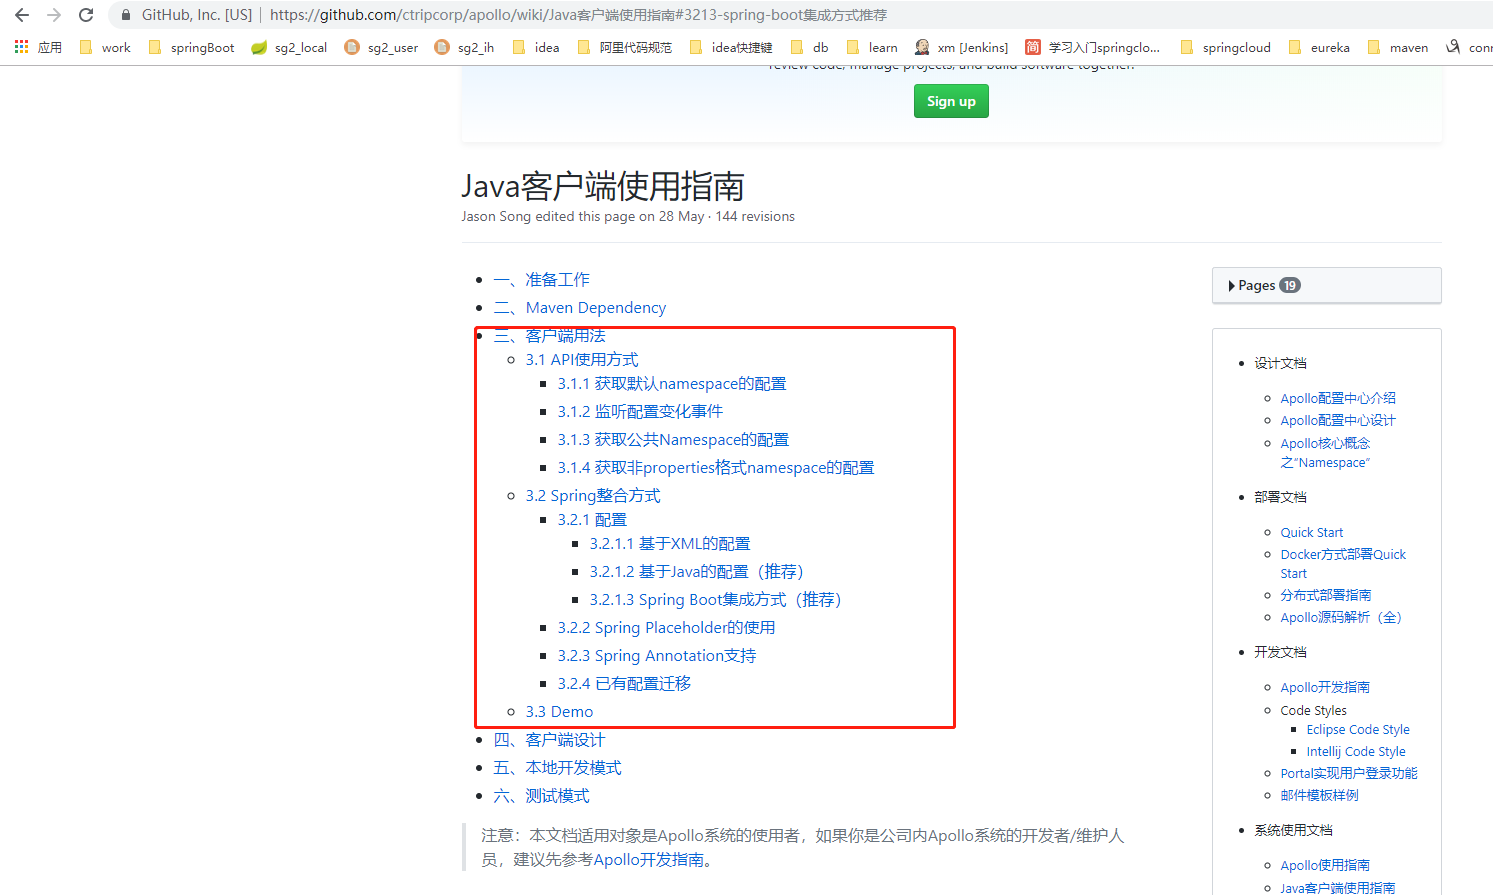
2、 让自己的springCloud项目 用上自己搭建的Apollo配置中心的配置 (参考 http://ghoulich.xninja.org/2018/04/28/basic-usage-method-of-apollo/ )
① 配置中心

② jar包
<dependency>
    <groupId>com.ctrip.framework.apollo</groupId>
    <artifactId>apollo-client</artifactId>
    <version>1.1.2</version>
</dependency>
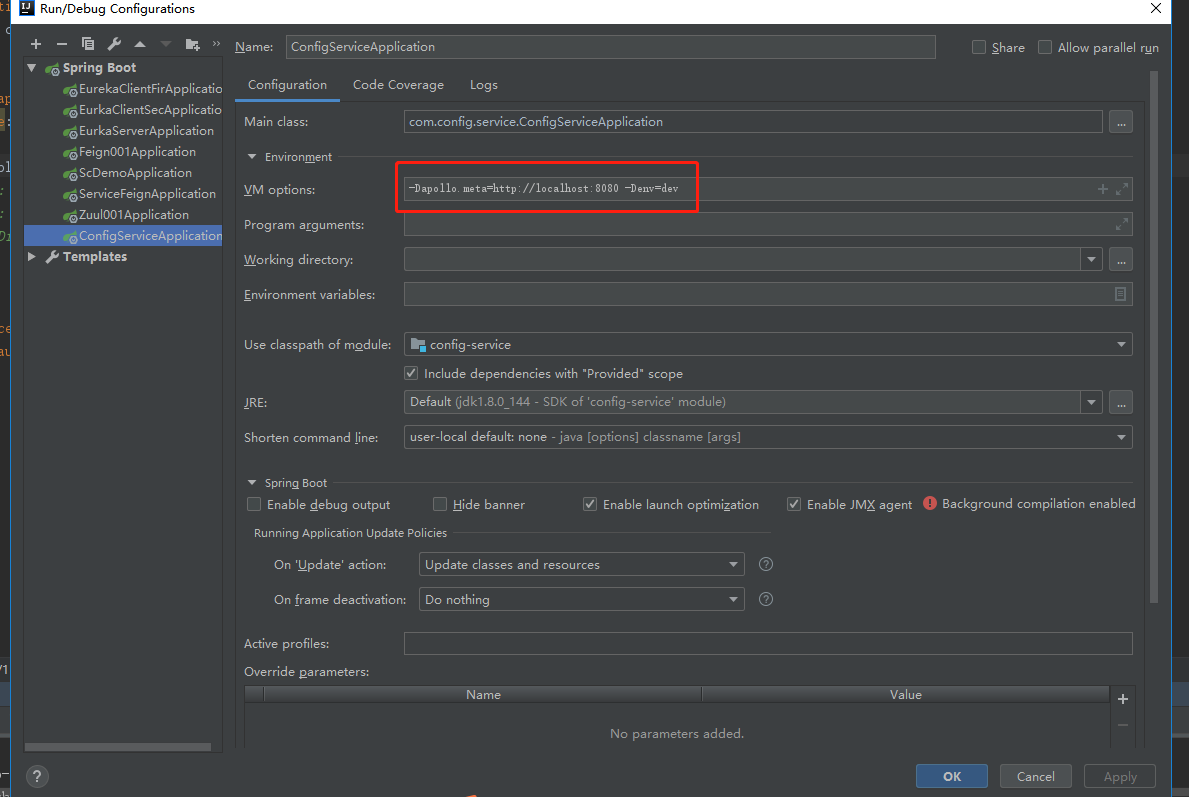
③ 配置文件 与 启动VM设置
玩法一:


玩法二:

配置文件 少了
apollo:
  bootstrap:
    enable: true
配置中心也可以用
可能默认如此 (建议 要加上 即使默认为true 可读性)
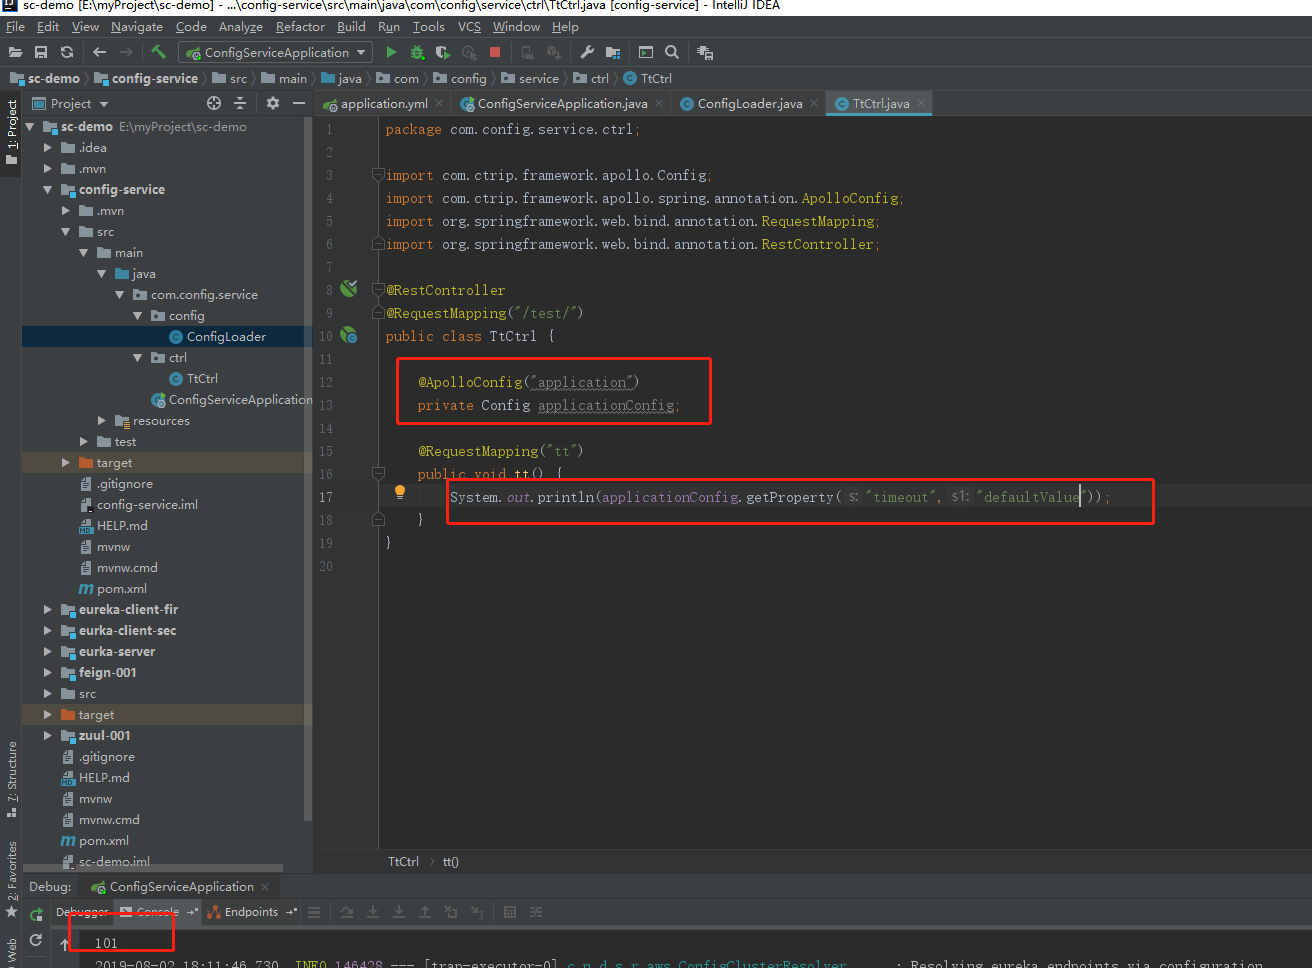
④ java代码
将配置中心的配置注入到spring bean工厂

将配置中心的配置 整合到 springboot项目有多种方式(此demo 使用注解@Configuration @EnableApolloConfig)
测试类:
后记:
  1、配置中心 有很多供选择,某度上有对比。
  2、公司架构师(峰哥)建议选型 阿里的 Nacos (一、阿里 行内 执牛耳者  二、峰哥 不喜欢apollo那种配置方式)


注意:
Apollo安装完成之后有两个页面,而application.yml中配置的meta的端口号应该是8080而不是8070


需要先在Apollo中创建一个项目(appid使用application.yml中的spring.application.name的值)

application.yml中的关键配置信息
server:
  port: 9510
  address: 0.0.0.0

spring:
  application:
    name: ant-api
  profiles:
    active: my
  jackson:
    time-zone: CTT


# apollo appId
app:
  id: ${spring.application.name}
# apollo config
apollo: # will inject 'application' namespace in bootstrap phase
  meta: http://localhost:8080
  cacheDir: ./
  cluster: Cluster-1
  bootstrap:
    enabled: true
    namespaces: application # will inject 'application'namespaces in bootstrap phase
    eagerLoad:
      enabled: true # put apollo initialization before logging system initialization
application-my.yml中的关键内容
# 服务在启动时,会把自己当做一个 Eureka 客户端去注册到 Eureka 服务器上,且从服务器上拉取信息
# 而该服务本身就是一个 Eureka 服务器
eureka:
  client:
    # 服务注册,声明是否将自己的信息注册到 Eureka 服务器上
    register-with-eureka: true
    # 服务发现,是否到 Eureka 服务器中抓取注册信息
    fetch-registry: true
    service-url:
      defaultZone: http://localhost:8080/eureka #Eureka客户端与Eureka服务端的交互地址,高可用状态配置对方的地址,单机状态配置自己(如果不配置则默认本机8761端口)

pom.xml中增加maven依赖
        <dependency>
            <groupId>org.springframework.cloud</groupId>
            <artifactId>spring-cloud-starter-netflix-eureka-server</artifactId>
            <version>2.0.1.RELEASE</version>
        </dependency>
启动文件中增加注解@EnableEurekaServer
@SpringBootApplication
@MapperScan({"com.company.ant.api.repository.mysql.mapper"})
@EnableCaching
@EnableSwagger2
@EnableTransactionManagement
@EnableFeignClients(basePackages = "com.company.ant.api.service")
@EnableEurekaServer
public class AntApiApplication {
    public static void main(String[] args) {
        SpringApplication.run(AntApiApplication.class, args);
    }
}
然后启动服务
启动成功后访问Eureka

写一个controller供测试使用
@RestController
public class TestController {

    @GetMapping("/hello")
    public String hello(){
        return "hello world";
    }
}
编写测试服务:
pom.xml
        <dependency>
            <groupId>org.springframework.cloud</groupId>
            <artifactId>spring-cloud-starter-openfeign</artifactId>
            <version>2.1.3.RELEASE</version>
        </dependency>
        <dependency>
            <groupId>org.springframework.cloud</groupId>
            <artifactId>spring-cloud-starter-netflix-ribbon</artifactId>
            <version>2.1.1.RELEASE</version>
        </dependency>
        <dependency>
            <groupId>org.springframework.cloud</groupId>
            <artifactId>spring-cloud-starter-netflix-eureka-client</artifactId>
            <version>2.0.1.RELEASE</version>
        </dependency>
启动类增加注解
@SpringBootApplication
@MapperScan({"com.company.ant.api.repository.mysql.mapper"})
@EnableCaching
@EnableSwagger2
@EnableTransactionManagement
@EnableFeignClients(basePackages = "com.company.ant.api.service")
@EnableEurekaClient
public class AntApiApplication {
    public static void main(String[] args) {
        SpringApplication.run(AntApiApplication.class, args);
    }
}
编写Service
@FeignClient("ant-api")
public interface TestService {

    @GetMapping("/hello")
    public String hello();
}
application.yml
server:
  port: 9511
  address: 0.0.0.0

spring:
  application:
    name: ant-api-lym
  profiles:
    active: my
  jackson:
    time-zone: CTT
# apollo appId
app:
  id: ${spring.application.name}
# apollo config
apollo: # will inject 'application' namespace in bootstrap phase
  meta: http://localhost:8080
  cacheDir: ./
  #cluster: Cluster-1
  bootstrap:
    enabled: true
    namespaces: application # will inject 'application'namespaces in bootstrap phase
    eagerLoad:
      enabled: true # put apollo initialization before logging system initialization
application-my.yml
# 服务在启动时,会把自己当做一个 Eureka 客户端去注册到 Eureka 服务器上,且从服务器上拉取信息
# 而该服务本身就是一个 Eureka 服务器
eureka:
  client:
    service-url:
      defaultZone: http://localhost:8080/eureka #Eureka客户端与Eureka服务端的交互地址,高可用状态配置对方的地址,单机状态配置自己(如果不配置则默认本机8761端口)
编写测试类
@Slf4j
@RunWith(SpringRunner.class)
@SpringBootTest(classes = AntApiApplication.class,webEnvironment = SpringBootTest.WebEnvironment.RANDOM_PORT)
public class SchoolControllerTest {

    @ApolloConfig("application")
    private Config applicationConfig;

    @Autowired
    private TestService testService;

    @Test
    public void apollo(){
        log.info(applicationConfig.getProperty("timeout","defaultValue"));
        log.info(testService.hello());
    }

}

控制台输出结果
2019-12-18 10:05:51,268:INFO main (SchoolControllerTest.java:27) - 100
2019-12-18 10:05:53,702:INFO main (SchoolControllerTest.java:28) - hello world

 浙公网安备 33010602011771号