MQTT Broker:使用 EMQX
EMQX 开源版
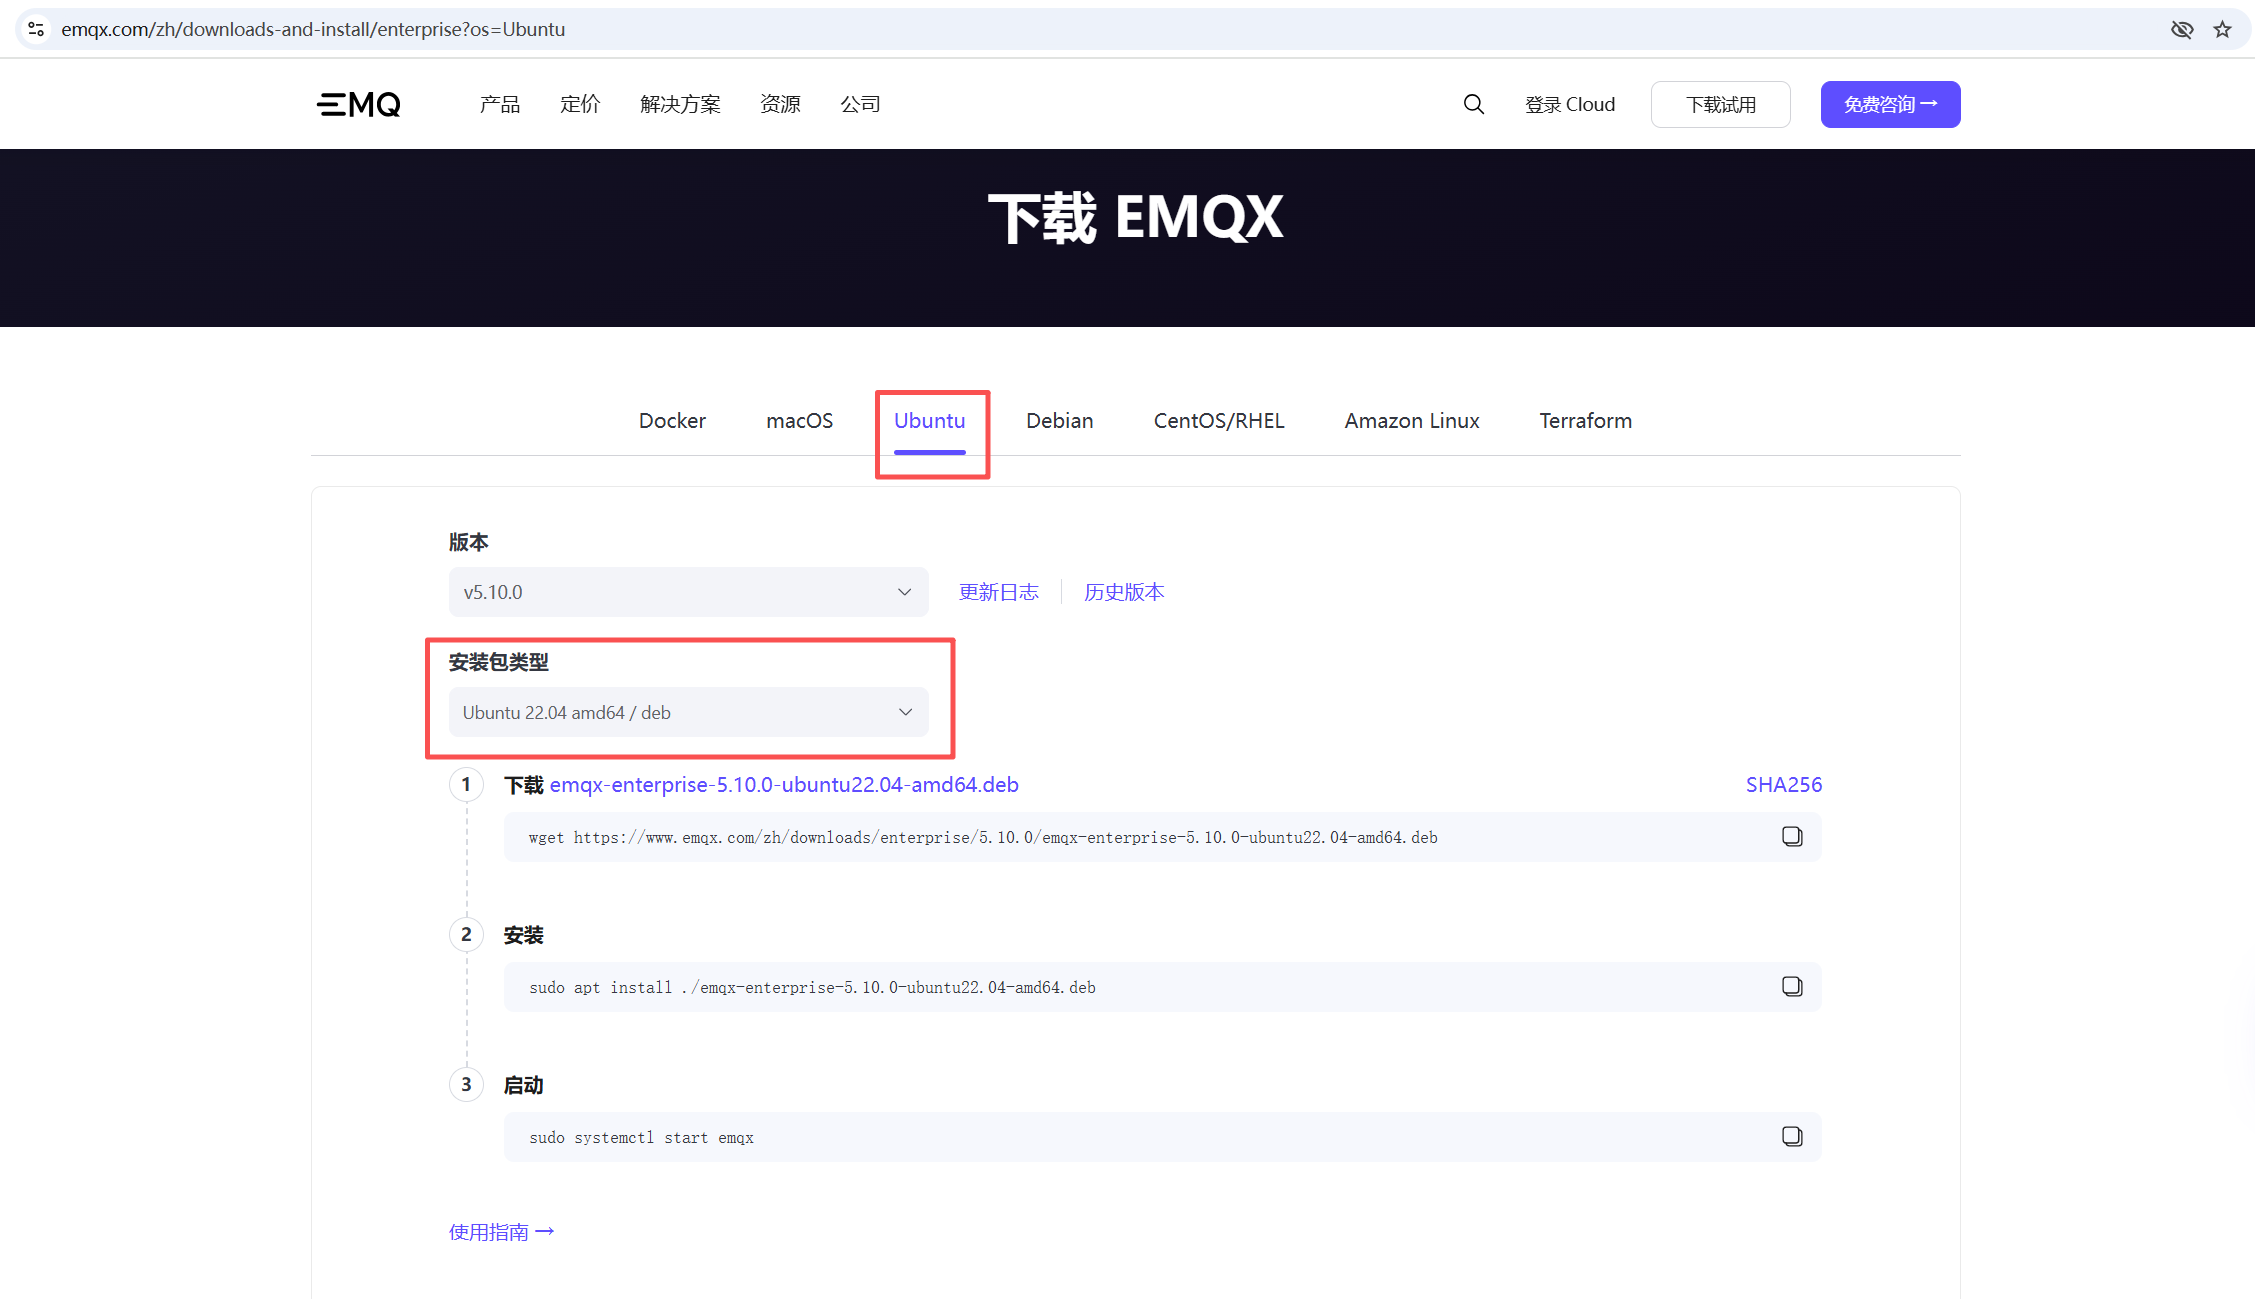
EMQX Ubuntu 直接安装
https://www.emqx.com/zh/downloads-and-install/enterprise?os=Ubuntu
选择 Ubuntu ,选择 版本,选择 Ubuntu 的版本,粘贴代码执行
启动 EMQX
参考:使用指南
🟢 启动 EMQX
sudo systemctl start emqx
🟢 停止 EMQX
emqx stop
🟢 卸载 EMQX Broker
DEB 包:
sudo apt remove --purge emqx
查看状态
sudo systemctl status emqx
EMQX 使用 Docker 安装
docker run -d \
  --name emqx \
  --restart=unless-stopped \
  -e EMQX_NODE_NAME=emqx@127.0.0.1 \
  -v $(pwd)/emqx/data:/opt/emqx/data \
  -v $(pwd)/emqx/etc:/opt/emqx/etc \
  -p 1883:1883 \
  -p 8083:8083 \
  -p 8084:8084 \
  -p 8883:8883 \
  -p 18083:18083 \
  emqx/emqx:5.7.0
测试连接
端口
服务器防火墙放开端口:18083、1883 等
- MQTT 连接端口: 1883 等
- Web 管理端口:18083
Web 管理面板
http://localhost:18083/
默认的
账号:admin
密码:public
添加其他 MQTT 连接用户
从配置文件中可以获取
dashboard {
    listeners.http {
        bind = 18083
    }
    default_username = "admin"
    default_password = "public"
}
提示修改密码
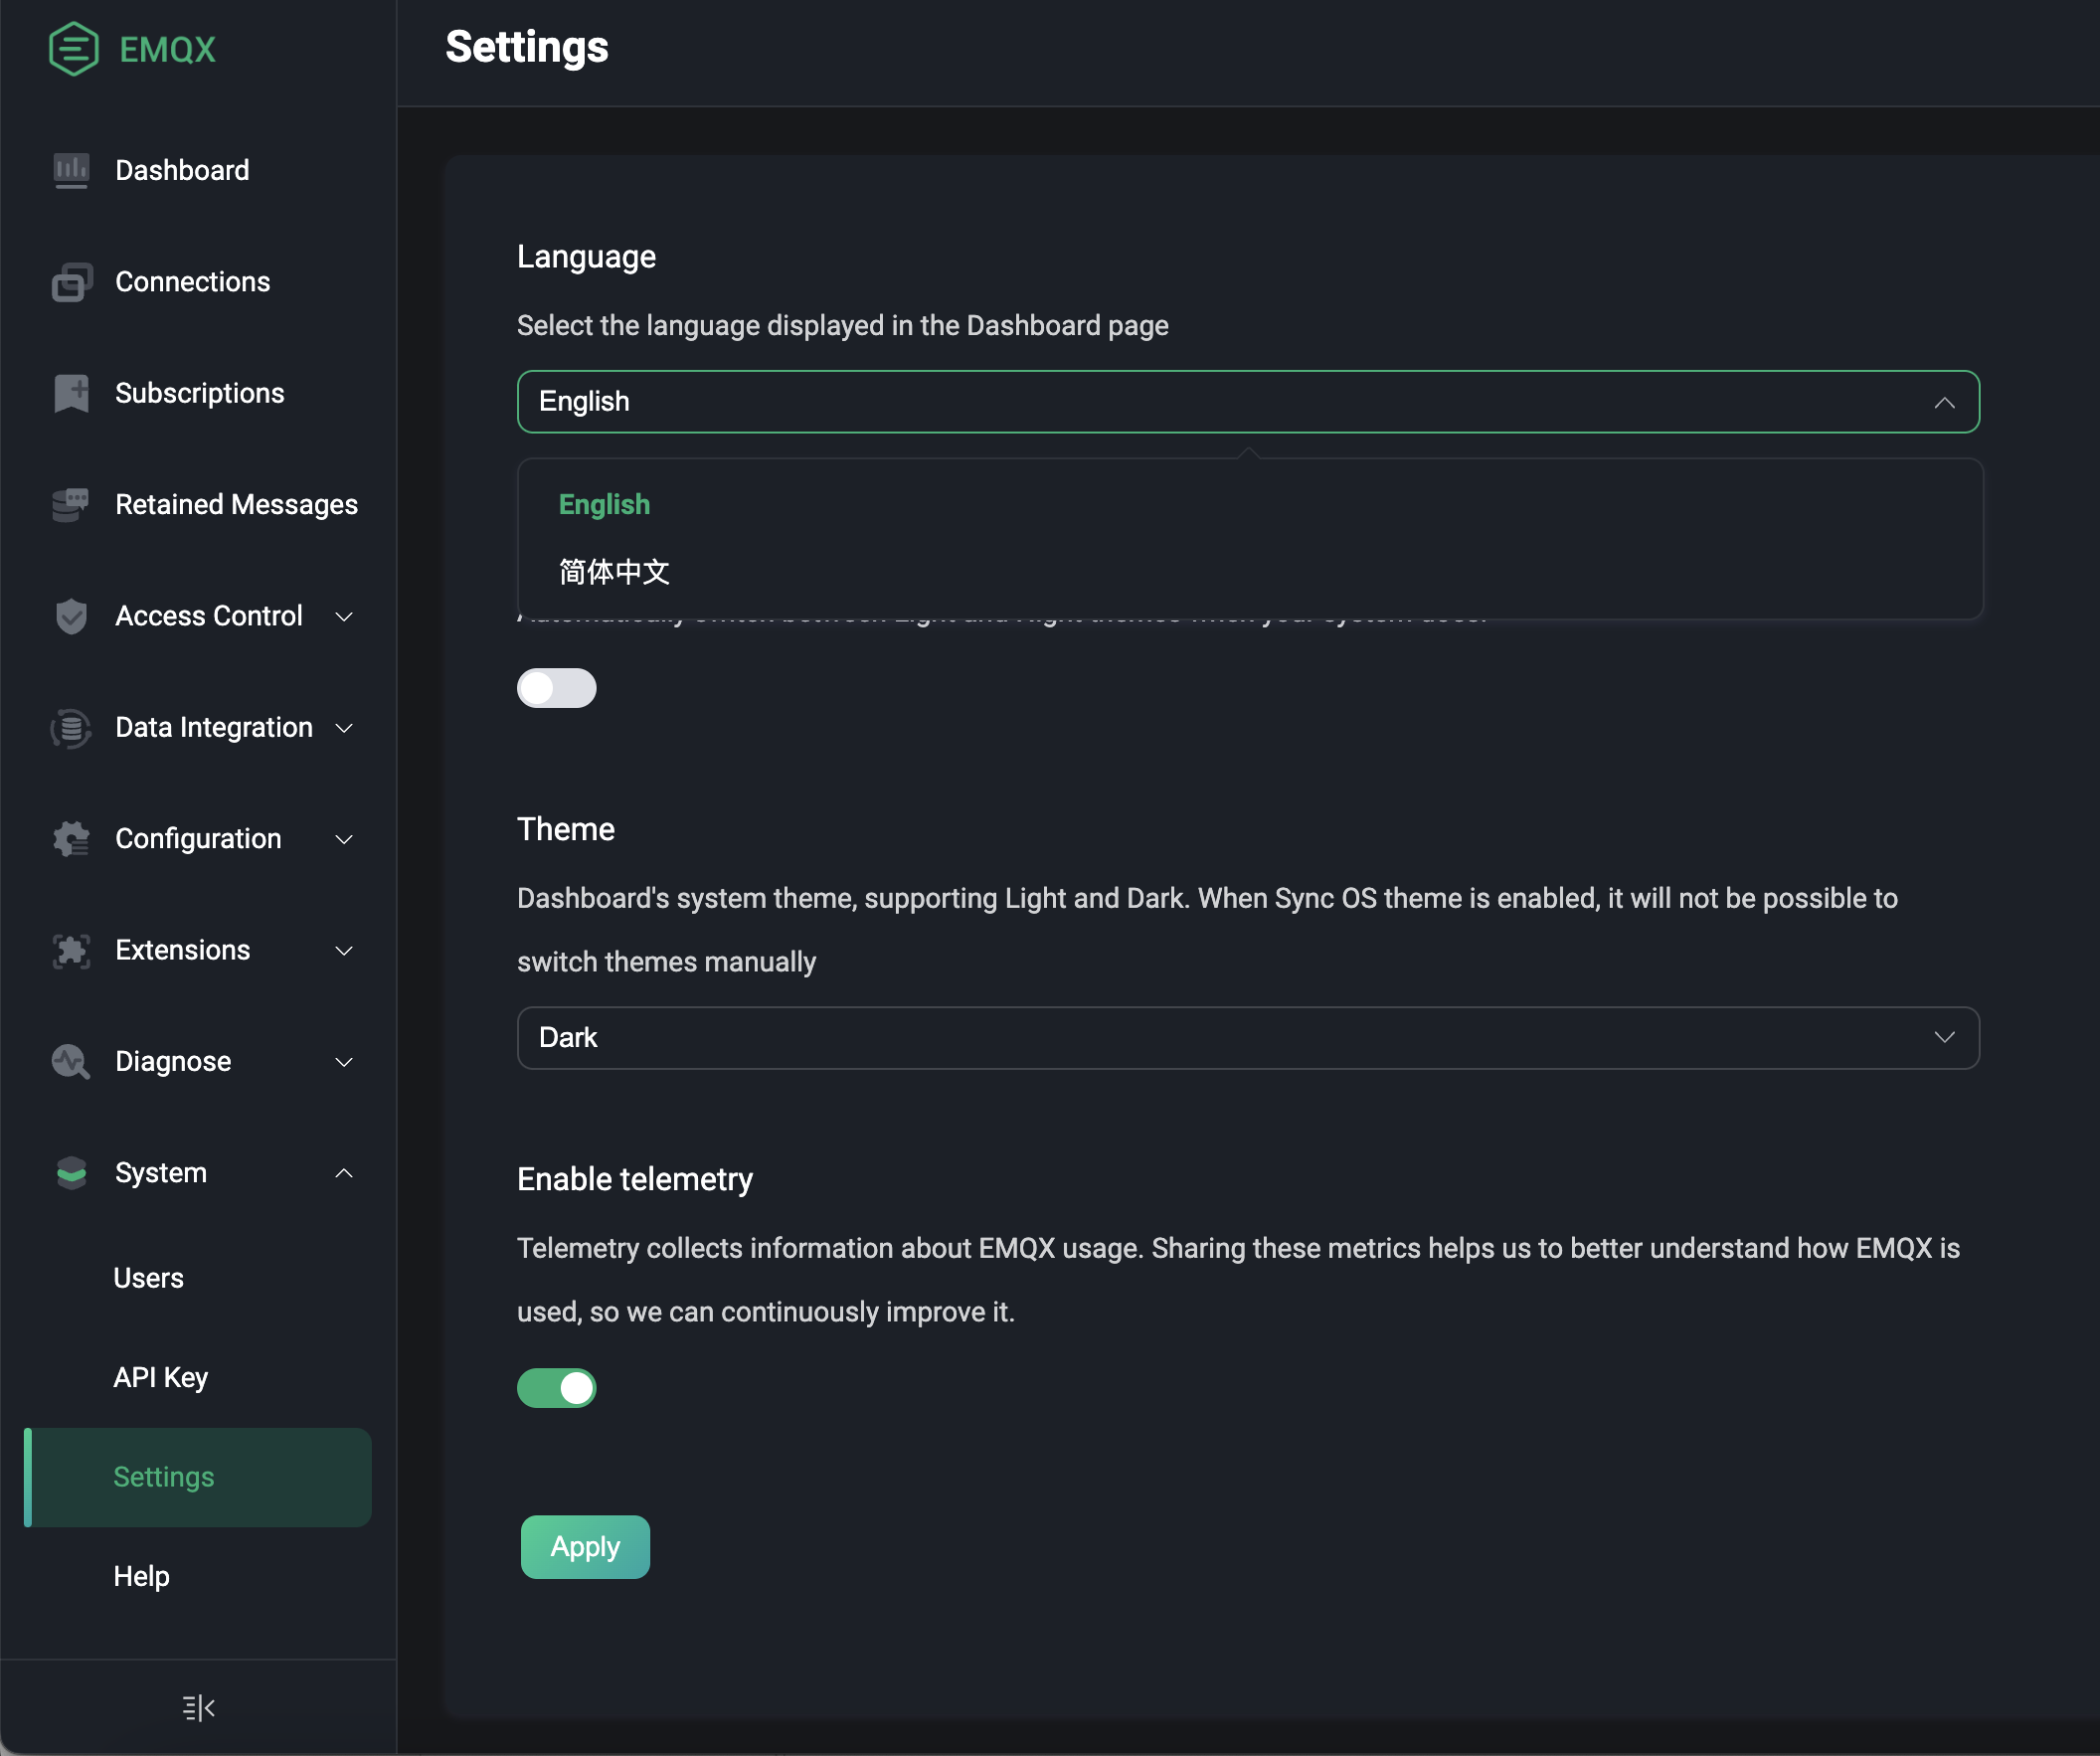
设置中文
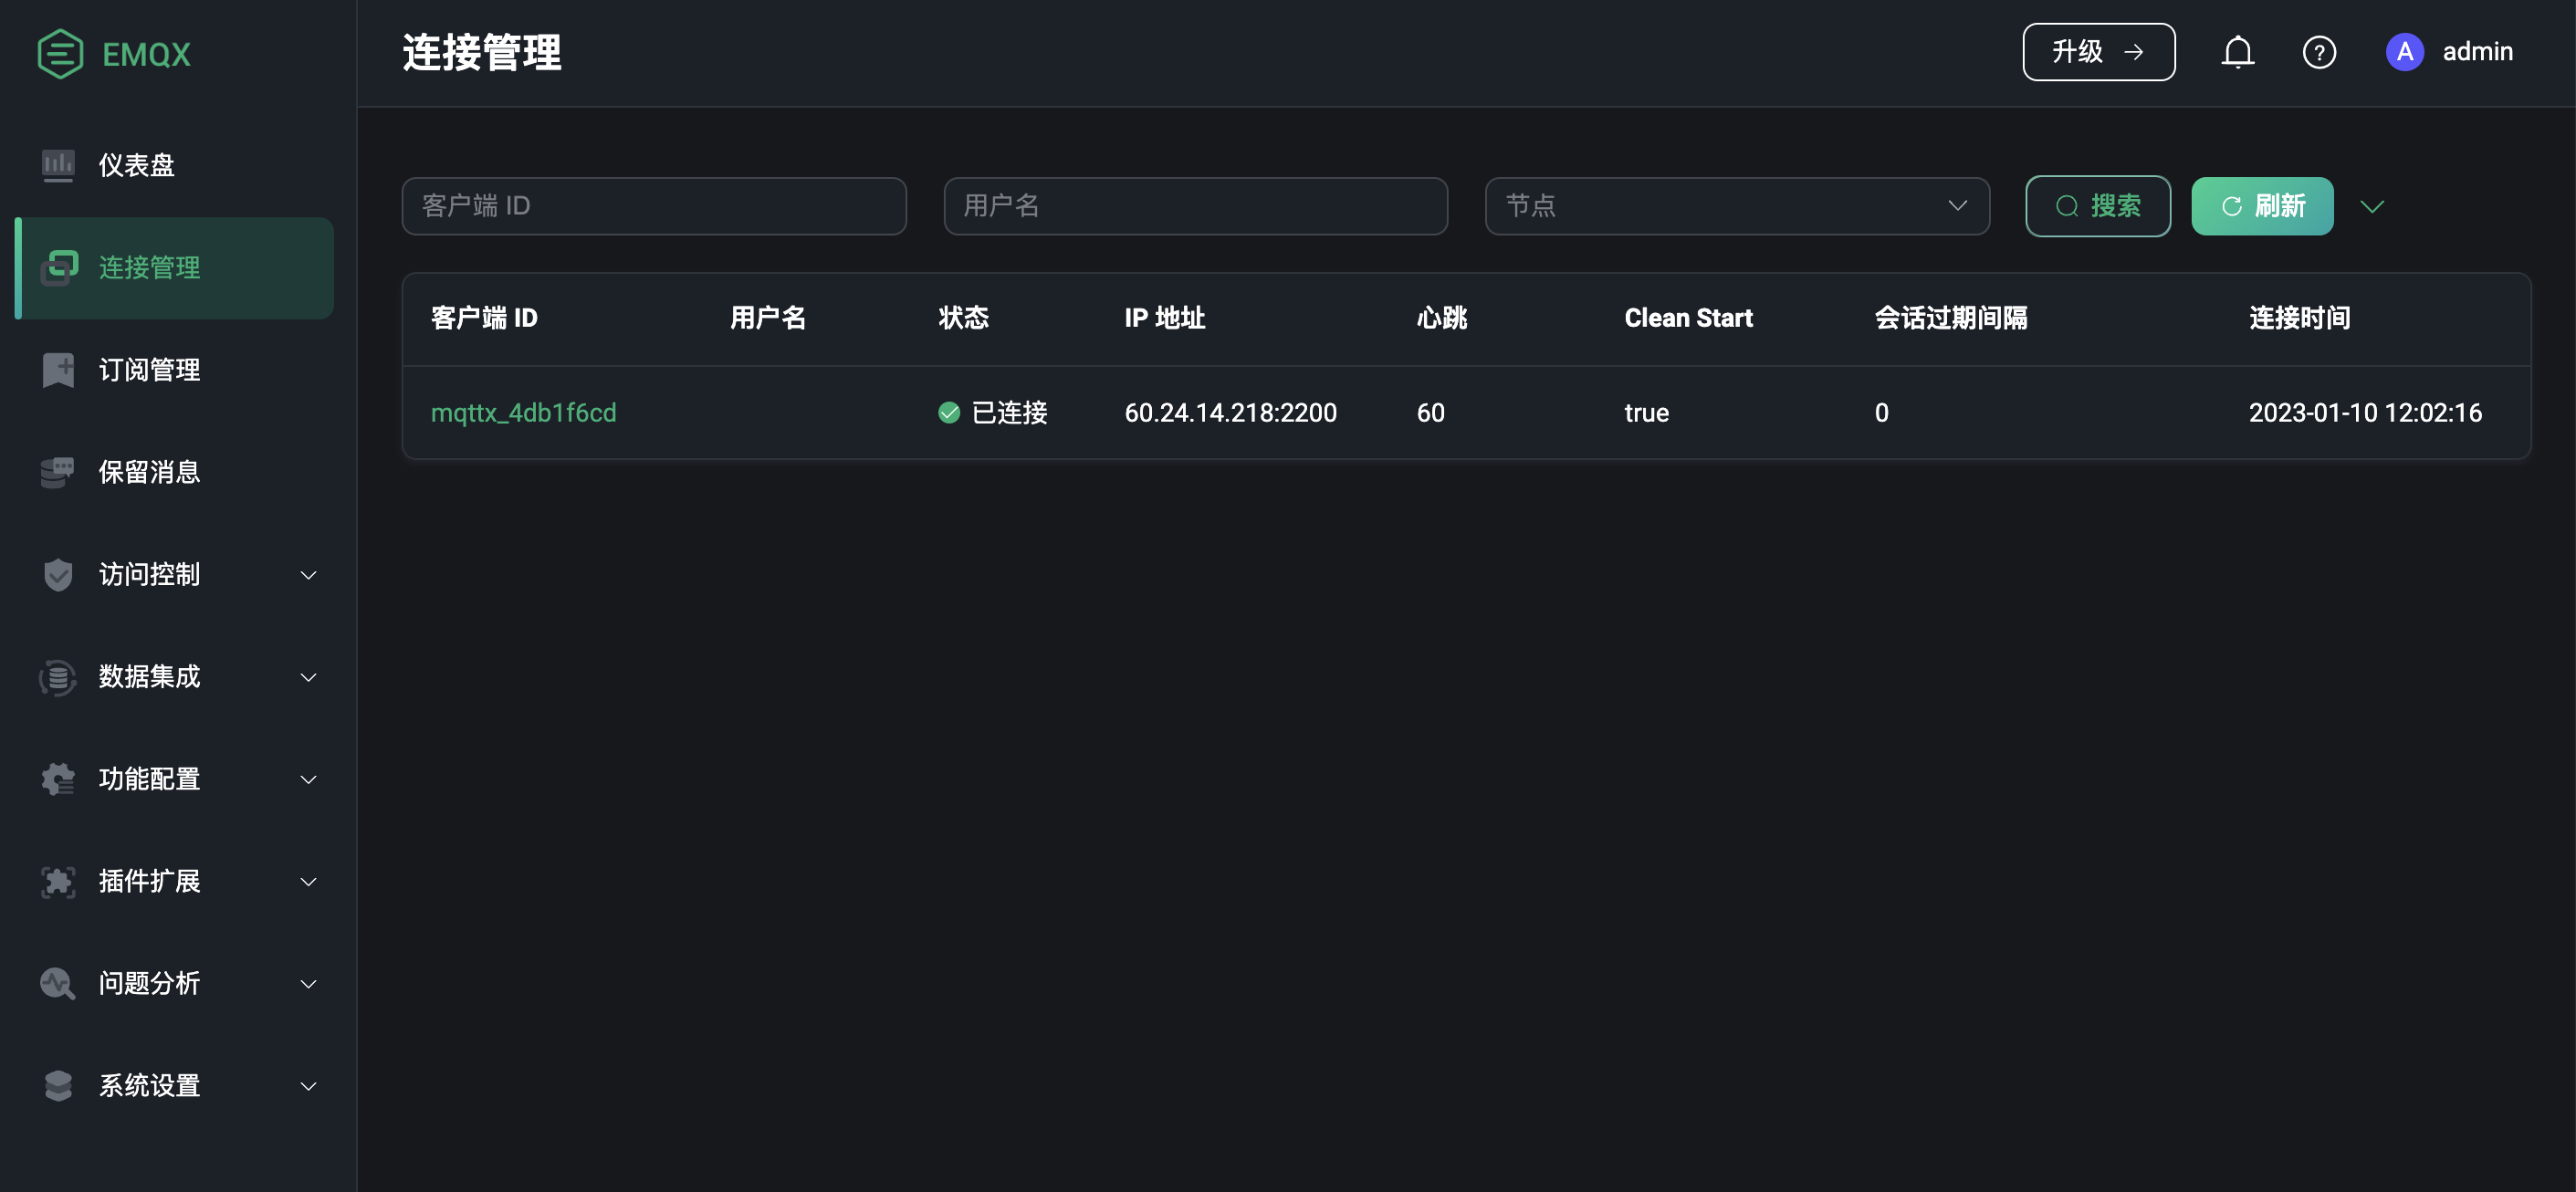
查看连接
MQTT 连接
MQTT 匿名连接
127.0.0.1
1883
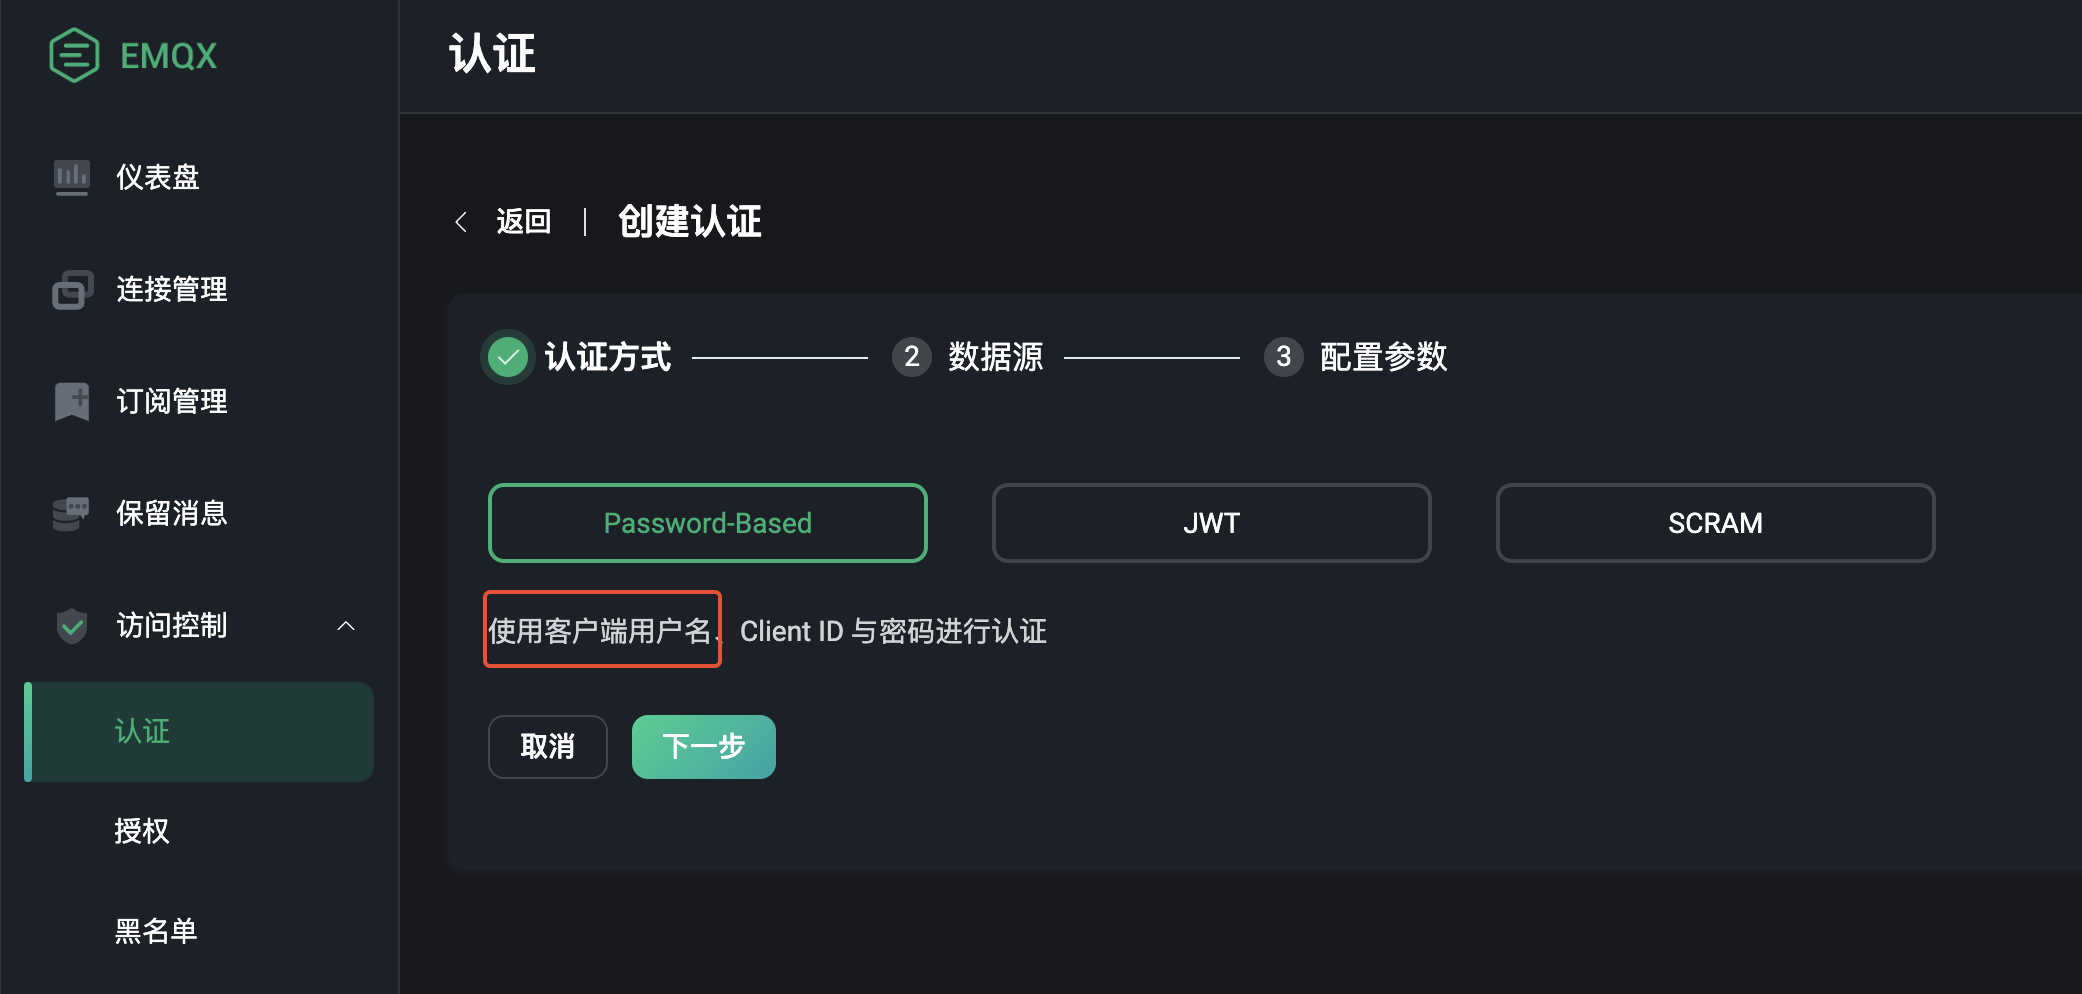
配置认证
找到认证设置页面,选择用户名密码的认证方式。
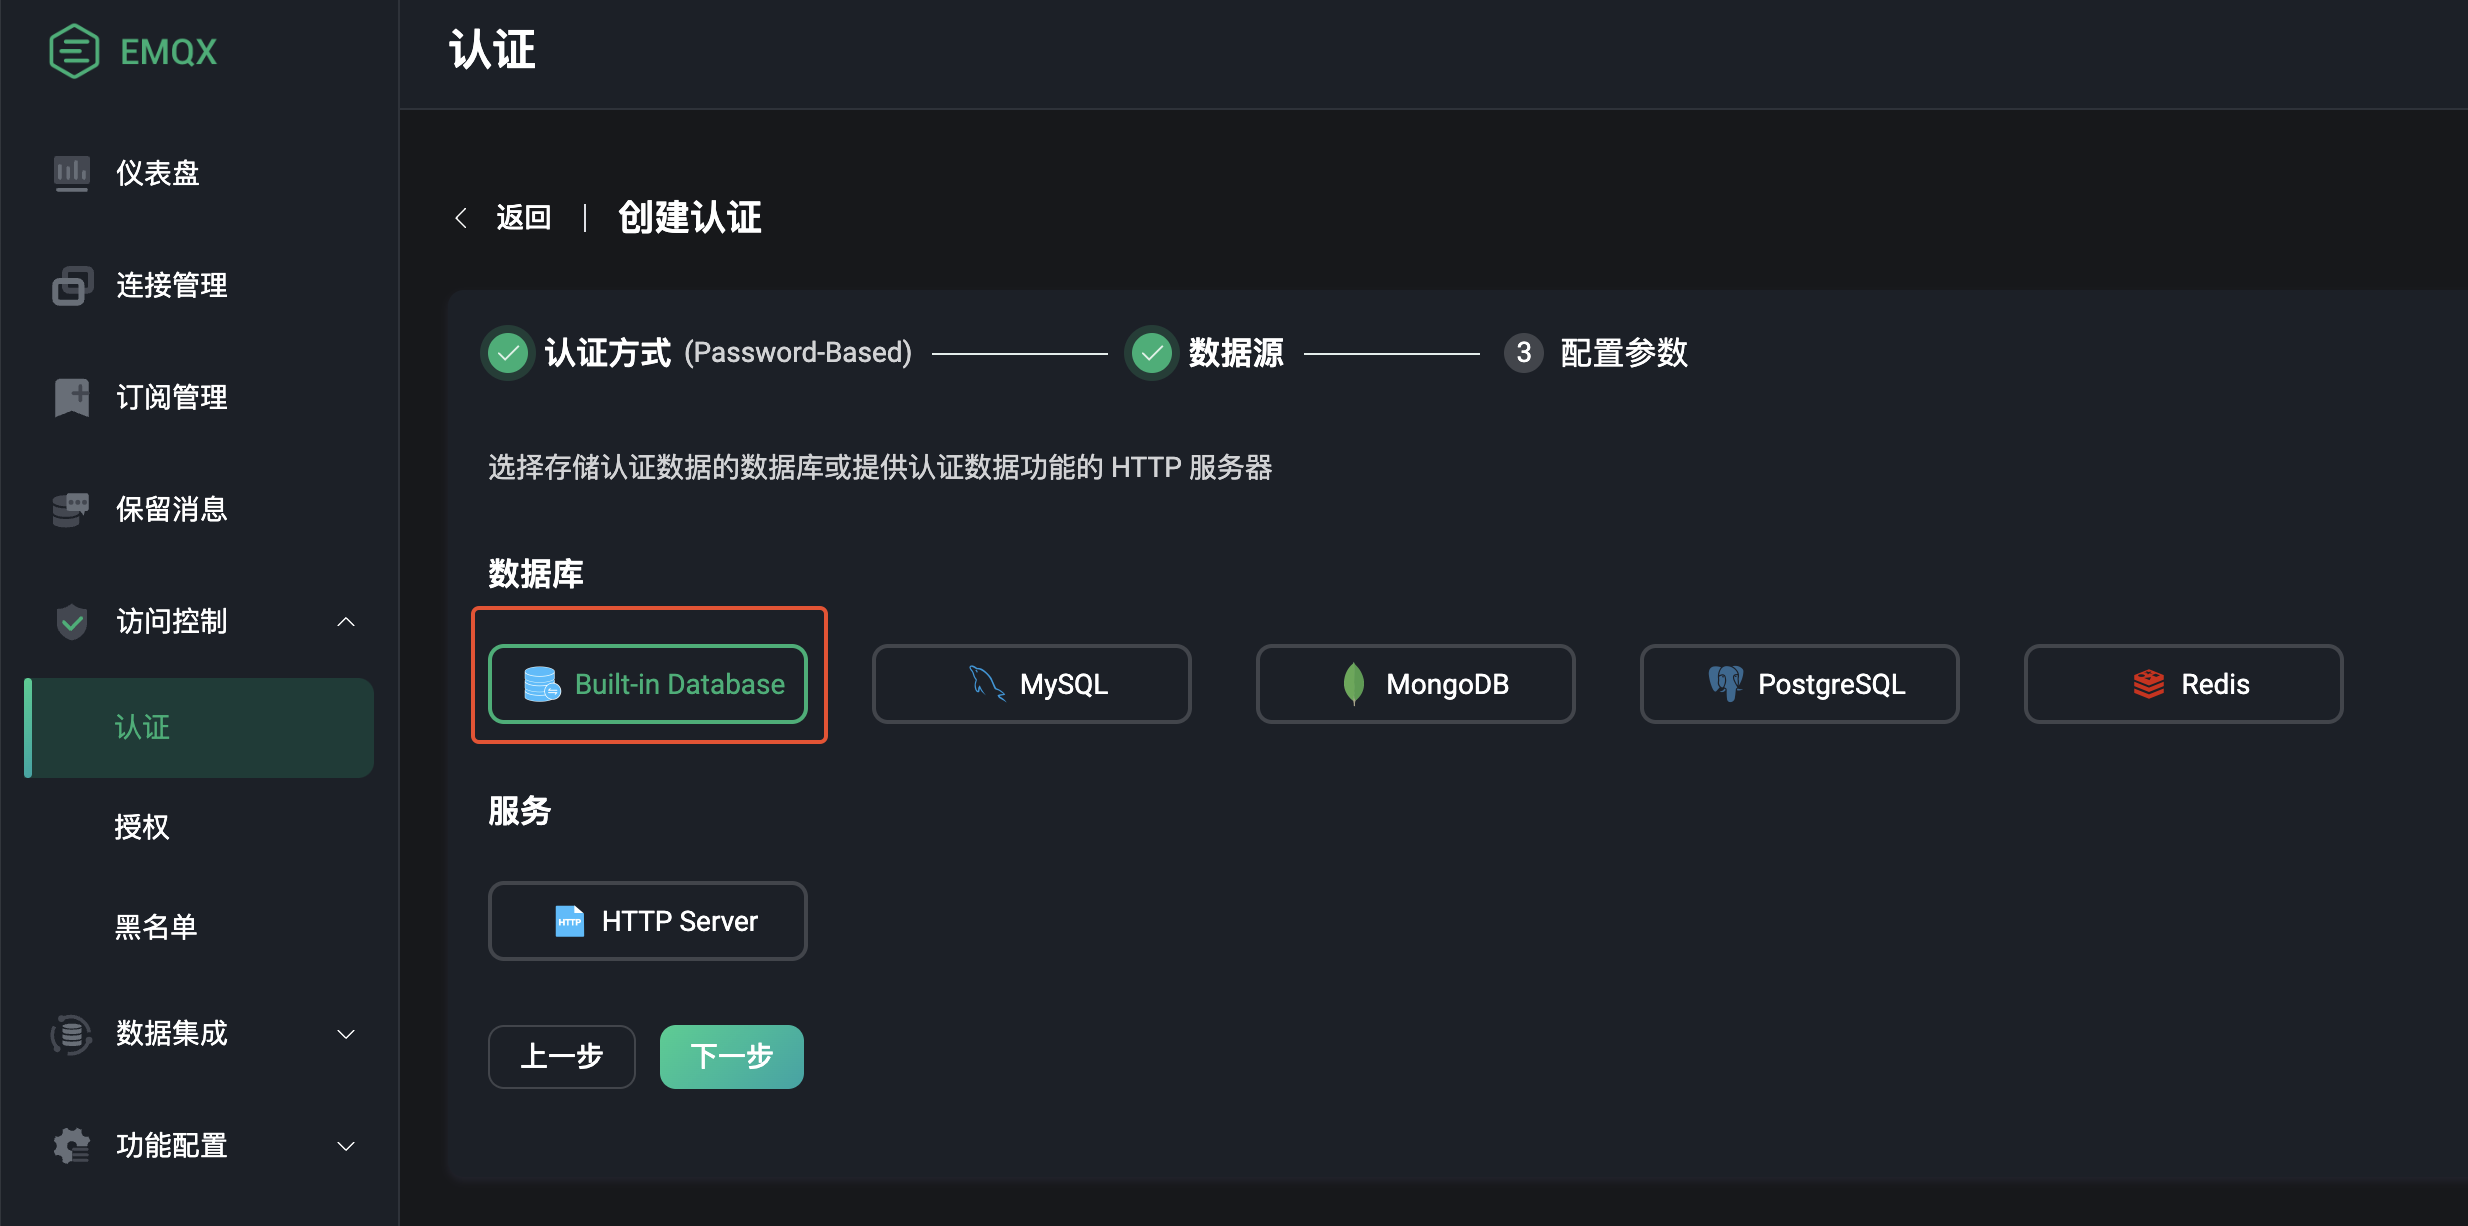
选择使用Built-in Database(内置的数据库)
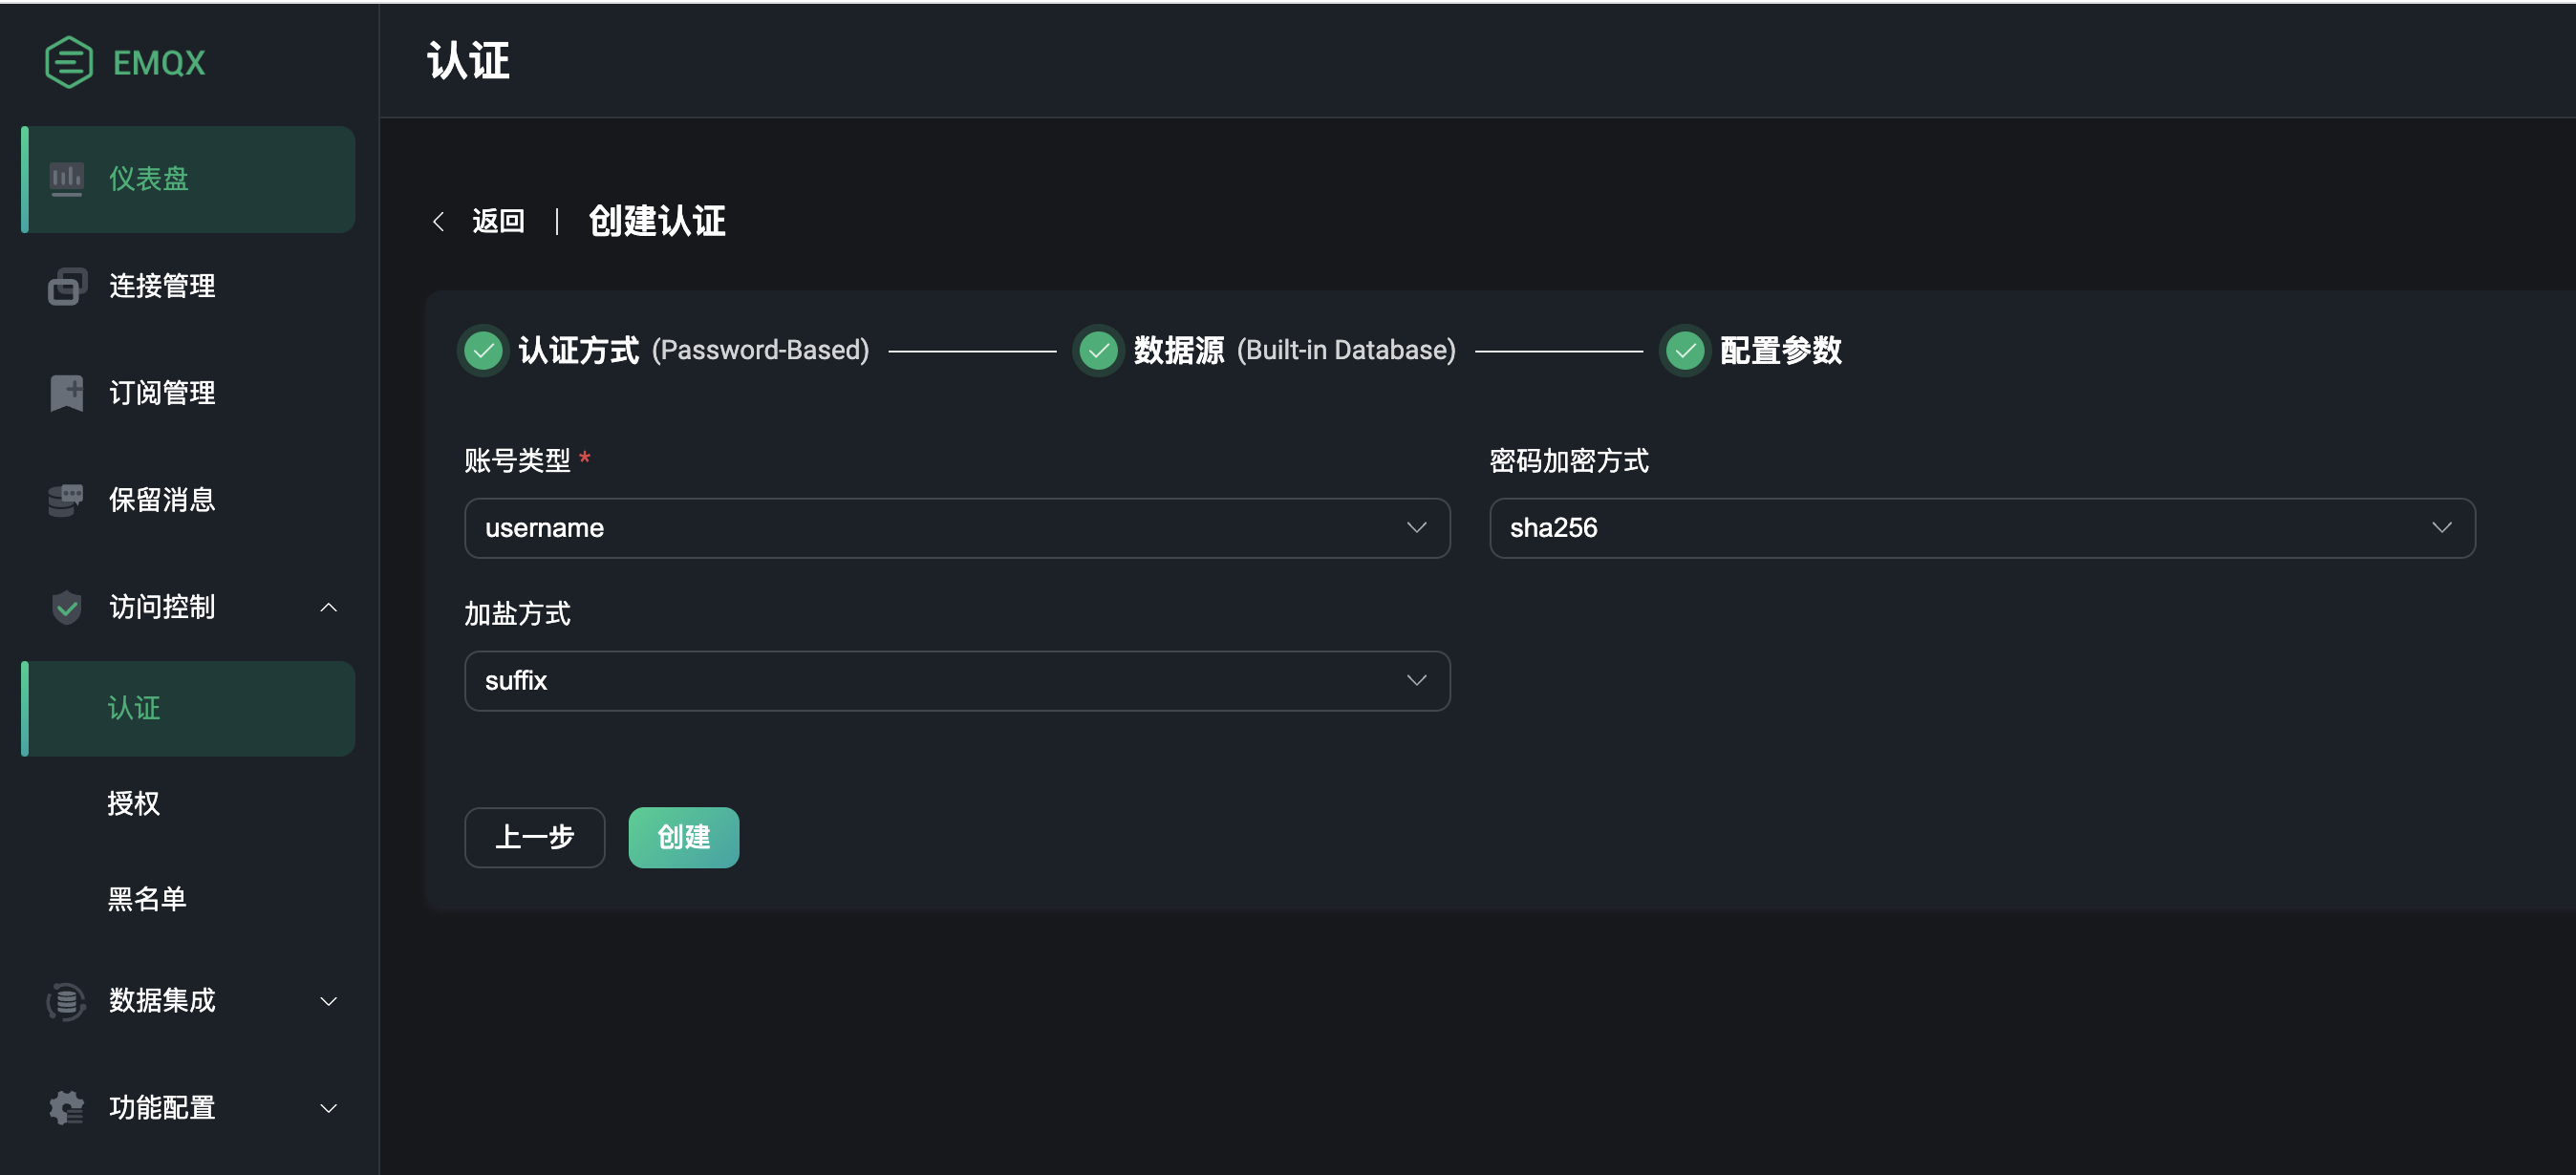
选用用户名方式、加密方式、hash加盐是前缀还是后缀,默认即可
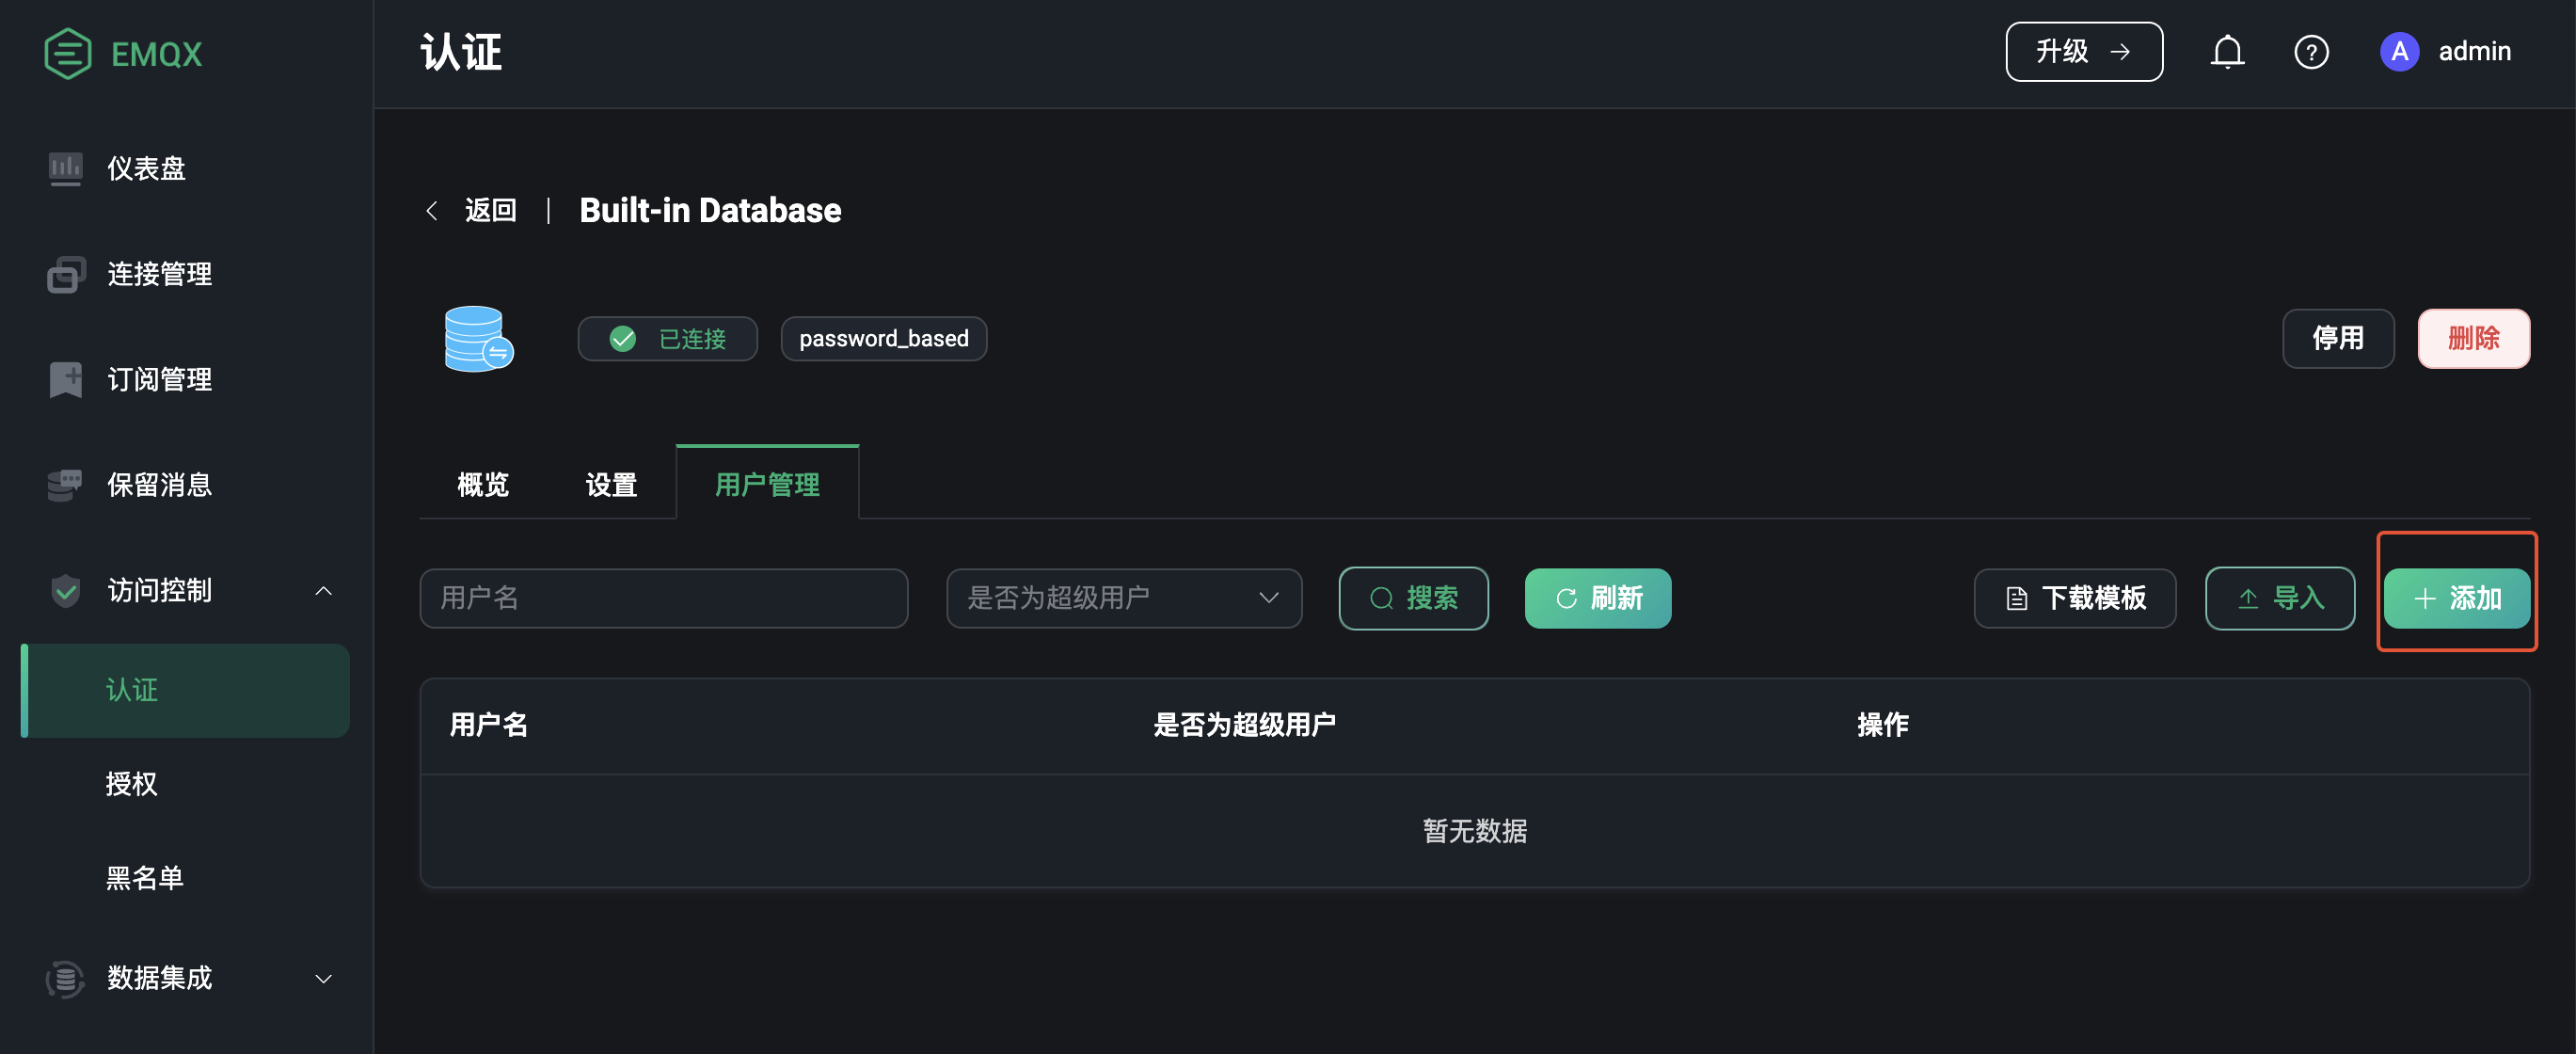
用户管理
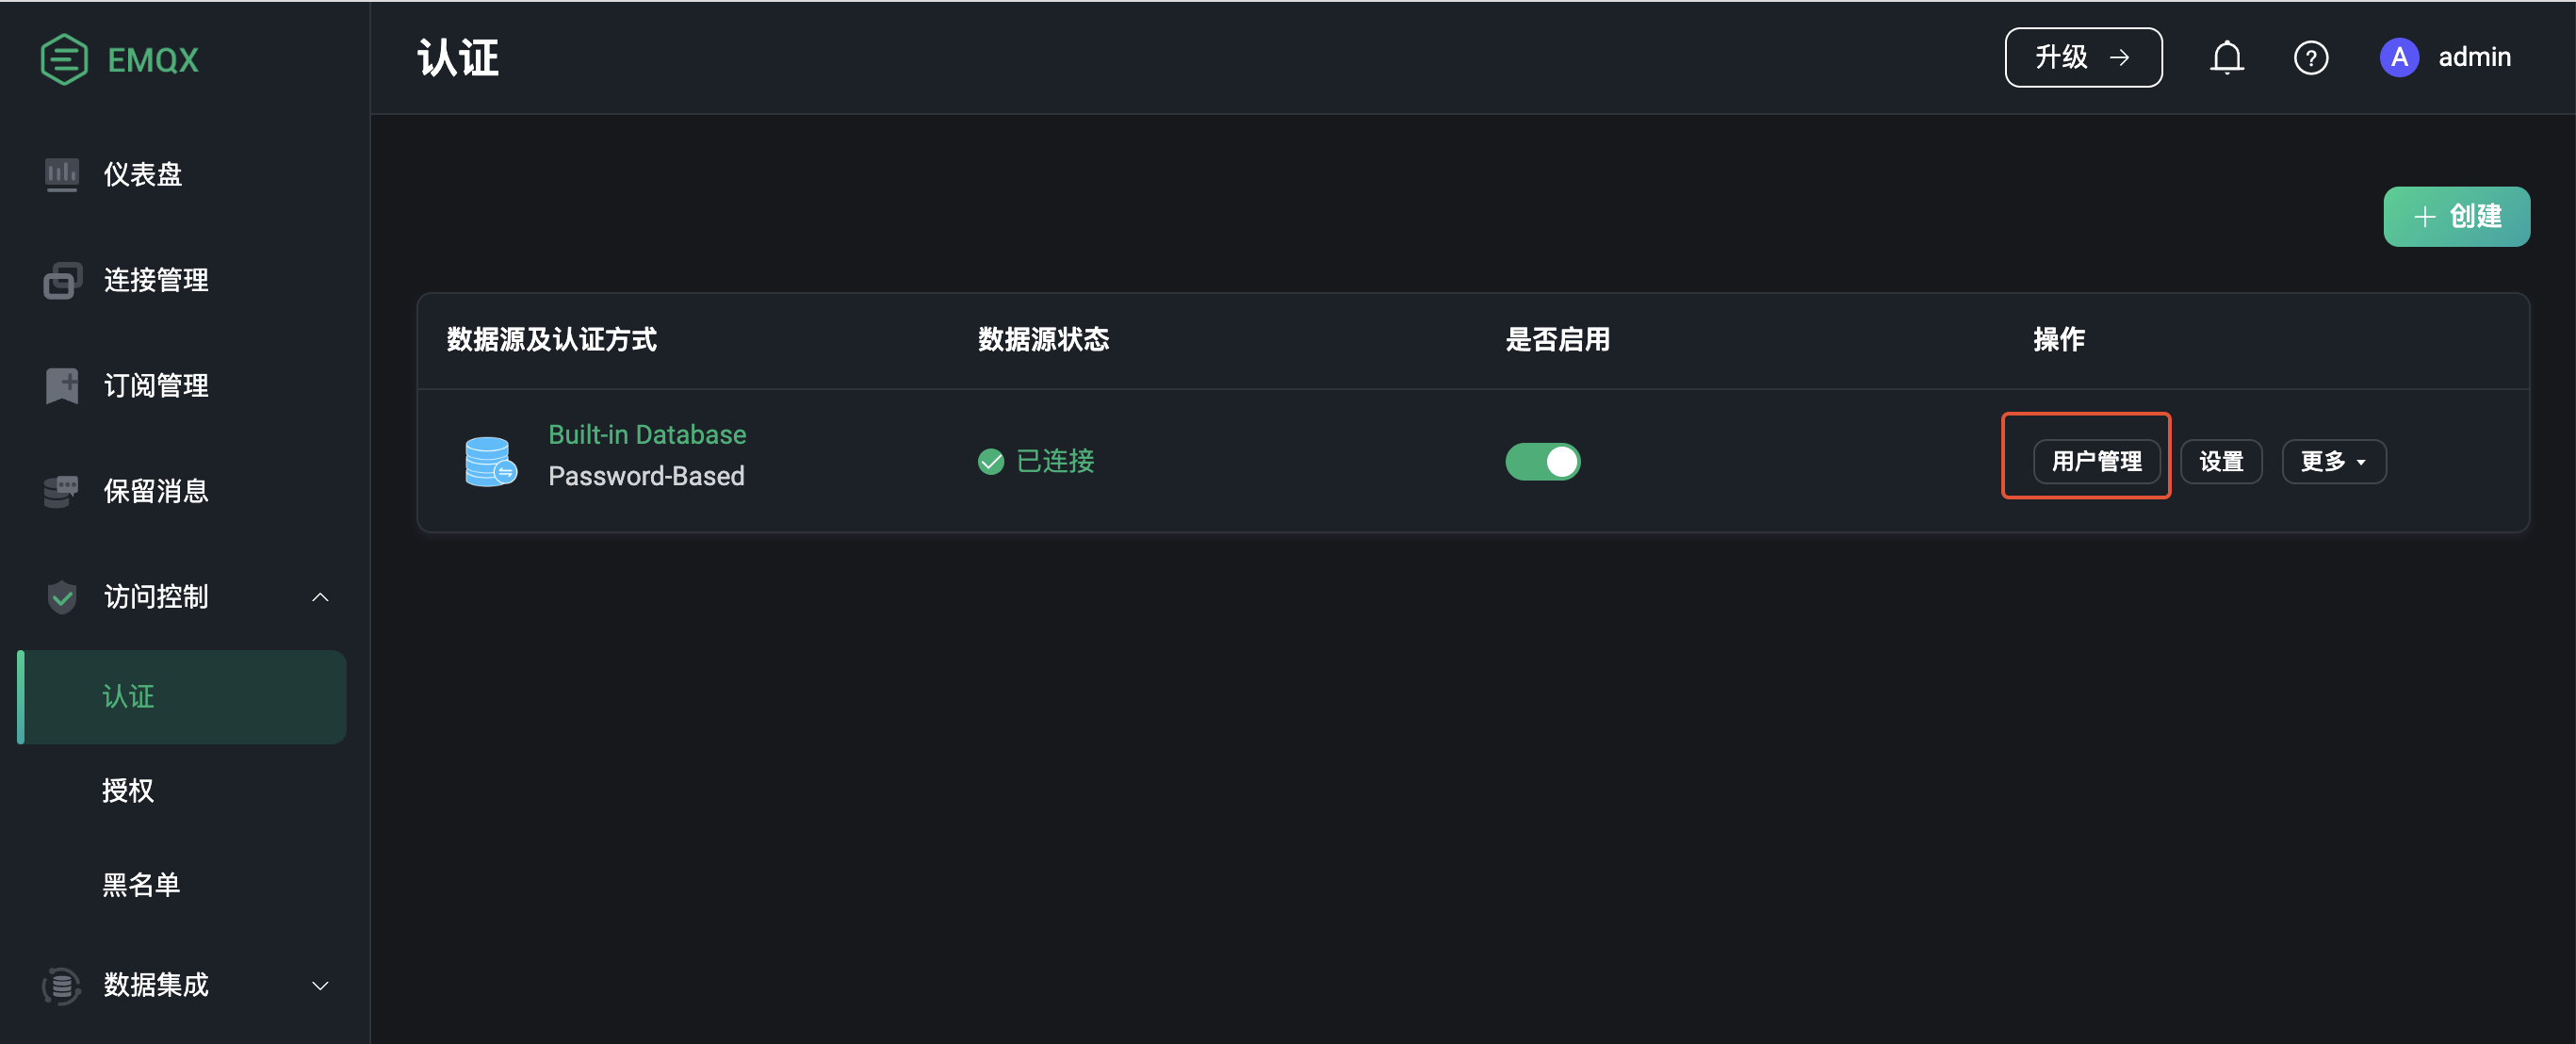
添加用户
配置文件
配置文件路径:/etc/emqx/emqx.conf
配置文件内容,参考:配置文件
EMQX的配置文件格式是 HOCON (opens new window)。 HOCON(Human-Optimized Config Object Notation)是一个JSON的超集,非常适用于易于人类读写的配置数据存储。
配置文件内容
## NOTE:
## Configs in this file might be overridden by:
## 1. Environment variables which start with 'EMQX_' prefix
## 2. File $EMQX_NODE__DATA_DIR/configs/cluster-override.conf
## 3. File $EMQX_NODE__DATA_DIR/configs/local-override.conf
##
## The *-override.conf files are overwritten at runtime when changes
## are made from EMQX dashboard UI, management HTTP API, or CLI.
## All configuration details can be found in emqx.conf.example

node {
  name = "emqx@127.0.0.1"
  cookie = "emqxsecretcookie"
  data_dir = "/var/lib/emqx"
}

log {
  file_handlers.default {
    level = warning
    file = "/var/log/emqx/emqx.log"
  }
}

cluster {
  name = emqxcl
  discovery_strategy = manual
}


listeners.tcp.default {
  bind = "0.0.0.0:1883"
  max_connections = 1024000
}

listeners.ssl.default {
  bind = "0.0.0.0:8883"
  max_connections = 512000
  ssl_options {
    keyfile = "/etc/emqx/certs/key.pem"
    certfile = "/etc/emqx/certs/cert.pem"
    cacertfile = "/etc/emqx/certs/cacert.pem"
  }
}

listeners.ws.default {
  bind = "0.0.0.0:8083"
  max_connections = 1024000
  websocket.mqtt_path = "/mqtt"
}

listeners.wss.default {
  bind = "0.0.0.0:8084"
  max_connections = 512000
  websocket.mqtt_path = "/mqtt"
  ssl_options {
    keyfile = "/etc/emqx/certs/key.pem"
    certfile = "/etc/emqx/certs/cert.pem"
    cacertfile = "/etc/emqx/certs/cacert.pem"
  }
}

# listeners.quic.default {
#  enabled = true
#  bind = "0.0.0.0:14567"
#  max_connections = 1024000
#  keyfile = "/etc/emqx/certs/key.pem"
#  certfile = "/etc/emqx/certs/cert.pem"
#}

dashboard {
    listeners.http {
        bind = 18083
    }
    default_username = "admin"
    default_password = "public"
}

authorization {
  deny_action = ignore
  no_match = allow
  sources =  [
    {
      type = file
      enable = true
      # This file is immutable to EMQX.
      # Once new rules are created from dashboard UI or HTTP API,
      # the file 'data/authz/acl.conf' is used instead of this one
      path = "/etc/emqx/acl.conf"
    }
  ]
}
配置文件内容了解
不同连接方式和端口
listeners.tcp.default {
  bind = "0.0.0.0:1883"
  max_connections = 1024000
}

listeners.ssl.default {
  bind = "0.0.0.0:8883"
  max_connections = 512000
  ssl_options {
    keyfile = "/etc/emqx/certs/key.pem"
    certfile = "/etc/emqx/certs/cert.pem"
    cacertfile = "/etc/emqx/certs/cacert.pem"
  }
}

listeners.ws.default {
  bind = "0.0.0.0:8083"
  max_connections = 1024000
  websocket.mqtt_path = "/mqtt"
}

listeners.wss.default {
  bind = "0.0.0.0:8084"
  max_connections = 512000
  websocket.mqtt_path = "/mqtt"
  ssl_options {
    keyfile = "/etc/emqx/certs/key.pem"
    certfile = "/etc/emqx/certs/cert.pem"
    cacertfile = "/etc/emqx/certs/cacert.pem"
  }
}
Web 页面大屏(指示板)
dashboard {
    listeners.http {
        bind = 18083
    }
    default_username = "admin"
    default_password = "public"
}

 浙公网安备 33010602011771号