Vue 脚手架
Vue 脚手架安装搭建
1:说明
Vue 脚手架
1.X 1.X
2.X 2.X
3.X 3.X
4.X
1. Vue脚手架是Vue官方提供的标准化开发工具(开发平台)。
2.最新的版本是4.x。
3.文档: https://cli.vuejs.org/zh/
Vue CLI ===> Vue command line interface 命令行接口工具(脚手架)

2:具体步骤
第一步(仅第一次执行):全局安装@vue/cli
npm install -g @vue/clie
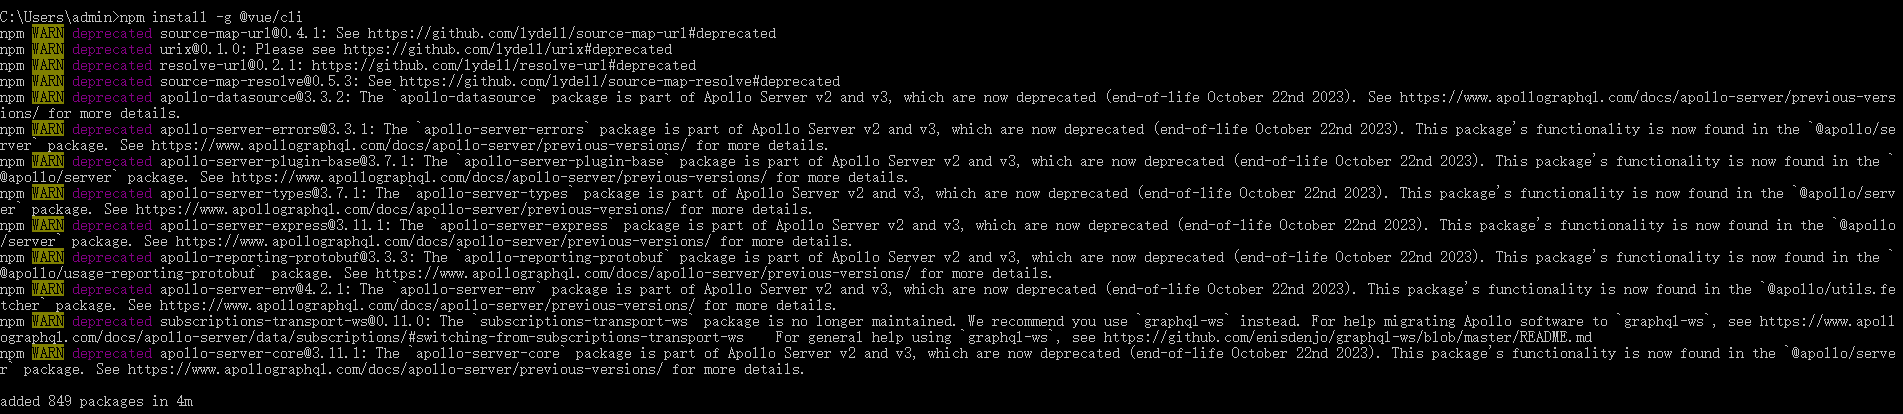
安装完 再开一个新的cmd命令窗口:看效果

第二步:切换到你要创建项目的目录,然后使用命令创建项目
vue create xxxXe'

第三步:启动项目
npm run servee
Microsoft Windows [版本 10.0.19045.2251]
(c) Microsoft Corporation。保留所有权利。

C:\Users\admin>vue
Usage: vue <command> [options]

Options:
  -V, --version                              output the version number
  -h, --help                                 display help for command

Commands:
  create [options] <app-name>                create a new project powered by vue-cli-service
  add [options] <plugin> [pluginOptions]     install a plugin and invoke its generator in an already created project
  invoke [options] <plugin> [pluginOptions]  invoke the generator of a plugin in an already created project
  inspect [options] [paths...]               inspect the webpack config in a project with vue-cli-service
  serve                                      alias of "npm run serve" in the current project
  build                                      alias of "npm run build" in the current project
  ui [options]                               start and open the vue-cli ui
  init [options] <template> <app-name>       generate a project from a remote template (legacy API, requires
                                             @vue/cli-init)
  config [options] [value]                   inspect and modify the config
  outdated [options]                         (experimental) check for outdated vue cli service / plugins
  upgrade [options] [plugin-name]            (experimental) upgrade vue cli service / plugins
  migrate [options] [plugin-name]            (experimental) run migrator for an already-installed cli plugin
  info                                       print debugging information about your environment
  help [command]                             display help for command

  Run vue <command> --help for detailed usage of given command.


C:\Users\admin>cd E:\Vue_demo\VueCli

C:\Users\admin>e:

E:\Vue_demo\VueCli>vue create vue_test


Vue CLI v5.0.8
? Please pick a preset: Default ([Vue 2] babel, eslint)


Vue CLI v5.0.8
✨  Creating project in E:\Vue_demo\VueCli\vue_test.
⚙️  Installing CLI plugins. This might take a while...


added 847 packages in 4m
  Invoking generators...
  Installing additional dependencies...


added 86 packages in 37s
⚓  Running completion hooks...

  Generating README.md...

  Successfully created project vue_test.
  Get started with the following commands:

 $ cd vue_test
 $ npm run serve


E:\Vue_demo\VueCli>cd vue_test

E:\Vue_demo\VueCli\vue_test>npm run serve

> vue_test@0.1.0 serve
> vue-cli-service serve

 INFO  Starting development server...


 DONE  Compiled successfully in 53431ms                                                                         15:57:13

  App running at:
  - Local:   http://localhost:8080/
  - Network: http://192.168.255.128:8080/

  Note that the development build is not optimized.
  To create a production build, run npm run build.


备注:
1.如出现下载缓慢请配置npm淘宝镜像:
npm config set registry https://registry.npm.taobao.orge

2. Vue脚手架隐藏了所有webpack相关的配置,若想查看具体的webpakc配置,请执
行:
npm inspect > output.jse
Vue 脚手架结构及相关配置文件内容说明
1:工程结构图

2:index.html

<!DOCTYPE html>
<html lang="">
  <head>
    <meta charset="utf-8">
    <!-- 针对ie浏览器的一个特殊配置,含义是让ie浏览器以最高的渲染级别进行渲染界面 -->
    <meta http-equiv="X-UA-Compatible" content="IE=edge">
    <!-- 开启移动端理想视口 -->
    <meta name="viewport" content="width=device-width,initial-scale=1.0">
    <!-- 配置页签的图标 -->
    <link rel="icon" href="<%= BASE_URL %>favicon.ico">
    <!-- 配置网页的标题:找 package.json文件里的 "name": "vue_test" 值 -->
    <title><%= htmlWebpackPlugin.options.title %></title>
  </head>
  <body>
    <!-- 如果浏览器不支持js,则该标签的元素里的内容将会被渲染 -->
    <noscript>
      <strong>We're sorry but <%= htmlWebpackPlugin.options.title %> doesn't work properly without JavaScript enabled. Please enable it to continue.</strong>
    </noscript>
    <!-- 容器 -->
    <div id="app"></div>
    <!-- built files will be auto injected -->
  </body>
</html>
3:DamainChridren1.vue

 <!-- 组件的结构 -->
<template>
    <div class="chridren">
        <h2>子网站名称:{{name}}</h2>
        <h2>子网站域名:{{url}}</h2>
        <button @click="showName">点击提示网站名称</button>
    </div>
</template>
<script>
//默认暴露组件方式:或者下面的简写实现方式:进一步简写方式
export default   {
    name:"DamainChridren1",/* 非单文件组件的组件文件名 */
    data(){
        return{
            name:"百度地图",
            url:"map.baidu.com/"
        }
    },
 };

</script>
<style  >
/* //组件的样式 */
 .chridren{
    background-color:blue;
 }

</style>
4:DomainName0.vue

 <!-- 组件的结构 -->
<template>
    <div class="demo">
        <h2>网站名称:{{name}}</h2>
        <h2>网站域名:{{url}}</h2>
        <button @click="showName">点击提示网站名称</button>
    </div>
</template>

<script>
 //组件交互相关的代码(数据、方法等)
 //export const domainName ... 该方式为分别暴露组件方式
 /*export*//* const domainName =Vue.extends({
    data(){
        return{
            name:"百度",
            url:"www.baidu.com"
        }
    },
    methods: {
        showName(){
            alert(this.name);
        }
    },
 });
//统一暴露组件方式  引入时需要这么写: import {???} from  ???
// export {  domainName }
// 默认暴露组件方式  当暴露对象往往只有一个的时候,默认都用这个 默认暴露组件方式来实现,因为引入简单  只需要写 import 引入组件名  from  哪里的文件名
export default domainName;
*/
// 默认暴露组件方式:或者下面的简写实现方式
/* export default  Vue.extends({
    data(){
        return{
            name:"百度",
            url:"www.baidu.com"
        }
    },
    methods: {
        showName(){
            alert(this.name);
        }
    },
 }); */
//默认暴露组件方式:或者下面的简写实现方式:进一步简写方式
export default   {
    name:"DomainName0",/* 非单文件组件的组件文件名 */
    data(){
        return{
            name:"百度",
            url:"www.baidu.com"
        }
    },
    methods: {

        showName(){
            alert(this.name);
        }
    },
 };

</script>
<style  >
/* //组件的样式 */
 .demo{
    background-color: orange;
 }

</style>
5:App.vue

<!-- App.vue 为管理所有的组件的管理者 -->
<template>
    <div>
        <DomainName0></DomainName0>
        <hr/>
        <DamainChridren1></DamainChridren1>
    </div>
</template>

<script>
    // 引入组件
    import DomainName0 from './components/DomainName0.vue';
    import DamainChridren1 from './components/DamainChridren1.vue';

    export default {
        name:"App",
        components:{
            // 组成组件
            DomainName0,
            DamainChridren1
        }
    };
</script>

<style>

</style>
7:main.js

 /*
 该文件为整个项目入口文件

	关于不同版本的Vue:

		1.vue.js与vue.runtime.xxx.js的区别:
				(1).vue.js是完整版的Vue,包含:核心功能+模板解析器。
				(2).vue.runtime.xxx.js是运行版的Vue,只包含:核心功能;没有模板解析器。

		2.因为vue.runtime.xxx.js没有模板解析器,所以不能使用template配置项,需要使用
			render函数接收到的createElement函数去指定具体内容。
*/
// 引入vue
import Vue from 'vue'
// 引入App组件
import App from './App.vue'
// 关闭Vue的生产提示
Vue.config.productionTip = false
// 创建Vue实例对象
new Vue({
  // 主要完成的功能:将App组件放入容器中。
  render: h => h(App),
}).$mount('#app')  //.$mount('#app') 将app组件挂着到vue里
8:.gitignore
.DS_Store
node_modules
/dist


# local env files
.env.local
.env.*.local

# Log files
npm-debug.log*
yarn-debug.log*
yarn-error.log*
pnpm-debug.log*

# Editor directories and files
.idea
.vscode
*.suo
*.ntvs*
*.njsproj
*.sln
*.sw?
9:babel.config.js
module.exports = {
  presets: [
    '@vue/cli-plugin-babel/preset'
  ]
}
10:jsconfig.json
{
  "compilerOptions": {
    "target": "es5",
    "module": "esnext",
    "baseUrl": "./",
    "moduleResolution": "node",
    "paths": {
      "@/*": [
        "src/*"
      ]
    },
    "lib": [
      "esnext",
      "dom",
      "dom.iterable",
      "scripthost"
    ]
  }
}
11:package-lock.json
12:package.json
{
  "name": "vue_test",
  "version": "0.1.0",
  "private": true,
  "scripts": {
    "serve": "vue-cli-service serve",
    "build": "vue-cli-service build",
    "lint": "vue-cli-service lint"
  },
  "dependencies": {
    "core-js": "^3.8.3",
    "vue": "^2.6.14"
  },
  "devDependencies": {
    "@babel/core": "^7.12.16",
    "@babel/eslint-parser": "^7.12.16",
    "@vue/cli-plugin-babel": "~5.0.0",
    "@vue/cli-plugin-eslint": "~5.0.0",
    "@vue/cli-service": "~5.0.0",
    "eslint": "^7.32.0",
    "eslint-plugin-vue": "^8.0.3",
    "vue-template-compiler": "^2.6.14"
  },
  "eslintConfig": {
    "root": true,
    "env": {
      "node": true
    },
    "extends": [
      "plugin:vue/essential",
      "eslint:recommended"
    ],
    "parserOptions": {
      "parser": "@babel/eslint-parser"
    },
    "rules": {
      "no-unused-vars":"off",
      "no-mixed-spaces-and-tabs":0
    }
  },
  "browserslist": [
    "> 1%",
    "last 2 versions",
    "not dead"
  ]
}
13:README.md
# vue_test

## Project setup
```
npm install
```

### Compiles and hot-reloads for development
```
npm run serve
```

### Compiles and minifies for production
```
npm run build
```

### Lints and fixes files
```
npm run lint
```

### Customize configuration
See [Configuration Reference](https://cli.vuejs.org/config/).


##=============================================================================================================================================
14:运行后效果图


修改Vue脚手架配置
1:Vue脚手架不能修改的配置信息

2:Vue 官方提供修改的说明
官方网址:https://cli.vuejs.org/zh/config/
1:修改入口js的配置


Vue 脚手架笔记
笔记内容
# 笔记 ## 脚手架文件结构 ├── node_modules ├── public │ ├── favicon.ico: 页签图标 │ └── index.html: 主页面 ├── src │ ├── assets: 存放静态资源 │ │ └── logo.png │ │── component: 存放组件 │ │ └── HelloWorld.vue │ │── App.vue: 汇总所有组件 │ │── main.js: 入口文件 ├── .gitignore: git版本管制忽略的配置 ├── babel.config.js: babel的配置文件 ├── package.json: 应用包配置文件 ├── README.md: 应用描述文件 ├── package-lock.json:包版本控制文件 ## 关于不同版本的Vue 1. vue.js与vue.runtime.xxx.js的区别: 1. vue.js是完整版的Vue,包含:核心功能 + 模板解析器。 2. vue.runtime.xxx.js是运行版的Vue,只包含:核心功能;没有模板解析器。 2. 因为vue.runtime.xxx.js没有模板解析器,所以不能使用template这个配置项,需要使用render函数接收到的createElement函数去指定具体内容。 ## vue.config.js配置文件 1. 使用vue inspect > output.js可以查看到Vue脚手架的默认配置。 2. 使用vue.config.js可以对脚手架进行个性化定制,详情见:https://cli.vuejs.org/zh ## ref属性 1. 被用来给元素或子组件注册引用信息(id的替代者) 2. 应用在html标签上获取的是真实DOM元素,应用在组件标签上是组件实例对象(vc) 3. 使用方式: 1. 打标识:```<h1 ref="xxx">.....</h1>``` 或 ```<School ref="xxx"></School>``` 2. 获取:```this.$refs.xxx``` ## props配置项 1. 功能:让组件接收外部传过来的数据 2. 传递数据:```<Demo name="xxx"/>``` 3. 接收数据: 1. 第一种方式(只接收):```props:['name'] ``` 2. 第二种方式(限制类型):```props:{name:String}``` 3. 第三种方式(限制类型、限制必要性、指定默认值): ```js props:{ name:{ type:String, //类型 required:true, //必要性 default:'老王' //默认值 } } ``` > 备注:props是只读的,Vue底层会监测你对props的修改,如果进行了修改,就会发出警告,若业务需求确实需要修改,那么请复制props的内容到data中一份,然后去修改data中的数据。 ## mixin(混入) 1. 功能:可以把多个组件共用的配置提取成一个混入对象 2. 使用方式: 第一步定义混合: ``` { data(){....}, methods:{....} .... } ``` 第二步使用混入: 全局混入:```Vue.mixin(xxx)``` 局部混入:```mixins:['xxx'] ``` ## 插件 1. 功能:用于增强Vue 2. 本质:包含install方法的一个对象,install的第一个参数是Vue,第二个以后的参数是插件使用者传递的数据。 3. 定义插件: ```js 对象.install = function (Vue, options) { // 1. 添加全局过滤器 Vue.filter(....) // 2. 添加全局指令 Vue.directive(....) // 3. 配置全局混入(合) Vue.mixin(....) // 4. 添加实例方法 Vue.prototype.$myMethod = function () {...} Vue.prototype.$myProperty = xxxx } ``` 4. 使用插件:```Vue.use()``` ## scoped样式 1. 作用:让样式在局部生效,防止冲突。 2. 写法:```<style scoped>``` ## 总结TodoList案例 1. 组件化编码流程: (1).拆分静态组件:组件要按照功能点拆分,命名不要与html元素冲突。 (2).实现动态组件:考虑好数据的存放位置,数据是一个组件在用,还是一些组件在用: 1).一个组件在用:放在组件自身即可。 2). 一些组件在用:放在他们共同的父组件上(<span style="color:red">状态提升</span>)。 (3).实现交互:从绑定事件开始。 2. props适用于: (1).父组件 ==> 子组件 通信 (2).子组件 ==> 父组件 通信(要求父先给子一个函数) 3. 使用v-model时要切记:v-model绑定的值不能是props传过来的值,因为props是不可以修改的! 4. props传过来的若是对象类型的值,修改对象中的属性时Vue不会报错,但不推荐这样做。 ## webStorage 1. 存储内容大小一般支持5MB左右(不同浏览器可能还不一样) 2. 浏览器端通过 Window.sessionStorage 和 Window.localStorage 属性来实现本地存储机制。 3. 相关API: 1. ```xxxxxStorage.setItem('key', 'value');``` 该方法接受一个键和值作为参数,会把键值对添加到存储中,如果键名存在,则更新其对应的值。 2. ```xxxxxStorage.getItem('person');``` 该方法接受一个键名作为参数,返回键名对应的值。 3. ```xxxxxStorage.removeItem('key');``` 该方法接受一个键名作为参数,并把该键名从存储中删除。 4. ``` xxxxxStorage.clear()``` 该方法会清空存储中的所有数据。 4. 备注: 1. SessionStorage存储的内容会随着浏览器窗口关闭而消失。 2. LocalStorage存储的内容,需要手动清除才会消失。 3. ```xxxxxStorage.getItem(xxx)```如果xxx对应的value获取不到,那么getItem的返回值是null。 4. ```JSON.parse(null)```的结果依然是null。 ## 组件的自定义事件 1. 一种组件间通信的方式,适用于:<strong style="color:red">子组件 ===> 父组件</strong> 2. 使用场景:A是父组件,B是子组件,B想给A传数据,那么就要在A中给B绑定自定义事件(<span style="color:red">事件的回调在A中</span>)。 3. 绑定自定义事件: 1. 第一种方式,在父组件中:```<Demo @atguigu="test"/>``` 或 ```<Demo v-on:atguigu="test"/>``` 2. 第二种方式,在父组件中: ```js <Demo ref="demo"/> ...... mounted(){ this.$refs.xxx.$on('atguigu',this.test) } ``` 3. 若想让自定义事件只能触发一次,可以使用```once```修饰符,或```$once```方法。 4. 触发自定义事件:```this.$emit('atguigu',数据)``` 5. 解绑自定义事件```this.$off('atguigu')``` 6. 组件上也可以绑定原生DOM事件,需要使用```native```修饰符。 7. 注意:通过```this.$refs.xxx.$on('atguigu',回调)```绑定自定义事件时,回调<span style="color:red">要么配置在methods中</span>,<span style="color:red">要么用箭头函数</span>,否则this指向会出问题! ## 全局事件总线(GlobalEventBus) 1. 一种组件间通信的方式,适用于<span style="color:red">任意组件间通信</span>。 2. 安装全局事件总线: ```js new Vue({ ...... beforeCreate() { Vue.prototype.$bus = this //安装全局事件总线,$bus就是当前应用的vm }, ...... }) ``` 3. 使用事件总线: 1. 接收数据:A组件想接收数据,则在A组件中给$bus绑定自定义事件,事件的<span style="color:red">回调留在A组件自身。</span> ```js methods(){ demo(data){......} } ...... mounted() { this.$bus.$on('xxxx',this.demo) } ``` 2. 提供数据:```this.$bus.$emit('xxxx',数据)``` 4. 最好在beforeDestroy钩子中,用$off去解绑<span style="color:red">当前组件所用到的</span>事件。 ## 消息订阅与发布(pubsub) 1. 一种组件间通信的方式,适用于<span style="color:red">任意组件间通信</span>。 2. 使用步骤: 1. 安装pubsub:```npm i pubsub-js``` 2. 引入: ```import pubsub from 'pubsub-js'``` 3. 接收数据:A组件想接收数据,则在A组件中订阅消息,订阅的<span style="color:red">回调留在A组件自身。</span> ```js methods(){ demo(data){......} } ...... mounted() { this.pid = pubsub.subscribe('xxx',this.demo) //订阅消息 } ``` 4. 提供数据:```pubsub.publish('xxx',数据)``` 5. 最好在beforeDestroy钩子中,用```PubSub.unsubscribe(pid)```去<span style="color:red">取消订阅。</span> ## nextTick 1. 语法:```this.$nextTick(回调函数)``` 2. 作用:在下一次 DOM 更新结束后执行其指定的回调。 3. 什么时候用:当改变数据后,要基于更新后的新DOM进行某些操作时,要在nextTick所指定的回调函数中执行。 ## Vue封装的过度与动画 1. 作用:在插入、更新或移除 DOM元素时,在合适的时候给元素添加样式类名。 2. 图示:<img src="https://img04.sogoucdn.com/app/a/100520146/5990c1dff7dc7a8fb3b34b4462bd0105" style="width:60%" /> 3. 写法: 1. 准备好样式: - 元素进入的样式: 1. v-enter:进入的起点 2. v-enter-active:进入过程中 3. v-enter-to:进入的终点 - 元素离开的样式: 1. v-leave:离开的起点 2. v-leave-active:离开过程中 3. v-leave-to:离开的终点 2. 使用```<transition>```包裹要过度的元素,并配置name属性: ```vue <transition name="hello"> <h1 v-show="isShow">你好啊!</h1> </transition> ``` 3. 备注:若有多个元素需要过度,则需要使用:```<transition-group>```,且每个元素都要指定```key```值。 ## vue脚手架配置代理 ### 方法一 在vue.config.js中添加如下配置: ```js devServer:{ proxy:"http://localhost:5000" } ``` 说明: 1. 优点:配置简单,请求资源时直接发给前端(8080)即可。 2. 缺点:不能配置多个代理,不能灵活的控制请求是否走代理。 3. 工作方式:若按照上述配置代理,当请求了前端不存在的资源时,那么该请求会转发给服务器 (优先匹配前端资源) ### 方法二 编写vue.config.js配置具体代理规则: ```js module.exports = { devServer: { proxy: { '/api1': {// 匹配所有以 '/api1'开头的请求路径 target: 'http://localhost:5000',// 代理目标的基础路径 changeOrigin: true, pathRewrite: {'^/api1': ''} }, '/api2': {// 匹配所有以 '/api2'开头的请求路径 target: 'http://localhost:5001',// 代理目标的基础路径 changeOrigin: true, pathRewrite: {'^/api2': ''} } } } } /* changeOrigin设置为true时,服务器收到的请求头中的host为:localhost:5000 changeOrigin设置为false时,服务器收到的请求头中的host为:localhost:8080 changeOrigin默认值为true */ ``` 说明: 1. 优点:可以配置多个代理,且可以灵活的控制请求是否走代理。 2. 缺点:配置略微繁琐,请求资源时必须加前缀。 ## 插槽 1. 作用:让父组件可以向子组件指定位置插入html结构,也是一种组件间通信的方式,适用于 <strong style="color:red">父组件 ===> 子组件</strong> 。 2. 分类:默认插槽、具名插槽、作用域插槽 3. 使用方式: 1. 默认插槽: ```vue 父组件中: <Category> <div>html结构1</div> </Category> 子组件中: <template> <div> <!-- 定义插槽 --> <slot>插槽默认内容...</slot> </div> </template> ``` 2. 具名插槽: ```vue 父组件中: <Category> <template slot="center"> <div>html结构1</div> </template> <template v-slot:footer> <div>html结构2</div> </template> </Category> 子组件中: <template> <div> <!-- 定义插槽 --> <slot name="center">插槽默认内容...</slot> <slot name="footer">插槽默认内容...</slot> </div> </template> ``` 3. 作用域插槽: 1. 理解:<span style="color:red">数据在组件的自身,但根据数据生成的结构需要组件的使用者来决定。</span>(games数据在Category组件中,但使用数据所遍历出来的结构由App组件决定) 2. 具体编码: ```vue 父组件中: <Category> <template scope="scopeData"> <!-- 生成的是ul列表 --> <ul> <li v-for="g in scopeData.games" :key="g">{{g}}</li> </ul> </template> </Category> <Category> <template slot-scope="scopeData"> <!-- 生成的是h4标题 --> <h4 v-for="g in scopeData.games" :key="g">{{g}}</h4> </template> </Category> 子组件中: <template> <div> <slot :games="games"></slot> </div> </template> <script> export default { name:'Category', props:['title'], //数据在子组件自身 data() { return { games:['红色警戒','穿越火线','劲舞团','超级玛丽'] } }, } </script> ``` ``` ``` ## Vuex ### 1.概念 在Vue中实现集中式状态(数据)管理的一个Vue插件,对vue应用中多个组件的共享状态进行集中式的管理(读/写),也是一种组件间通信的方式,且适用于任意组件间通信。 ### 2.何时使用? 多个组件需要共享数据时 ### 3.搭建vuex环境 1. 创建文件:```src/store/index.js``` ```js //引入Vue核心库 import Vue from 'vue' //引入Vuex import Vuex from 'vuex' //应用Vuex插件 Vue.use(Vuex) //准备actions对象——响应组件中用户的动作 const actions = {} //准备mutations对象——修改state中的数据 const mutations = {} //准备state对象——保存具体的数据 const state = {} //创建并暴露store export default new Vuex.Store({ actions, mutations, state }) ``` 2. 在```main.js```中创建vm时传入```store```配置项 ```js ...... //引入store import store from './store' ...... //创建vm new Vue({ el:'#app', render: h => h(App), store }) ``` ### 4.基本使用 1. 初始化数据、配置```actions```、配置```mutations```,操作文件```store.js``` ```js //引入Vue核心库 import Vue from 'vue' //引入Vuex import Vuex from 'vuex' //引用Vuex Vue.use(Vuex) const actions = { //响应组件中加的动作 jia(context,value){ // console.log('actions中的jia被调用了',miniStore,value) context.commit('JIA',value) }, } const mutations = { //执行加 JIA(state,value){ // console.log('mutations中的JIA被调用了',state,value) state.sum += value } } //初始化数据 const state = { sum:0 } //创建并暴露store export default new Vuex.Store({ actions, mutations, state, }) ``` 2. 组件中读取vuex中的数据:```$store.state.sum``` 3. 组件中修改vuex中的数据:```$store.dispatch('action中的方法名',数据)``` 或 ```$store.commit('mutations中的方法名',数据)``` > 备注:若没有网络请求或其他业务逻辑,组件中也可以越过actions,即不写```dispatch```,直接编写```commit``` ### 5.getters的使用 1. 概念:当state中的数据需要经过加工后再使用时,可以使用getters加工。 2. 在```store.js```中追加```getters```配置 ```js ...... const getters = { bigSum(state){ return state.sum * 10 } } //创建并暴露store export default new Vuex.Store({ ...... getters }) ``` 3. 组件中读取数据:```$store.getters.bigSum``` ### 6.四个map方法的使用 1. <strong>mapState方法:</strong>用于帮助我们映射```state```中的数据为计算属性 ```js computed: { //借助mapState生成计算属性:sum、school、subject(对象写法) ...mapState({sum:'sum',school:'school',subject:'subject'}), //借助mapState生成计算属性:sum、school、subject(数组写法) ...mapState(['sum','school','subject']), }, ``` 2. <strong>mapGetters方法:</strong>用于帮助我们映射```getters```中的数据为计算属性 ```js computed: { //借助mapGetters生成计算属性:bigSum(对象写法) ...mapGetters({bigSum:'bigSum'}), //借助mapGetters生成计算属性:bigSum(数组写法) ...mapGetters(['bigSum']) }, ``` 3. <strong>mapActions方法:</strong>用于帮助我们生成与```actions```对话的方法,即:包含```$store.dispatch(xxx)```的函数 ```js methods:{ //靠mapActions生成:incrementOdd、incrementWait(对象形式) ...mapActions({incrementOdd:'jiaOdd',incrementWait:'jiaWait'}) //靠mapActions生成:incrementOdd、incrementWait(数组形式) ...mapActions(['jiaOdd','jiaWait']) } ``` 4. <strong>mapMutations方法:</strong>用于帮助我们生成与```mutations```对话的方法,即:包含```$store.commit(xxx)```的函数 ```js methods:{ //靠mapActions生成:increment、decrement(对象形式) ...mapMutations({increment:'JIA',decrement:'JIAN'}), //靠mapMutations生成:JIA、JIAN(对象形式) ...mapMutations(['JIA','JIAN']), } ``` > 备注:mapActions与mapMutations使用时,若需要传递参数需要:在模板中绑定事件时传递好参数,否则参数是事件对象。 ### 7.模块化+命名空间 1. 目的:让代码更好维护,让多种数据分类更加明确。 2. 修改```store.js``` ```javascript const countAbout = { namespaced:true,//开启命名空间 state:{x:1}, mutations: { ... }, actions: { ... }, getters: { bigSum(state){ return state.sum * 10 } } } const personAbout = { namespaced:true,//开启命名空间 state:{ ... }, mutations: { ... }, actions: { ... } } const store = new Vuex.Store({ modules: { countAbout, personAbout } }) ``` 3. 开启命名空间后,组件中读取state数据: ```js //方式一:自己直接读取 this.$store.state.personAbout.list //方式二:借助mapState读取: ...mapState('countAbout',['sum','school','subject']), ``` 4. 开启命名空间后,组件中读取getters数据: ```js //方式一:自己直接读取 this.$store.getters['personAbout/firstPersonName'] //方式二:借助mapGetters读取: ...mapGetters('countAbout',['bigSum']) ``` 5. 开启命名空间后,组件中调用dispatch ```js //方式一:自己直接dispatch this.$store.dispatch('personAbout/addPersonWang',person) //方式二:借助mapActions: ...mapActions('countAbout',{incrementOdd:'jiaOdd',incrementWait:'jiaWait'}) ``` 6. 开启命名空间后,组件中调用commit ```js //方式一:自己直接commit this.$store.commit('personAbout/ADD_PERSON',person) //方式二:借助mapMutations: ...mapMutations('countAbout',{increment:'JIA',decrement:'JIAN'}), ``` ## 路由 1. 理解: 一个路由(route)就是一组映射关系(key - value),多个路由需要路由器(router)进行管理。 2. 前端路由:key是路径,value是组件。 ### 1.基本使用 1. 安装vue-router,命令:```npm i vue-router``` 2. 应用插件:```Vue.use(VueRouter)``` 3. 编写router配置项: ```js //引入VueRouter import VueRouter from 'vue-router' //引入Luyou 组件 import About from '../components/About' import Home from '../components/Home' //创建router实例对象,去管理一组一组的路由规则 const router = new VueRouter({ routes:[ { path:'/about', component:About }, { path:'/home', component:Home } ] }) //暴露router export default router ``` 4. 实现切换(active-class可配置高亮样式) ```vue <router-link active-class="active" to="/about">About</router-link> ``` 5. 指定展示位置 ```vue <router-view></router-view> ``` ### 2.几个注意点 1. 路由组件通常存放在```pages```文件夹,一般组件通常存放在```components```文件夹。 2. 通过切换,“隐藏”了的路由组件,默认是被销毁掉的,需要的时候再去挂载。 3. 每个组件都有自己的```$route```属性,里面存储着自己的路由信息。 4. 整个应用只有一个router,可以通过组件的```$router```属性获取到。 ### 3.多级路由(多级路由) 1. 配置路由规则,使用children配置项: ```js routes:[ { path:'/about', component:About, }, { path:'/home', component:Home, children:[ //通过children配置子级路由 { path:'news', //此处一定不要写:/news component:News }, { path:'message',//此处一定不要写:/message component:Message } ] } ] ``` 2. 跳转(要写完整路径): ```vue <router-link to="/home/news">News</router-link> ``` ### 4.路由的query参数 1. 传递参数 ```vue <!-- 跳转并携带query参数,to的字符串写法 --> <router-link :to="/home/message/detail?id=666&title=你好">跳转</router-link> <!-- 跳转并携带query参数,to的对象写法 --> <router-link :to="{ path:'/home/message/detail', query:{ id:666, title:'你好' } }" >跳转</router-link> ``` 2. 接收参数: ```js $route.query.id $route.query.title ``` ### 5.命名路由 1. 作用:可以简化路由的跳转。 2. 如何使用 1. 给路由命名: ```js { path:'/demo', component:Demo, children:[ { path:'test', component:Test, children:[ { name:'hello' //给路由命名 path:'welcome', component:Hello, } ] } ] } ``` 2. 简化跳转: ```vue <!--简化前,需要写完整的路径 --> <router-link to="/demo/test/welcome">跳转</router-link> <!--简化后,直接通过名字跳转 --> <router-link :to="{name:'hello'}">跳转</router-link> <!--简化写法配合传递参数 --> <router-link :to="{ name:'hello', query:{ id:666, title:'你好' } }" >跳转</router-link> ``` ### 6.路由的params参数 1. 配置路由,声明接收params参数 ```js { path:'/home', component:Home, children:[ { path:'news', component:News }, { component:Message, children:[ { name:'xiangqing', path:'detail/:id/:title', //使用占位符声明接收params参数 component:Detail } ] } ] } ``` 2. 传递参数 ```vue <!-- 跳转并携带params参数,to的字符串写法 --> <router-link :to="/home/message/detail/666/你好">跳转</router-link> <!-- 跳转并携带params参数,to的对象写法 --> <router-link :to="{ name:'xiangqing', params:{ id:666, title:'你好' } }" >跳转</router-link> ``` > 特别注意:路由携带params参数时,若使用to的对象写法,则不能使用path配置项,必须使用name配置! 3. 接收参数: ```js $route.params.id $route.params.title ``` ### 7.路由的props配置 作用:让路由组件更方便的收到参数 ```js { name:'xiangqing', path:'detail/:id', component:Detail, //第一种写法:props值为对象,该对象中所有的key-value的组合最终都会通过props传给Detail组件 // props:{a:900} //第二种写法:props值为布尔值,布尔值为true,则把路由收到的所有params参数通过props传给Detail组件 // props:true //第三种写法:props值为函数,该函数返回的对象中每一组key-value都会通过props传给Detail组件 props(route){ return { id:route.query.id, title:route.query.title } } } ``` ### 8.```<router-link>```的replace属性 1. 作用:控制路由跳转时操作浏览器历史记录的模式 2. 浏览器的历史记录有两种写入方式:分别为```push```和```replace```,```push```是追加历史记录,```replace```是替换当前记录。路由跳转时候默认为```push``` 3. 如何开启```replace```模式:```<router-link replace .......>News</router-link>``` ### 9.编程式路由导航 1. 作用:不借助```<router-link> ```实现路由跳转,让路由跳转更加灵活 2. 具体编码: ```js //$router的两个API this.$router.push({ name:'xiangqing', params:{ id:xxx, title:xxx } }) this.$router.replace({ name:'xiangqing', params:{ id:xxx, title:xxx } }) this.$router.forward() //前进 this.$router.back() //后退 this.$router.go() //可前进也可后退 ``` ### 10.缓存路由组件 1. 作用:让不展示的路由组件保持挂载,不被销毁。 2. 具体编码: ```vue <keep-alive include="News"> <router-view></router-view> </keep-alive> ``` ### 11.两个新的生命周期钩子 1. 作用:路由组件所独有的两个钩子,用于捕获路由组件的激活状态。 2. 具体名字: 1. ```activated```路由组件被激活时触发。 2. ```deactivated```路由组件失活时触发。 ### 12.路由守卫 1. 作用:对路由进行权限控制 2. 分类:全局守卫、独享守卫、组件内守卫 3. 全局守卫: ```js //全局前置守卫:初始化时执行、每次路由切换前执行 router.beforeEach((to,from,next)=>{ console.log('beforeEach',to,from) if(to.meta.isAuth){ //判断当前路由是否需要进行权限控制 if(localStorage.getItem('school') === 'atguigu'){ //权限控制的具体规则 next() //放行 }else{ alert('暂无权限查看') // next({name:'guanyu'}) } }else{ next() //放行 } }) //全局后置守卫:初始化时执行、每次路由切换后执行 router.afterEach((to,from)=>{ console.log('afterEach',to,from) if(to.meta.title){ document.title = to.meta.title //修改网页的title }else{ document.title = 'vue_test' } }) ``` 4. 独享守卫: ```js beforeEnter(to,from,next){ console.log('beforeEnter',to,from) if(to.meta.isAuth){ //判断当前路由是否需要进行权限控制 if(localStorage.getItem('school') === 'atguigu'){ next() }else{ alert('暂无权限查看') // next({name:'guanyu'}) } }else{ next() } } ``` 5. 组件内守卫: ```js //进入守卫:通过路由规则,进入该组件时被调用 beforeRouteEnter (to, from, next) { }, //离开守卫:通过路由规则,离开该组件时被调用 beforeRouteLeave (to, from, next) { } ``` ### 13.路由器的两种工作模式 1. 对于一个url来说,什么是hash值?—— #及其后面的内容就是hash值。 2. hash值不会包含在 HTTP 请求中,即:hash值不会带给服务器。 3. hash模式: 1. 地址中永远带着#号,不美观 。 2. 若以后将地址通过第三方手机app分享,若app校验严格,则地址会被标记为不合法。 3. 兼容性较好。 4. history模式: 1. 地址干净,美观 。 2. 兼容性和hash模式相比略差。 3. 应用部署上线时需要后端人员支持,解决刷新页面服务端404的问题。
为人:谦逊、激情、博学、审问、慎思、明辨、 笃行
学问:纸上得来终觉浅,绝知此事要躬行
为事:工欲善其事,必先利其器。
态度:道阻且长,行则将至;行而不辍,未来可期
.....................................................................
------- 桃之夭夭,灼灼其华。之子于归,宜其室家。 ---------------
------- 桃之夭夭,有蕡其实。之子于归,宜其家室。 ---------------
------- 桃之夭夭,其叶蓁蓁。之子于归,宜其家人。 ---------------
=====================================================================
* 博客文章部分截图及内容来自于学习的书本及相应培训课程以及网络其他博客,仅做学习讨论之用,不做商业用途。
* 如有侵权,马上联系我,我立马删除对应链接。 * @author Alan -liu * @Email no008@foxmail.com
转载请标注出处! ✧*꧁一品堂.技术学习笔记꧂*✧. ---> https://www.cnblogs.com/ios9/

 浙公网安备 33010602011771号