搭建高可用kubernetes集群(keepalived+haproxy)
序
由于单master节点的kubernetes集群,存在master节点异常之后无法继续使用的缺陷。本文参考网管流程搭建一套多master节点负载均衡的kubernetes集群。官网给出了两种拓扑结构:堆叠control plane node和external etcd node,本文基于第一种拓扑结构进行搭建,使用keepalived + haproxy搭建,完整的拓扑图如下:
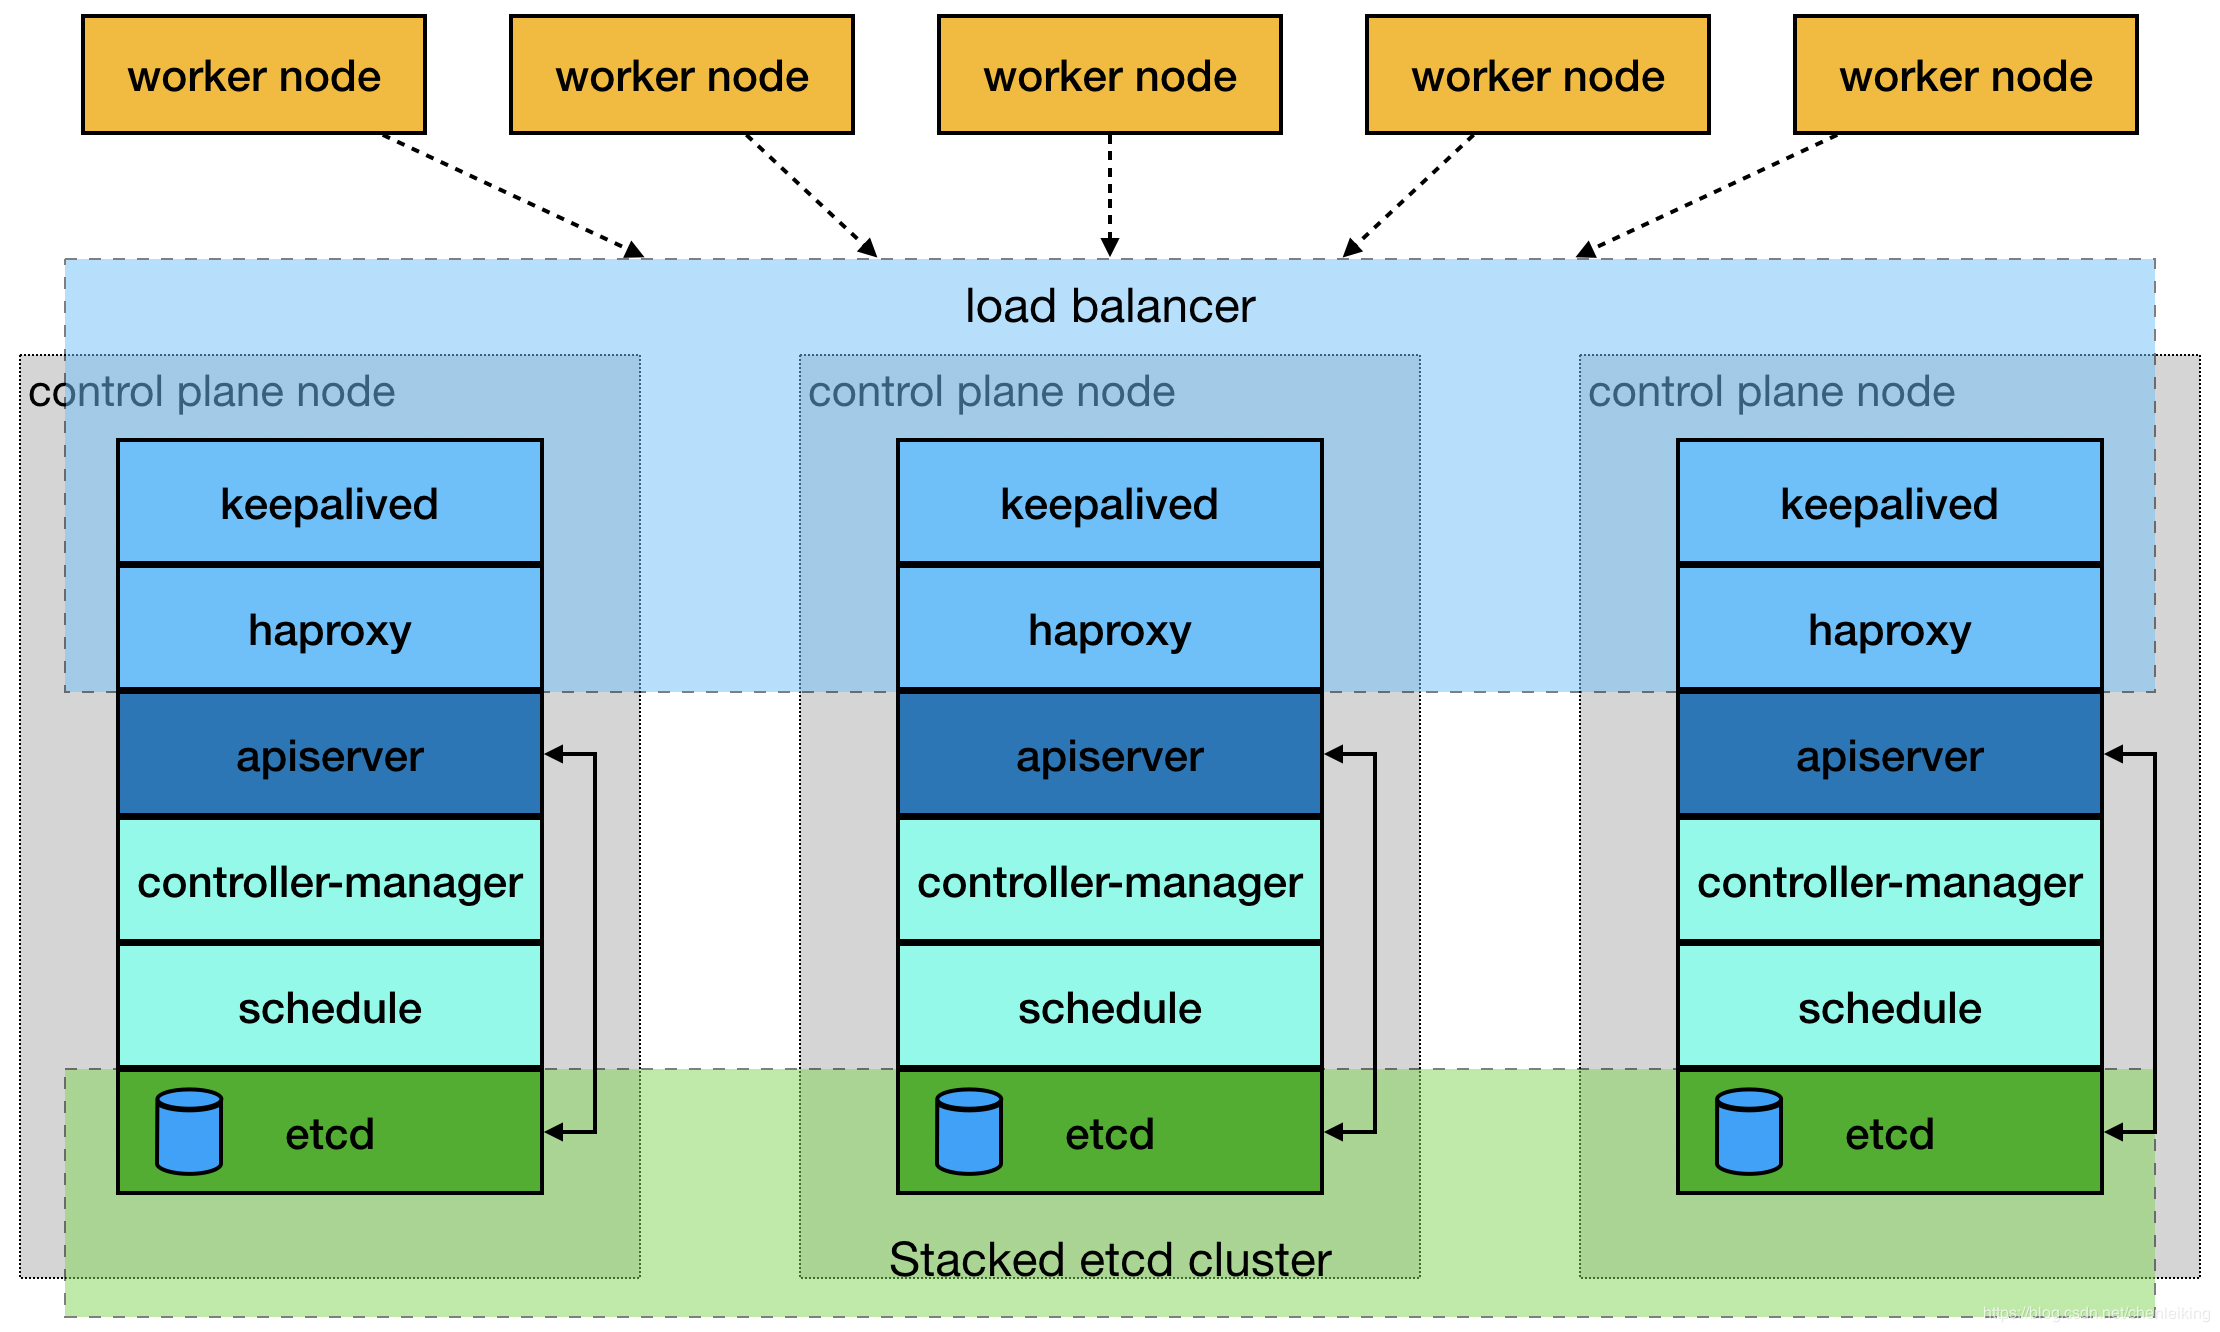
(堆叠control plane node)
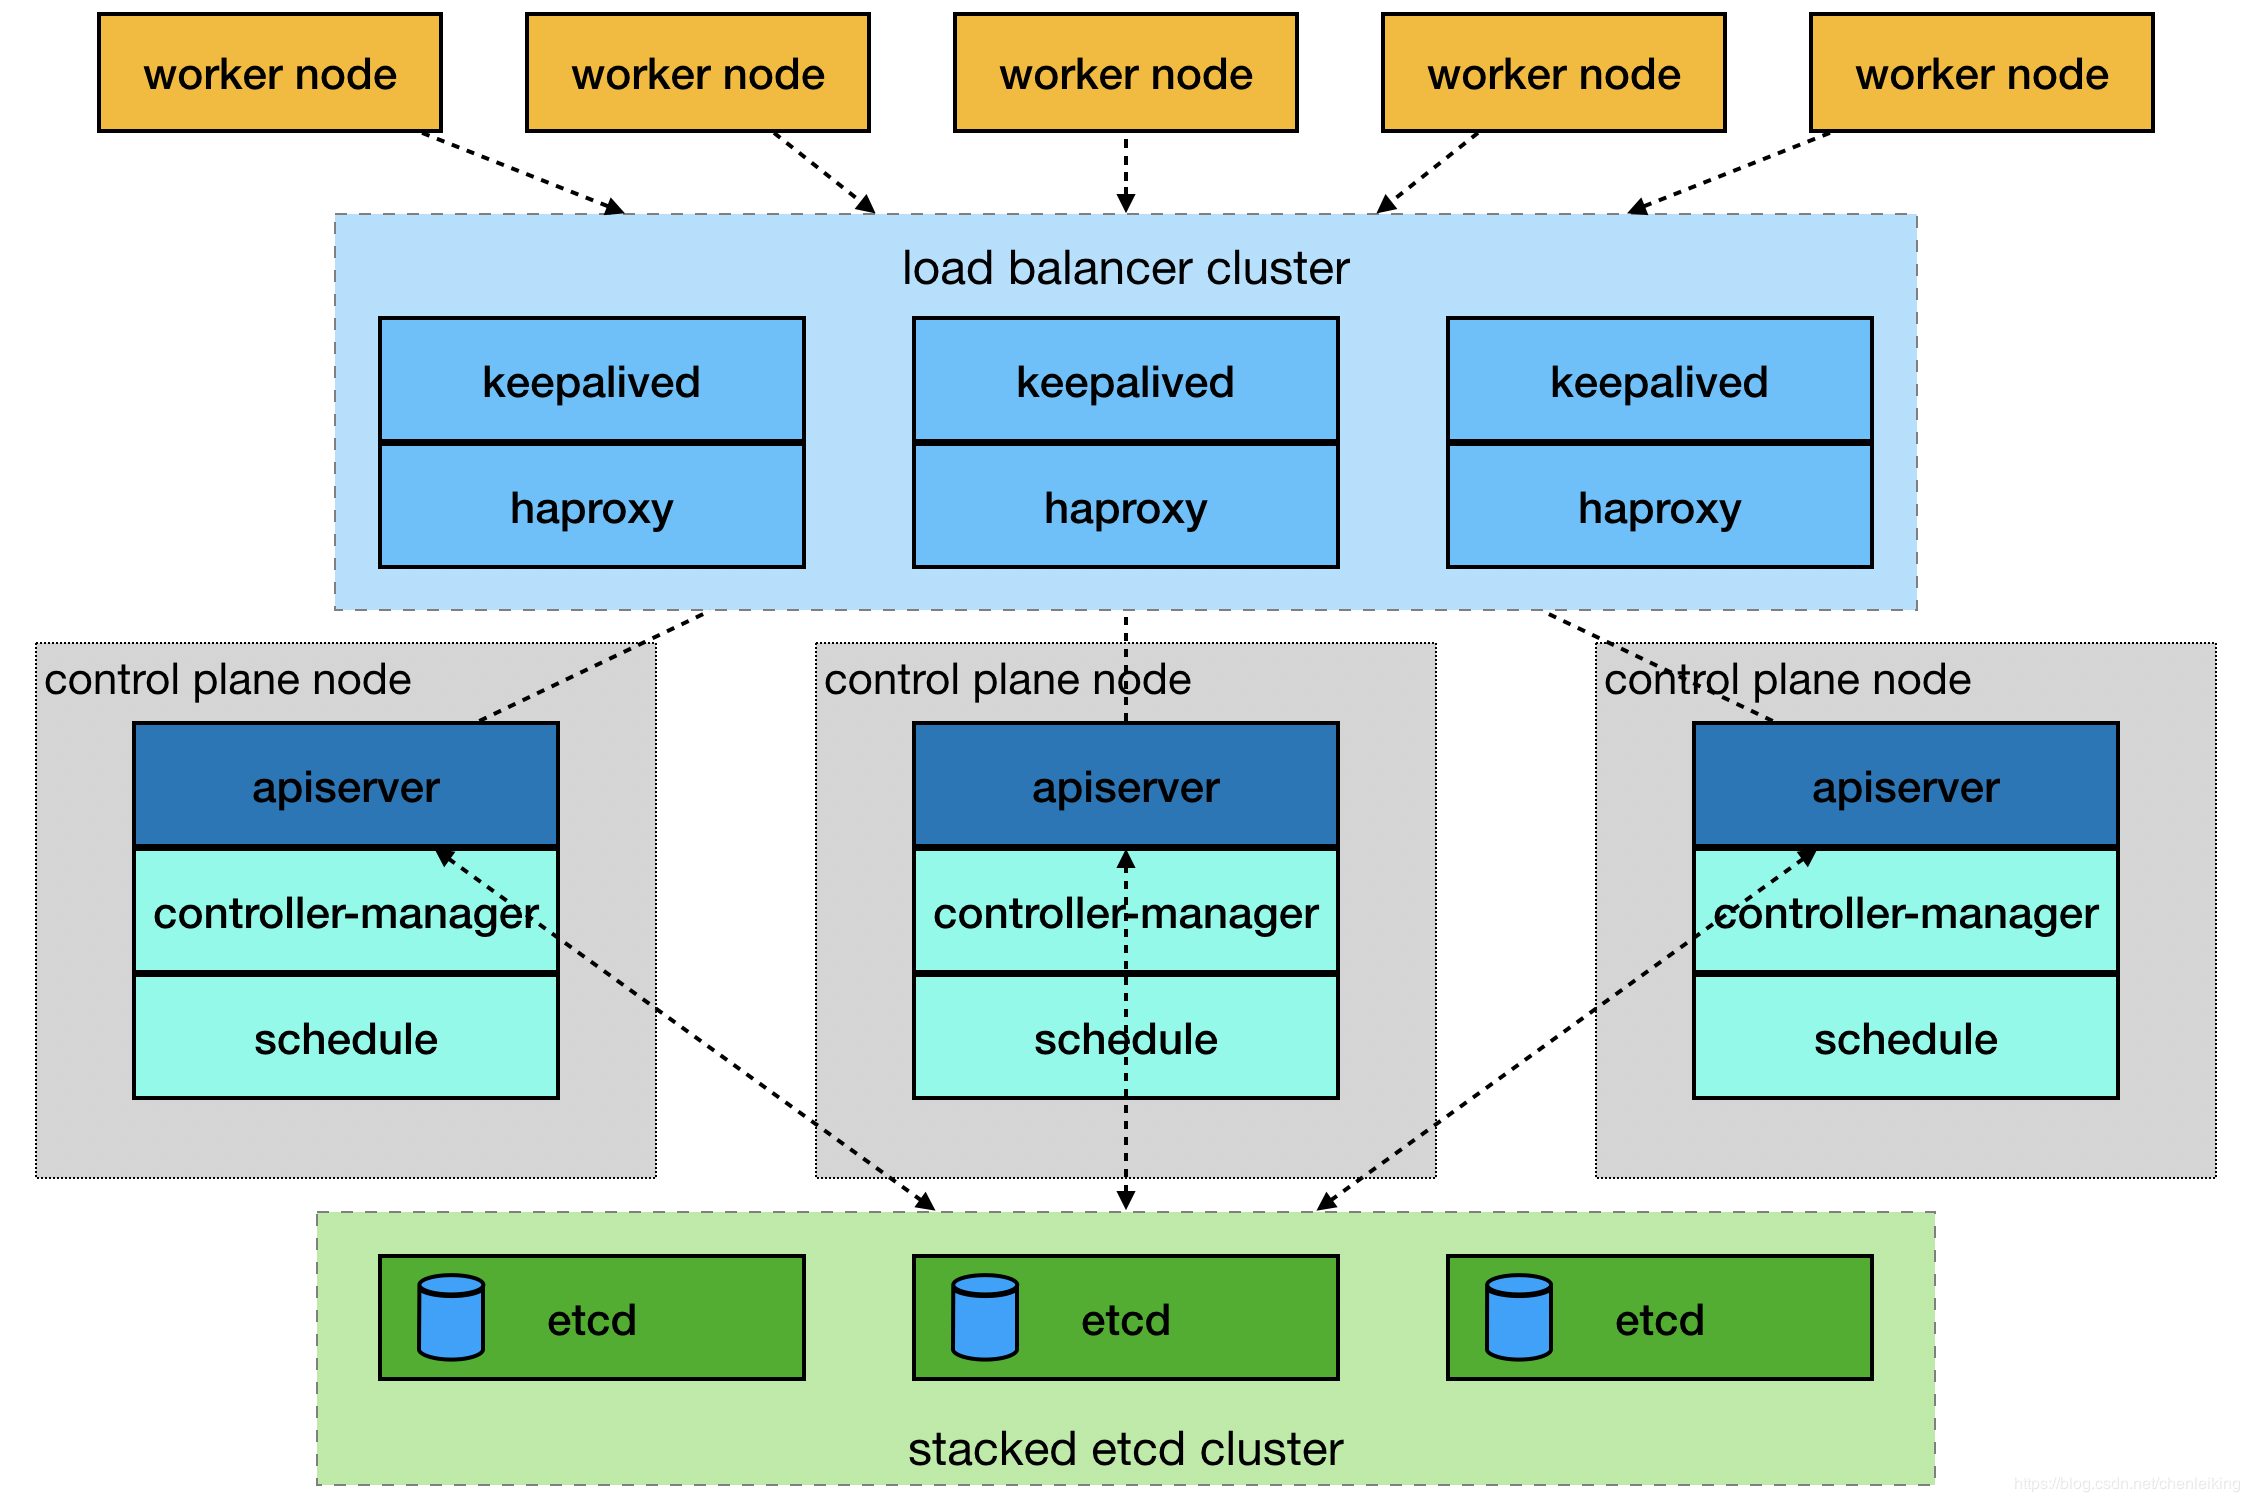
(external etcd node)
mastre节点需要部署etcd、apiserver、controller-manager、schedule这4种服务,其中etcd、ntroller-manager、schedule这三种服务kubernetes自身已经实现了高可用,在多master节点的情况下,每个master节点都会启动这三种服务器,同一时间只有一个生效。因此要实现kubernetes的高可用,只需要apiserver服务高可用。
keepalived是一种高性能的服务器高可用或热备解决方案,可以用来防止服务器单点故障导致服务中断的问题。keepalived使用主备模式,至少需要两台服务器才能正常工作。比如keepalived将三台服务器搭建成一个集群,对外提供一个唯一IP,正常情况下只有一台服务器上可以看到这个IP的虚拟网卡。如果这台服务异常,那么keepalived会立即将IP移动到剩下的两台服务器中的一台上,使得IP可以正常使用。
haproxy是一款提供高可用性、负载均衡以及基于TCP(第四层)和HTTP(第七层)应用的代理软件,支持虚拟主机,它是免费、快速并且可靠的一种解决方案。使用haproxy负载均衡后端的apiserver服务,达到apiserver服务高可用的目的。
本文使用的keepalived+haproxy方案,使用keepalived对外提供稳定的入口,使用haproxy对内均衡负载。因为haproxy运行在master节点上,当master节点异常后,haproxy服务也会停止,为了避免这种情况,我们在每一台master节点都部署haproxy服务,达到haproxy服务高可用的目的。由于多master节点会出现投票竞选的问题,因此master节点的数据最好是单数,避免票数相同的情况。
搭建环境
第一步:环境说明
|
1
2
3
4
|
192.168.1.13 master-01192.168.1.14 master-02192.168.1.15 master-03192.168.1.16 node-01 |
第二步:关闭防火墙等(all)
|
1
2
3
4
5
6
7
8
9
10
11
12
13
14
|
# 1.关闭防火墙systemctl stop firewalld && systemctl disable firewalld# 2.关闭selinuxsetenforce 0vim /etc/selinux/configSELINUX=enforcing改为SELINUX=disabled,保存后退出# 3.关闭交换分区swapoff -ased -i 's/.*swap.*/#&/' /etc/fstab# 4.iptables设置iptables -P FORWARD ACCEPT |
第三步:安装docker(all)
|
1
2
3
4
5
6
7
8
9
10
11
12
13
14
|
# 1.安装yum install docker -y# 2.启动和默认启动systemctl start docker && systemctl enable docker# 3.配置cat > /etc/docker/daemon.json << EOF{ "registry-mirrors": ["https://阿里个人加速网址.mirror.aliyuncs.com"], "exec-opts":["native.cgroupdriver=systemd"], "graph": "/new-path/docker" # 该路径必须存在}EOF |
第四步:启动docker时配置iptables(all)
|
1
2
3
|
vim /etc/systemd/system/docker.service[Service]下面添加ExecStartPost=/sbin/iptables -I FORWARD -s 0.0.0.0/0 -j ACCEPT |
第五步:设置host(all)
|
1
2
3
4
5
6
7
8
9
10
11
12
13
|
# 在不同的服务器上运行hostnamectl set-hostname master-01hostnamectl set-hostname master-02hostnamectl set-hostname master-03hostnamectl set-hostname node-01# 所有的服务器都运行cat >> /etc/hosts << EOF192.168.1.13 master-01192.168.1.14 master-02192.168.1.15 master-03192.168.1.16 node-01EOF |
第六步:设置yum源(all)
|
1
2
3
4
5
6
7
8
9
10
11
12
13
14
15
16
17
18
19
20
21
22
23
24
|
cat > /etc/yum.repos.d/docker.repo <<EOF[docker-repo]name=Docker Repositorybaseurl=http://mirrors.aliyun.com/docker-engine/yum/repo/main/centos/7enabled=1gpgcheck=0EOFcat > /etc/sysctl.d/k8s.conf << EOFnet.bridge.bridge-nf-call-ip6tables = 1net.bridge.bridge-nf-call-iptables = 1net.ipv4.ip_forward = 1EOFcat > /etc/yum.repos.d/kubernetes.repo << EOF[kubernetes]name=Kubernetesbaseurl=http://mirrors.aliyun.com/kubernetes/yum/repos/kubernetes-el7-x86_64enabled=1gpgcheck=0repo_gpgcheck=0gpgkey=http://mirrors.aliyun.com/kubernetes/yum/doc/yum-key.gpghttp://mirrors.aliyun.com/kubernetes/yum/doc/rpm-package-key.gpgEOF |
第七步:安装keepalived(master)
|
1
2
3
4
5
6
7
8
9
10
11
12
13
14
15
16
17
18
19
20
21
22
23
24
25
26
27
28
29
30
31
32
33
34
35
36
37
38
39
40
41
42
43
44
|
# 1. 安装yumyum install -y keepalived# 2.备份配置文件cp /etc/keepalived/keepalived.conf /etc/keepalived/keepalived.conf-back# 3.编辑配置文件cat > /etc/keepalived/keepalived.conf << EOF! Configuration File for keepalivedglobal_defs { router_id LVS_DEVEL}vrrp_script check_haproxy { script "killall -0 haproxy" interval 3 weight -2 fall 10 rise 2}vrrp_instance VI_1 { state MASTER interface ens33 # 虚拟网卡桥接的真实网卡 virtual_router_id 51 # 优先级配置,每台服务器最好都不一样,如100,90,80等,优先级越高越先使用 priority 90 advert_int 1 authentication { auth_type PASS auth_pass 111 } virtual_ipaddress { 192.168.1.200 # 对外提供的虚拟IP } track_script { check_haproxy }}EOF# 4.启动systemctl start keepalived && systemctl enable keepalived && systemctl status keepalived |
说明:检查keepalived是否安装成功的标准是:1.任何一台服务器上ping虚拟ip可以通;2.虚拟IP只在一台服务上可见;3.任意停止某一台服务器后,虚拟IP会移动到剩下的某一台服务器上,并正常使用。
第九步:安装haproxy(master)
|
1
2
3
4
5
6
7
8
9
10
11
12
13
14
15
16
17
18
19
20
21
22
23
24
25
26
27
28
29
30
31
32
33
34
35
36
37
38
39
40
41
42
43
44
45
46
47
48
49
50
51
52
53
54
55
56
57
58
59
60
61
62
63
64
65
66
67
68
69
70
71
72
73
74
75
76
77
78
79
80
81
|
# 1.安装yum install -y haproxy# 2.备份配置文件cp /etc/haproxy/haproxy.cfg /etc/haproxy/haproxy.cfg-back# 3.编辑配置文件cat > /etc/haproxy/haproxy.cfg << EOF#---------------------------------------------------------------------# Global settings#---------------------------------------------------------------------global # to have these messages end up in /var/log/haproxy.log you will # need to: # # 1) configure syslog to accept network log events. This is done # by adding the '-r' option to the SYSLOGD_OPTIONS in # /etc/sysconfig/syslog # # 2) configure local2 events to go to the /var/log/haproxy.log # file. A line like the following can be added to # /etc/sysconfig/syslog # # local2.* /var/log/haproxy.log # log 127.0.0.1 local2 chroot /var/lib/haproxy pidfile /var/run/haproxy.pid maxconn 4000 user haproxy group haproxy daemon # turn on stats unix socket stats socket /var/lib/haproxy/stats#---------------------------------------------------------------------# common defaults that all the 'listen' and 'backend' sections will# use if not designated in their block#---------------------------------------------------------------------defaults mode http log global option httplog option dontlognull option http-server-close option forwardfor except 127.0.0.0/8 option redispatch retries 3 timeout http-request 10s timeout queue 1m timeout connect 10s timeout client 1m timeout server 1m timeout http-keep-alive 10s timeout check 10s maxconn 3000#---------------------------------------------------------------------# kubernetes apiserver frontend which proxys to the backends#---------------------------------------------------------------------frontend kubernetes-apiserver mode tcp bind *:6444 # 对外提供服务的端口,必须和kubernetes一致 option tcplog default_backend kubernetes-apiserver #后端服务的名称#---------------------------------------------------------------------# round robin balancing between the various backends#---------------------------------------------------------------------backend kubernetes-apiserver mode tcp balance roundrobin server master-01 192.168.1.13:6443 check # 后端服务器hostname和IP server master-02 192.168.1.14:6443 check # 后端服务器hostname和IP server master-03 192.168.1.15:6443 check # 后端服务器hostname和IPEOF# 4.启动systemctl start haproxy && systemctl enable haproxy && systemctl status haproxy |
第九步:安装kubelet kubeadm kubectl(all)
|
1
2
3
4
5
|
# 1.安装yum install -y kubelet kubeadm kubectl#2.启动systemctl enable kubelet && systemctl start kubelet |
第十步:master节点初始化kubeadm配置文件(master)
|
1
2
3
4
5
6
7
8
9
10
11
12
13
14
15
16
17
18
19
20
21
22
23
24
25
26
27
28
29
30
31
32
33
34
35
36
37
38
39
40
41
42
43
44
45
46
47
48
|
# 1.导入默认的配置文件kubeadm config print init-defaults > kubeadm-config.yaml# 2.编辑配置文件cat kubeadm-config.yamlapiVersion: kubeadm.k8s.io/v1beta2bootstrapTokens:- groups: - system:bootstrappers:kubeadm:default-node-token token: abcdef.0123456789abcdef ttl: 24h0m0s usages: - signing - authenticationkind: InitConfigurationlocalAPIEndpoint: advertiseAddress: 192.168.1.13 bindPort: 6443nodeRegistration: criSocket: /var/run/dockershim.sock name: master-01 taints: - effect: NoSchedule key: node-role.kubernetes.io/master---apiServer: timeoutForControlPlane: 4m0sapiVersion: kubeadm.k8s.io/v1beta2certificatesDir: /etc/kubernetes/pkiclusterName: kubernetescontrolPlaneEndpoint: "192.168.1.200:6444" # IP要和keepalived一致 端口要和haproxy一致controllerManager: {}dns: type: CoreDNSetcd: local: dataDir: /var/lib/etcdimageRepository: registry.aliyuncs.com/google_containerskind: ClusterConfigurationkubernetesVersion: v1.18.0networking: dnsDomain: cluster.local podSubnet: 10.244.0.0/16 # flannel网络IP范围 serviceSubnet: 10.96.0.0/12scheduler: {}# 初始化kubeadm init --config kubeadm-config.yaml |
第十一步:安装flanner网络(all)
|
1
2
3
4
5
6
7
|
# 1.添加IP和hostname的对应关系cat >> /etc/hosts << EOF151.101.76.133 raw.githubusercontent.comEOF# 2.下载并启动flannelkubectl create -f https://raw.githubusercontent.com/coreos/flannel/master/Documentation/kube-flannel.yml |
第十二步:添加master节点(master)
|
1
2
3
4
5
6
7
8
9
10
11
12
13
14
15
|
# 1.从master节点拷贝配置文件到准备添加的节点上mkdir -p /etc/kubernetes/pki/etcdscp /etc/kubernetes/admin.conf root@192.168.1.14:/etc/kubernetes/admin.confscp /etc/kubernetes/pki/{ca.*,sa.*,front-proxy-ca.*} root@192.168.1.14:/etc/kubernetes/pkiscp /etc/kubernetes/pki/etcd/ca.* root@192.168.1.14:/etc/kubernetes/pki/etcd# 2.在master节点上初始化时,最后会打印两条命令,一条是添加master节点,一条是添加node节点,直接运行即可,如下是添加master节点:kubeadm join 192.168.1.200:6444 --token abcdef.0123456789abcdef \ --discovery-token-ca-cert-hash sha256:03e40218613fedde35123d1e0c81577d2f07285f7cda01000cf887ba17b2911f \ --control-plane# 3.join命令执行后,打印几条命令,同样需要执行,如下所示:mkdir -p $HOME/.kubesudo cp -i /etc/kubernetes/admin.conf $HOME/.kube/configsudo chown $(id -u):$(id -g) $HOME/.kube/config |
第十三步:添加node节点(node)
|
1
2
3
|
# 1.在master节点上初始化时,最后会打印两条命令,一条是添加master节点,一条是添加node节点,直接运行即可,如下是添加node节点:kubeadm join 192.168.1.200:6444 --token abcdef.0123456789abcdef \ --discovery-token-ca-cert-hash sha256:03e40218613fedde35123d1e0c81577d2f07285f7cda01000cf887ba17b2911f |
第十四步:检查环节是否搭建成功
任意关闭一台master节点,然后查看集群是否可以正常工作。
第十五步:同步集群服务器时间
|
1
2
3
4
|
yum -y install ntp ntpdate #安装ntpdate时间同步工具ntpdate cn.pool.ntp.org #设置时间同步hwclock --systohc #将系统时间写入硬件时间timedatectl #查看系统时间 |
结束
本次搭建的高可用kubernetes集群,版本是1.8,环境还在运行过程中,如有问题,欢迎一起讨论学习。

 浙公网安备 33010602011771号