用vmware workstation制作cloudstack(kvm)镜像及问题解决办法
说明1:vmware workstation镜像是vmdk格式
说明2:cloudstack配置文件目录:/run/libvirt/qemu/ kvm配置文件目录:/etc/libvirt/qemu
说明3:windows下格式转换方法
C:\Program Files (x86)\VMware\VMware Workstation>vmware-vdiskmanager.exe -r d:\centos7.4\CentOS.vmdk -t 0 temp.vmdk
一、在vmware workstation安装centos7.4系统
二、在系统安装目录找到vmdk文件,上传到linux系统
三、kvm文件转换
1,转化vmdk到qcow2
qemu-img convert -f vmdk -O qcow2 temp.vmdk CentOS72.qcow2
2,下载wget https://launchpadlibrarian.net/40519715/virt-goodies_0.4.tar.gz
3,配置文件转换,转vmx为xml,
./vmware2libvirt -f /opt/image/CentOS.vmx > /opt/image/CentOS.xml
|
1
2
3
4
5
6
7
8
9
10
11
12
13
14
15
16
17
18
19
20
21
22
23
24
25
26
27
28
29
30
31
|
<domain type='kvm'> <name>CentOS</name> <uuid>c2fbe7d6-d8c5-44df-9001-1632ebde8e58</uuid> <memory>1048576</memory> <currentMemory>1048576</currentMemory> <vcpu>1</vcpu> <os> <type arch='i686' machine='pc'>hvm</type> #改为<type arch='x86_64' machine='pc'>hvm</type> <boot dev='hd'/> </os> <features> <acpi/> </features> <clock offset='utc'/> <on_poweroff>destroy</on_poweroff> <on_reboot>restart</on_reboot> <on_crash>destroy</on_crash> <devices> <emulator>/usr/bin/kvm</emulator> <disk type='file' device='disk'> <source file='/opt/image/CentOS.vmdk'/> #改为<source file='/opt/image/CentOS.qcow2'/> <target dev='hda' /> </disk> <interface type='network'> <mac address='00:0c:29:2e:f9:2c'/> <source network='default'/> </interface> <input type='mouse' bus='ps2'/> <graphics type='vnc' port='-1' listen='127.0.0.1'/> </devices></domain> |
4,安装所需包,并连接到/usr/bin目录下
yum install libvirt-devel.x86_64 libvirt.x86_64
ln -s /usr/libexec/qemu-kvm /usr/bin/kvm
5,启动kvm
virsh define Ubuntu.xml
6,启动virt-manager:Applications->System Tools->Virtual Machine Manager
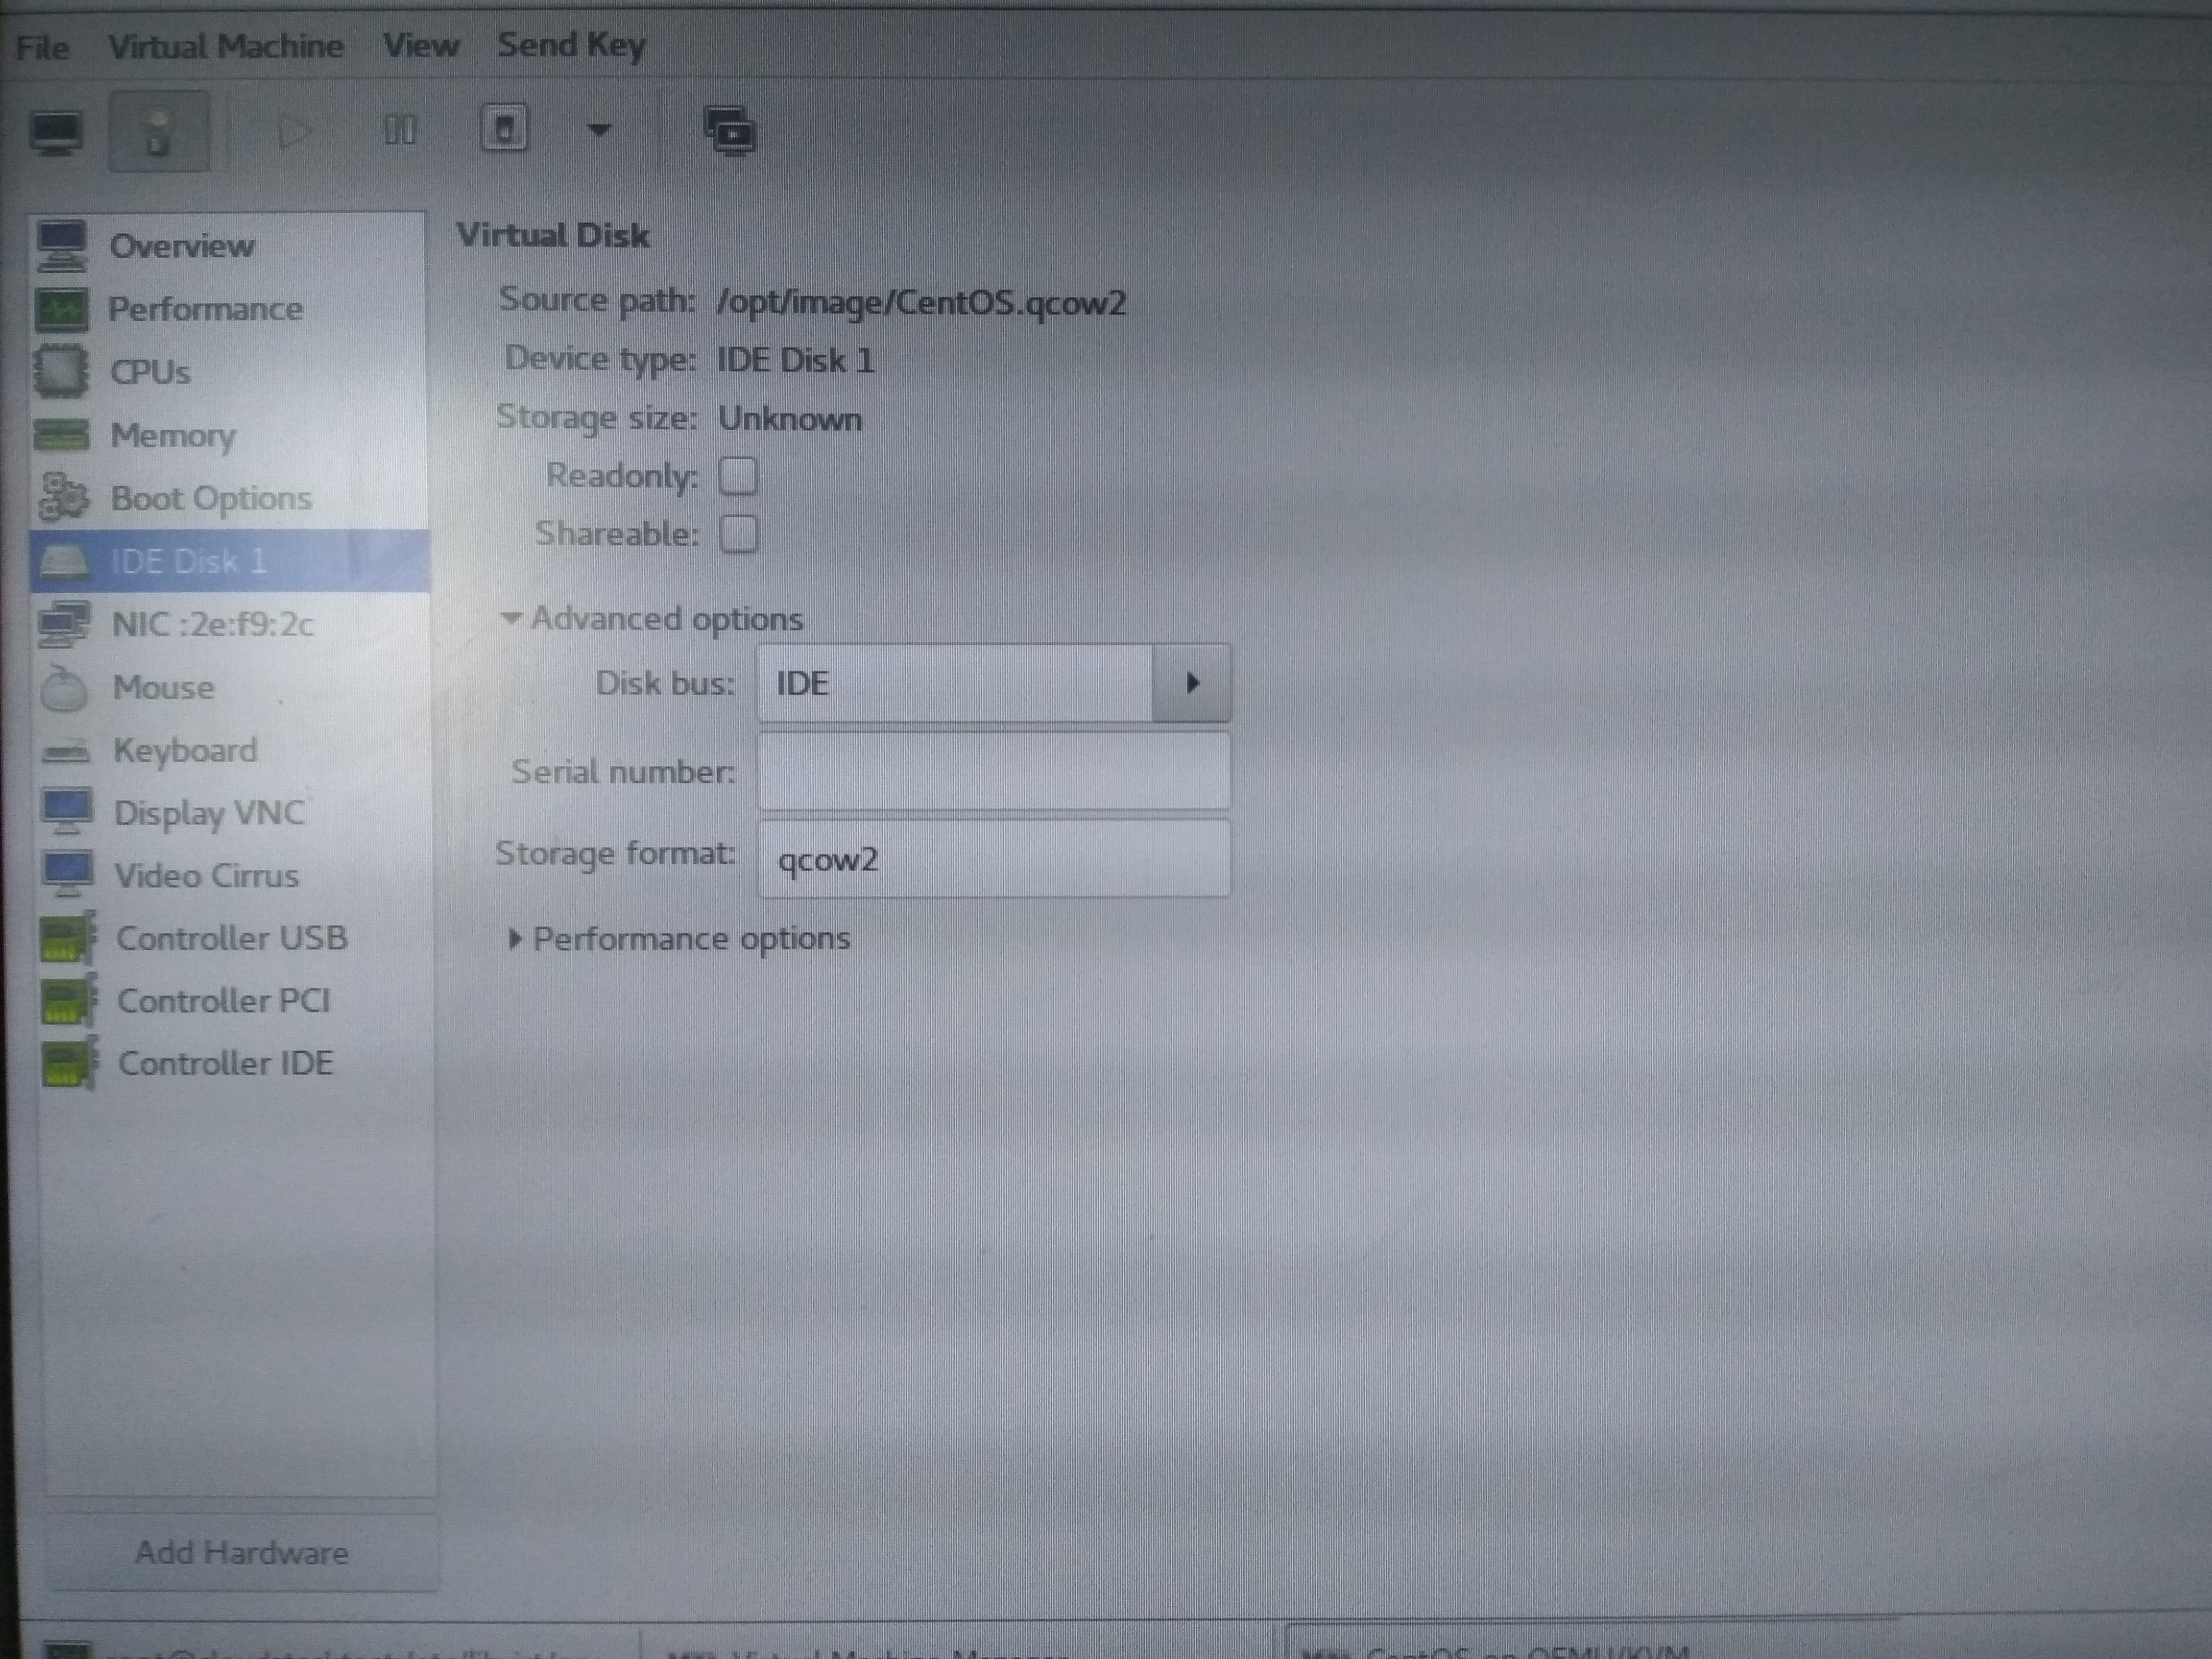
7,如图更改配置文件
storage format:qcow2
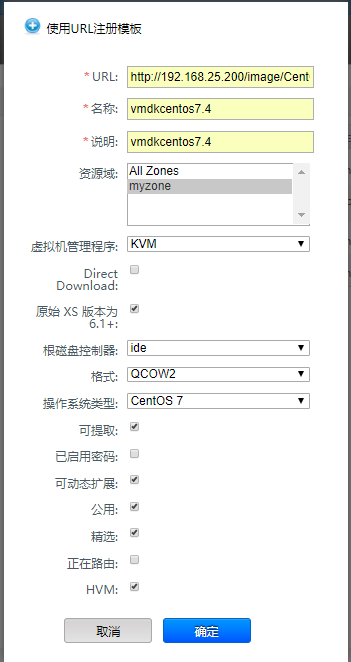
四,利用cloudstack4.11直接转换
可以直接上传vmdk或vmdk转换后的qcow2镜像,跟磁盘控制器要选择ide

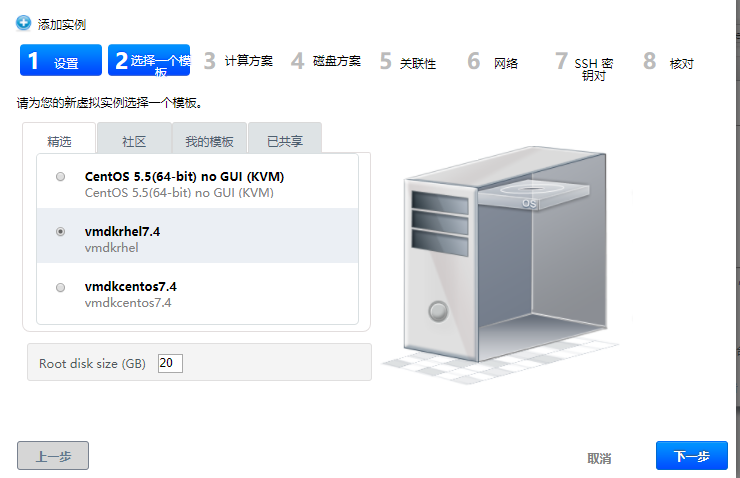
2,启动实例,选择刚才上传的模板
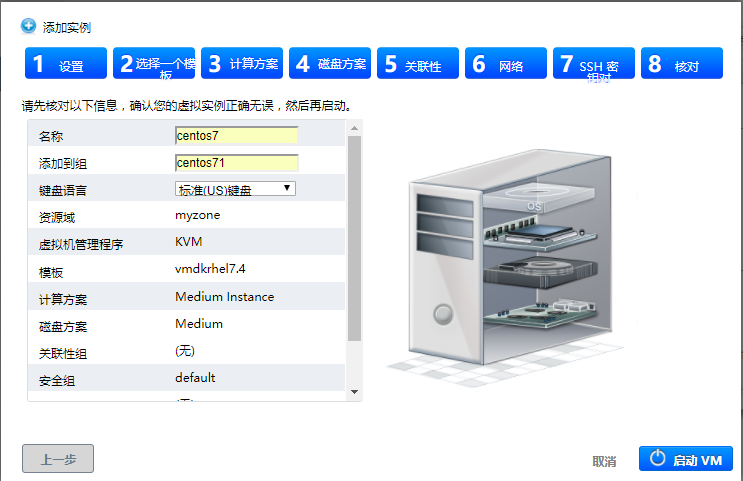
3,查看实例


 浙公网安备 33010602011771号