to top

SpringBoot框架搭建

1.简介

SpringBoot框架最大的有点在于快速开发,快速开发的原理就是SpringBoot中的三大主要配置:

起步依赖,引导类,属性配置文件(两类三种,第一类是application.yaml和application.yml类的配置文件,第二类是application.properties)
1.起步依赖:将一个框架所必须的依赖jar包和环境集成,直接引入起步依赖便完成了jar包的引入问题。
2.引导类:可直接启动项目
3.属性配置文件:可以将数据源,端口。。等信息添加进去,具体的配置方式需要按照要求引入。

2.搭建步骤

2.1 首先先创建一个Maven项目,按照目录结构创建包(Application.java是引导类,引导类必须放在当前项目的根目录下,否则不会出现spring的图标,项目无法启动)controller/service/dao(mapper)分别是三层架构,util是工具类
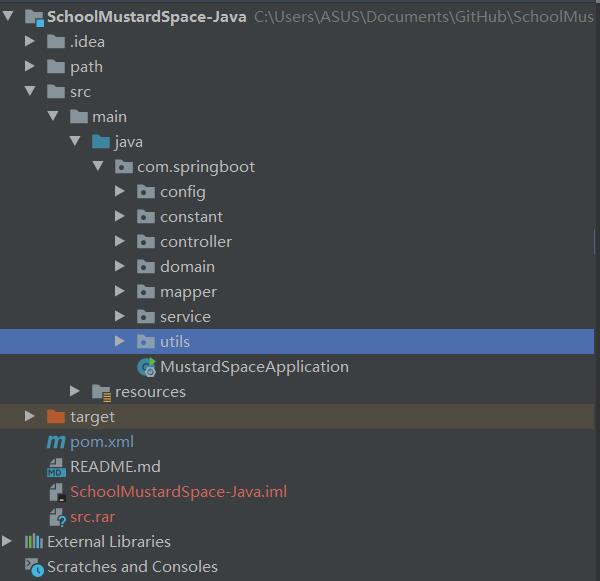
图片

2.2在pom.xml中添加起步依赖


org.springframework.boot
spring-boot-starter-parent
2.0.1.RELEASE


<project.build.sourceEncoding>UTF-8</project.build.sourceEncoding>
<project.reporting.outputEncoding>UTF-8</project.reporting.outputEncoding>
<java.version>1.8</java.version>


org.springframework.boot
spring-boot-starter-data-jpa


org.springframework.boot
spring-boot-starter-web


org.springframework.boot
spring-boot-starter-tomcat


mysql
mysql-connector-java
runtime


org.apache.commons
commons-lang3


org.bouncycastle
bcprov-jdk16
1.46


com.alibaba
druid
1.1.9


com.aliyun
aliyun-java-sdk-core
3.2.8


com.aliyun.oss
aliyun-sdk-oss
2.8.3


com.aliyun
aliyun-java-sdk-dysmsapi
1.1.0


com.alibaba
fastjson
1.2.47


com.aliyun
aliyun-java-sdk-cloudauth
1.1.2


org.springframework.boot
spring-boot-starter-data-redis


com.alibaba
fastjson
1.2.15


org.apache.httpcomponents
httpclient


org.apache.httpcomponents
httpcore


org.eclipse.jetty
jetty-util


junit
junit
test


commons-beanutils
commons-beanutils
1.8.3


commons-codec
commons-codec
1.10


commons-collections
commons-collections
3.2.1


commons-httpclient
commons-httpclient
3.1


commons-lang
commons-lang
2.6


commons-logging
commons-logging
1.2


net.sf.ezmorph
ezmorph
1.0.6


org.apache.httpcomponents
httpclient
4.5.2


org.apache.httpcomponents
httpcore
4.4.6


net.sf.json-lib
json-lib
2.4
jdk15


org.springframework.boot
spring-boot-starter-cache


org.springframework.boot
spring-boot-starter-data-redis


org.springframework.boot
spring-boot-starter-test
test


com.fasterxml.jackson.core
jackson-databind
2.9.6


com.github.wxpay
wxpay-sdk
0.0.3


com.google.zxing
javase
3.0.0


com.github.pagehelper
pagehelper
5.1.2


org.springframework.boot
spring-boot-maven-plugin


2.3属性配置文件application.properties

DB Configuration:

spring.datasource.driverClassName=com.mysql.cj.jdbc.Driver

spring.datasource.url=jdbc:mysql://localhost:3306/space?serverTimezone=UTC

spring.datasource.username=root

spring.datasource.password=123456

JPA Configuration:

spring.jpa.database=MySQL

spring.jpa.show-sql=true

spring.jpa.generate-ddl=true

spring.jpa.hibernate.ddl-auto=update

spring.jpa.hibernate.naming_strategy=org.hibernate.cfg.ImprovedNamingStrategy

spring.freemarker.checkTemplateLocation=false

spring.thymeleaf.cache=false

2.4创建引导类

@SpringBootApplication
public class Application {
public static void main(String[] args) {
//启动springboot实例化spring容器调用内置的tomcat
SpringApplication.run(Application.class, args);
}
}

项目到这里就创建完成了,接下来是启动springboot,当出现下图时则表明启动成功
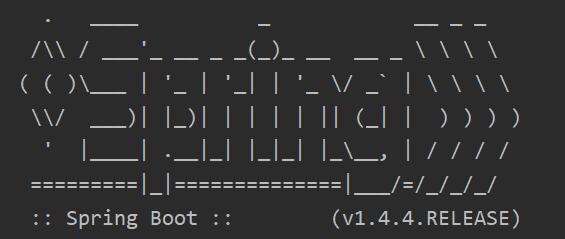
图片

接下来完善各个层的代码,就完成了springboot的搭建。

posted @ 2020-06-15 00:26  hhxd  阅读(344)  评论(0)    收藏  举报