

- #import "AppDelegate.h"
- #import "UIStyleSheet.h"
- #import "StartViewController.h"
- #import "InfoViewController.h"
- #import "ThiredViewController.h"
- #import "TopViewController.h"
- @implementation AppDelegate
- @synthesize window = _window;
- - (void)dealloc
- {
- [_window release];
- [super dealloc];
- }
- - (BOOL)application:(UIApplication *)application didFinishLaunchingWithOptions:(NSDictionary *)launchOptions
- {
- //创建导航条
- TTNavigator* navigator = [TTNavigator navigator];
- navigator.persistenceMode = TTNavigatorPersistenceModeAll;
- navigator.window = [[[UIWindow alloc] initWithFrame:TTScreenBounds()] autorelease];
- //注释1
- [TTStyleSheet setGlobalStyleSheet:[[[UIStyleSheet alloc] init] autorelease]];
- //注释2
- TTURLMap* map = navigator.URLMap;
- //注释3
- [map from:@"*" toViewController:[TTWebController class]];
- //注释4
- [map from:@"tt://StartView" toSharedViewController:[StartViewController class]];
- //注释5
- [map from:@"tt://InfoView/(initInfo:)" toViewController:[InfoViewController class]];
- //注释6
- [map from:@"tt://ThiredView" toViewController:[ThiredViewController class]];
- //注释7
- [map from:@"tt://TopView" toModalViewController:[TopViewController class]];
- if (![navigator restoreViewControllers])
- {
- //注释8
- [navigator openURLAction:[TTURLAction actionWithURLPath:@"tt://StartView"]];
- }
- return YES;
- }
- @end
注释1:表示加载当前皮肤类,界面中高级控件的皮肤将应用与UIStyleSheet类中的设定。因为所有与皮肤相关的设置都写在UIStyleSheet类当中,比如按钮的样式、标题栏的颜色等。
- #import <Three20/Three20.h>
- @interface StartViewController : TTViewController
- @end
- #import "StartViewController.h"
- @implementation StartViewController
- - (void)viewDidLoad
- {
- [super viewDidLoad];
- //标题栏名称
- self.title = @"雨松MOMO";
- //设置视图背景颜色
- self.view.backgroundColor = [UIColor blackColor];
- //创建图片视图
- TTImageView *imageview = [[[TTImageView alloc] initWithFrame:
- CGRectMake(100, 10, 120, 120)] autorelease];
- //设置图片视图显示的图片资源
- imageview.defaultImage = TTIMAGE(@"bundle://0.jpg");
- //将图片视图加入整个视图当中
- [self.view addSubview:imageview];
- //注释1
- NSArray *buttons = [NSArray arrayWithObjects:
- [TTButton buttonWithStyle:@"embossedButton:" title:@"开始游戏"],
- [TTButton buttonWithStyle:@"embossedButton:" title:@"继续游戏"],
- [TTButton buttonWithStyle:@"embossedButton:" title:@"关于游戏"],
- [TTButton buttonWithStyle:@"embossedButton:" title:@"退出游戏"],
- nil];
- for (int i=0; i<buttons.count; i++)
- {
- //使用循环将按钮绘制在屏幕当中
- TTButton *button = [buttons objectAtIndex:i];
- //设置字体的大小
- button.font = [UIFont boldSystemFontOfSize:30];
- //设置字体的显示区域
- button.frame = CGRectMake(60, 200 + i*50, 200, 50);
- //设置字体的标记,通过标记可判断那个按钮点击了
- button.tag = i;
- //设置按钮点击相应事件,点击后进入ButtonPressed方法
- [button addTarget:self action:@selector(ButtonPressed:) forControlEvents:UIControlEventTouchUpInside];
- //将按钮加入整个视图当中
- [self.view addSubview: button];
- }
- }
- //按钮点击后将进入这个方法
- -(void)ButtonPressed:(id)buttonID
- {
- //得到导航对象
- TTNavigator* navigator = [TTNavigator navigator];
- //获取点击的按钮
- UIButton *button = (UIButton *)buttonID;
- //注释2
- switch (button.tag) {
- case 0:
- [navigator openURLAction:[[TTURLAction actionWithURLPath:@"tt://InfoView/0"] applyAnimated:YES]];
- break;
- case 1:
- [navigator openURLAction:[[TTURLAction actionWithURLPath:@"tt://InfoView/1"] applyAnimated:YES]];
- break;
- case 2:
- [navigator openURLAction:[[TTURLAction actionWithURLPath:@"tt://InfoView/2"] applyAnimated:YES] ];
- break;
- case 3:
- [navigator openURLAction:[[TTURLAction actionWithURLPath:@"tt://InfoView/3"] applyAnimated:YES]];
- break;
- default:
- break;
- }
- }
- @end
注释1:表示在屏幕中共添加了4个按钮,这里比较重要的是按钮的风格。目前4个按钮组件的风格是@"embossedButton:",而这个参数对应的是UIStyleSheet类中方法,下面请大家看看UIStyleSheet这个类。
- #import <Three20/Three20.h>
- @interface UIStyleSheet : TTDefaultStyleSheet
- @end
UIStyleSheet.m文件
- #import "UIStyleSheet.h"
- @implementation UIStyleSheet
- //设置标题栏的颜色
- - (UIColor*)navigationBarTintColor {
- return [UIColor blueColor];
- }
- //按钮的风格
- - (TTStyle*)embossedButton:(UIControlState)state {
- if (state == UIControlStateNormal) {
- return
- [TTShapeStyle styleWithShape:[TTRoundedRectangleShape shapeWithRadius:8] next:
- [TTInsetStyle styleWithInset:UIEdgeInsetsMake(0, 0, 1, 0) next:
- [TTShadowStyle styleWithColor:RGBACOLOR(255,255,255,0) blur:1 offset:CGSizeMake(0, 1) next:
- [TTLinearGradientFillStyle styleWithColor1:RGBCOLOR(255, 255, 255)
- color2:RGBCOLOR(216, 221, 231) next:
- [TTSolidBorderStyle styleWithColor:RGBCOLOR(161, 167, 178) width:1 next:
- [TTBoxStyle styleWithPadding:UIEdgeInsetsMake(10, 12, 9, 12) next:
- [TTTextStyle styleWithFont:nil color:TTSTYLEVAR(linkTextColor)
- shadowColor:[UIColor colorWithWhite:255 alpha:0.4]
- shadowOffset:CGSizeMake(0, -1) next:nil]]]]]]];
- } else if (state == UIControlStateHighlighted) {
- return
- [TTShapeStyle styleWithShape:[TTRoundedRectangleShape shapeWithRadius:8] next:
- [TTInsetStyle styleWithInset:UIEdgeInsetsMake(0, 0, 1, 0) next:
- [TTShadowStyle styleWithColor:RGBACOLOR(255,255,255,0.9) blur:1 offset:CGSizeMake(0, 1) next:
- [TTLinearGradientFillStyle styleWithColor1:RGBCOLOR(225, 225, 225)
- color2:RGBCOLOR(196, 201, 221) next:
- [TTSolidBorderStyle styleWithColor:RGBCOLOR(161, 167, 178) width:1 next:
- [TTBoxStyle styleWithPadding:UIEdgeInsetsMake(10, 12, 9, 12) next:
- [TTTextStyle styleWithFont:nil color:[UIColor whiteColor]
- shadowColor:[UIColor colorWithWhite:255 alpha:0.4]
- shadowOffset:CGSizeMake(0, -1) next:nil]]]]]]];
- } else {
- return nil;
- }
- }
- @end
-(UIColor*)navigationBarTintColor :该方法用来设定导航栏颜色,目前设置它的颜色为蓝色。
-(TTStyle*)embossedButton: (UIContorlState)state:这个方法就比较重要了,请回到StartViewController类中,刚刚在设定按钮风格的时候参数 名称与这个方法名称一致、表示按钮将采取这个方法中的显示风格。切记一定要设定这个风格类应用于整个工程。还记得在AppDelegate类中执行的方法 吗?
[TTStyleSheet setGlobalStyleSheet:[[[UIStyleSheet alloc] init] autorelease]];
该 方法表示程序将采取UIStyleSheet类中的风格,这行代码一定要写,否则将不会采取UIStyleSheet类中的风格,使用系统默认风格。 UIStyleSheet类中不止可以设定按钮的风格,整个IOS所有高级控件的显示风格都可以设定,官方的文档中已经详细说明:
http://api.three20.info/interface_t_t_default_style_sheet.php
拓 展学习:如下图所示,Three20一共封装了9中按钮的样式,足够开发中使用,而本例中我们使用到的按钮样式就是"Embossed Button"。大家也可根据自己的喜好去设定不同的按钮样式,按钮的官方例子写在“Catalog”工程当中。详细按钮的代码写在 ButtonTestController.m文件中。

高级控件风格的教学就先到此为止,本文讨论的重点并不是它,请大家再次回到StartViewController.m类当中。
注释2:由于界面中共设置了4个按钮,为了让这4个按钮共用一个初始事件的方法,可在创建按钮时为它添加一个标记。4个按钮中点击任意按钮后都会进入ButtonPressed方法,然后通过id的到当前点击按钮的对象,使用button.tag可判断那个按钮被点击。
请注意看下方的switch方法,通过用户点击不同的按钮将打开@"tt://InfoView/X"页面,applyAnimated:YES表示播放切换页面的动画,不写开始动画效果也可,只是切换页面时将不在有切换动画。
- switch (button.tag) {
- case 0:
- [navigator openURLAction:[[TTURLAction actionWithURLPath:@"tt://InfoView/0"] applyAnimated:YES]];
- break;
- case 1:
- [navigator openURLAction:[[TTURLAction actionWithURLPath:@"tt://InfoView/1"] applyAnimated:YES]];
- break;
- case 2:
- [navigator openURLAction:[[TTURLAction actionWithURLPath:@"tt://InfoView/2"] applyAnimated:YES] ];
- break;
- case 3:
- [navigator openURLAction:[[TTURLAction actionWithURLPath:@"tt://InfoView/3"] applyAnimated:YES]];
- break;
- default:
- break;
- }
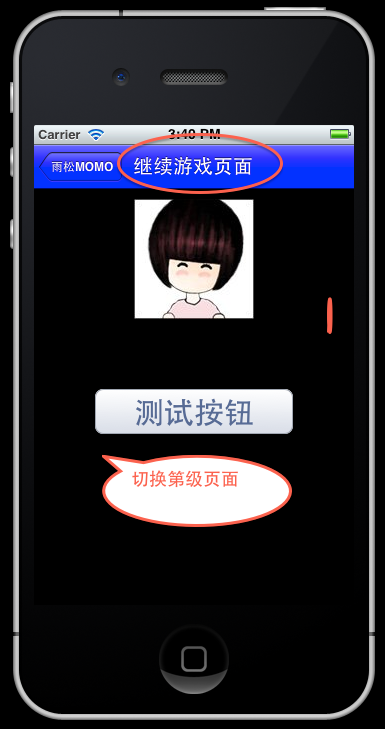
如下图所示,在StartViewController类中点击按钮“开始游戏”、“机修游戏”、“关于游戏”、“退出游戏”将分别进入页面:@“tt://InfoView/0”
@“tt://InfoView/1”
@“tt://InfoView/2” @"tt://InfoView/3",它们对应的视图控制器为"InfoViewController"。

根据它们的关系可得:InfoViewController为StartViewController的子页面。
InfoViewController.h文件:
- #import <Three20/Three20.h>
- @interface InfoViewController : TTViewController
- {
- //页面的ID
- int pageID;
- }
- @end
InfoViewController.m文件:
- #import "InfoViewController.h"
- @implementation InfoViewController
- //注释1
- - (id)initInfo:(int)ID {
- if (self = [super init]) {
- pageID = ID;
- }
- return self;
- }
- - (void)viewDidLoad
- {
- [super viewDidLoad];
- //根据上级页面点击的按钮而显示标题
- switch (pageID) {
- case 0:
- self.title = @"开始游戏页面";
- break;
- case 1:
- self.title = @"继续游戏页面";
- break;
- case 2:
- self.title = @"关于游戏页面";
- break;
- case 3:
- self.title = @"退出游戏页面";
- break;
- default:
- break;
- }
- self.view.backgroundColor = [UIColor blackColor];
- //创建图片视图
- TTImageView *imageview = [[[TTImageView alloc] initWithFrame:
- CGRectMake(100, 10, 120, 120)]autorelease];
- imageview.defaultImage = TTIMAGE(@"bundle://1.jpg");
- [self.view addSubview:imageview];
- //添加按钮
- TTButton *button = [TTButton buttonWithStyle:@"embossedButton:" title:@"测试按钮"];
- button.font = [UIFont boldSystemFontOfSize:30];
- button.frame = CGRectMake(60, 200, 200, 50);
- [button addTarget:self action:@selector(ButtonPressed) forControlEvents:UIControlEventTouchUpInside];
- [self.view addSubview: button];
- }
- -(void)ButtonPressed
- {
- //按钮点击后开启ThiredView页面
- TTNavigator* navigator = [TTNavigator navigator];
- [navigator openURLAction:[[TTURLAction actionWithURLPath:@"tt://ThiredView"] applyAnimated:YES]];
- }
- @end
注释1:还记得在StartViewController类中点击按钮后,打开URL:@"tt://InfoView/0"类似的页面吗?大家在回想一下在AppDelegate类中声明所有页面的方法中。
[map from:@"tt://InfoView/(initInfo:)" toViewController:[InfoViewController class]];
如 果通过@"tt://InfoView/0"进入InfoViewController类,在-(id)initInfo:(int)ID方法中,ID的 值就是0,如果@“tt://InfoView/1”进入InfoViewController类,那么对应ID的值就是1。以此类推,通过这样的方法就 能在不同页面之间传递数值。
本 例在进入InfoViewController页面中记录上一级界面中点击按钮的ID,然后在ViewDidLoad方法中去编辑当前标题栏中显示的标题 内容,实现通过参数来区分显示的页面信息。然后在当前页面中添加一个按钮,点击该按钮后在此将页面切换至第三级页面中。
 q
q
点击“测试按钮后”程序将进入第三级页面,进入@"tt://ThiredView"对应的ThiredViewController中。
ThiredViewController.h文件
- #import <Three20/Three20.h>
- @interface ThiredViewController : TTViewController
- @end
ThiredViewController.m文件。
- #import "ThiredViewController.h"
- @implementation ThiredViewController
- - (void)viewDidLoad
- {
- [super viewDidLoad];
- self.view.backgroundColor = [UIColor blackColor];
- //创建图片视图
- TTImageView *imageview = [[[TTImageView alloc] initWithFrame:
- CGRectMake(100, 10, 120, 120)] autorelease];
- imageview.defaultImage = TTIMAGE(@"bundle://2.jpg");
- [self.view addSubview:imageview];
- TTButton *button0 = [TTButton buttonWithStyle:@"embossedButton:" title:@"返回主界面"];
- button0.font = [UIFont boldSystemFontOfSize:30];
- button0.frame = CGRectMake(60, 200, 200, 50);
- [button0 addTarget:self action:@selector(ReturnStartView) forControlEvents:UIControlEventTouchUpInside];
- [self.view addSubview: button0];
- TTButton *button1 = [TTButton buttonWithStyle:@"embossedButton:" title:@"打开顶窗口"];
- button1.font = [UIFont boldSystemFontOfSize:30];
- button1.frame = CGRectMake(60, 250, 200, 50);
- [button1 addTarget:self action:@selector(OpenTopView) forControlEvents:UIControlEventTouchUpInside];
- [self.view addSubview: button1];
- }
- -(void)dealloc
- {
- [super dealloc];
- [[TTNavigator navigator] setDelegate:nil];
- }
- -(void)ReturnStartView
- {
- //注释1
- TTNavigator* navigator = [TTNavigator navigator];
- [navigator openURLAction:[[TTURLAction actionWithURLPath:@"tt://StartView" ] applyAnimated:YES]];
- }
- -(void)OpenTopView
- {
- //注释2
- TTNavigator* navigator = [TTNavigator navigator];
- [navigator openURLAction:[[TTURLAction actionWithURLPath:@"tt://TopView"] applyAnimated:YES]];
- }
- @end
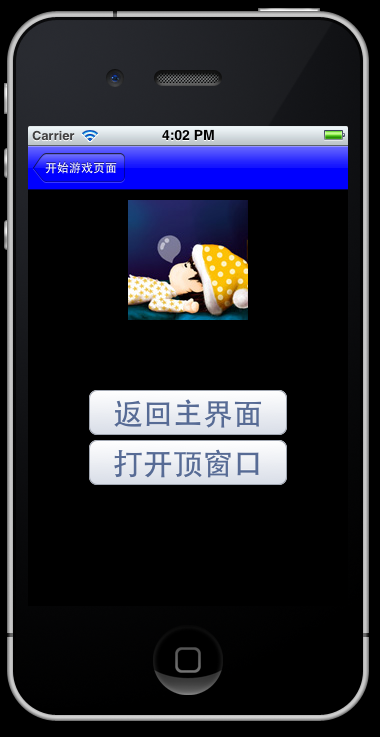
注
释1:在屏幕中点击“返回主界面”按钮后,将切换程序页面进入@"tt://StartView"
也就是回到主页面。如下图所示,界面正常的回到了主页面。到这里大家可能会有疑惑。为什么界面的左上角没有返回的按钮。原因简单,回到
AppDelegate类中,在入口方法中我们在创建主页面中使用的方法是:
[map from:@"tt://StartView" toSharedViewController:[StartViewController class]];
"toSharedViewController"它表示共享创建控制器,所以页面再次切换至StartViewController类,它不会重新加载页面,所以左上角不会有返回按钮。
带着上面这个疑问,请大家将AppDelegate.m中的方法修改一下。
修改前: [map from:@"tt://StartView" toSharedViewController:[StartViewController class]];
修改后:[map from:@"tt://StartView" toViewController:[StartViewController class]];
如下图所示,返回按钮出现在屏幕当中,显然这不是一个好办法,因为使用toViewController表示页面将会再次加载一次,所以当前的主菜单并不是最开始创建的主菜单,而成为了ThiredViewController的子窗口。

请大家再次回到ThiredViewController当中。
注 释2:在界面中点击“打开顶层窗口”按钮,程序页面将切换至@"tt://TopView",也就是打开TopViewController这个类。为什 么说它是顶层窗口?原因是它不同于之前的窗口,之前的窗口左上角都会有返回按钮,点击返回后可回到上一级窗口,而它仅仅是覆盖了上一级窗口,所以它没有左 上角的返回按钮。然而这一些的设置都在AppDelegate当中:
[map from:@"tt://TopView" toModalViewController:[TopViewController class]];
toModalViewController方法表示当前界面为一个覆盖类型的页面,打开该页面后将覆盖原有页面。
TopViewController.h文件
- #import <Three20/Three20.h>
- @interface TopViewController : TTViewController
- @end
TopViewController.m文件
- #import "TopViewController.h"
- @implementation TopViewController
- - (void)viewDidLoad
- {
- [super viewDidLoad];
- self.title=@"顶窗口页面";
- self.view.backgroundColor = [UIColor blackColor];
- //创建图片视图
- TTImageView *imageview = [[[TTImageView alloc] initWithFrame:
- CGRectMake(100, 10, 120, 120)] autorelease];
- imageview.defaultImage = TTIMAGE(@"bundle://3.jpg");
- [self.view addSubview:imageview];
- TTButton *button0 = [TTButton buttonWithStyle:@"embossedButton:" title:@"关闭页面"];
- button0.font = [UIFont boldSystemFontOfSize:30];
- button0.frame = CGRectMake(60, 200, 200, 50);
- [button0 addTarget:self action:@selector(dismiss) forControlEvents:UIControlEventTouchUpInside];
- [self.view addSubview: button0];
- }
- - (void)dismiss
- {
- //关闭窗口,包括关闭动画
- [self dismissModalViewControllerAnimated:YES];
- }
- @end
如下图所示,顶层窗口页面已经打开,它的打开动画也不同于其它窗口,打开时动画方向向上播放。左上角不会出现返回的按钮。在屏幕中点击“关闭页面按钮”将关闭最上层界面,关闭时动画方向向下播放。

仔 细想想通过这篇文章我们学习了Three20中打开界面的三种方式,这也是最常用的方式。我相信仔细阅读过这篇博文的朋友应该会爱上Three20了吧。 做IOS软件的话,就用它吧。通过这个例子大家应该已经能区分toSharedViewController 与toViewController 以及toModalViewController切换界面之间的区别的吧,一口气写了这么多,累得够呛!!哇咔咔~

 浙公网安备 33010602011771号