实用的支付宝支付案例
一、描述
支付宝支付主要分为三个步骤:
- 创建应用
- 生成私钥及公钥
- 创建沙箱环境
- 代码实现
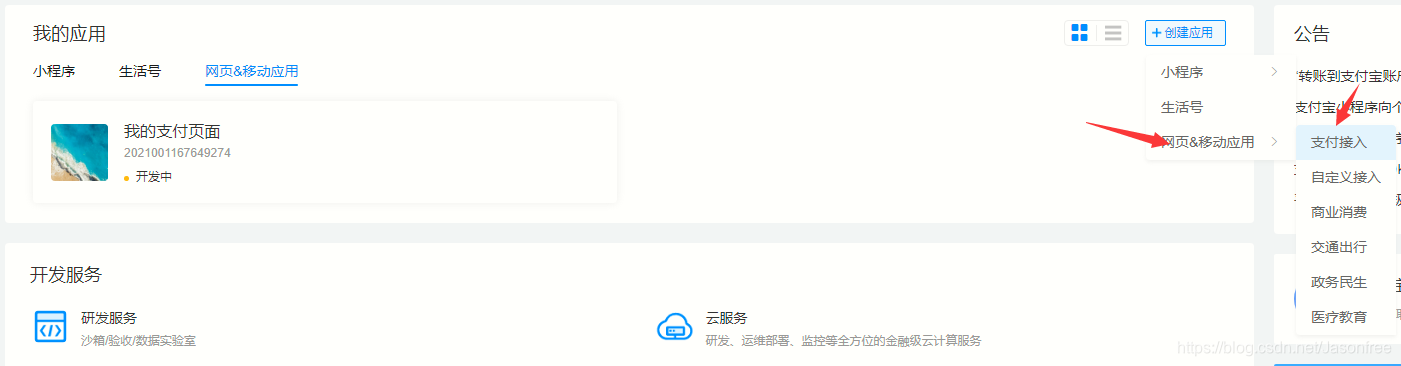
二、创建应用
-
在支付宝开发者中心注册支付宝账号(有支付宝账号直接登录)
-
进入管理中心
-
进入网页&移动应用

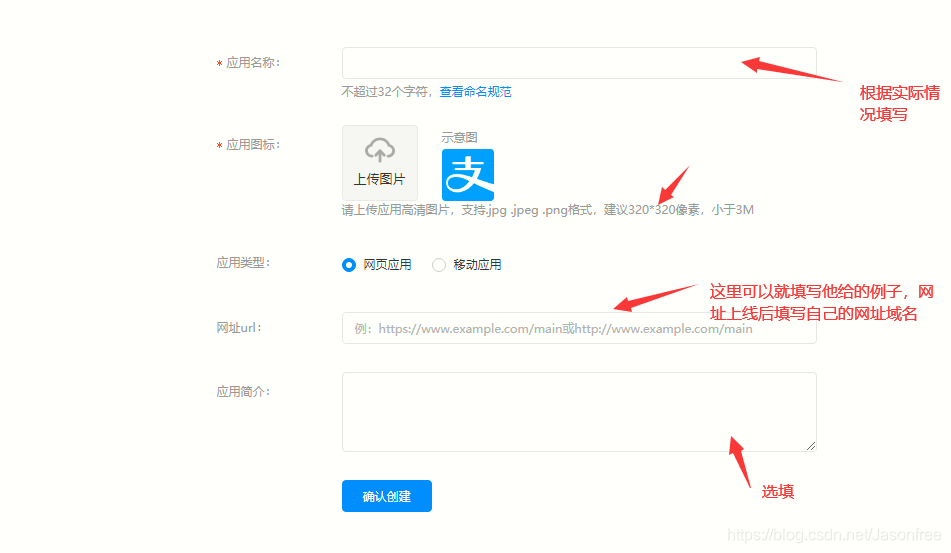
4. 创建应用
- 填入信息
三、生成私钥及公钥
- 返回首页
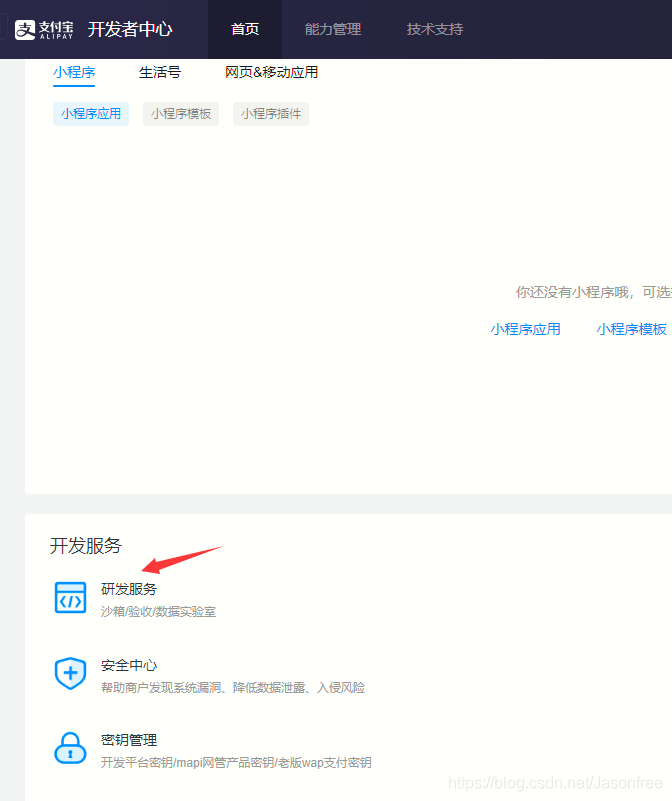
- 生成公密钥
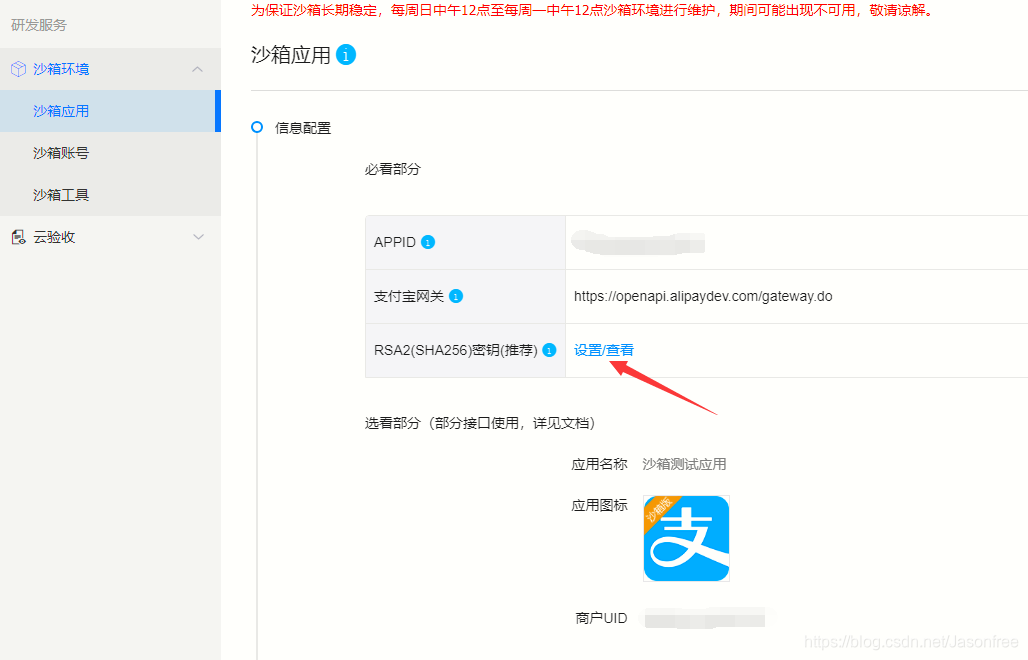
3. 下载官网提供给你的软件,用于生成公密钥
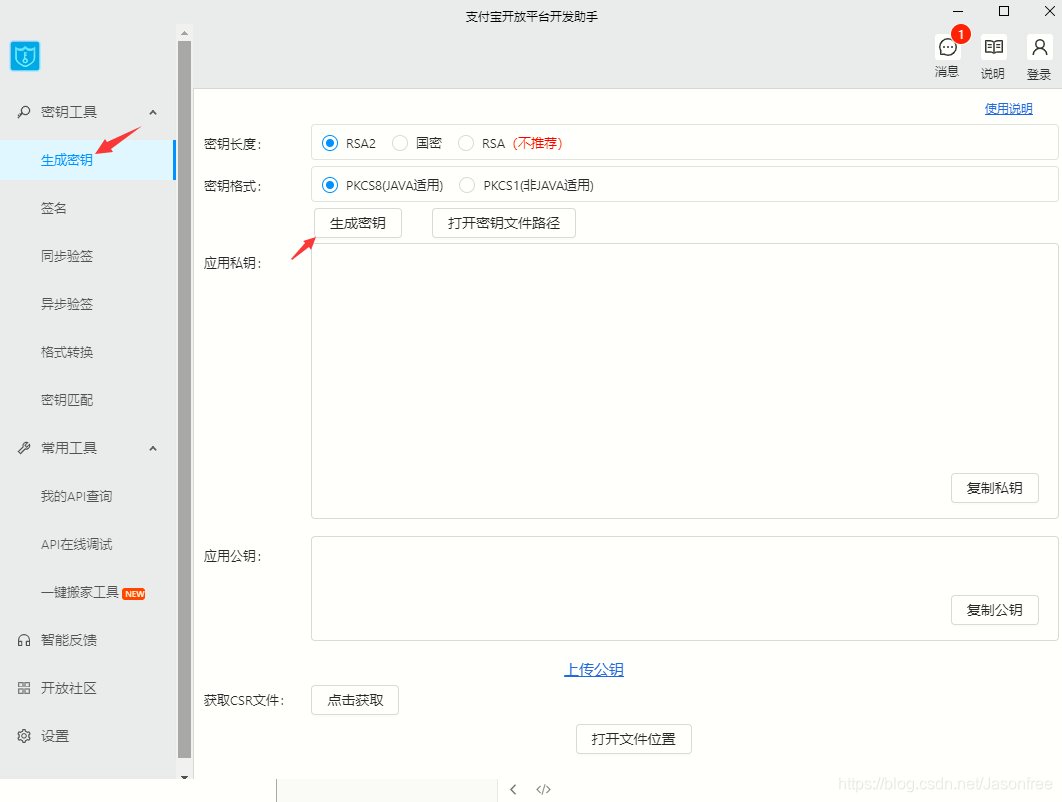
注意:保存生成的公密钥,其实记住公密钥的文件路径就行
- 沙箱账号(设置好前面的会自动生成,用于后面的支付宝账号登录用)
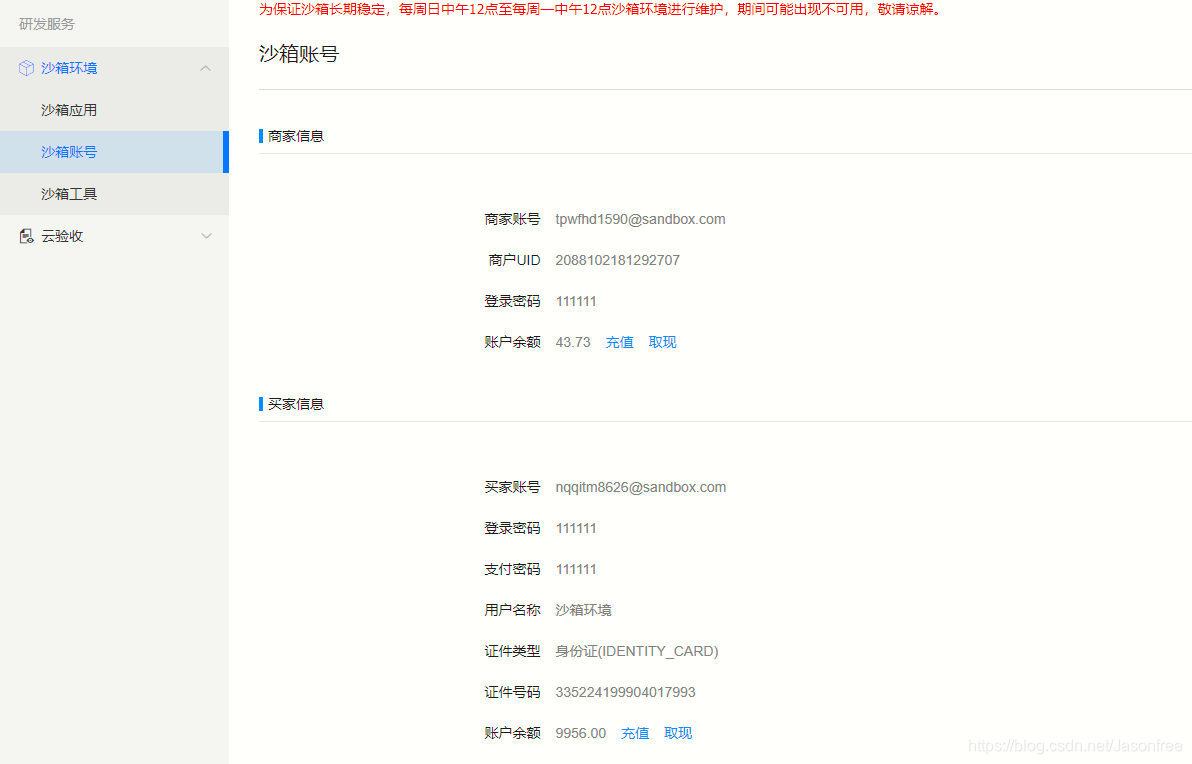
提示:沙箱可以简单的理解为测试环境,并非生产环境
四、代码实现
-
创建springboot基础项目
-
pom.xml
<?xml version="1.0" encoding="UTF-8"?> <project xmlns="http://maven.apache.org/POM/4.0.0" xmlns:xsi="http://www.w3.org/2001/XMLSchema-instance" xsi:schemaLocation="http://maven.apache.org/POM/4.0.0 https://maven.apache.org/xsd/maven-4.0.0.xsd"> <modelVersion>4.0.0</modelVersion> <parent> <groupId>org.springframework.boot</groupId> <artifactId>spring-boot-starter-parent</artifactId> <version>2.3.0.RELEASE</version> <relativePath/> <!-- lookup parent from repository --> </parent> <groupId>com.example</groupId> <artifactId>alipaydemo</artifactId> <version>0.0.1-SNAPSHOT</version> <name>alipaydemo</name> <description>Demo project for Spring Boot</description> <properties> <java.version>1.8</java.version> </properties> <dependencies> <dependency> <groupId>org.springframework.boot</groupId> <artifactId>spring-boot-starter-web</artifactId> </dependency> <!--支付宝sdk--> <dependency> <groupId>com.alipay.sdk</groupId> <artifactId>alipay-sdk-java</artifactId> <version>3.0.0</version> </dependency> <dependency> <groupId>org.springframework.boot</groupId> <artifactId>spring-boot-starter-test</artifactId> <scope>test</scope> <exclusions> <exclusion> <groupId>org.junit.vintage</groupId> <artifactId>junit-vintage-engine</artifactId> </exclusion> </exclusions> </dependency> <dependency> <groupId>junit</groupId> <artifactId>junit</artifactId> <scope>test</scope> </dependency> </dependencies> <build> <plugins> <plugin> <groupId>org.apache.maven.plugins</groupId> <artifactId>maven-compiler-plugin</artifactId> <configuration> <source>1.8</source> <target>1.8</target> <encoding>UTF-8</encoding> </configuration> </plugin> <plugin> <groupId>org.springframework.boot</groupId> <artifactId>spring-boot-maven-plugin</artifactId> </plugin> </plugins> </build> </project> -
aplication.yml配置文件
spring: mvc: view: prefix: / suffix: .html -
创建配置类AppConfig,下面的appid,私钥及公钥填写你自己的。
package com.example.config; import java.io.FileWriter; import java.io.IOException; /** *基础配置类,设置帐户有关信息及返回路径 * * @author Mr.Ma */ public class AlipayConfig { /** * 应用ID,您的APPID,收款账号既是您的APPID对应支付宝账号 */ public static String app_id = ""; /** * 商户私钥,您的PKCS8格式RSA2私钥 */ public static String merchant_private_key = ""; /** * 支付宝公钥,查看地址:https://openhome.alipay.com/platform/keyManage.htm 对应APPID下的支付宝公钥。 */ public static String alipay_public_key = ""; /** * 服务器异步通知页面路径 需http://格式的完整路径,不能加?id=123这类自定义参数,必须外网可以正常访问 */ public static String notify_url = "http://localhost:8080/alipay.trade.page.pay-JAVA-UTF-8/notify_url.jsp"; /** * 页面跳转同步通知页面路径 需http://格式的完整路径,不能加?id=123这类自定义参数,必须外网可以正常访问,支付成功后需要跳转的页面 */ public static String return_url = "http://localhost:8080/home"; /** * 签名方式 */ public static String sign_type = "RSA2"; /** * 字符编码格式 */ public static String charset = "utf-8"; /** * 支付宝网关 */ public static String gatewayUrl = "https://openapi.alipaydev.com/gateway.do"; /** * 支付宝网关 */ public static String log_path = "C:\\"; /** * 写日志,方便测试(看网站需求,也可以改成把记录存入数据库) * @param sWord 要写入日志里的文本内容 */ public static void logResult(String sWord) { FileWriter writer = null; try { writer = new FileWriter(log_path + "alipay_log_" + System.currentTimeMillis()+".txt"); writer.write(sWord); } catch (Exception e) { e.printStackTrace(); } finally { if (writer != null) { try { writer.close(); } catch (IOException e) { e.printStackTrace(); } } } } } -
创建关于订单的实体类
package com.example.entity; import org.springframework.stereotype.Component; /** * 目的是封装前端的必须的请求参数 * 官方API(https://opendocs.alipay.com/apis/api_1/alipay.trade.app.pay) * @author Mr.Ma */ @Component public class AliPay { //销售产品码 private String product_code; //订单编号 private String out_trade_no; //订单名称 private String subject; //订单金额 private String total_amount; //订单描述 private String body; public AliPay() { } public String getProduct_code() { return product_code; } public AliPay(String product_code, String out_trade_no, String subject, String total_amount, String body) { this.product_code = product_code; this.out_trade_no = out_trade_no; this.subject = subject; this.total_amount = total_amount; this.body = body; } public void setProduct_code(String product_code) { this.product_code = product_code; } public String getOut_trade_no() { return out_trade_no; } public void setOut_trade_no(String out_trade_no) { this.out_trade_no = out_trade_no; } public String getSubject() { return subject; } public void setSubject(String subject) { this.subject = subject; } public String getTotal_amount() { return total_amount; } public void setTotal_amount(String total_amount) { this.total_amount = total_amount; } public String getBody() { return body; } public void setBody(String body) { this.body = body; } @Override public String toString() { return "AliPay{" + "product_code='" + product_code + '\'' + ", out_trade_no='" + out_trade_no + '\'' + ", subject='" + subject + '\'' + ", total_amount='" + total_amount + '\'' + ", body='" + body + '\'' + '}'; } }-
编写前端展示页面index.html
<!DOCTYPE html>
<html lang="en">
<head>
    <meta charset="UTF-8">
    <link rel="stylesheet" href="https://cdn.jsdelivr.net/npm/bootstrap@4.5.0/dist/css/bootstrap.min.css" integrity="sha384-9aIt2nRpC12Uk9gS9baDl411NQApFmC26EwAOH8WgZl5MYYxFfc+NcPb1dKGj7Sk" crossorigin="anonymous">
    <title>下单</title>
</head>
<body>
<style type="text/css">
    input{
        max-width: 400px;
    }
    div{
        margin-left: 800px;

    }

</style>
<div>
    <!--支付所需的参数,前面我们已经封装成了实体类-->
    <form action="/pay" method="post">
        <input  type="hidden" name="product_code" value="FAST_INSTANT_TRADE_PAY">
        订单号:<input class="form-control"  type="text" name="out_trade_no" required><br/>
        订单名称:<input class="form-control" type="text" name="subject" required><br/>
        付款金额:<input class="form-control" type="text" name="total_amount" required><br/>
        描述:<input class="form-control" type="text" name="body"><br/>
        <input  class="btn btn-primary" type="submit" value="下单">
        <input  class="btn btn-primary" type="reset" value="重置">
    </form>
</div>
</body>
</html>
-
-
编写home.html(支付成功后需要跳转的页面)
<!DOCTYPE html>
<html lang="en">
<head>
    <meta charset="UTF-8">
    <title>首页</title>
</head>
<body>
<h1>商品列表</h1>
<h2>裤子</h2>
<h2>鞋子</h3>
<h2>袜子</h3>
<h2>...</h3>
</body>
</html>
注:把页面放在static目录下,由于我这里没有导入模板引擎所以放在templates下面需要在WebMvcConfigurer里配置
-
编写Controller
package com.example.controller;


import com.alipay.api.AlipayApiException;
import com.alipay.api.AlipayClient;
import com.alipay.api.DefaultAlipayClient;
import com.alipay.api.request.AlipayTradePagePayRequest;
import com.example.config.AlipayConfig;
import com.example.entity.AliPay;
import com.fasterxml.jackson.databind.ObjectMapper;
import org.springframework.stereotype.Controller;
import org.springframework.web.bind.annotation.RequestMapping;
import javax.servlet.http.HttpServletRequest;
import javax.servlet.http.HttpServletResponse;
import java.io.IOException;


/**
 * @author Mr.Ma
 */

@Controller
public class AlipayController {


    @RequestMapping("/")
    public String index() {

        return "index";
    }


    @RequestMapping("/home")
    public String home(){
        return "home";
    }


    @RequestMapping("/pay")
    public void aliPay(AliPay aliPay, HttpServletRequest request, HttpServletResponse response) throws IOException {

        //初始化参数对应配置类AlipayConfig属性
        AlipayClient alipayClient = new DefaultAlipayClient(AlipayConfig.gatewayUrl, AlipayConfig.app_id, AlipayConfig.merchant_private_key, "json", AlipayConfig.charset, AlipayConfig.alipay_public_key, AlipayConfig.sign_type);
        //创建API对应的request
        AlipayTradePagePayRequest alipayRequest = new AlipayTradePagePayRequest();
        alipayRequest.setReturnUrl(AlipayConfig.return_url);
        //在公共参数中设置回跳和通知地址
        alipayRequest.setNotifyUrl(AlipayConfig.notify_url);

        //将对象转化为json格式
        ObjectMapper objectMapper = new ObjectMapper();
        String content = objectMapper.writeValueAsString(aliPay);
        //请求参数集合
        alipayRequest.setBizContent(content);


        //填充业务参数
        String form = "";
        try {
            //调用SDK生成表单
            form = alipayClient.pageExecute(alipayRequest).getBody();
        } catch (AlipayApiException e) {
            e.printStackTrace();
        }
        response.setContentType("text/html;charset=" + AlipayConfig.charset);

        //直接将完整的表单html输出到页面
        response.getWriter().write(form);
        response.getWriter().flush();
        response.getWriter().close();


    }
}
以上部分代码来自官网:https://opendocs.alipay.com/open/270/105899
- 启动项目:http://localhost:8080/ ,返回界面如下:
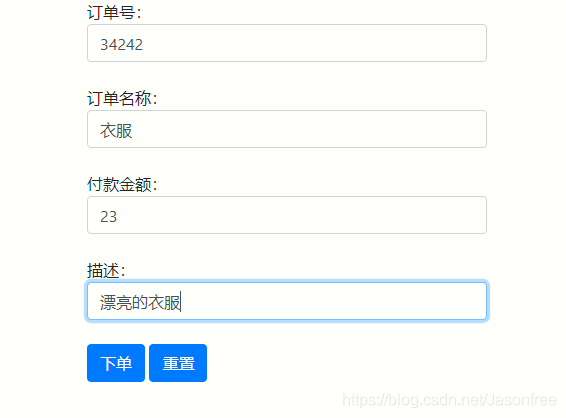
-
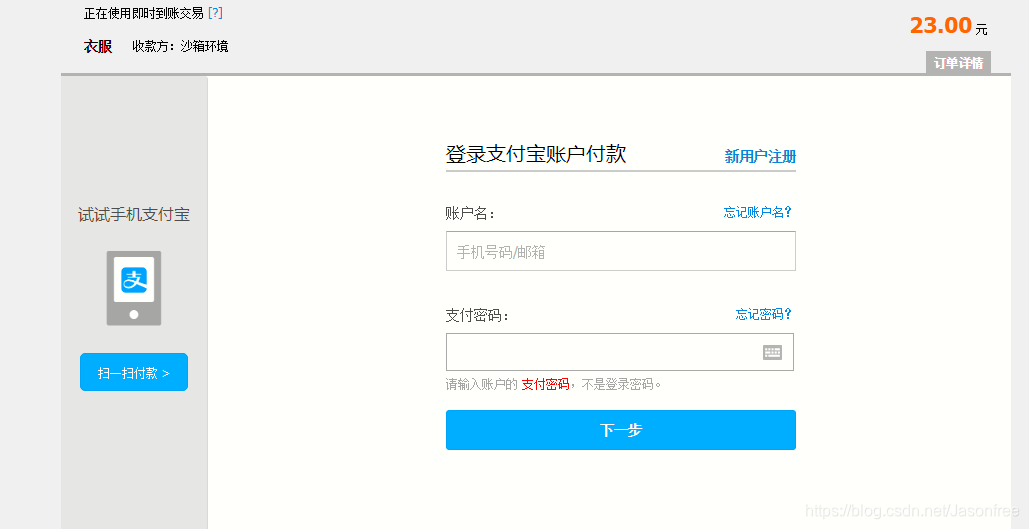
下单后跳转页面

这里是没法用扫描的,因为我们是在沙箱环境,正式上线需要审核
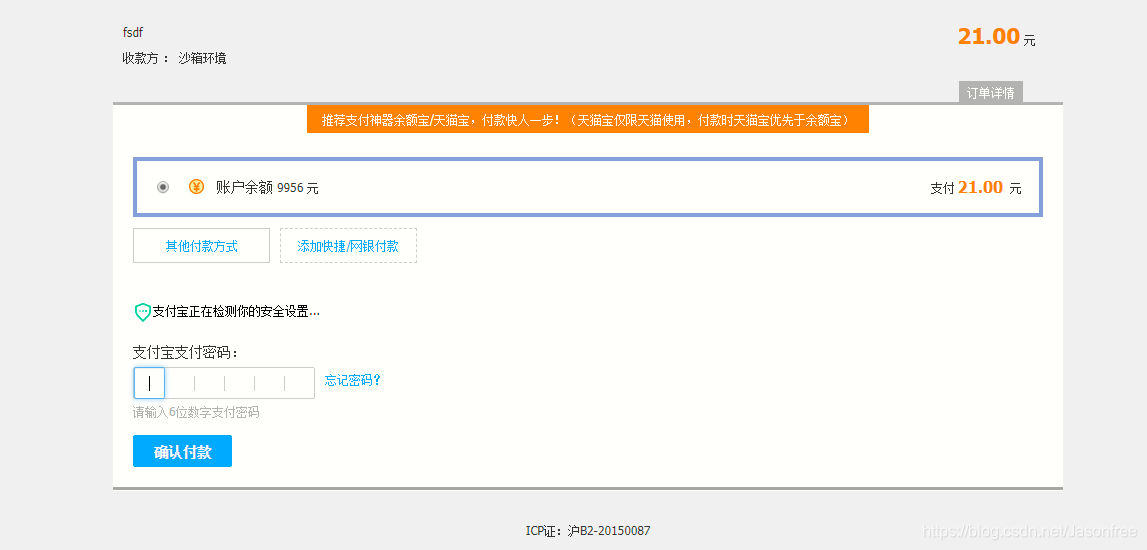
- 登录账户付款(沙箱应用里提供的买家账号和密码登录)
-
登录后跳转页面
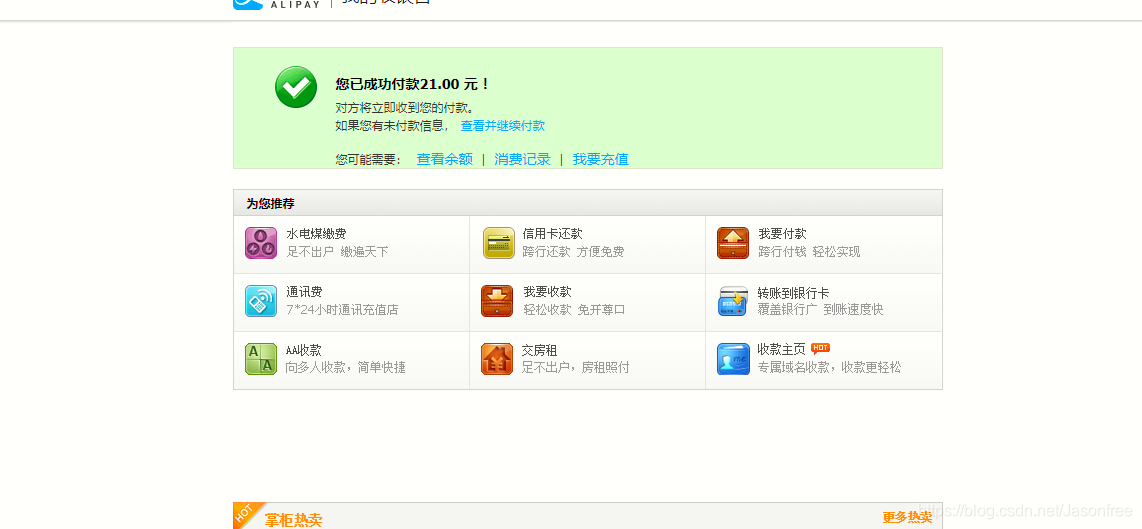
- 支付后短暂跳转页面,几秒后自动跳转到首页(home.html)
--------------------------------------------------------完结-------------------------------------------
- 支付后短暂跳转页面,几秒后自动跳转到首页(home.html)
最后也可以尝试官方的一站式开发套件,具体操作步骤请移步:https://opendocs.alipay.com/open/11111/canpro
本文来自博客园,作者:猿大佛,转载请注明原文链接:https://www.cnblogs.com/hushaoz/p/15484118.html

 浙公网安备 33010602011771号