

接触前端也很久了,今天才发现,要做好一个轮播,其实有很多东西需要考虑进去,否则做出来的轮播效果并不好,下面我就来做一个轮播,是依赖jquery来写的
1.要做轮播,首先需要的是HTML的内容,css的机构样式,以下为html代码:


 1 <!DOCTYPE html>
 2 <html>
 3
 4 <head>
 5     <meta charset="utf-8" />
 6     <link rel="stylesheet" href="./ft-carousel.css" />
 7     <script src="./jquery-3.3.1.min.js"></script>
 8     <script src="./ft-carousel.min.js"></script>
 9     <style>
10     </style>
11 </head>
12
13 <body>
14
15     <div class="example">
16         <div class="ft-carousel" id="carousel_1">
17             <ul class="carousel-inner">
18                 <li class="carousel-item">
19                     <img src="img/a1.jpg" />
20                 </li>
21                 <li class="carousel-item">
22                     <img src="img/a2.jpg" />
23                 </li>
24                 <li class="carousel-item">
25                     <img src="img/a3.jpg" />
26                 </li>
27                 <li class="carousel-item">
28                     <img src="img/a4.jpg" />
29                 </li>
30
31             </ul>
32         </div>
33     </div>
34     <script type="text/javascript">
35         $("#carousel_1").FtCarousel();
36     </script>
37
38 </body>
39
40 </html>
2.css 代码如下:
  1 ul,
  2 ol,
  3 li,
  4 div {
  5     margin: 0;
  6     padding: 0;
  7 }
  8
  9 * {
 10     margin: 0;
 11     padding: 0;
 12 }
 13
 14 ul,
 15 ol {
 16     list-style: none;
 17 }
 18
 19 .ft-carousel {
 20     position: relative;
 21     width: 100%;
 22     height: 700px;
 23     overflow: hidden;
 24 }
 25
 26 .ft-carousel .carousel-inner {
 27     position: absolute;
 28     left: 0;
 29     top: 0;
 30     height: 100%;
 31 }
 32
 33 .ft-carousel .carousel-inner .carousel-item {
 34     float: left;
 35     height: 100%;
 36 }
 37
 38 .ft-carousel .carousel-item img {
 39     width: 100%;
 40 }
 41
 42 .ft-carousel .carousel-indicators {
 43     position: absolute;
 44     left: 0;
 45     bottom: 10px;
 46     width: 100%;
 47     text-align: center;
 48     font-size: 0;
 49 }
 50
 51 .ft-carousel .carousel-indicators span {
 52     display: inline-block;
 53     width: 12px;
 54     height: 12px;
 55     background-color: #fff;
 56     margin: 0 4px;
 57     border-radius: 50%;
 58     cursor: pointer;
 59 }
 60
 61 .ft-carousel .carousel-indicators span.active {
 62     background-color: #de3a3a;
 63 }
 64
 65 .ft-carousel .carousel-btn {
 66     position: absolute;
 67     top: 50%;
 68     width: 50px;
 69     height: 45px;
 70     margin-top: -25px;
 71     cursor: pointer;
 72 }
 73
 74 .ft-carousel .carousel-prev-btn {
 75     left: 0;
 76     background: url(./img/prev.png) no-repeat;
 77 }
 78
 79 .ft-carousel .carousel-next-btn {
 80     right: 0;
 81     background: url(./img/next.png) no-repeat;
 82 }
 83
 84 body {
 85     margin: 0;
 86     font-family: "微软雅黑";
 87     background-color: #1F1F1F;
 88 }
 89
 90 .example {
 91     width: 100%;
 92     font-size: 40px;
 93     text-align: center;
 94     margin: 20px auto;
 95     background-color: #464576;
 96 }
 97
 98 .carousel-item {
 99     line-height: 336px;
100     color: #fff;
101     font-family: Arial Black
102 }
3.轮播的关键在于js;
因为是依赖jquery的,所以先把jquery 传进去,使用一个立即执行函数(注意,加+,减-,波浪线~,感叹号!开始,或者使用小括号括起来,都是立即执行函数的写法):主要有三个步骤,一是创建构造函数i(t,i), 二是改写构造函数的原型对象,三是在jquery上扩展调用函数的方法,如下:
 1 ~ function (t) {
 2     // 创建构造函数
 3     function i(t, i) {
 4         this.init(t, i);
 5     };
 6     // 改写构造函数的原型对象
 7     i.prototype = {
 8
 9     };
10     // 在jquery 上扩展FtCarousel函数
11     t.fn.FtCarousel = function (n) {
12         return this.each(function () {
13             new i(t(this), n);
14         });
15     };
16 }(jQuery);
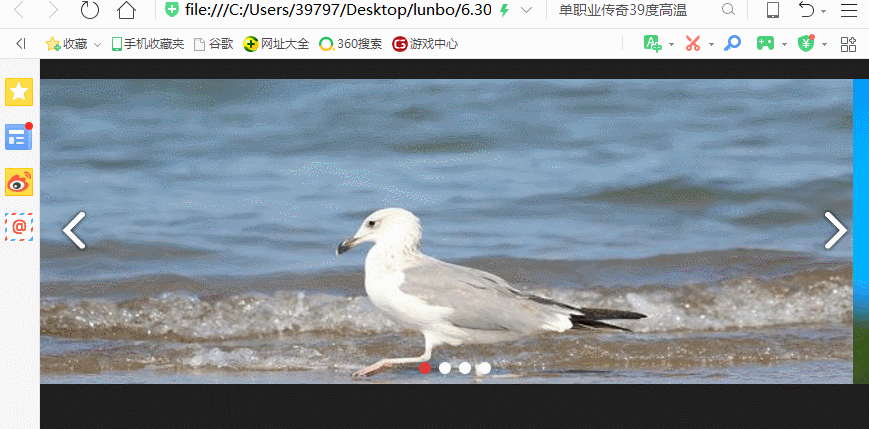
4.我们要做的是一个无缝轮播,但是在HTML中,我们只有4 张图片,二制作无缝轮播需要使用 (要轮播的图片数量 + 2 )张图片,所以在做轮播之前,我们需要先加上另外的两张图片,复制第一张图片放到最后一张图片的位置,复制最后一张图片放到第一张图片的位置,这是一个;然后,在轮播中需要控制轮播上一页下一页的按钮,这在html 中也没有写,所以这也需要加上;在控制轮播的时候,我需要直接跳到某一张图片,这也需要一个轮播序号的按钮,在HTML 中也没有,所以,这个也需要加上;这些是硬件方面的要求
5.完成上一点,已经有6 张图片在网页上了,那么就开始做轮播吧;要做轮播,首先要设置起始照片,设置第二张图片开始,因为现在的第二张图是原来的第一张图片;然后设置定位问题,设置装图片的box 为绝对定位,这样才好进行移动,然后设置 box 上一层的div为相对定位;为了使box内的图片之间不留空隙,需要设置图片img 为浮动,即左浮动;
6.因为要达到移动的效果,box上一层的div 设置一个宽度,超出宽度部分禁止显示;然后设置图片box的宽度为显示div宽度的 6 倍,然后设置img图片的宽度与显示div的宽度相同,这样,box 左右移动,就形成了img图片左右移动的效果,当轮播从前到后移动到最后一个时,立即设置left 的值为 附 一个显示宽度的值,当轮播从后到前,移动到第一个时,立即设置left 值为轮播长度负的轮播长度减二个显示宽度,这样,轮播就会立即显示到第一张图片或者最后一张图片,给人的感觉就像是一直循环轮播移动一样,这就是无缝轮播的原理
7. 下面来完成第3个步骤中没有完成的部分:不构造函数的原型对象继续写完;原型对象上的函数,new 出来的对象是可以直接调用的;
  1 ~ function (t) {
  2     // 创建构造函数
  3     function i(t, i) {
  4         this.init(t, i);
  5     };
  6     // 改写构造函数的原型对象
  7     i.prototype = {
  8             //  函数初始化
  9             // 在这里括号中的i 为传入的需要进行轮播移动的对象
 10             init: function (i, n) {
 11                 // 把ele属性设置到调用函数上,设置ele的值为需要进行轮播的对象
 12                 this.ele = i,
 13                     // 添加一个opts 对象扩展到jquery 对象上,在这里t 为外部传入的jquery 对象,对象上有index /auto/time/indecators/button 等参数
 14                     this.opts = t.extend({}, {
 15                         index: 0,
 16                         auto: !0,
 17                         time: 3e3,
 18                         indicators: !0,
 19                         buttons: !0,
 20                         oresize: true
 21                     }, n),
 22                     // 在构造函数上添加index 属性,this.index 的属性值为 this.opts 对象上的index属性值,把opts 对象上的属性值赋值给this对象上的index 值
 23                     this.index = this.opts.index,
 24                     // 在执行初始化函数时,执行以下几个方法:render,eventBind,loop,resize
 25                     this.render(),
 26                     this.eventBind(),
 27                     this.opts.auto && this.loop(),
 28                     this.opts.oresize && this.resize()
 29             },
 30             render: function () {
 31                 this.renCas();
 32                 this.opts.indicators && this.renIns();
 33                 this.opts.buttons && this.renBtns();
 34             },
 35             renCas: function () {
 36                 var t = this.ele.find(".carousel-inner"),
 37                     i = t.find(".carousel-item"),
 38                     n = i.length,
 39                     e = i.eq(n - 1).clone(),
 40                     s = i.eq(0).clone(),
 41                     o = this.ele.width(), ///获取轮播框的宽度
 42                     startW = 1863,
 43                     startH = 700;
 44                 this.ele.height(parseInt(o * startH / startW)),
 45                     // this.index 表示获取当前显示的轮播图图片的索引值,
 46                     this.index = this.index < 1 || this.index > (n + 2 - 2) ? 1 : this.index,
 47                     t.width((n + 2) * o).prepend(e).append(s).css("left", (this.index) * -o),
 48                     t.find(".carousel-item").width(o);
 49             },
 50             renIns: function () {
 51                 for (var t = this.ele.find(".carousel-item").length - 2, i = '<div class="carousel-indicators">', n = 0; n < t; n++) i += '<span data-index="' + n + '"></span>';
 52                 i += "</div>",
 53                     this.ele.append(i).find(".carousel-indicators span").eq(this.index - 1).addClass("active")
 54             },
 55             renBtns: function () {
 56                 this.ele.append('<span class="carousel-btn carousel-prev-btn"></span><span class="carousel-btn carousel-next-btn"></span>')
 57             },
 58             // 在这里,要把 t 改为 index
 59             // 这里传入参数,传入1 未左右,传入-1 为右移,
 60             // 移动时,如此设置  tarLeft = -(this.index+t)*e;
 61             animate: function (t) {
 62                 if (this.ele.find(".carousel-inner").is(":animated")) return;
 63                 var i = this,
 64                     n = this.ele.find(".carousel-inner"),
 65                     e = this.ele.width(),
 66                     s = n.find(".carousel-item").length;
 67                 var tarLeft = -(this.index + t) * e + 'px';
 68                 n.stop(true, !0).animate({
 69                     left: tarLeft,
 70                 }, 1000, function () {
 71                     i.index = i.index + t,
 72                         i.index > (s - 2) && (i.index = 1) && n.css("left", -e * i.index + 'px'),
 73                         i.index < 1 && (i.index = s - 2) && n.css("left", -e * i.index + 'px'),
 74                         i.opts.buttons && i.showBtn();
 75                 });
 76             },
 77             showBtn: function () {
 78                 this.ele.find(".carousel-indicators span").removeClass("active").eq(this.index - 1).addClass("active")
 79             },
 80             loop: function () {
 81                 clearInterval(i.timer);
 82                 var t = this.ele.find(".carousel-next-btn");
 83                 this.timer = setInterval(function () {
 84                     t.trigger("click")
 85                 }, this.opts.time)
 86             },
 87             eventBind: function () {
 88                 var i = this,
 89                     n = this.ele.find(".carousel-prev-btn"),
 90                     e = this.ele.find(".carousel-next-btn"),
 91                     s = this.ele.find(".carousel-indicators"),
 92                     o = this.ele.width(),
 93                     a = this.opts.auto;
 94                 var that = this;
 95
 96                 e.on("click", function () {
 97                     i.animate(1)
 98                 }), n.on("click", function () {
 99                     i.animate(-1)
100                 }), s.on("click", "span", function () {
101                     var curindex = i.ele.find(".carousel-indicators span.active").attr("data-index");
102                     var tarindex = $(this).attr("data-index");
103                     var tarmove = tarindex - curindex;
104                     i.animate(tarmove);
105                 }), a && this.ele.hover(function () {
106                     clearInterval(i.timer)
107                 }, function () {
108                     i.loop()
109                 });
110             },
111             resize: function () {
112                 var i = this,
113                     startW = 1863,
114                     startH = 700;
115                 $(window).on('resize', function () {
116                     o = i.ele.width(),
117                         t = i.ele.find(".carousel-inner"),
118                         limg = t.find(".carousel-item"),
119                         s = t.find(".carousel-item").length;
120                     //设置宽
121                     t.width(o * s), limg.width(o);
122                     var Oheight = parseInt(o * startH / startW);
123                     i.ele.height(Oheight)
124                 });
125             },
126         },
127         // 在jquery 上扩展FtCarousel函数
128         t.fn.FtCarousel = function (n) {
129             return this.each(function () {
130                 new i(t(this), n);
131             });
132         };
133
134 }(jQuery);
以上,轮播图完成了,支持窗口自适应;
不过有一点瑕疵,就是在窗口自适应的时候,个人感觉不太连续,目前还不知道问题出在哪里,有知道的大神请留言提示一下,谢谢;

 浙公网安备 33010602011771号