

ubuntu18 安装 chirpstack
环境(以下操作均使用root)
Ubuntu 18.04.6 LTS (GNU/Linux 4.4.189 aarch64)
官网文档
https://www.chirpstack.io/network-server/install/config/
1.安装mqtt
方法1:在线安装
apt install mosquitto -y
配置文件 /etc/mosquitto/mosquitto.conf,使用默认配置即可
#设置开机自启动
systemctl enable mosquitto
方法2:离线安装
源码下载 https://mosquitto.org/download/
可参考 https://www.cnblogs.com/huangyuanni/p/15935062.html
2.安装postgresql
参考文档:
(官方)https://www.postgresql.org/download/linux/ubuntu/
https://linux.cn/article-11480-1.html
sh -c 'echo "deb http://apt.postgresql.org/pub/repos/apt $(lsb_release -cs)-pgdg main" > /etc/apt/sources.list.d/pgdg.list'
wget --quiet -O - https://www.postgresql.org/media/keys/ACCC4CF8.asc | sudo apt-key add -
sudo apt-get update
sudo apt-get -y install postgresql postgresql-contrib
#设置自启动
systemctl enable postgresql
#设置postgresql密码(参考https://www.cnblogs.com/shhnwangjian/p/8392050.html,)
psql -U postgres
postgres=# ALTER USER postgres WITH PASSWORD '123456'
postgres=# \q
#修改配置文件
修改数据库配置文件 /etc/postgresql/14/main/postgresql.conf,修改端口
#如需开启远程 ,则设置listen_addresses = '*')
listen_addresses = 'localhost'
                                        # what IP address(es) to listen on;
                                        # comma-separated list of addresses;
                                        # defaults to 'localhost'; use '*' for all
                                        # (change requires restart)
port = 5432                             # (change requires restart)
修改数据库客户端授权配置文件 /etc/postgresql/14/main/pg_hba.conf,设置连接校验方式
# DO NOT DISABLE!
# If you change this first entry you will need to make sure that the
# database superuser can access the database using some other method.
# Noninteractive access to all databases is required during automatic
# maintenance (custom daily cronjobs, replication, and similar tasks).
#
# Database administrative login by Unix domain socket
local   all             postgres                                md5

# TYPE  DATABASE        USER            ADDRESS                 METHOD

# "local" is for Unix domain socket connections only
local   all             all                                     md5
# IPv4 local connections:
host    all             all             127.0.0.1/32            trust
####如需开启远程连接,则在此处加入一行
host    all             all             0.0.0.0/0                md5
# IPv6 local connections:
重启postgresql
#创建用户chirpstack_as、chirpstack_ns
root@ubuntu:/home/develop# sudo -u postgres psql(或者psql -U postgres)
用户 postgres 的口令:
psql (14.2 (Ubuntu 14.2-1.pgdg18.04+1))
输入 "help" 来获取帮助信息.
postgres=# create role chirpstack_as with login password '123456';
CREATE ROLE
postgres=# create role chirpstack_ns with login password '123456';
CREATE ROLE
postgres=# create database chirpstack_as with owner chirpstack_as;
CREATE DATABASE
postgres=# create database chirpstack_ns with owner chirpstack_ns;
CREATE DATABASE
postgres=# \c chirpstack_as
您现在已经连接到数据库 "chirpstack_as",用户 "postgres".
chirpstack_as=# create extension pg_trgm;
CREATE EXTENSION
chirpstack_as=# create extension hstore;
CREATE EXTENSION
chirpstack_as=#
验证设置
psql -h localhost -U chirpstack_ns -W chirpstack_ns 或者psql -U chirpstack_ns -W chirpstack_ns
3.安装redis
详见 https://www.cnblogs.com/huangyuanni/p/15875737.html
此处设置了redis密码为123456
4.安装go环境
#离线安装go环境( 参考 https://www.jianshu.com/p/56ad9457012a)
cd /usr/local
wget https://golang.google.cn/dl/go1.17.7.linux-arm64.tar.gz
解压并重命名为 /usr/local/go
#设置环境变量
root用户 /root/.bashrc
全局 /etc/profile(最后一行加入),保存后 source /etc/profile
export GOROOT=/usr/local/go
export PATH=$PATH:$GOROOT/bin
#验证go环境
go version
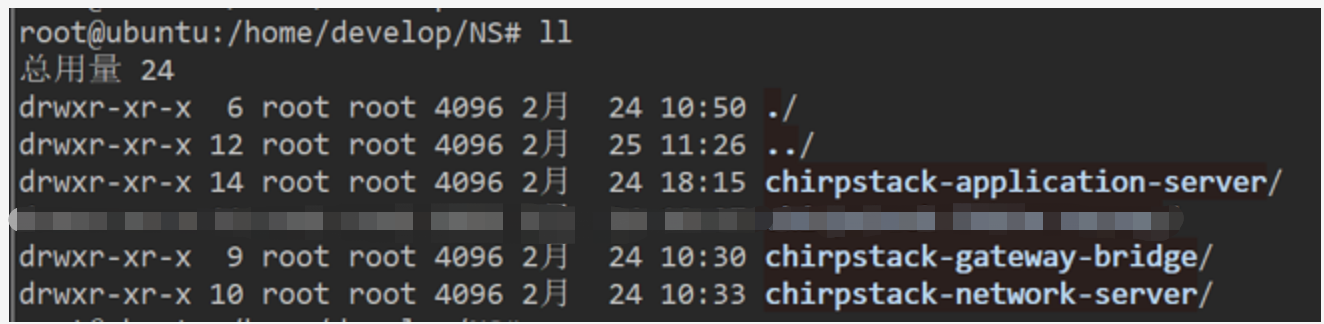
5.源码编译chirpstack
下载源码后,放到服务器上并解压、重命名
https://github.com/brocaar/chirpstack-network-server/archive/refs/heads/master.zip
https://github.com/brocaar/chirpstack-gateway-bridge/archive/refs/heads/master.zip
https://github.com/brocaar/chirpstack-application-server/archive/refs/heads/master.zip
A.编译chirpstack-gateway-bridge
cd /home/develop/NS/chirpstack-gateway-bridge
make dev-requirements
报错:
root@ubuntu:/home/develop/NS/chirpstack-gateway-bridge# make dev-requirements
go install golang.org/x/lint/golint
make: go: Command not found
Makefile:34: recipe for target 'dev-requirements' failed
make: *** [dev-requirements] Error 127
#######go环境变量的问题,设置好后, 再次编译,再次报错:
root@ubuntu:/home/develop/NS/chirpstack-gateway-bridge#  make dev-requirements
go install golang.org/x/lint/golint
go: github.com/brocaar/chirpstack-api/go/v3@v3.11.0: Get "https://proxy.golang.org/github.com/brocaar/chirpstack-api/go/v3/@v/v3.11.0.mod": dial tcp 172.217.160.113:443: i/o timeout
go: downloading golang.org/x/lint v0.0.0-20190930215403-16217165b5de
go: github.com/brocaar/chirpstack-api/go/v3@v3.11.0: Get "https://proxy.golang.org/github.com/brocaar/chirpstack-api/go/v3/@v/v3.11.0.mod": dial tcp 172.217.160.113:443: i/o timeout
Makefile:34: recipe for target 'dev-requirements' failed
make: *** [dev-requirements] Error 1
网站被墙,修改go模块来源,参考 https://www.cnblogs.com/niuben/p/12560104.html
export GO111MODULE=on
go env -w GOPROXY=https://goproxy.cn,direct
// 阿里云镜像 GOPROXY=https://mirrors.aliyun.com/goproxy/
// 中国golang镜像 GOPROXY=https://goproxy.io
// 中国最可靠的Go模块代理 GOPROXY=https://goproxy.cn
go env查看结果

再次编译,ok了
make build
cd build/
#生成配置文件
./chirpstack-gateway-bridge configfile >chirpstack-gateway-bridge.toml
B.编译chirpstack-network-server
cd /home/develop/NS/chirpstack-network-server/
make dev-requirements
make build
cd build/
./chirpstack-network-server configfile > chirpstack-network-server.toml
C.编译chirpstack-application-server(需要node.js,低版本可能不太行)
cd /home/develop/NS/chirpstack-application-server/
make dev-requirements ui-requirements
make build
报错
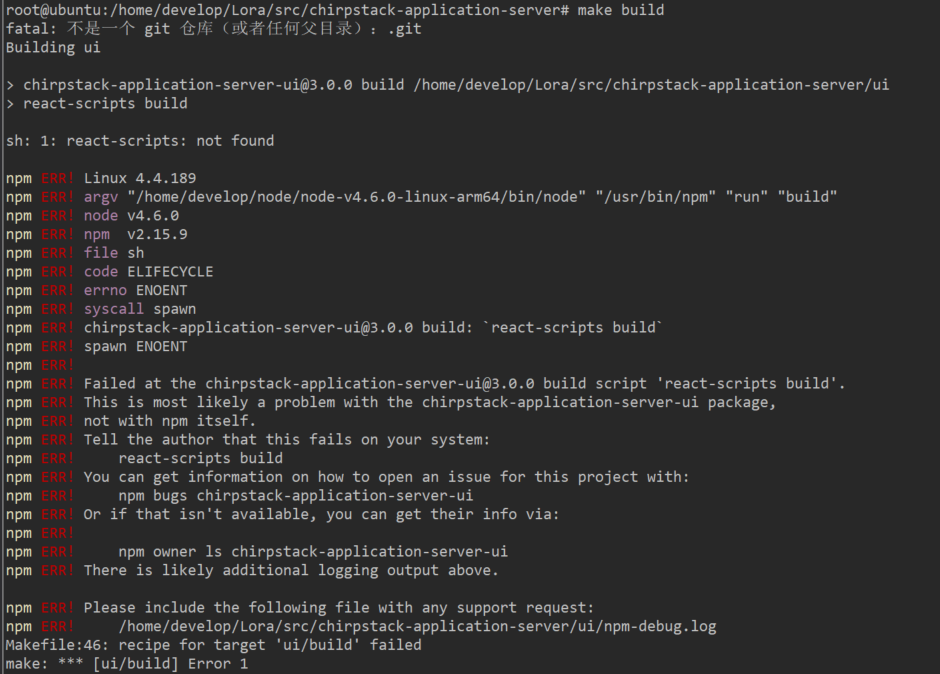
尝试手动安装相应模块 npm install react-scripts -S
再次报错
root@ubuntu:/home/develop/Lora/src/chirpstack-application-server# make build
fatal: 不是一个 git 仓库(或者任何父目录):.git
Building ui

> chirpstack-application-server-ui@3.0.0 build
> react-scripts build

Creating an optimized production build...
Browserslist: caniuse-lite is outdated. Please run:
npx browserslist@latest --update-db
Compiled successfully.

File sizes after gzip:

473.97 KB build/static/js/2.c5cd9146.chunk.js
56.12 KB build/static/js/main.90eacd87.chunk.js
23.57 KB build/static/css/2.23f5c0ee.chunk.css
789 B build/static/js/runtime-main.ce245b8e.js
116 B build/static/css/main.a2b7b0b6.chunk.css

The project was built assuming it is hosted at /.
You can control this with the homepage field in your package.json.

The build folder is ready to be deployed.
You may serve it with a static server:

npm install -g serve
serve -s build

Find out more about deployment here:

bit.ly/CRA-deploy

Fetching Swagger definitions and generate combined Swagger JSON
正克隆到 '/tmp/chirpstack-api'...


fatal: unable to access 'https://github.com/brocaar/chirpstack-api.git/': gnutls_handshake() failed: The TLS connection was non-properly terminated.
Makefile:51: recipe for target 'static/swagger/api.swagger.json' failed
make: *** [static/swagger/api.swagger.json] Error 128
换了更高版本的node(注意环境变量),make clean 后重新编译
make dev-requirements ui-requirements
make build
(这里反复报错反复编译,耗费了很多时间)
ln -s /home/develop/node/node-v16.14.0-linux-arm64/bin/npx /usr/bin/npx
make clean后重新编译。。。
cd build/
./chirpstack-application-server configfile > chirpstack-application-server.toml
配置文件(参考官方文档配置)
1)chirpstack-network-server.toml
修改dsn="postgres://localhost/chirpstack_ns?sslmode=disable"为dsn="postgres://chirpstack_ns:123456@localhost/chirpstack_ns?sslmode=disable"
再修改
[network_server.band]
name="CN_470_510"
[network_server.network_settings]
enabled_uplink_channels=[8, 9, 10, 11, 12, 13, 14, 15]
2)chirpstack-application-server.toml
[postgresql]
dsn="postgres://chirpstack_as:123456@localhost/chirpstack_as?sslmode=disable"

#jwt
[application_server.external_api]
jwt_secret="verysecret"
#启动chirpstack-gateway-bridge
./chirpstack-gateway-bridge -c chirpstack-gateway-bridge.toml
#启动chirpstack-network-server
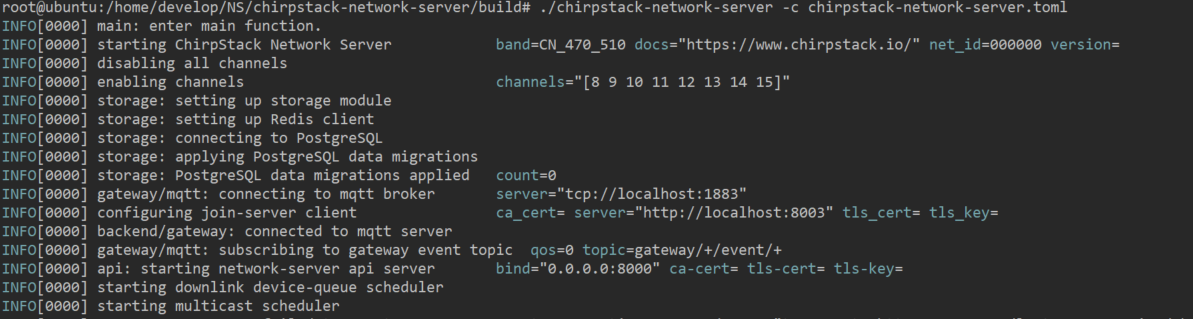
./chirpstack-network-server -c chirpstack-network-server.toml
报错,postgresql数据库拒绝连接

排查发现postgresql默认用了5433端口,修改/etc/postgresql/14/main/postgresql.conf中port = 5432并重启postgresql;
再次启动 chirpstack-network-server
报错,连接redis密码没设置
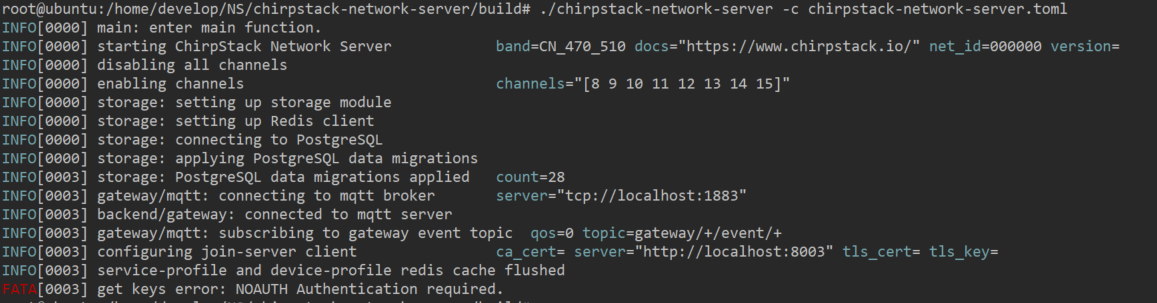
修改chirpstack-network-server.toml
# Set the password when connecting to Redis requires password authentication.
password="123456"
再次启动 chirpstack-network-server
#启动chirpstack-application-server
./chirpstack-application-server -c chirpstack-application-server.toml
登录chirpstack,http://192.168.101.109:8080


总结
#ChirpStack网关网桥:处理与LoRaWAN网关的通信
/home/develop/NS/chirpstack-gateway-bridge -c /home/develop/NS/chirpstack-gateway-bridge.toml
#ChirpStack网络服务器:LoRaWAN网络服务器的实现
/home/develop/NS/chirpstack-network-server -c /home/develop/NS/chirpstack-network-server.toml
#ChirpStack应用服务器:LoRaWAN应用服务器的实现
/home/develop/NS/chirpstack-application-server -c /home/develop/NS/chirpstack-application-server.toml
#配置开机启动
参考 https://www.cnblogs.com/huangyuanni/p/15935730.html

 浙公网安备 33010602011771号