聊一聊如何截获 C# 程序产生的日志
一:背景
1.讲故事
前段时间分析了一个dump,一顿操作之后,我希望用外力来阻止程序内部对某一个com组件的调用,对,就是想借助外力实现,如果用 windbg 的话,可以说非常轻松,但现实情况比较复杂,客户机没有windbg,也不想加入任何的手工配置,希望全自动化来处理。
真的很无理哈。。。不过这种无理要求花点心思还是可以实现的,方法就是用代码将应用程序变成调试器 来实现自动化阻止,为了简化操作,我们拿 C# 的 File.WriteAllText 来举个例子,让我的调试器来截获它的 content。
2. 测试案例
为了方便讲述,创建一个 WPF 程序,在 button 事件中用 File.WriteAllText 方法来写日志,参考代码如下:
    public partial class Form1 : Form
    {
        public Form1()
        {
            InitializeComponent();
        }

        private void button1_Click(object sender, EventArgs e)
        {
            System.IO.File.WriteAllText("C:\\1.txt", DateTime.Now.ToString());
        }
    }
代码非常简单,点一下按钮就写一条时间日志,接下来分别用 WinDbg 和 自定义调试器 来截获这个时间。
二:WinDbg 下的实现
1. 实现原理
要想截获日志,需要知道这个链路的下游方法,比如:kernel32!WriteFile,msdn 上的定义如下:
BOOL WriteFile(
  [in]                HANDLE       hFile,
  [in]                LPCVOID      lpBuffer,
  [in]                DWORD        nNumberOfBytesToWrite,
  [out, optional]     LPDWORD      lpNumberOfBytesWritten,
  [in, out, optional] LPOVERLAPPED lpOverlapped
);
其中 lpBuffer 存放的就是 content 信息, nNumberOfBytesToWrite 存放的是长度,有了这些基础,就可以通过 bp 下断点了。
0:007> bp kernel32!WriteFile

0:007> g
Breakpoint 0 hit
eax=0126a4e8 ebx=00000000 ecx=000004a0 edx=76663510 esi=0320eb6c edi=010feaa8
eip=76663510 esp=010fea24 ebp=010fea90 iopl=0         nv up ei pl nz na po nc
cs=0023  ss=002b  ds=002b  es=002b  fs=0053  gs=002b             efl=00200202
KERNEL32!WriteFile:
76663510 ff2558106c76    jmp     dword ptr [KERNEL32!_imp__WriteFile (766c1058)] ds:002b:766c1058={KERNELBASE!WriteFile (75ebd760)}

0:000> kb 3
 # ChildEBP RetAddr      Args to Child
00 010fea90 6a829fef     00000000 010feaa8 00000013 KERNEL32!WriteFile
01 010feab8 6a829f2c     010fead4 00000000 00000013 mscorlib_ni!System.IO.FileStream.WriteFileNative+0x6f
02 010feae0 6a829ec5     00000013 00000000 0320d69c mscorlib_ni!System.IO.FileStream.WriteCore+0x3c
因为 kernel32!WriteFile 用的是 stdcall 协定,所以 lpBuffer 变量在 esp+0x8 的位置, nNumberOfBytesToWrite 变量在 esp+0xc 的位置。
0:000> da poi(esp+8)
0320eb6c  "2022/11/24 17:25:39"

0:000> dp esp+0xc L1
010fea30  00000013

0:000> ? poi(esp+0xc)
Evaluate expression: 19 = 00000013
从卦中看,content 和 length 都出来了,非常完美,接下来看下如何自定义实现调试器。
三:自己实现一个调试器
1. 技术原理
要想自定义实现,需要打通这三块。
- 如何给
kernel32!WriteFile下 bp 断点
bp 的原理其实就是 int 3 ,简而言之就是 windbg 会将 kernel32!WriteFile 指令的首字节修改成机器码 0xcc,命中之后又将 0xcc 撤销掉。这一串逻辑是 windbg 内部自己实现的,接下来我们验证下,将首字节直接改成 0xcc 。
0:011> x kernel32!WriteFile
76663510          KERNEL32!WriteFile (_WriteFile@20)
0:011> db 76663510 L1
76663510  ff                                               .
0:011> eb 76663510 cc
0:011> db 76663510 L1
76663510  cc                                               .

从卦中看已修改成功,接下来直接点击 WPF 窗体的 button 按钮就会直接命中这里的 int 3 实现中断。

到了这一步后,可以在程序中使用 WriteProcessMemory 恢复 WriteFile 原始字节为 ff。
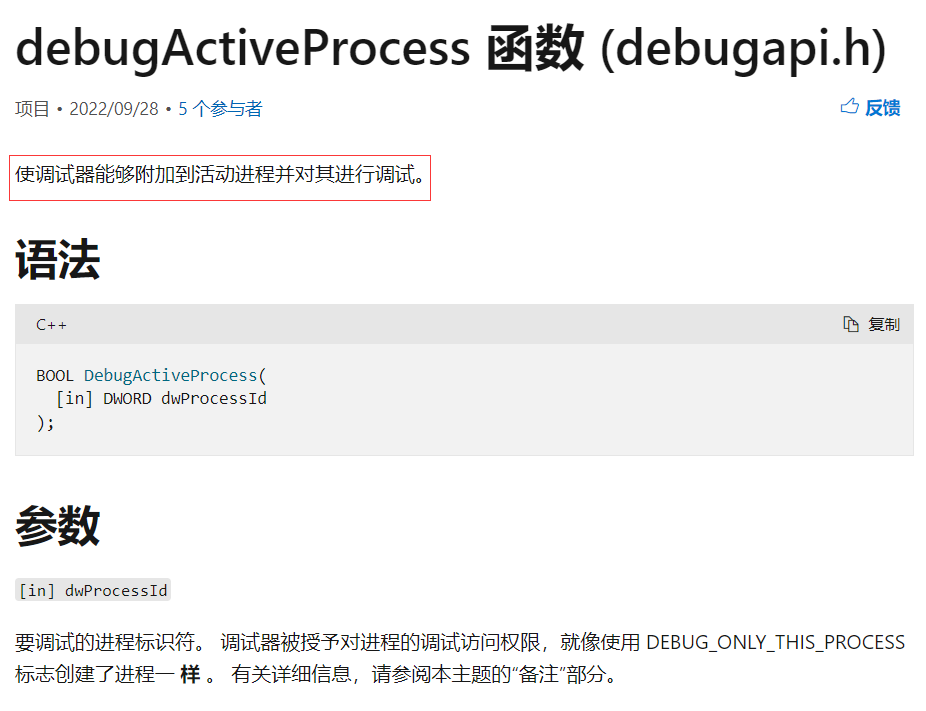
- 如何让 int 3 中断给程序
刚才看到的是中断给WinDbg,那怎么中断给程序呢? 其实 Win32 API 中有一个叫 DebugActiveProcess 函数可以让宿主程序充当调试器,mdsn 中的描述如下:
- 如何读写 wpf 的内存和寄存器
只要获取到了 wpf 程序的进程和线程句柄,可以用 WriteProcessMemory 和 ReadProcessMemory 读写内存,用 GetThreadContext 和 SetThreadContext 读写寄存器。
2. 代码实现
思路和技术都搞清楚后,代码落地就非常简单了,参考如下:
// HookDebug.cpp : This file contains the 'main' function. Program execution begins and ends there.
//

#include <iostream>
#include <Windows.h>

LPVOID writefile_addr = NULL;
CREATE_PROCESS_DEBUG_INFO cpdi;
BYTE int3 = 0xCC;
BYTE ff = 0;

BOOL OnCreateProcessDebugEvent(LPDEBUG_EVENT pde) {

	writefile_addr = GetProcAddress(GetModuleHandle(L"kernel32.dll"), "WriteFile");

	memcpy(&cpdi, &pde->u.CreateProcessInfo, sizeof(CREATE_PROCESS_DEBUG_INFO));

	ReadProcessMemory(cpdi.hProcess, writefile_addr, &ff, sizeof(BYTE), NULL);
	WriteProcessMemory(cpdi.hProcess, writefile_addr, &int3, sizeof(BYTE), NULL);

	return TRUE;
}

BOOL OnExceptionDebugEvent(LPDEBUG_EVENT pde) {

	CONTEXT ctx;
	PBYTE lpBuffer = NULL;
	DWORD lpBufferStart, nNumberOfBytesToWrite;

	PEXCEPTION_RECORD pr = &pde->u.Exception.ExceptionRecord;

	//int3 断点
	if (pr->ExceptionCode == EXCEPTION_BREAKPOINT && writefile_addr == pr->ExceptionAddress) {

		//1. unhook,恢复 writefile 的
		WriteProcessMemory(cpdi.hProcess, writefile_addr, &ff, sizeof(BYTE), NULL);

		//2. 获取上下文
		ctx.ContextFlags = CONTEXT_ALL;
		GetThreadContext(cpdi.hThread, &ctx);

		//3. 获取 WriteFile 写入的内容
		ReadProcessMemory(cpdi.hProcess, (PVOID)(ctx.Esp + 0x8), &lpBufferStart, sizeof(DWORD), NULL);
		ReadProcessMemory(cpdi.hProcess, (PVOID)(ctx.Esp + 0xc), &nNumberOfBytesToWrite, sizeof(DWORD), NULL);

		//4. 分配缓冲区
		lpBuffer = (PBYTE)calloc(nNumberOfBytesToWrite + 1, sizeof(BYTE));

		//5. copy 数据到缓冲区中
		ReadProcessMemory(cpdi.hProcess, (LPVOID)lpBufferStart, lpBuffer, nNumberOfBytesToWrite, NULL);

		printf("截获的内容: %s \n", lpBuffer);

		//6. 重新修改 eip ,指向 writefile 开头,写回到线程上下文中
		ctx.Eip = (DWORD)writefile_addr;
		SetThreadContext(cpdi.hThread, &ctx);

		//7. 继续执行
		ContinueDebugEvent(pde->dwProcessId, pde->dwThreadId, DBG_CONTINUE);

		Sleep(0);

		//8. 重新 hook
		WriteProcessMemory(cpdi.hProcess, writefile_addr, &int3, sizeof(BYTE), NULL);

		return TRUE;
	}

	return FALSE;
}

void loop() {

	DEBUG_EVENT de;

	while (WaitForDebugEvent(&de, INFINITE))
	{
		//注入事件
		if (de.dwDebugEventCode == CREATE_PROCESS_DEBUG_EVENT) {
			OnCreateProcessDebugEvent(&de);
		}

		//异常事件
		if (de.dwDebugEventCode == EXCEPTION_DEBUG_EVENT) {
			if (OnExceptionDebugEvent(&de)) continue;
		}

		ContinueDebugEvent(de.dwProcessId, de.dwThreadId, DBG_CONTINUE);
	}
}

int main()
{
	//程序日志
	DWORD dwPID = 23264;

	if (!DebugActiveProcess(dwPID)) {
		printf("fail");
		return 1;
	}

	loop();

	return 0;
}
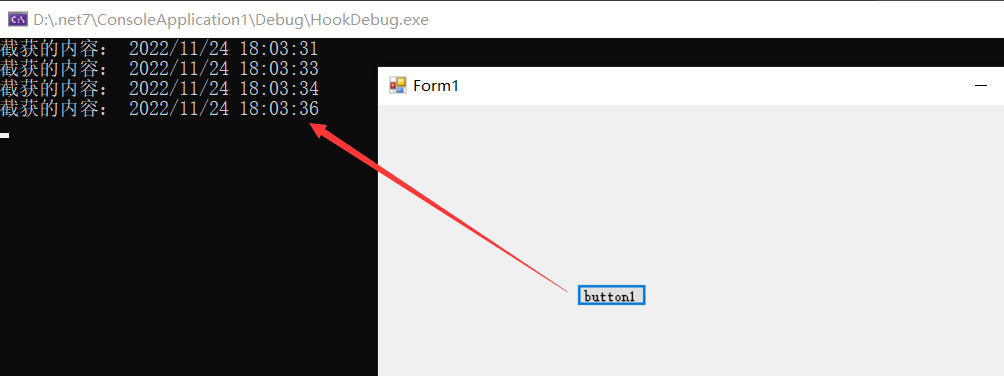
代码中的 dwPID 是 WPF 程序的 PID,指定好之后把程序跑起来,点击 button 按钮观察,截图如下,非常完美。
三:总结
在无法安装 windbg 的受限环境下,部署 HookDebug.exe 就是我们的另一种选择,而且完全自动化拦截,基本实现无人工干预。

 浙公网安备 33010602011771号