
第二篇(下)常用模块
- 实用网址
1 PythonCodeExample:https://www.programcreek.com/python/(模块代码示例) - 模块
![]() 模块
模块1 ''' 2 1、什么是模块? 3 模块就是一系列功能的集合体,分为三大类 4 I:内置的模块 5 II:第三方的模块 6 III:自定义的模块 7 一个python文件本身就一个模块,文件名m.py,模块名叫m 8 9 ps:模块有四种形式 10 1 使用python编写的.py文件 11 12 2 已被编译为共享库或DLL的C或C++扩展 13 14 3 把一系列模块组织到一起的文件夹(注:文件夹下有一个__init__.py文件,该文件夹称之为包) 15 16 4 使用C编写并链接到python解释器的内置模块 17 18 2、为何有用模块 19 I:内置与第三的模块拿来就用,无需定义,这种拿来主义,可以极大地提升自己的开发效率 20 II:自定义的模块 21 可以将程序的各部分功能提取出来放到一模块中为大家共享使用 22 好处是减少了代码冗余,程序组织结构更加清晰 23 24 25 3、如何用模块 26 ''' 27 28 y=333 29 z=444 30 import foo 31 # 1、首次导入模块会发生3件事 32 # 1、执行foo.py 33 # 2、产生foo.py的名称空间,将foo.py运行过程中产生的名字都丢到foo的名称空间中 34 # 3、在当前文件中产生的有一个名字foo,该名字指向2中产生的名称空间 35 36 # 之后的导入,都是直接引用首次导入产生的foo.py名称空间,不会重复执行代码 37 # import foo 38 # import foo 39 # import foo 40 # import foo 41 42 43 # 2、引用: 44 # print(foo.x) 45 # print(foo.get) 46 # print(foo.change) 47 # 强调1:模块名.名字,是指名道姓地问某一个模块要名字对应的值,不会与当前名称空间中的名字发生冲突 48 # x=1111111111111 49 # print(x) 50 # print(foo.x) 51 52 # 强调2:无论是查看还是修改操作的都是模块本身,与调用位置无关 53 # import foo 54 # 55 # x=3333333333 56 # # foo.get() 57 # 58 # foo.change() 59 # print(x) 60 # 61 # print(foo.x) 62 # foo.get() 63 64 65 66 67 # 3、可以以逗号为分隔符在一行导入多个模块 68 # 建议如下所示导入多个模块 69 # import time 70 # import foo 71 # import m 72 73 # 不建议在一行同时导入多个模块 74 import time,foo,m 75 76 77 # 4、导入模块的规范 78 #I. python内置模块 79 #II. 第三方模块 80 #III. 程序员自定义模块 81 82 # import time 83 # import sys 84 # 85 # import 第三方1 86 # import 第三方2 87 # 88 # import 自定义模块1 89 # import 自定义模块2 90 # import 自定义模块3 91 92 93 # 5、import 。。。 as 。。。 94 # import foo as f # f=foo 95 # f.get() 96 97 98 # import abcdefgadfadfas 99 # # 100 # # abcdefgadfadfas.f1 101 # # abcdefgadfadfas.f2 102 # # abcdefgadfadfas.f3 103 104 105 # import abcdefgadfadfas as mmm 106 # 107 # mmm.f1 108 # mmm.f2 109 # mmm.f3 110 111 112 #6、模块是第一类对象 113 import foo 114 115 #7、自定义模块的命名应该采用纯小写+下划线的风格 116 117 118 #8、可以在函数内导入模块 119 def func(): 120 import foo
![]() 模块导入
模块导入1 1# 一个python文件有两种用途 2 # 1、被当成程序运行 3 # 2、被当做模块导入 4 5 2# impot导入模块在使用时必须加前缀"模块." 6 # 优点:肯定不会与当前名称空间中的名字冲突 7 # 缺点:加前缀显得麻烦 8 9 # from ... import ...导入也发生了三件事 10 # 1、产一个模块的名称空间 11 # 2、运行foo.py将运行过程中产生的名字都丢到模块的名称空间去 12 # 3、在当前名称空间拿到一个名字,该名字与模块名称空间中的某一个内存地址 13 # from foo import x # x=模块foo中值0的内存地址 14 # from foo import get 15 # from foo import change 16 17 # print(x) 18 # print(get) 19 # print(change) 20 # x=333333333 21 # print(x) 22 # get() 23 # change() 24 # get() 25 26 # print(x) 27 # from foo import x # x=新地址 28 # print(x) 29 30 # from...impot...导入模块在使用时不用加前缀 31 # 优点:代码更精简 32 # 缺点:容易与当前名称空间混淆 33 # from foo import x # x=模块foo中值1的内存地址 34 # x=1111 35 36 37 # 一行导入多个名字(不推荐) 38 # from foo import x,get,change 39 40 # *:导入模块中的所有名字 41 # name='egon' 42 # from foo import * 43 # print(name) 44 45 from socket import * 46 47 48 # 了解:__all__ 49 # from foo import * 50 # print(x) 51 # print(get) 52 # print(change) 53 54 55 # 起别名 56 from foo import get as g 57 print(g) 58 59 3模块的搜索路径 60 # 无论是import还是from...import在导入模块时都涉及到查找问题 61 # 优先级: 62 # 1、内存(内置模块) 63 # 2、硬盘:按照sys.path中存放的文件的顺序依次查找要导入的模块 64 65 # import sys 66 # 值为一个列表,存放了一系列的对文件夹 67 # 其中第一个文件夹是当前执行文件所在的文件夹 68 # print(sys.path) 69 70 # import foo # 内存中已经有foo了 71 # foo.say() 72 # 73 # import time 74 # time.sleep(10) 75 # 76 # import foo 77 # foo.say() 78 79 80 # 了解:sys.modules查看已经加载到内存中的模块 81 import sys 82 # import foo # foo=模块的内存地址 83 # del foo 84 85 # def func(): 86 # import foo # foo=模块的内存地址 87 # 88 # func() 89 # 90 # # print('foo' in sys.modules) 91 # print(sys.modules) 92 93 94 import sys 95 # 找foo.py就把foo.py的文件夹添加到环境变量中 96 sys.path.append(r'/Users/linhaifeng/PycharmProjects/s14/day21/aa') 97 # import foo 98 # foo.say() 99 100 from foo import say
![]() 函数的类型提示
函数的类型提示1 def register(name:"必须传入名字傻叉",age:1111111,hobbbies:"必须传入爱好元组")->"返回的是整型": 2 print(name) 3 print(age) 4 print(hobbbies) 5 return 111 6 7 # register(1,'aaa',[1,]) 8 # res=register('egon',18,('play','music')) 9 # res=register('egon',19,(1,2,3)) 10 11 print(register.__annotations__) #{'name': '必须传入名字傻叉', 'age': 1111111, 'hobbbies': '必须传入爱好元组', 'return': '返回的是整型'}
![]() 包的使用
包的使用1 ''' 2 1、包就是一个包含有__init__.py文件的文件夹 3 4 5 2、为何要有包 6 包的本质是模块的模块的一种形式,包是用来被当做模块导入 7 ''' 8 9 #1、产生一个名称空间 10 #2、运行包下的__init__.py文件,将运行过程中产生的名字都丢到1的名称空间中 11 #3、在当前执行文件的名称空间中拿到一个名字mmm,mmm指向1的名称空间 12 # import mmm 13 # print(mmm.x) 14 # print(mmm.y) 15 # mmm.say() 16 17 # from mmm import x 18 19 20 # 模块的使用者:egon老湿 21 22 # 环境变量是以执行文件为准备的,所有的被导入的模块或者说后续的其他文件引用 23 # 的sys.path都是参照执行文件的sys.path 24 import sys 25 sys.path.append('/aaaaaaaaaaaaaaaaaaaaaaaaaa') 26 # print(sys.path) 27 28 sys.path.append(r'/Users/linhaifeng/PycharmProjects/s14/day21/aa') 29 30 31 # import foo # foo下__init__.py 32 # # 33 # # 34 # foo.f1() 35 # foo.f2() 36 # foo.f3() 37 38 # from foo import f1,f2,f3,f4 39 40 # f1() 41 # f2() 42 # f3() 43 # f4() 44 45 # import foo 46 # foo.f4() 47 48 # 强调: 49 # 1.关于包相关的导入语句也分为import和from ... import ... 50 # 两种,但是无论哪种,无论在什么位置,在导入时都必须遵循一个原则: 51 # 凡是在导入时带点的,点的左边都必须是一个包,否则非法。 52 # 可以带有一连串的点,如import 顶级包.子包.子模块,但都必须遵循这个原则。但对于导入后,在使用时就没有这种限制了,点的左边可以是包,模块,函数,类(它们都可以用点的方式调用自己的属性)。 53 # 例如: 54 # from a.b.c.d.e.f import xxx 55 # import a.b.c.d.e.f 56 # 其中a、b、c、d、e 都必须是包 57 58 59 # 2、包A和包B下有同名模块也不会冲突,如A.a与B.a来自俩个命名空间 60 # 61 # 3、import导入文件时,产生名称空间中的名字来源于文件, 62 # import 包,产生的名称空间的名字同样来源于文件,即包下的__init__.py,导入包本质就是在导入该文件 63 64 65 # import foo 66 # # print(foo.f1) 67 # # print(foo.f2) 68 # # print(foo.f3) 69 # # print(foo.f4) 70 # 71 # foo.f4() 72 73 # from foo import * 74 # print(f1) 75 # print(f2) 76 # print(f3) 77 # print(f4)
-
查模块&使用
1 dir ---返回内部方法![]()
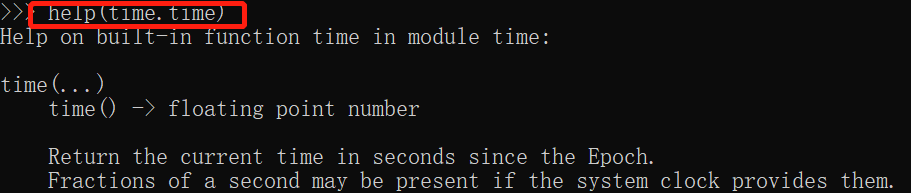
2 help ---方法使用说明
![]()
- 常用模块1
日期格式化:
![]() datetime
datetime# import datetime # i = datetime.datetime.now() # print ("当前的日期和时间是 %s" % i) # 2019-01-04 11:04:24.874607 # print ("ISO格式的日期和时间是 %s" % i.isoformat()) # print ("当前的年份是 %s" %i.year) # print ("当前的月份是 %s" %i.month) # print ("当前的日期是 %s" %i.day) # print ("dd/mm/yyyy 格式是 %s/%s/%s" % (i.day, i.month, i.year)) #4/1/2019 # print ("当前小时是 %s" %i.hour) # print ("当前分钟是 %s" %i.minute) # print ("当前秒是 %s" %i.second) # 获取星期 def get_week_day(): week_day = { 0: '星期一', 1: '星期二', 2: '星期三', 3: '星期四', 4: '星期五', 5: '星期六', 6: '星期日', } day = datetime.date.today().weekday() return week_day[day] # print(datetime.date.today(), get_week_day()) #2021-12-06 星期一
datetime.datetime.now().strftime("%Y-%m-%d %H:%M:%S") #'2021-09-16 20:13:43'

datetime.datetime.now().strftime("%A %d %B %Y %I:%M:%S%p") #'Thursday 16 September 2021 08:14:52PM'![]()
![]() 时间模块
时间模块1 # 时间模块优先掌握的操作 2 #一:time 3 import time 4 5 # 时间分为三种格式: 6 # 1、时间戳:从1970年到现在经过的秒数 7 # 作用:用于时间间隔的计算 8 9 # print(time.time()) 10 11 # 2、按照某种格式显示的时间:2020-03-30 11:11:11 12 # 作用:用于展示时间 13 14 # print(time.strftime('%Y-%m-%d %H:%M:%S %p')) 15 # print(time.strftime('%Y-%m-%d %X')) 16 17 # 3、结构化的时间 18 # 作用:用于单独获取时间的某一部分 19 20 # res=time.localtime() 21 # print(res) 22 # print(res.tm_year) 23 # print(res.tm_yday) 24 25 #二:datetime 26 import datetime 27 28 # print(datetime.datetime.now()) 29 # print(datetime.datetime.now() + datetime.timedelta(days=3)) 30 # print(datetime.datetime.now() + datetime.timedelta(weeks=1)) 31 32 33 34 # 时间模块需要掌握的操作 35 # 1、时间格式的转换 36 # struct_time->时间戳 37 import time 38 # s_time=time.localtime() 39 # print(time.mktime(s_time)) 40 41 # 时间戳->struct_time 42 # tp_time=time.time() 43 # print(time.localtime(tp_time)) 44 45 # 补充:世界标准时间与本地时间 46 # print(time.localtime()) 47 # print(time.gmtime()) # 世界标准时间,了解 48 # print(time.localtime(333333333)) 49 # print(time.gmtime(333333333)) 50 51 52 # struct_time->格式化的字符串形式的时间 53 # s_time=time.localtime() 54 # print(time.strftime('%Y-%m-%d %H:%M:%S',s_time)) 55 56 # print(time.strptime('1988-03-03 11:11:11','%Y-%m-%d %H:%M:%S')) 57 58 59 # !!!真正需要掌握的只有一条:format string<------>timestamp 60 # '1988-03-03 11:11:11'+7 61 62 # format string--->struct_time--->timestamp 63 # struct_time=time.strptime('1988-03-03 11:11:11','%Y-%m-%d %H:%M:%S') 64 # timestamp=time.mktime(struct_time)+7*86400 65 # print(timestamp) 66 67 # format string<---struct_time<---timestamp 68 # res=time.strftime('%Y-%m-%d %X',time.localtime(timestamp)) 69 # print(res) 70 71 # time.sleep(3) 72 73 # 了解知识 74 # import time 75 # print(time.asctime()) 76 77 78 import datetime 79 # print(datetime.datetime.now()) 80 # print(datetime.datetime.utcnow()) 81 82 print(datetime.datetime.fromtimestamp(333333))
![]() random模块
random模块1 import random 2 3 # print(random.random()) #(0,1)----float 大于0且小于1之间的小数 4 # print(random.randint(1, 3)) # [1,3] 大于等于1且小于等于3之间的整数 5 6 # print(random.randrange(1, 3)) # [1,3) 大于等于1且小于3之间的整数 7 # 8 # print(random.choice([111, 'aaa', [4, 5]])) # 1或者23或者[4,5] 9 # 10 # print(random.sample([111, 'aaa', 'ccc','ddd'],2)) # 列表元素任意2个组合 11 # 12 # print(random.uniform(1, 3)) # 大于1小于3的小数,如1.927109612082716 13 # 14 # item = [1, 3, 5, 7, 9] 15 # random.shuffle(item) # 打乱item的顺序,相当于"洗牌" 16 # print(item) 17 18 # 应用:随机验证码 19 20 # import random 21 # 22 # res='' 23 # for i in range(6): 24 # 从26大写字母中随机取出一个=chr(random.randint(65,90)) 25 # 从10个数字中随机取出一个=str(random.randint(0,9)) 26 # 27 # 随机字符=random.choice([从26大写字母中随机取出一个,从10个数字中随机取出一个]) 28 # res+=随机字符 29 30 31 import random 32 33 def make_code(size=4): 34 res='' 35 for i in range(size): 36 s1=chr(random.randint(65,90)) 37 s2=str(random.randint(0,9)) 38 res+=random.choice([s1,s2]) 39 return res 40 41 print(make_code(6))
![]() os模块
os模块1 import os 2 3 # 获取某一个文件夹下所有的子文件以及子文件夹的名字 4 # res=os.listdir('.') 5 # print(res) 6 # 7 # 8 # size=os.path.getsize(r'/Users/linhaifeng/PycharmProjects/s14/day22/01 时间模块.py') 9 # print(size) 10 11 12 13 # os.remove() 删除一个文件 14 # os.rename("oldname","newname") 重命名文件/目录 15 16 17 18 # 应用程序----》"ls /" 19 # os.system("ls /") 20 21 # 规定:key与value必须都为字符串 22 23 # os.environ['aaaaaaaaaa']='111' 24 # print(os.environ) 25 26 27 # print(os.path.dirname(r'/a/b/c/d.txt')) 28 # print(os.path.basename(r'/a/b/c/d.txt')) 29 30 31 # print(os.path.isfile(r'笔记.txt')) 32 # print(os.path.isfile(r'aaa')) 33 # print(os.path.isdir(r'aaa')) 34 35 # print(os.path.join('a','/','b','c','d')) 36 37 38 39 40 # 推荐用这种 41 BASE_DIR=os.path.dirname(os.path.dirname(__file__)) 42 # print(BASE_DIR) 43 44 45 # BASE_DIR=os.path.normpath(os.path.join( 46 # __file__, 47 # '..', 48 # '..' 49 # )) 50 # print(BASE_DIR) 51 52 # 在python3.5之后,推出了一个新的模块pathlib 53 from pathlib import Path 54 55 # res = Path(__file__).parent.parent 56 # print(res) 57 58 59 # res=Path('/a/b/c') / 'd/e.txt' 60 # print(res) 61 62 # print(res.resolve())
![]() sys&打印进度条
sys&打印进度条1 import sys 2 3 # python3.8 run.py 1 2 3 4 # sys.argv获取的是解释器后参数值 5 # print(sys.argv) 6 7 # src_file=input('源文件路径: ').strip() 8 # dst_file=input('目标文件路径: ').strip() 9 # 10 # src_file=sys.argv[1] 11 # dst_file=sys.argv[2] 12 # # 判断 13 # 14 # with open(r'%s' %src_file,mode='rb') as read_f,\ 15 # open(r'%s' %dst_file,mode='wb') as write_f: 16 # for line in read_f: 17 # write_f.write(line) 18 19 # python3.8 run.py src_file dst_file 20 21 22 # print('[%-50s]' %'#') 23 # print('[%-50s]' %'##') 24 # print('[%-50s]' %'###') 25 26 27 28 # import time 29 # 30 # res='' 31 # for i in range(50): 32 # res+='#' 33 # time.sleep(0.5) 34 # print('\r[%-50s]' % res,end='') 35 36 37 import time 38 39 40 def progress(percent): 41 if percent > 1: 42 percent = 1 43 res = int(50 * percent) * '#' 44 print('\r[%-50s] %d%%' % (res, int(100 * percent)), end='') 45 46 recv_size=0 47 total_size=1025011 48 49 while recv_size < total_size: 50 time.sleep(0.01) # 下载了1024个字节的数据 51 52 recv_size+=1024 # recv_size=2048 53 54 # 打印进度条 55 # print(recv_size) 56 percent = recv_size / total_size # 1024 / 333333 57 progress(percent)
- 常用模块2
![]() json&pickle模块
json&pickle模块1 # 1、什么是序列化&反序列化 2 # 内存中的数据类型---->序列化---->特定的格式(json格式或者pickle格式) 3 # 内存中的数据类型<----反序列化<----特定的格式(json格式或者pickle格式) 4 5 # 土办法: 6 # {'aaa':111}--->序列化str({'aaa':111})----->"{'aaa':111}" 7 # {'aaa':111}<---反序列化eval("{'aaa':111}")<-----"{'aaa':111}" 8 9 # 2、为何要序列化 10 # 序列化得到结果=>特定的格式的内容有两种用途 11 # 1、可用于存储=》用于存档 12 # 2、传输给其他平台使用=》跨平台数据交互 13 # python java 14 # 列表 特定的格式 数组 15 16 # 强调: 17 # 针对用途1的特定一格式:可是一种专用的格式=》pickle只有python可以识别 18 # 针对用途2的特定一格式:应该是一种通用、能够被所有语言识别的格式=》json 19 20 21 # 3、如何序列化与反序列化 22 # 示范1 23 # import json 24 # # 序列化 25 # json_res=json.dumps([1,'aaa',True,False]) 26 # # print(json_res,type(json_res)) # "[1, "aaa", true, false]" 27 # 28 # # 反序列化 29 # l=json.loads(json_res) 30 # print(l,type(l)) 31 32 33 # 示范2: 34 import json 35 36 # 序列化的结果写入文件的复杂方法 37 # json_res=json.dumps([1,'aaa',True,False]) 38 # # print(json_res,type(json_res)) # "[1, "aaa", true, false]" 39 # with open('test.json',mode='wt',encoding='utf-8') as f: 40 # f.write(json_res) 41 42 # 将序列化的结果写入文件的简单方法 43 # with open('test.json',mode='wt',encoding='utf-8') as f: 44 # json.dump([1,'aaa',True,False],f) 45 46 47 # 从文件读取json格式的字符串进行反序列化操作的复杂方法 48 # with open('test.json',mode='rt',encoding='utf-8') as f: 49 # json_res=f.read() 50 # l=json.loads(json_res) 51 # print(l,type(l)) 52 53 # 从文件读取json格式的字符串进行反序列化操作的简单方法 54 # with open('test.json',mode='rt',encoding='utf-8') as f: 55 # l=json.load(f) 56 # print(l,type(l)) 57 58 59 # json验证: json格式兼容的是所有语言通用的数据类型,不能识别某一语言的所独有的类型 60 # json.dumps({1,2,3,4,5}) 61 62 # json强调:一定要搞清楚json格式,不要与python混淆 63 # l=json.loads('[1, "aaa", true, false]') 64 # l=json.loads("[1,1.3,true,'aaa', true, false]") 65 # print(l[0]) 66 67 # 了解 68 # l = json.loads(b'[1, "aaa", true, false]') 69 # print(l, type(l)) 70 71 # with open('test.json',mode='rb') as f: 72 # l=json.load(f) 73 74 75 # res=json.dumps({'name':'哈哈哈'}) 76 # print(res,type(res)) 77 78 # res=json.loads('{"name": "\u54c8\u54c8\u54c8"}') 79 # print(res,type(res)) 80 81 # 4、猴子补丁 82 # 在入口处打猴子补丁 83 # import json 84 # import ujson 85 # 86 # def monkey_patch_json(): 87 # json.__name__ = 'ujson' 88 # json.dumps = ujson.dumps 89 # json.loads = ujson.loads 90 # 91 # monkey_patch_json() # 在入口文件出运行 92 93 94 # import ujson as json # 不行 95 96 # 后续代码中的应用 97 98 # json.dumps() 99 # json.loads() 100 101 102 # 5.pickle模块 103 import pickle 104 # res=pickle.dumps({1,2,3,4,5}) 105 # print(res,type(res)) 106 107 # s=pickle.loads(res) 108 # print(s,type(s))
![]() configparser
configparser1 """ 2 解析.ini(初始化类文件)配置文件 3 文件格式示例: 4 [alex] 5 name = alex Li 6 password = e99a18c428cb38d5f260853678922e03 7 expire = 2017-09-20 8 9 10 [egon] 11 name = egg lin 12 password = dddd 13 expire = 2018-01-01 14 """ 15 config=configparser.ConfigParser() 16 config.read('test.ini') 17 18 # 1、获取sections 19 # print(config.sections()) 20 21 # 2、获取某一section下的所有options 22 # print(config.options('section1')) 23 24 # 3、获取items 25 # print(config.items('section1')) 26 27 # 4、 28 # res=config.get('section1','user') 29 # print(res,type(res)) 30 31 # res=config.getint('section1','age') 32 # print(res,type(res)) 33 34 35 # res=config.getboolean('section1','is_admin') 36 # print(res,type(res)) 37 38 39 # res=config.getfloat('section1','salary') 40 # print(res,type(res))
![]() hashlib哈希
hashlib哈希1 # 1、什么是哈希hash 2 # hash一类算法,该算法接受传入的内容,经过运算得到一串hash值 3 # hash值的特点: 4 #I 只要传入的内容一样,得到的hash值必然一样 5 #II 不能由hash值返解成内容 6 #III 不管传入的内容有多大,只要使用的hash算法不变,得到的hash值长度是一定 7 8 # 2、hash的用途 9 # 用途1:特点II用于密码密文传输与验证 10 # 用途2:特点I、III用于文件完整性校验 11 12 # 3、如何用 13 # import hashlib 14 # 15 # m=hashlib.md5() 16 # m.update('hello'.encode('utf-8')) 17 # m.update('world'.encode('utf-8')) 18 # res=m.hexdigest() # 'helloworld' 19 # print(res) 20 # 21 # m1=hashlib.md5('he'.encode('utf-8')) 22 # m1.update('llo'.encode('utf-8')) 23 # m1.update('w'.encode('utf-8')) 24 # m1.update('orld'.encode('utf-8')) 25 # res=m1.hexdigest()# 'helloworld' 26 # print(res) 27 28 29 30 # 模拟撞库 31 # cryptograph='aee949757a2e698417463d47acac93df' 32 # import hashlib 33 # 34 # # 制作密码字段 35 # passwds=[ 36 # 'alex3714', 37 # 'alex1313', 38 # 'alex94139413', 39 # 'alex123456', 40 # '123456alex', 41 # 'a123lex', 42 # ] 43 # 44 # dic={} 45 # for p in passwds: 46 # res=hashlib.md5(p.encode('utf-8')) 47 # dic[p]=res.hexdigest() 48 # 49 # # 模拟撞库得到密码 50 # for k,v in dic.items(): 51 # if v == cryptograph: 52 # print('撞库成功,明文密码是:%s' %k) 53 # break 54 55 56 # 提升撞库的成本=>密码加盐 57 import hashlib 58 59 m=hashlib.md5() 60 61 m.update('天王'.encode('utf-8')) 62 m.update('alex3714'.encode('utf-8')) 63 m.update('盖地虎'.encode('utf-8')) 64 print(m.hexdigest()) 65 66 67 68 69 # m.update(文件所有的内容) 70 # m.hexdigest() 71 # 72 # f=open('a.txt',mode='rb') 73 # f.seek() 74 # f.read(2000) # 巨琳 75 # m1.update(文见的一行) 76 # 77 # m1.hexdigest()
![]() subprocess(子进程)
subprocess(子进程)import subprocess def runcmd(command): ret = subprocess.run(command,shell=True,stdout=subprocess.PIPE,stderr=subprocess.PIPE,encoding="utf-8",timeout=1) if ret.returncode == 0: print("success:",ret) else: print("error:",ret) # 方式一:#序列参数 # runcmd(["curl" ,"-i", "www.baidu.com"]) # 方式二:#字符串参数(推荐) runcmd("curl -i ww.baidu.com")
![]() MD5加密
MD5加密import hashlib def gen_md5(origin): """ md5加密 :param origin: :return: """ ha = hashlib.md5(b'jk3usodfjwkrsdf') ha.update(origin.encode('utf-8')) return ha.hexdigest()
-
日志库(logging)
![]() logging1
logging1#!\Users\Local\Programs\Python37 # -*- coding: utf-8 -*- # # a ={'title': 'VA、VD缺乏,对儿童健康有什么影响?', 'url': 'https://baijiahao.baidu.com/s?id=1702173637719000648&wfr=spider&for=pc', 'release_time': '2021-06-09', 'web_source_id': 1, 'hospital_id': 2, 'source': 'PSM药盾公益', 'article_abstract': '作者:南方医科大学深圳医院药剂科 药师 崔旭兰 维生素A(简称VA)和维生素D(简称VD)是与儿童健康密切相关的两种脂溶性维生素,而维生素AD(简称VAD)是一种复合维生素,是维生素A与维生素D的复合制剂,用于需要同时补充维A和维D的人群...'} # print(tuple(a.values())) # 日志记录 # import logging # # logging.basicConfig(level=logging.DEBUG, # filename='output.log', # datefmt='%Y/%m/%d %H:%M:%S', # format='%(asctime)s - %(name)s - %(levelname)s - %(lineno)d - %(module)s - %(message)s') # logger = logging.getLogger(__name__) # # logger.info('This is a log info') # logger.debug('Debugging') # logger.warning('Warning exists') # logger.info('Finish') import logging logger = logging.getLogger(__name__) logger.setLevel(level=logging.DEBUG) # Formatter formatter = logging.Formatter('%(asctime)s - %(name)s - %(levelname)s - %(message)s') # FileHandler file_handler = logging.FileHandler('result.log') file_handler.setFormatter(formatter) logger.addHandler(file_handler) # StreamHandler stream_handler = logging.StreamHandler() stream_handler.setFormatter(formatter) logger.addHandler(stream_handler) # Log logger.info('Start') logger.warning('Something maybe fail.') try: result = 10 / 0 except Exception: logger.error('Faild to get result', exc_info=True) logger.info('Finished')
![]() logging
logging#原文链接:#https://juejin.cn/post/6844903616046694413#heading-4 # 捕获 Traceback import logging logger = logging.getLogger(__name__) logger.setLevel(level=logging.DEBUG) # Formatter formatter = logging.Formatter('%(asctime)s - %(name)s - %(levelname)s - %(message)s') # FileHandler file_handler = logging.FileHandler('result.log') file_handler.setFormatter(formatter) logger.addHandler(file_handler) # StreamHandler (输出到控制台) stream_handler = logging.StreamHandler() stream_handler.setFormatter(formatter) logger.addHandler(stream_handler) # Log logger.info('Start') logger.warning('Something maybe fail.') try: result = 10 / 0 except Exception: logger.error('Faild to get result', exc_info=True) logger.info('Finished')
![]() loguru
loguru#!\Users\Local\Programs\Python37 # -*- coding: utf-8 -*- #打印日志: #方式一: # import logging # logging.basicConfig(level=logging.INFO, format='%(asctime)s - %(name)s - %(levelname)s - %(message)s') # logger = logging.getLogger(__name__) # # logger.info('this is another debug message') # logger.warning('this is another debug message') # logger.error('this is another debug message') # logger.info('this is another debug message') # 方式二 from loguru import logger logger.debug('this is a debug message') logger.info('this is another debug message') logger.warning('this is another debug message') logger.error('this is another debug message') logger.info('this is another debug message') logger.success('this is success message!') logger.critical('this is critical message!')
![]()
![]() loguru详解
loguru详解原文链接:https://mp.weixin.qq.com/s/COzw38LgM_M-qiw1GTsvOQ 示例: import os from loguru import logger # 日志相关配置 base_dir = os.path.dirname(os.path.dirname(__file__)) log_dir = os.path.join(base_dir, 'log/lora/lora.log') logger.add(log_dir,encoding="utf-8",retention='7 days',level='INFO',rotation="200 MB") # 旧日志保留7天,200MB分割日志,最低级别为INFO logger.debug("debug相关日志记录") logger.info("INFO消息记录!!" ) logger.success("插入异常数据成功 -- %s") logger.error("提示:有新的设备`devEUI=%s`了,请录入数据库哦!!" )
- 进度条(tqdm)
![]() tqdm进度条
tqdm进度条# Tqdm 是一个智能进度表。它能够显示所有可迭代对象当前执行的进度 (Tqdm) # 显示---> 100%|██████████| 100/100 [00:01<00:00, 99.36it/s] # pip install tqdm from tqdm import tqdm from time import sleep #1 使用 tqdm() 封装可迭代的对象 text = "" for char in tqdm(["a", "b", "c", "d"]): sleep(0.25) text = text + char #2 trange(i) 是特殊的关键字,是封装了range的tqdm对象 from tqdm import trange from tqdm import trange for i in trange(100): sleep(0.01) # 3 手动的形式 pbar = tqdm(total=100) for i in range(10): sleep(0.1) pbar.update(10) pbar.close() # 4 qdm 在命令行中结合使用 #只需在管道之间插入 tqdm (或 python -m tqdm),即可将进度条显示到终端上 #实例: """ $ find . -name '*.py' -type f -exec cat \{} \; | tqdm --unit loc --unit_scale --total 857366 >> /dev/null 100%|█████████████████████████████████| 857K/857K [00:04<00:00, 246Kloc/s] """ """ 备份大目录 $ tar -xcf - docs/ | tqdm --bytes --total `du -sb docs/ | cut -f1` \ > backup.tgz 44%|██████████████▊ | 153M/352M [00:14<00:18, 11.0MB/s] """
- 路径(os&pathlib&glob)
![]() os
os# os模块 import os # 返回当前所在目录 dir =os.getcwd() # 返回上上层目录 base_dir =os.path.dirname(os.path.dirname(os.getcwd())) # 拼接目录 new_path =os.path.join(base_dir,"test","test.txt") # 获取当前目录下所有文件或文件夹名字 dir_list =os.listdir() # 创建文件夹,重命名 # new_dir =os.makedirs(os.path.join('project', 'test'), exist_ok=True) # os.rename('test.txt','new_test.txt', ) # 将test.txt 重命名为 new_test.txt # print(dir,"\n",base_dir,"\n",new_path) # 使用os.walk扫描目录(默认自上而下扫描,没扫描一返回一个元组(curDir, dirs, files)) # for curDir, dirs, files in os.walk("./"): # print("====================") # print("现在的目录:" + curDir) # print("该目录下包含的子目录:" + str(dirs)) # print("该目录下包含的文件:" + str(files))
![]() pathlib
pathlib####### pathlib模块 ########## from pathlib import Path #1 遍历目录的子目录或者文件 dirs=Path("./").iterdir() for i in Path("./").iterdir(): print(i) # 2返回当前所在目录 cur_dir = Path.cwd() # 3返回上上一级目录 base_dir=Path.cwd().parent.parent # 4目录拼接 paths = ["test","test.txt"] new_dir =Path.cwd().parent.joinpath(*paths) # print(new_dir) # 5创建 project/test目录,重命名 # Path('project/test').mkdir(parents=True, exist_ok=True) # Path('test.txt').rename('new_test.txt') # 6返回绝对路径 print(Path("./").resolve()) # print(os.path.abspath("./")) print(Path("./project").is_dir()) # 判断是否是目录 print(Path("./new_test.txt").is_file()) # 是否是文件 print(Path("test").exists()) # 判断路径是否存在 # Path("./tt").unlink() # 删除文件(文件非空触发异常) # Path("./project").rmdir() # 删除目录(目录非空触发异常)
from pathlib import Path

FILE = Path(__file__).resolve()  # <class 'pathlib.WindowsPath'>
ROOT = FILE.parents[0]  # 上级目录路径
print(Path("./").resolve()) # 解析为绝对路径,解析符号链接并正常化(例如在Windows下将 斜杠 转换为 反斜杠)
print(Path("./")) #D:\rsrc

#方式二
import os
script_path = os.path.realpath(__file__) #当前文件路径
script_dir = os.path.dirname(script_path) #所在目录绝对路径![]() Glob(示例:jpg,png结尾的所有图片路径)
Glob(示例:jpg,png结尾的所有图片路径)# Glob 匹配指定路径下的文件信息,列表的形式返回匹配到的文件绝对路径 import glob pic_type =["jpg","png"] paths =[] paths.extend(glob.glob(r"D:\rsrc\data\electromobile\electric_car\JPEGImages\*.{}".format(i)) for i in pic_type) #二维数组:所有jpg绝对路径和png图片绝对路径 print(paths) #[['D:\\rsrc\\data\\electromobile\\electric_car\\JPEGImages\\00001.jpg',],[xxx.png]]
![]() os,shutil
os,shutilimport shutil import os # 1. 获取当前脚本绝对路径 """ abs_path = os.path.abspath(__file__) print(abs_path) """ # 2. 获取当前文件的上级目录 """ base_path = os.path.dirname( os.path.dirname(路径) ) print(base_path) """ # 3. 路径拼接 """ p1 = os.path.join(base_path, 'xx') print(p1) p2 = os.path.join(base_path, 'xx', 'oo', 'a1.png') print(p2) """ # 4. 判断路径是否存在 """ exists = os.path.exists(p1) print(exists) """ # 5. 创建文件夹 """ os.makedirs(路径) """ """ path = os.path.join(base_path, 'xx', 'oo', 'uuuu') if not os.path.exists(path): os.makedirs(path) """ # 6. 是否是文件夹 """ file_path = os.path.join(base_path, 'xx', 'oo', 'uuuu.png') is_dir = os.path.isdir(file_path) print(is_dir) # False folder_path = os.path.join(base_path, 'xx', 'oo', 'uuuu') is_dir = os.path.isdir(folder_path) print(is_dir) # True """ # 7. 删除文件或文件夹 """ os.remove("文件路径") """ """ path = os.path.join(base_path, 'xx') shutil.rmtree(path) """ # 8. 拷贝文件夹 """ shutil.copytree("/Users/wupeiqi/Desktop/图/csdn/","/Users/wupeiqi/PycharmProjects/CodeRepository/files") """ # 9.拷贝文件 """ shutil.copy("/Users/wupeiqi/Desktop/图/csdn/WX20201123-112406@2x.png","/Users/wupeiqi/PycharmProjects/CodeRepository/") shutil.copy("/Users/wupeiqi/Desktop/图/csdn/WX20201123-112406@2x.png","/Users/wupeiqi/PycharmProjects/CodeRepository/x.png") """ # 10.文件或文件夹重命名 """ shutil.move("/Users/wupeiqi/PycharmProjects/CodeRepository/x.png","/Users/wupeiqi/PycharmProjects/CodeRepository/xxxx.png") shutil.move("/Users/wupeiqi/PycharmProjects/CodeRepository/files","/Users/wupeiqi/PycharmProjects/CodeRepository/images") """
- image
![]() PIL&cv2
PIL&cv2from PIL import Image import numpy as np import cv2 im = Image.open(jpg) # <class 'PIL.JpegImagePlugin.JpegImageFile'> a = np.array(im) # <class 'numpy.ndarray'> img = cv2.imread(jpg) #<class 'numpy.ndarray'> image = Image.fromarray(img) # np转化为PIL图片 --> <class 'PIL.Image.Image'>
-
容器数据类型 (collections)
# 1 Counter 计数统计
from collections import Counter
data =["1","2","1","3","3","2","4"]
counter_dict =Counter(data)
print(counter_dict.most_common()) #[('1', 2), ('2', 2), ('3', 2), ('4', 1)]
print(counter_dict.values()) # dict_values([2, 2, 2, 1])
![]() Counter(列表元素统计)
Counter(列表元素统计)from collections import Counter ct2 =Counter() a =[1,2,3,1,2,5] c =(i for i in a) # generator object ct2.update(c) print(ct2) #Counter({1: 2, 2: 2, 3: 1, 5: 1})
![]() Counter对象(计数工具)
Counter对象(计数工具)# 计数器工具提供方面、快速的计数方法。示例 >>> # Tally occurrences of words in a list >>> cnt = Counter() >>> for word in ['red', 'blue', 'red', 'green', 'blue', 'blue']: ... cnt[word] += 1 >>> cnt Counter({'blue': 3, 'red': 2, 'green': 1}) >>> # Find the ten most common words in Hamlet >>> import re >>> words = re.findall(r'\w+', open('hamlet.txt').read().lower()) >>> Counter(words).most_common(10) [('the', 1143), ('and', 966), ('to', 762), ('of', 669), ('i', 631), ('you', 554), ('a', 546), ('my', 514), ('hamlet', 471), ('in', 451)] >>> Counter('abracadabra').most_common(3) [('a', 5), ('r', 2), ('b', 2)] >>> c = Counter(a=4, b=2, c=0, d=-2) >>> sorted(c.elements()) ['a', 'a', 'a', 'a', 'b', 'b'] >>> c = Counter() # a new, empty counter >>> c = Counter('gallahad') # a new counter from an iterable >>> c = Counter({'red': 4, 'blue': 2}) # a new counter from a mapping >>> c = Counter(cats=4, dogs=8) # a new counter from keyword args # 常用模式 sum(c.values()) # total of all counts c.clear() # reset all counts list(c) # list unique elements set(c) # convert to a set dict(c) # convert to a regular dictionary c.items() # convert to a list of (elem, cnt) pairs Counter(dict(list_of_pairs)) # convert from a list of (elem, cnt) pairs c.most_common()[:-n-1:-1] # n least common elements +c # remove zero and negative counts
![]() defaultdict示例
defaultdict示例>>> s = [('yellow', 1), ('blue', 2), ('yellow', 3), ('blue', 4), ('red', 1)] >>> d = defaultdict(list) >>> for k, v in s: ... d[k].append(v) ... >>> sorted(d.items()) [('blue', [2, 4]), ('red', [1]), ('yellow', [1, 3])] # dict.setdefault()技术更简单和更快 >>> d = {} >>> for k, v in s: ... d.setdefault(k, []).append(v) ... >>> sorted(d.items()) [('blue', [2, 4]), ('red', [1]), ('yellow', [1, 3])]
![]() OrderDict对象(字典排序)
OrderDict对象(字典排序)>>> # regular unsorted dictionary >>> d = {'banana': 3, 'apple': 4, 'pear': 1, 'orange': 2} >>> # dictionary sorted by key >>> OrderedDict(sorted(d.items(), key=lambda t: t[0])) OrderedDict([('apple', 4), ('banana', 3), ('orange', 2), ('pear', 1)]) >>> # dictionary sorted by value >>> OrderedDict(sorted(d.items(), key=lambda t: t[1])) OrderedDict([('pear', 1), ('orange', 2), ('banana', 3), ('apple', 4)]) >>> # dictionary sorted by length of the key string >>> OrderedDict(sorted(d.items(), key=lambda t: len(t[0]))) OrderedDict([('pear', 1), ('apple', 4), ('orange', 2), ('banana', 3)])
- 编码检测(chardet库)
![]() 编码检测-(爬虫应用)
编码检测-(爬虫应用)#!\Users\Local\Programs\Python37 # -*- coding: utf-8 -*- # 现字符串/文件的编码检测 import chardet # 中文检测 str1 ="你好chardet,我是中文".encode("gbk") a =chardet.detect(str1) print(a) # {'encoding': 'GB2312', 'confidence': 0.99, 'language': 'Chinese'} print(a["encoding"]) #GB2312 str2 = '我有一个梦想'.encode('utf-8') chardet.detect(str2) print(chardet.detect(str2)["encoding"]) # 日文检测 str3 = 'ありがとう'.encode('euc-jp') #{'encoding': 'EUC-JP', 'confidence': 0.99, 'language': 'Japanese'} a=chardet.detect(str3) print(a) # 爬虫应用实例 import chardet import requests headers = {'User-Agent':'Mozilla/5.0 (Windows NT 6.1; WOW64) AppleWebKit/537.36 (KHTML, like Gecko) Chrome/55.0.2883.87 Safari/537.36'} response = requests.get('https://www.baidu.com',headers=headers) # 使用chardet指定编码 response.encoding = chardet.detect(response.content)['encoding'] print(response.text)
- pdfkit库生成pdf文件
![]() pdfkit-->pdf(string,html,url)
pdfkit-->pdf(string,html,url)#!\Users\Local\Programs\Python37 # -*- coding: utf-8 -*- """ 1 pip install pdfkit 2 安装wkhtmltopdf.exe文件 (https://wkhtmltopdf.org/downloads.html) 注意:记住安装地址,找到wkhtmltopdf.exe文件所在的绝对路径,后面要用到 3 使用pdfkit库生成pdf文件 """ # 导入库 import pdfkit '''将网页url生成pdf文件''' def url_to_pdf(url, to_file): # 将wkhtmltopdf.exe程序绝对路径传入config对象 path_wkthmltopdf = r'E:\常用软件安装包\wkhtmltopdf\bin\wkhtmltopdf.exe' config = pdfkit.configuration(wkhtmltopdf=path_wkthmltopdf) # 生成pdf文件,to_file为文件路径 pdfkit.from_url(url, to_file, configuration=config) print('完成') # 传入知乎专栏文章url,转换为pdf # url_to_pdf(r'https://zhuanlan.zhihu.com/p/69869004', 'out_1.pdf') # 导入库 import pdfkit '''将html文件生成pdf文件''' def html_to_pdf(html, to_file): # 将wkhtmltopdf.exe程序绝对路径传入config对象 path_wkthmltopdf = r'E:\常用软件安装包\wkhtmltopdf\bin\wkhtmltopdf.exe' config = pdfkit.configuration(wkhtmltopdf=path_wkthmltopdf) # 生成pdf文件,to_file为文件路径 pdfkit.from_file(html, to_file, configuration=config) print('完成') # html_to_pdf('sample.html','out_2.pdf') # 导入库 import pdfkit '''将字符串生成pdf文件''' def str_to_pdf(string, to_file): # 将wkhtmltopdf.exe程序绝对路径传入config对象 path_wkthmltopdf = r'E:\常用软件安装包\wkhtmltopdf\bin\wkhtmltopdf.exe' config = pdfkit.configuration(wkhtmltopdf=path_wkthmltopdf) # 生成pdf文件,to_file为文件路径 pdfkit.from_string(string, to_file, configuration=config) print('完成') str_to_pdf('This is test!','out_3.pdf')
-
ddddocr(验证码识别)
环境要求:python >=3.8安装: pip install ddddocr![]() ddddocr-验证码识别
ddddocr-验证码识别import ddddocr ocr = ddddocr.DdddOcr() with open('code1.png', 'rb') as f: img_bytes = f.read() res = ocr.classification(img_bytes) print(res)
- 日志处理-读取配置文件-markdown转化为html(工具类)
![]() Config/user.conf
Config/user.conf[wechat] appID="你的appid" appsecret=fc20919dc4b52409abf20a6d723c3285 wechatID=oJ3nX591TD5ri1IJPhsDCSv6-3Gc tempID=1WyxLp1ll9rc4muW02BGtNUxyt4ehuNgnv124ptUuiM [API] token=https://api.weixin.qq.com/cgi-bin/token tmpsend=https://api.weixin.qq.com/cgi-bin/message/template/send info=http://127.0.0.1 [log] logdir=log level=debug
![]() logger & markdown等-->html
logger & markdown等-->html#! /usr/bin env python3 # -*- coding:utf-8 -*- """ 用途:集成工具为App使用 1 日志处理(读取配置文件) 2 markdowm等文件格式转换为html """ import datetime import os import sys import markdown from WebApi.WebApi import settings # 调试 # from WebApi import settings loglevel = { "debug": 0, "info": 1, "warn": 2, "error": 3 } work_dir = settings.BASE_DIR resouce_dir = os.path.join(work_dir, "Res") config_dir = os.path.join(work_dir, "Config") cache_dir = os.path.join(work_dir, "cache") config_file_name = os.path.join(config_dir, "user.conf") templeates_dir = os.path.join(work_dir, "templates") def init_all_resouce(): config_dict = {} with open(os.path.join(work_dir, config_file_name), 'r', encoding='utf-8') as config_file: all_config = config_file.read() print("all_config",all_config) config_list_tmp = all_config.split("[") for config_data in config_list_tmp: if config_data: config_list = config_data.split("]", maxsplit=1) config_dict[config_list[0]] = {} for key_value in config_list[1].split("\n"): if key_value and not key_value[0] == "#": key, value = key_value.split("=", maxsplit=1) config_dict[config_list[0]][key] = value return config_dict all_config = init_all_resouce() # 读取配置文件,构造为字典数据格式 # {'wechat': {'appID': 'wxc1feb2ec1499039e', 'appsecret': 'fc20919dc4b52409abf20a6d723c3285', 'wechatID': 'oJ3nX591TD5ri1IJPhsDCSv6-3Gc', 'tempID': '1WyxLp1ll9rc4muW02BGtNUxyt4ehuNgnv124ptUuiM'}, 'API': {'token': 'https://api.weixin.qq.com/cgi-bin/token', 'tmpsend': 'https://api.weixin.qq.com/cgi-bin/message/template/send', 'info': 'http://127.0.0.1'}, 'log': {'logdir': 'log', 'level': 'debug'}} # 用途:记录日志,分debug、info、warn、error四个等级 def loger(msg: str, logfrom=os.path.basename(sys.argv[0]).replace(".py", ""), level="info"): now = datetime.datetime.now().strftime('%y-%m-%d %H:%M:%S') logstr = "[%s] [%s] %s\n" % (level, now, msg) if loglevel[level] > loglevel[all_config["log"]["level"]]: path = os.path.join(work_dir, all_config["log"]["logdir"]) if not os.path.exists(path): os.makedirs(path.encode('utf-8')) with open(os.path.join(path, logfrom + ".log"), 'a', encoding='utf-8') as log_file: log_file.write(logstr) print(logstr, end="") # 将文本转成html def str2html(rel_str: str, str_type: str, filename="", path=""): if str_type == "markdown": html_str = markdown.markdown(rel_str) elif str_type == "text": html_str = "<pre>%s</pre>" % rel_str else: return False if filename and path: if not os.path.exists(path): os.makedirs(path.encode('utf-8')) with open(os.path.join(path, filename + ".html"), 'w', encoding='utf-8') as html_file: html_file.write(html_str) else: return html_str if __name__ == '__main__': print(init_all_resouce())
- python连接Linux(paramiko库)
#1、安装依赖包
pip install ecdsa
pip install Crypto
pip install Twisted
#2、安装paramiko
pip install paramiko
![]() 1 执行linux命令
1 执行linux命令#!\Users\Local\Programs\Python37 # -*- coding: utf-8 -*- """Python执行Linux命令""" import paramiko # 1 连接服务器 # ip、用户名、密码 ip = "远程Linux的IP地址" port = 22 user = "root" password = "密码" # 创建SSHClient 实例对象 ssh = paramiko.SSHClient() # 调用方法,表示没有存储远程机器的公钥,允许访问 ssh.set_missing_host_key_policy(paramiko.AutoAddPolicy()) # 连接远程机器,地址,端口,用户名密码 ssh.connect(ip, port, user, password, timeout=10) """ # 2 执行单条linux命令,如:ls # 输入linux命令 command1 = "ls" ssh.exec_command(command1) # stdout 为正确输出,stderr为错误输出 stdin, stdout, stderr = ssh.exec_command(command1) # 输出命令执行结果 result = stdout.read() print(result) """ # 3 执行多条Linux命令 # 输入linux命令 command = "cd / ;ls" stdin, stdout, stderr = ssh.exec_command(command) # 输出命令执行结果 result = stdout.read() ## bytes 转 str result = str(result) result = result.split('\\n') for i in result: print(i)
![]() 2 上传-下载文件(linux)
2 上传-下载文件(linux)#!\Users\Local\Programs\Python37 # -*- coding: utf-8 -*- #SFTPClient 传送文件 import paramiko # 1 连接Linux服务器 # 获取Transport实例 tran = paramiko.Transport(('远程Linuxip', 22)) # 连接SSH服务端,使用password tran.connect(username="root", password='密码') # 获取SFTP实例 sftp = paramiko.SFTPClient.from_transport(tran) # 2 上传文件 # 设置上传的本地/远程文件路径 localpath = "D:\python\\LH_healthypush_system.zip" remotepath = "/LH_healthypush_system.zip" # 执行上传动作 sftp.put(localpath, remotepath) # 关闭连接 tran.close() # # 3、从Linux服务器下载文件 # localpath2 = "D:/a1.txt" # remotepath2 = "/a1.txt" # # 执行下载动作 # sftp.get(remotepath2, localpath2) # # 关闭连接 # tran.close()
![]() 示例(上传-下载-zip)
示例(上传-下载-zip)#!\Users\Local\Programs\Python37 # -*- coding: utf-8 -*- import paramiko from pathlib import Path ip ='49.235.88.xx' port =22 # 1 上传文件到linux def window_to_linux(localpath): """ :param path: 本地文件路径 :param remote_path:远程文件路径 :return: """ tran = paramiko.Transport((ip, port)) tran.connect(username="root", password='Hw199499') sftp = paramiko.SFTPClient.from_transport(tran) # 2 上传文件 remotepath ="/root/"+localpath.split("\\")[-1] sftp.put(localpath, remotepath) tran.close() print(remotepath,"--上传成功") return remotepath # # 3、从Linux服务器下载文件 def linux_to_window(remotepath ="/root/lhpush.sh"): tran = paramiko.Transport((ip, port)) tran.connect(username="root", password='Hw1994XX') sftp = paramiko.SFTPClient.from_transport(tran) file_name =remotepath.split("/")[-1] localpath =Path.cwd().joinpath(file_name) print(localpath) # 执行下载动作 sftp.get(remotepath, localpath) tran.close() print(localpath,"--下载成功") # 3 解压压缩包,覆盖原先的已有压缩包 def unzip(remotepath): # 1 连接服务器 ssh = paramiko.SSHClient() ssh.set_missing_host_key_policy(paramiko.AutoAddPolicy()) ssh.connect(ip, port, "root", "Hw1994XX", timeout=10) # 2 执行单条linux命令,如:ls # 输入linux命令 command1 = f"unzip -o {remotepath}" ssh.exec_command(command1) # stdout 为正确输出,stderr为错误输出 stdin, stdout, stderr = ssh.exec_command(command1) # 如果错误输出error result = stderr.read() if result: print(result) else: print("解压成功") # # # 3 执行多条Linux命令 # # 输入linux命令 # command = "cd / ;ls" # stdin, stdout, stderr = ssh.exec_command(command) # # 输出命令执行结果 # result = stdout.read() # ## bytes 转 str # result = str(result) # result = result.split('\\n') # for i in result: # print(i) if __name__ == '__main__': remotepath =window_to_linux(localpath="D:\python\\LH_healthypush_system.zip") unzip(remotepath) # linux_to_window() # window_to_linux(localpath="D:\python\LH_healthypush_system\lhpush.sh")
- python 调用微信公众号接口
![]() 公众号-客服消息(获取access_token)
公众号-客服消息(获取access_token)import json import requests # 我们可以接受定义的复杂,但是不能接受调用的复杂 # 把代码从面向函数改成面向对象 class WxTools(): def __init__(self, app_id, app_secret): self.app_id = app_id self.app_secret = app_secret def get_access_token(self): url = f'https://api.weixin.qq.com/cgi-bin/token?grant_type=client_credential&appid={self.app_id}&secret={self.app_secret}' resp = requests.get(url).json() access_token = resp.get('access_token') return access_token def send_wx_customer_msg(self, opend_id, msg="有人闯入了你的家"): url = f'https://api.weixin.qq.com/cgi-bin/message/custom/send?access_token={self.get_access_token()}' req_data = { "touser": opend_id, "msgtype":"text", "text": { "content": msg } } requests.post(url, data=json.dumps(req_data, ensure_ascii=False).encode('utf-8')) if __name__ == "__main__": app_id = 'wx7f23641379450a2' app_secret = '2bfecd48e13964d00b4a1b0b26b0b' wx_tools = WxTools('wx7f23641379450a28', '2bfecd48e13964d00b4a1b0bf26b0acb') wx_tools.send_wx_customer_msg("oqtB6wXelAcohf9rasCA7VLHNk9c")
- 界面命令行工具click
![]() click
click# 官网:https://click.palletsprojects.com/en/8.0.x/options/#name-your-options # 参考:https://mp.weixin.qq.com/s/QNhO_EeF7_wKqtoyq9dwRg # 作用:命令行界面实现工具—Click import click @click.command() @click.option("--count",default=1,help="Number of grettings") @click.option("--name",prompt="Your name",help="The person to greet") def hello(count,name): for i in range(count): click.echo(f"Hello {name}!") @click.command() @click.option('--n', default=1) # 设定了默认值 def dots1(n): click.echo('.' * n) @click.command() @click.option('--n', required=True, type=int) # 设定必须传入参数值 def dots2(n): click.echo('.' * n) @click.command() @click.option('--from', '-f', 'from_') @click.option('--to', '-t') def reserved_param_name(from_, to): click.echo(f"from {from_} to {to}") @click.command() @click.option('--pos', nargs=2, type=float) #多值参数 --pos 5 2 def findme(pos): a, b = pos click.echo(f"{a} / {b}") @click.command() @click.option('--message', '-m', multiple=True) #多值参数 -m python -m list def commit(message): click.echo(' '.join(message)) import sys @click.command() @click.option('--shout/--no-shout', default=False) # 布尔标志 def info(shout): rv = sys.platform if shout: rv = rv.upper() + '!!!!111' click.echo(rv) @click.command() @click.option('--hash-type', type=click.Choice(['MD5', 'SHA1'], case_sensitive=False)) #选择选项 def digest(hash_type): click.echo(hash_type) @click.command() @click.option('--name', prompt='Your name please') #提示文本 def hello(name): click.echo(f"Hello {name}!") if __name__ == '__main__': # hello() # dots1() # dots2() reserved_param_name()
- Argparse 编写命令行
![]() View Code
View Code# 3 Argparse 编写命令行接口 from argparse import ArgumentParser parse =ArgumentParser() parse.add_argument("--a",default=0,type=int,required=True,help="the first number") parse.add_argument("--b",default=0,type=int,required=False,help="the second number") args =parse.parse_args() print("两数之和为:",args.a +args.b)
![]() View Code2
View Code2import argparse parser =argparse.ArgumentParser() parser.add_argument('--freeze', nargs='+', type=int, default=[0], help='Freeze layers') # python test12.py --freeze 18 12 --> [18,12] # parser.add_argument('--freeze', type=list, default=[], help='Freeze layers') # python test12.py --freeze 1911 --> ['1', '9', '1', '1'] parser.add_argument('--epochs', type=int, default=300) opt =parser.parse_args() print(opt.freeze) # python test12.py --freeze 18 12 --> [18,12] print(opt.epochs) # 300


作者:华王
博客:https://www.cnblogs.com/huahuawang/

 浙公网安备 33010602011771号