
1-Lombok工具使用
1.先给Eclispe安装Lombok插件
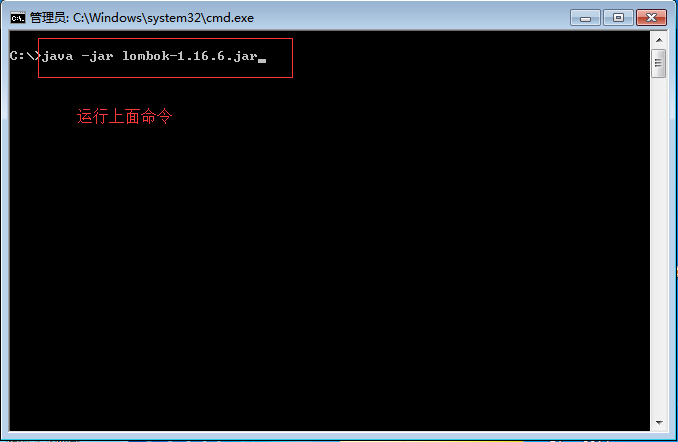
首先下载 lombok-1.16.6.jar 这个jar包 存放在系统任意盘里面 我这里是放在 c:\lombok-1.16.6.jar
运行命令
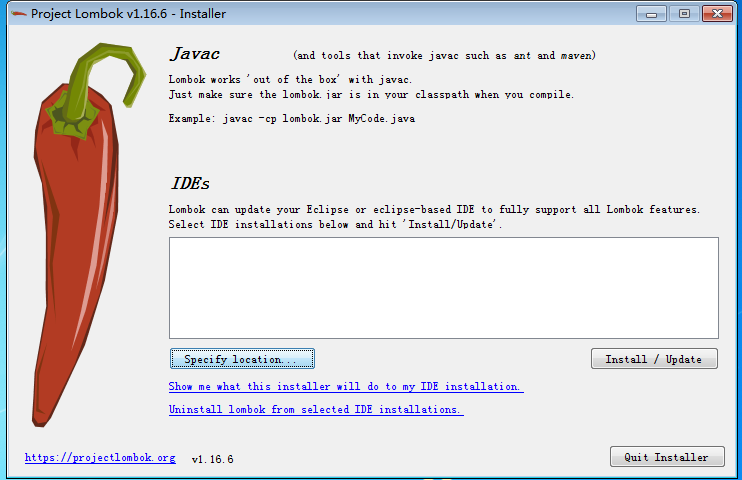
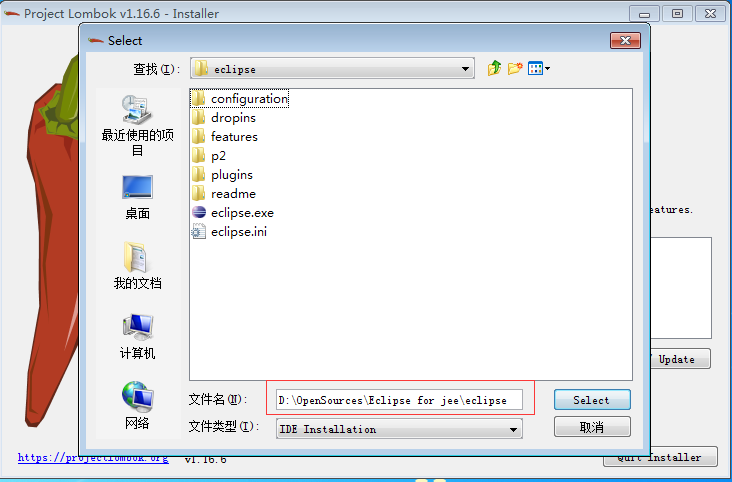
点击 Specify location 选择eclise软件的安装目录
选择好之后 点击instal/update按钮
打开我们eclispe软件的安装目录 里面会多出一个jar文件 lombok.jar
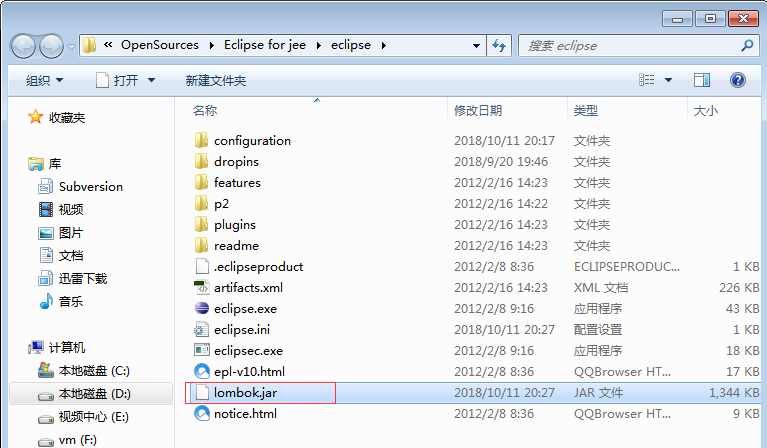
到此插件安装成功
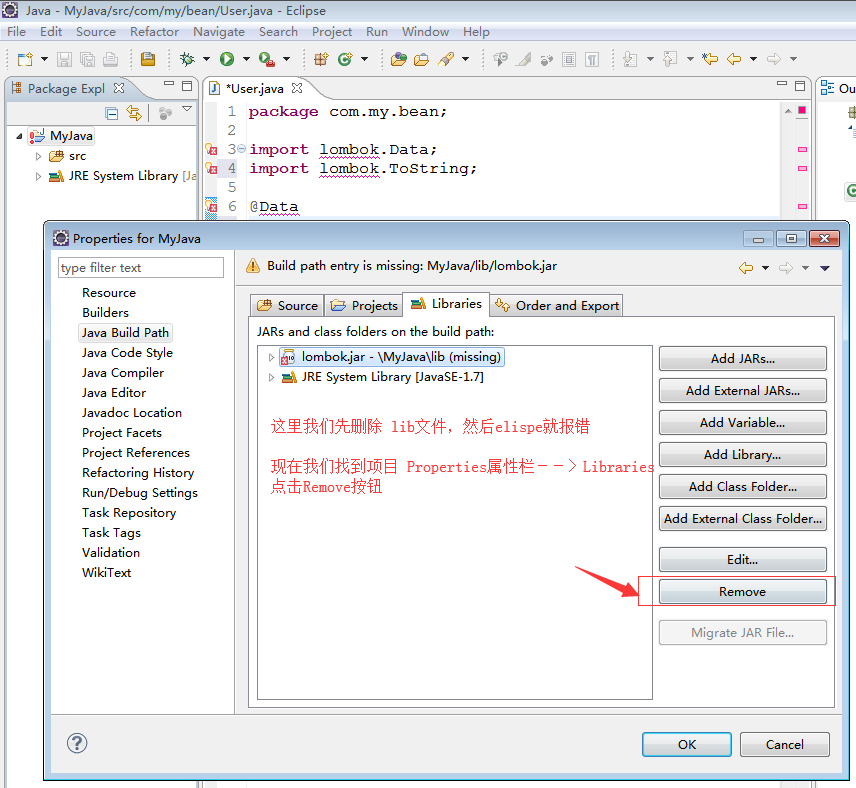
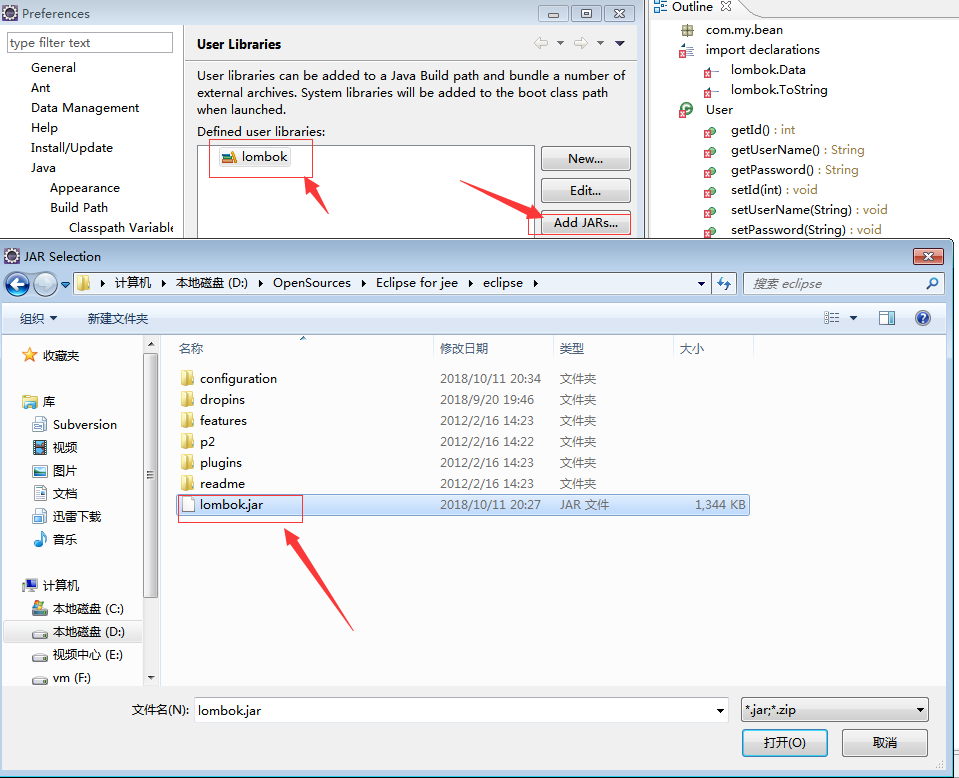
复制eclispe软件下面的 lombok.jar文件到我们项目工程当中 构造环境Build Path
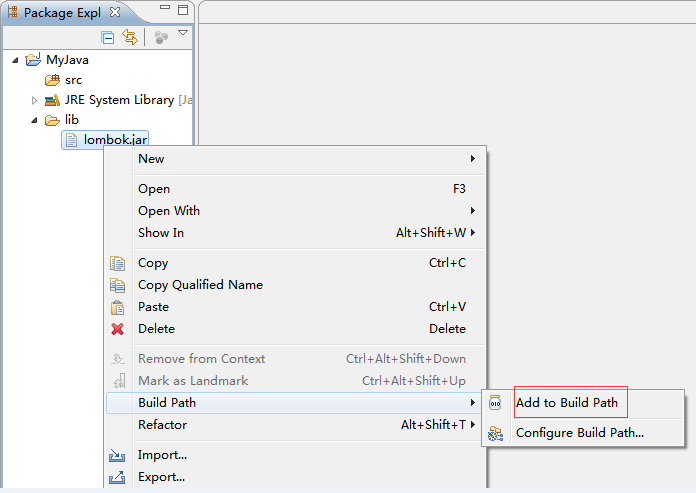


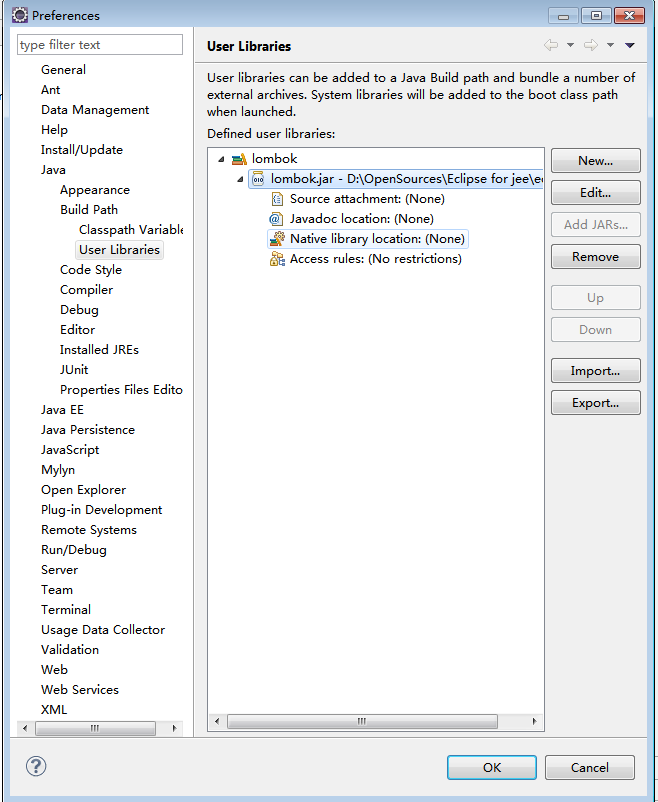
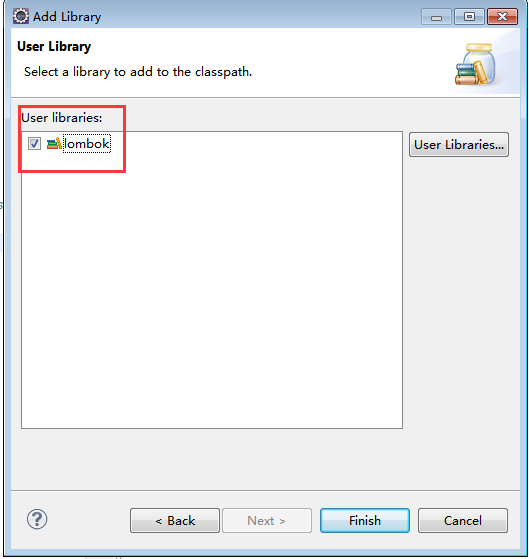
因为这个插件我们是经常用的到,所以我们也配置到eclispe User Libary当中去
配置步骤
Window --->Preferences --->搜索 User Libraries

然后给lombok 关联一个jar包
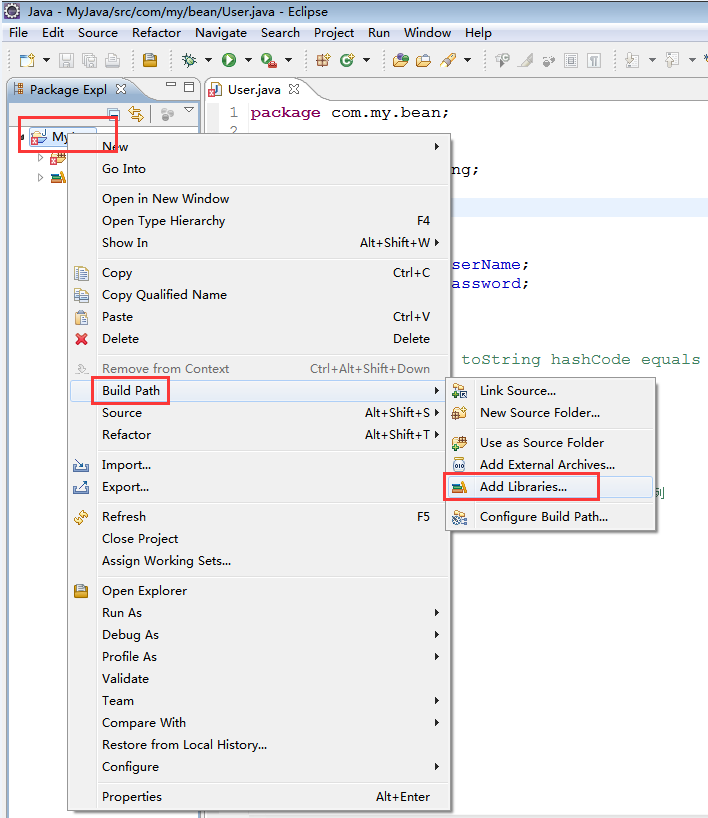
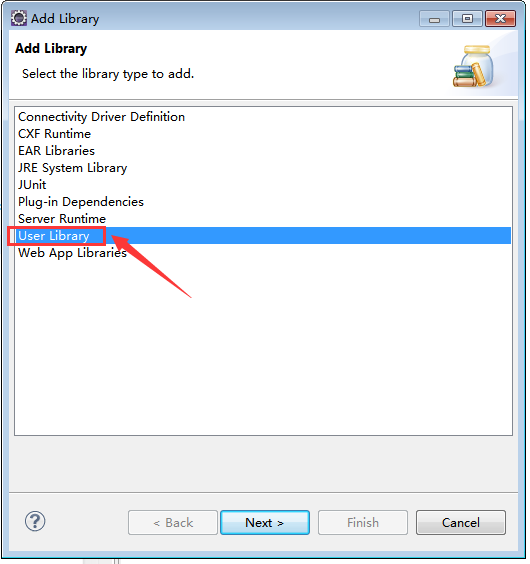
然后给我们项目配置插件
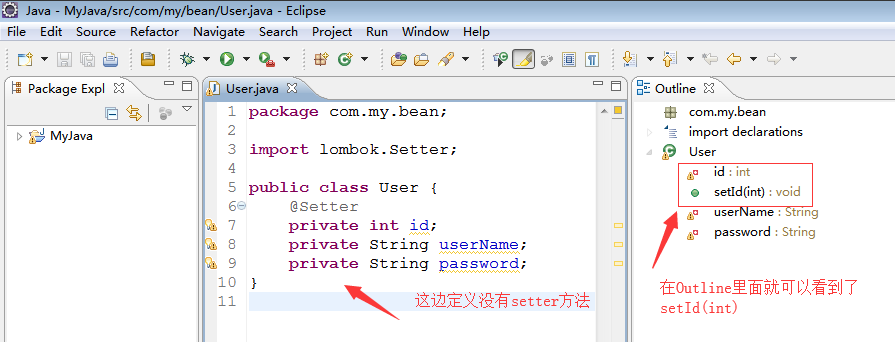
引用之后 代码就不会报错,
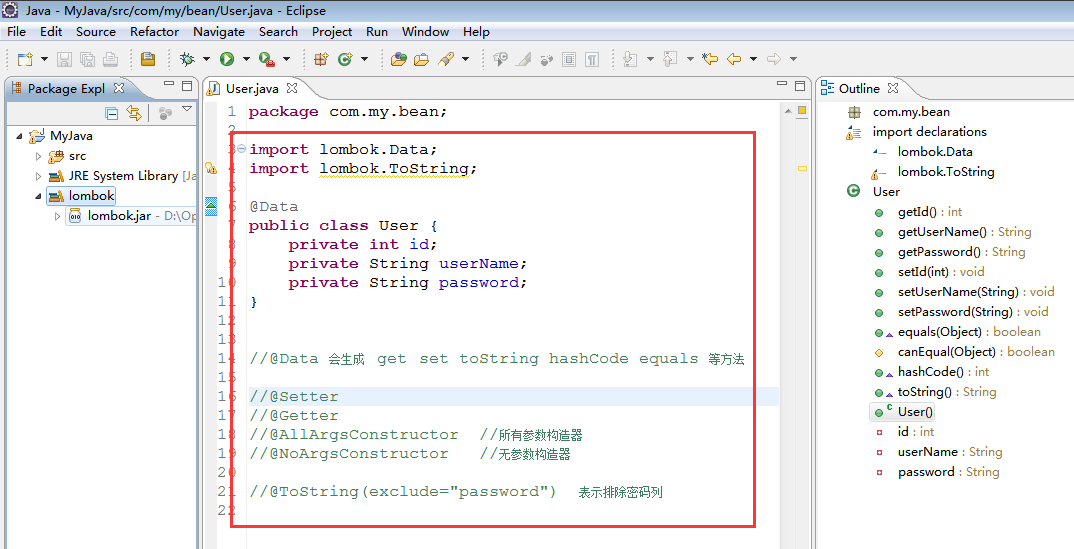
以后我们的其它也可以直接引用既可以
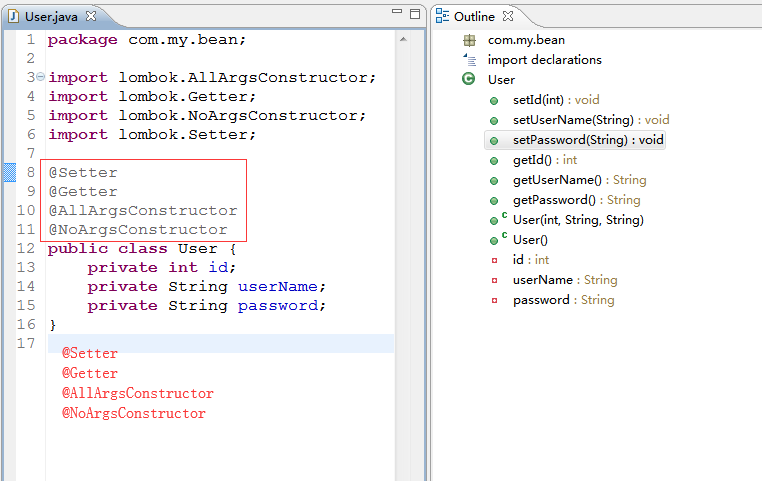
其实lombok 是帮助我们生成了这些方法,我们打开字节码来查看一下吧
打开的字节码如下显示
// Decompiled by Jad v1.5.8e2. Copyright 2001 Pavel Kouznetsov.
// Jad home page: http://kpdus.tripod.com/jad.html
// Decompiler options: packimports(3) fieldsfirst ansi space
// Source File Name:   User.java

package com.my.bean;


public class User
{

    private int id;
    private String userName;
    private String password;

    public int getId()
    {
        return id;
    }

    public String getUserName()
    {
        return userName;
    }

    public String getPassword()
    {
        return password;
    }

    public void setId(int id)
    {
        this.id = id;
    }

    public void setUserName(String userName)
    {
        this.userName = userName;
    }

    public void setPassword(String password)
    {
        this.password = password;
    }

    public boolean equals(Object o)
    {
        if (o == this)
            return true;
        if (!(o instanceof User))
            return false;
        User other = (User)o;
        if (!other.canEqual(this))
            return false;
        if (getId() != other.getId())
            return false;
        Object this$userName = getUserName();
        Object other$userName = other.getUserName();
        if (this$userName != null ? !this$userName.equals(other$userName) : other$userName != null)
            return false;
        Object this$password = getPassword();
        Object other$password = other.getPassword();
        return this$password != null ? this$password.equals(other$password) : other$password == null;
    }

    protected boolean canEqual(Object other)
    {
        return other instanceof User;
    }

    public int hashCode()
    {
        int PRIME = 59;
        int result = 1;
        result = result * 59 + getId();
        Object $userName = getUserName();
        result = result * 59 + ($userName != null ? $userName.hashCode() : 43);
        Object $password = getPassword();
        result = result * 59 + ($password != null ? $password.hashCode() : 43);
        return result;
    }

    public String toString()
    {
        return (new StringBuilder("User(id=")).append(getId()).append(", userName=").append(getUserName()).append(", password=").append(getPassword()).append(")").toString();
    }

    public User()
    {
    }
}
现在测试代码就是可以直接使用了
package com.my.test;

import com.my.bean.User;

public class Demo {

    /**
     * @param args
     */
    public static void main(String[] args) {

        User u=new User();
        u.setUserName("刘诗华");
        u.setPassword("xxxxxxxxxxx");
        u.setId(100);

    }

}

 浙公网安备 33010602011771号