Taro的学习1
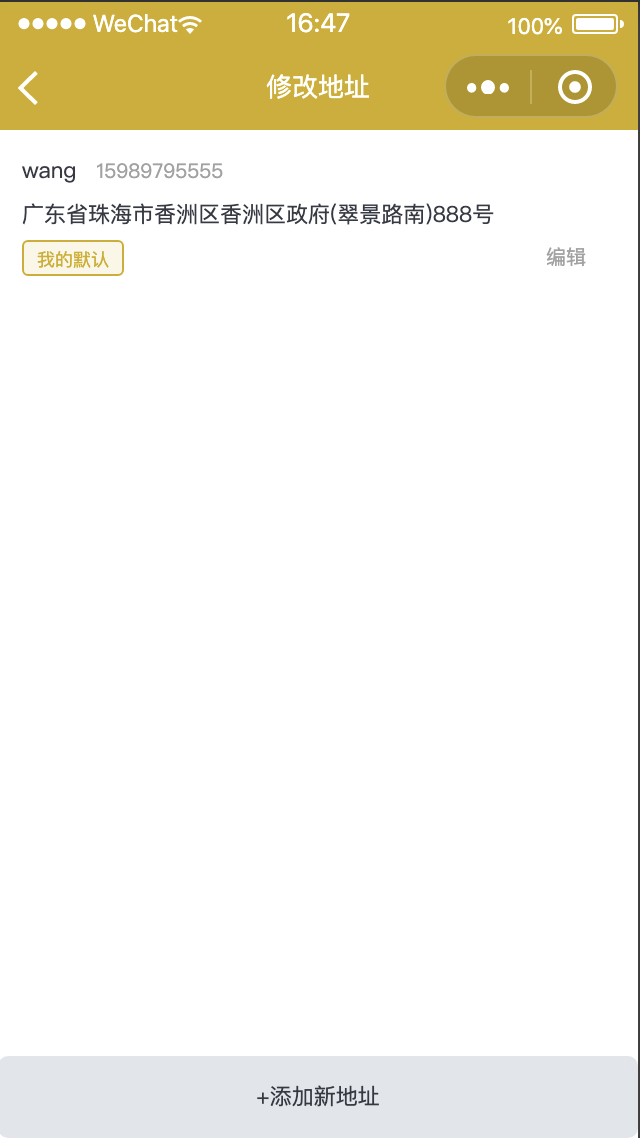
今天想通过地址管理这个界面学习下吧
1.每个组件都用
 static defaultProps = {
    onChange: null,
  };
3.然后设置下state:
 state = {
    userReady: false,
    list: null,
    error: false,
    showEdit: false,
    editItem: null,
    tmpStyle: {},
  };
4.界面部分,这是一个列表,对列表进行遍历:
render() {
    const { showEdit, list, error, tmpStyle, editItem } = this.state;
    return (
      data-fixme='02 block to view. need more test' data-scoped='wk-cal-List' className='wk-cal-List'>
        <View className='address-list' style={_safe_style_('display:' + (showEdit ? 'none' : ''))}>
          {!!(list && !list.length) && <Empty></Empty>}
          {!!error && <Error></Error>}
          {!!list && (
            <View className='address-list__list'>
              {(list || []).map((item, index) => {
                return (
                  <View
                    className='address-list__item'
                    key={index}
                    onClick={_fixme_with_dataset_(this.onSelected, { item: item })}
                  >
                    <View>
                      <Text className='address-list__item-name'>{item.consignee}</Text>
                      <Text className='address-list__item-mobile'>{item.mobile}</Text>
                    </View>
                    <View className='address-list__item-address'>
                      {(item.province || '') +
                        (item.city || '') +
                        (item.region || '') +
                        (item.address || '') +
                        (item.roomNumber || '')}
                    </View>
                    <View className='address-list__item-operator'>
                      {item.isDefault === 1 && (
                        <Text
                          className='address-list__item-default'
                          style={_safe_style_(
                            'color:' +
                              tmpStyle.btnColor +
                              ';border-color:' +
                              tmpStyle.btnColor +
                              ';background:' +
                              tmpStyle.bgColor
                          )}
                        >
                          我的默认
                        </Text>
                      )}

                      <Button className='address-list__item-edit' onClick={this.onEdit.bind(this, item)}>
                        编辑
                      </Button>
                    </View>
                  </View>
                );
              })}
            </View>
          )}
在这个列表的底部,有一个添加新地址的按钮:
 {!error && (
            <Button className='address-list__footer' onClick={this.onAdd}>
              +添加新地址
            </Button>
          )}
5.在组件加载后,进行一些数据拉取是操作:
 componentDidMount() {
    this.getTemplateStyle();
    this.fetchAddres();
  }
这里面有两个方法,一个是获取模板style。一个是获取地址。
//获取模板配置
  getTemplateStyle = () => {
    const templateStyle = template.getTemplateStyle();
    this.setState({
      tmpStyle: templateStyle,
    });
  };
fetchAddres = () => {
    wxApi
      .request({
        url: api.address.list,
        loading: true,
      })
      .then((res) => {
        this.setState({
          list: res.data,
          error: false,
        });
      })
      .catch((error) => {
        this.setState({
          error: true,
        });
      });
  };
这里通过微信的Api。获取到数据,然后将其setState,放到list中。
6.设置页面标题什么的
config = {
    navigationBarTitleText: '地址管理',
    component: true,
  };
7.接下来看看,增加新地址的响应:
onAdd = () => {
    this.setState({
      showEdit: true,
      editItem: null,
    });
  };
在这个onAdd方法中,把showEdit设为true.
8.在上面的界面代码中,可以看出地址列表有一个判断,即,如果showEdit为true就把地址列表隐藏。
在界面代码的下面有这样两行代码:
  {!!showEdit && (
          <Edit editItem={editItem} onSave={this.onSave.bind(this)} onDelete={this.onDelete.bind(this)}></Edit>
        )}
这里以showEdit为条件判断。如果showEdit为true的话,就会隐藏增加地址的界面:
import Edit from '../edit/index';
因为上面的add方法中,用了
static defaultProps = {
    editItem: null,
    onSave: null,
    onDelete: null,
  };
10.接着设定每个输入框的验证规则:
const rules = {
  consignee: [
    {
      required: true,
      message: '请输入联系人',
    },

    {
      reg: /^[0-9A-Za-z\u4e00-\u9fa5]+$/i,
      message: '联系人姓名由字母、数字或汉字组成',
    },
  ],

  mobile: [
    {
      required: true,
      message: '请输入手机号码',
    },

    {
      reg: /^1[3|4|5|6|7|8|9][0-9]\d{8}$/,
      message: '手机号码无效',
    },
  ],

  address: [
    {
      required: true,
      message: '请选择收货地址',
    },
  ],

  roomNumber: [
    {
      required: true,
      message: '请输入详细地址',
    },
  ],
};
11.设定页面的初始数据:
/**
   * 页面的初始数据
   */
  state = {
    region: [],
    form: {
      consignee: '',
      mobile: '',
      address: '',
      source: 'manual',
      status: 1,
      roomNumber: '',
      longitude: null,
      latitude: null,
    },

    checked: false,
    isEdit: false,
    dialogShow: false,
    cancelText: '',
    tipMsg: '',
    tmpStyle: {},
  };
12.接下来我们从
 componentDidMount() {
    this.getTemplateStyle();
    const { editItem: model } = this.props;
    const { form } = this.state;
    let title = '添加新地址';
    if (model) {
      form.consignee = model.consignee;
      form.mobile = model.mobile;
      form.address = model.address;
      form.roomNumber = model.roomNumber;
      form.longitude = model.longitude;
      form.latitude = model.latitude;
      this.setState({
        form: { ...form },
        isEdit: true,
        region: [model.province, model.city, model.region],
        checked: model.isDefault === 1 ? true : false,
      });

      this.model = model;
      title = '修改地址';
    }
    wxApi.setNavigationBarTitle({
      title: title,
    });
  }
可以看到,先是请求到模板style。然后从this.pros中拿到editItem。并重新命名为model.判断model不为空,即为编辑地址,这样的话,就进行赋值。接着,再对setState里的值进行赋值。
注意:要通过this.setState赋值刷新数据。form:{...form}这里的...是展开运算符,就是把每个属性都赋值上去。
我也不知道这里为什么不再需要connect什么的。我想是不是继承了taro的component。然后就直接写state就行了呢?
<View className='input-view'>
            <Text className='input-view-text'>联系人:</Text>
            <Input
              className='form-input'
              placeholderClass='placeholder'
              maxlength='16'
              value={form.consignee}
              onBlur={this.nameInput}
              placeholder='请输入联系人(最大16个字)'
            ></Input>
          </View>
在这里,联系人输入框。注意onBlur事件是监听输入事件的:
//修改联系人
  nameInput = (e) => {
    const { form } = this.state;
    form.consignee = e.detail.value.trim();
    this.setState({
      form,
    });
  };
注意这里,首先将this.state赋值给form.然后。通过e.detail.value.trim()获得输入的值。这个值就可以赋值给form.consignee。然后再通过this.setSate({form,});将值赋值给form。
最后是保存的按钮:
<Button
            className='btn second'
            onClick={this.addAddress}
            style={_safe_style_('background:' + tmpStyle.btnColor)}
          >
            保存
          </Button>
来看下响应代码:
  //增加修改地址
  addAddress = () => {
    if (!this.validate()) {
      return;
    }
    const { form, region, checked, isEdit } = this.state;
    const params = { ...form };
    params.isDefault = checked ? 1 : 0;

    let url = api.address.add;
    if (isEdit) {
      params.id = this.model.id;
      url = api.address.update;
    }

    wxApi
      .request({
        url: url,
        loading: true,
        data: params,
      })
      .then((res) => {
        wxApi.showToast({
          title: '保存成功。',
        });

        if (this.props.onSave) {
          this.props.onSave();
        }
      })
      .catch((error) => {
        console.log('address setDefault error: ' + JSON.stringify(error));
      });
  };
我们来解读下代码:
1.首先,进行验证:
 if (!this.validate()) {
      return;
    }
2.对一些变量进行赋值:
  const { form, region, checked, isEdit } = this.state;
    const params = { ...form };
    params.isDefault = checked ? 1 : 0;
3.紧接着,进行保存的请求:
let url = api.address.add;
    if (isEdit) {
      params.id = this.model.id;
      url = api.address.update;
    }

    wxApi
      .request({
        url: url,
        loading: true,
        data: params,
      })
      .then((res) => {
        wxApi.showToast({
          title: '保存成功。',
        });

        if (this.props.onSave) {
          this.props.onSave();
        }
      })
      .catch((error) => {
        console.log('address setDefault error: ' + JSON.stringify(error));
      });

 浙公网安备 33010602011771号