SpringSecurity - [01] 概述
Spring Security 是一个灵活且强大的工具,可以帮助你构建安全可靠的Spring应用程序。它不仅简化了认证和授权的过程,而且还提供了丰富的特性和扩展点,使得开发者可以根据项目的独特需求定制安全策略。无论是小型的内部工具还是大型的企业级应用,Spring Security都能提供必要的安全保障。
001 || SpringSecurity是什么
Spring Security是一个强大的、可定制的身份验证和访问控制框架,它是为基于Java的Spring应用程序设计的安全框架。
它提供了全面的安全服务,包括不限于:
- 认证(Authentication):确认用户身份,即验证用户提供的凭证(如用户名和密码)是否正确。
- 授权(Authorization):决定已认证的用户是否有权限执行某些操作或访问特定资源。
Spring Security构建在Spring框架之上,可以轻松集成到任何基于Spring的应用程序中,并且支持多种安全协议和技术,如OAuth2、JWT(JSON Web Tokens)、LDAP等。
002 || 作用
【1】保护Web应用:通过配置HTTP请求的安全策略来保护Web应用程序,例如限制对某些URL的访问。
【2】管理用户认证:提供多种方式来处理用户登录,包括表单登录、基本认证、记住我功能等。
【3】实施访问控制:允许开发者定义细粒度的访问规则,以确保只有授权用户才能访问敏感数据或执行关键操作。
【4】防止常见的共计:内置防御机制对抗跨站脚本共计(XSS)、跨站请求伪造(CSRF)、点击劫持(Clickjacking)等常见安全威胁。
【5】支持多样的认证机制:除了传统的用户名/密码认证外,还支持社交登录(如Google、Facebook)、双因素认证等现代认证方式。
003 || 如何使用
要在Spring Boot项目中使用Spring Security,通常需要完成以下几个步骤:
(1)添加依赖
首先,在pom.xml或build.gradle文件中添加Spring Security Starter依赖。以Maven项目为例,则为:
<dependency>
<groupId>org.springframework.boot</groupId>
<artifactId>spring-boot-starter-security</artifactId>
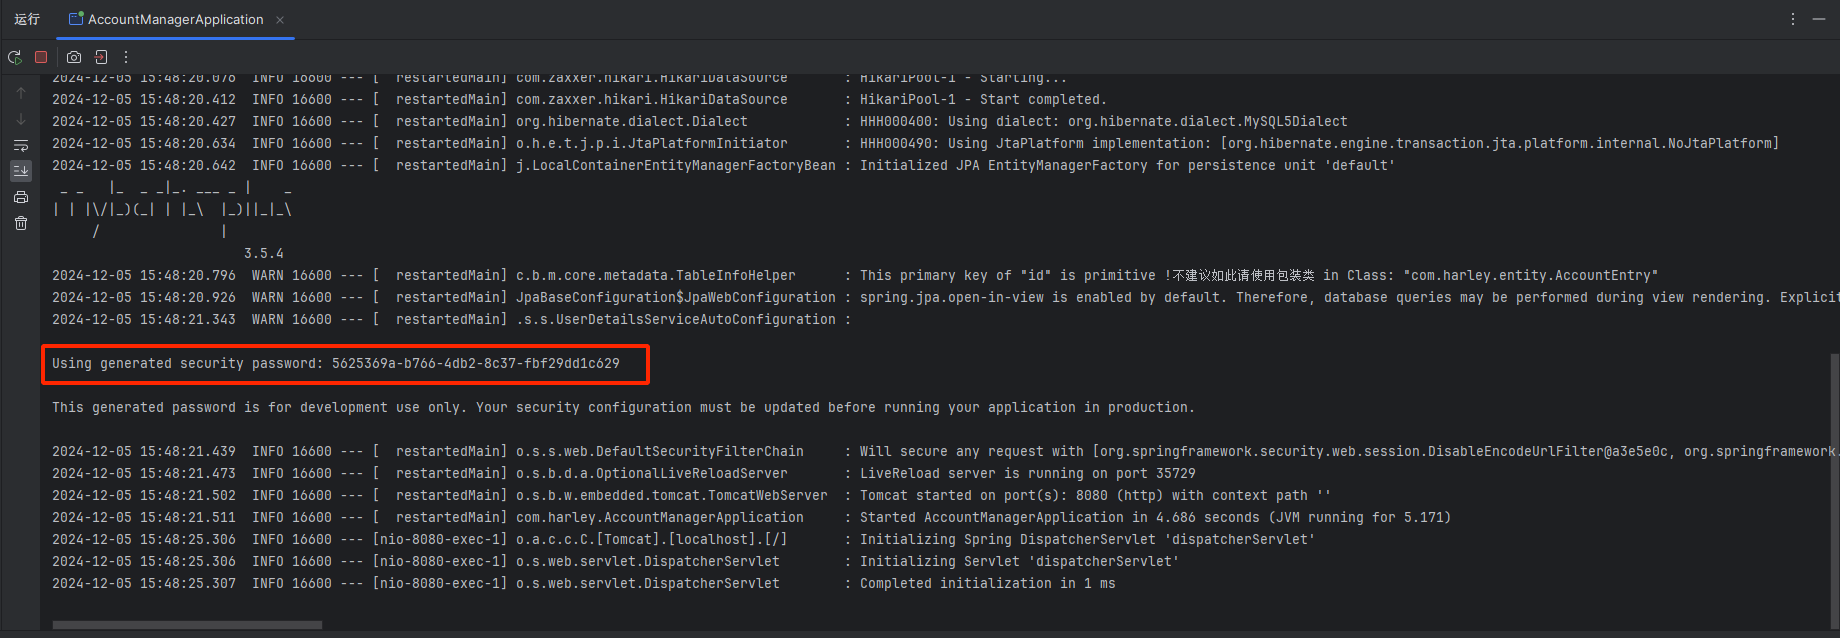
</dependency>默认启动Springboot项目之后,会在控制台显示默认用户user的临时密码
在浏览器准备访问 localhost:8080/hello 时,自动跳转到localhost:8080/login页面

(2)配置安全性
可以通过Java配置类或YAML/Properties文件来进行Spring Security相关配置。
下面是一个简单的Java配置示例,它允许匿名访问/hello路径,而其他所有请求都需要认证。
import org.springframework.context.annotation.Bean;
import org.springframework.context.annotation.Configuration;
import org.springframework.security.config.annotation.web.builders.HttpSecurity;
import org.springframework.security.config.annotation.web.configuration.EnableWebSecurity;
import org.springframework.security.web.SecurityFilterChain;

@Configuration
@EnableWebSecurity
public class SecurityConfig {

    @Bean
    public SecurityFilterChain securityFilterChain(HttpSecurity http) throws Exception {
        http
            .authorizeRequests()
                .antMatchers("/hello").permitAll() // 允许所有人访问 /hello
                .anyRequest().authenticated()     // 所有其他请求都需要认证
            .and()
            .formLogin();                         // 启用表单登录
        return http.build();
    }
}
(3)创建用户详情服务(可选)
自定义用户存储和服务,比如从数据库加载用户信息,需要实现UserDetailsService接口并覆盖loadUserByUsername方法。然后将这个实现注册为SpringBean:
import org.springframework.beans.factory.annotation.Autowired;
import org.springframework.security.core.userdetails.UserDetails;
import org.springframework.security.core.userdetails.UserDetailsService;
import org.springframework.security.core.userdetails.UsernameNotFoundException;
import org.springframework.stereotype.Service;

@Service
public class CustomUserDetailsService implements UserDetailsService {

    @Autowired
    private UserRepository userRepository;

    @Override
    public UserDetails loadUserByUsername(String username) throws UsernameNotFoundException {
        // 根据用户名查找用户实体,并将其转换为Spring Security的UserDetails对象
        return userRepository.findByUsername(username)
                .orElseThrow(() -> new UsernameNotFoundException("User not found"));
    }
}
(4)定义用户和角色(可选)
通过内存中的用户配置快速设置一些测试用户及其角色。这对于开发阶段非常有用:
import org.springframework.context.annotation.Bean;
import org.springframework.context.annotation.Configuration;
import org.springframework.security.config.annotation.authentication.builders.AuthenticationManagerBuilder;
import org.springframework.security.crypto.bcrypt.BCryptPasswordEncoder;
import org.springframework.security.crypto.password.PasswordEncoder;

@Configuration
public class SecurityConfiguration {

    @Autowired
    public void configureGlobal(AuthenticationManagerBuilder auth) throws Exception {
        auth.inMemoryAuthentication()
            .withUser("user").password(passwordEncoder().encode("password")).roles("USER")
            .and()
            .withUser("admin").password(passwordEncoder().encode("admin")).roles("ADMIN");
    }

    @Bean
    public PasswordEncoder passwordEncoder() {
        return new BCryptPasswordEncoder();
    }
}
(5)自定义登录页面(可选)
默认情况下,Spring Security会提供一个简易的登录页面。如果想要创建自己的登录界面,可以通过覆盖默认的登录路径来实现:
http
    .formLogin()
        .loginPage("/login")  // 指定自定义登录页面的URL
        .permitAll();         // 允许所有人访问登录页面
同时,需要创建相应的HTML模板或者JSP页面用于显示登录表单。

 浙公网安备 33010602011771号