centos7 安装redis 6.0.3
简介
Redis,全称 Remote Dictionary Server(远程字典服务器) ,全开源基于C语言开发,是高性能的(key/value)分布式内存数据库,基于内存运行并支持持久化的NoSQL数据库,是当前最热门的NoSQL数据库之一,也被人们称为数据结构服务器。
环境准备
操作系统
[root@had-test ~]# cat /etc/redhat-release
CentOS Linux release 7.5.1804 (Core)
redis6版本的下载连接: http://download.redis.io/releases/redis-6.0.3.tar.gz
创建redis目录,将redis的安装包下载到这个 目录
[root@had-test ~]# cd /opt/
[root@had-test opt]# mkdir redis #将redis的安装包下载到这个目录
安装依赖
yum -y install gcc gcc-c++ make tcl #测试需要依赖tcl
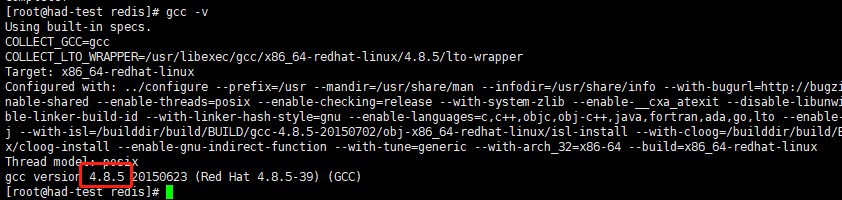
编译安装需要gcc5.3以上,可以用gcc -v 命令查看当前版本号,使用下面的命令升级到gcc9.1:
yum -y install centos-release-scl
yum -y install devtoolset-9-gcc devtoolset-9-gcc-c++ devtoolset-9-binutils
#scl命令启用只是临时的,新开的会话默认还是原gcc版本。
scl enable devtoolset-9 bash
#如果要长期使用gcc 9.1的话执行下面的命令即可:
echo -e "\nsource /opt/rh/devtoolset-9/enable" >>/etc/profile
编译安装
[root@redis-1 redis]# tar xf redis-6.0.3.tar.gz
[root@redis-1 redis]# ls
redis-6.0.3 redis-6.0.3.tar.gz
[root@redis-1 redis]# mv redis-6.0.3 redis
[root@redis-1 redis]# ls
redis redis-6.0.3.tar.gz
[root@redis-1 redis]# cd redis/
[root@redis-1 redis]# make
[root@redis-1 redis]#make install PREFIX=/opt/redis6 #安装指定目录
#如果编译出错之后再编译可以先执行命令删除之前的编译文件
make distclean
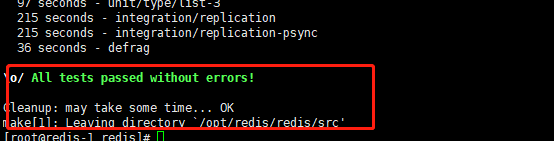
编译完了可以执行命令测试
make test
配置启动
进入到安装的目录/opt/redis6下 将源码中的redis.conf文件 复制到redis6的bin目录下并修改配置
mkdir /opt/redis6/data
cp /opt/redis/redis/redis.conf /opt//redis6/bin/
vim /opt/redis6/bin/redis.conf
#daemonize no 改为yes,开启后台运行,默认是前台运行
daemonize yes
#把这一行注释,监听所有IP
#bind 127.0.0.1
#protected-mode yes 如果改为no,则是关闭保护模式,这种模式下不能配置系统服务,建议还是开启
protected-mode yes
#requirpass,保护模式开启的时候要配置密码或者bind ip
requirepass 123456
#修改本参数,指定数据目录
dir /opt/redis6/data
#修改本参数,指定日志目录
logfile /opt//redis6/redis_6379.log
启动redis


编写启动脚本
vim /lib/systemd/system/redis.service
[Unit]
Description=Redis
After=network.target
[Service]
Type=forking
PIDFile=/var/run/redis_6379.pid
ExecStart=/opt/redis6/bin/redis-server /opt/redis6/bin/redis.conf
ExecReload=/bin/kill -s HUP $MAINPID
ExecStop=/bin/kill -s QUIT $MAINPID
PrivateTmp=true
[Install]
WantedBy=multi-user.target
使用systemctl命令
# 重载服务
systemctl daemon-reload
# 开机自启
systemctl enable redis
# 启动
systemctl start redis
# 重启
systemctl restart redis
# 停止
systemctl stop redis
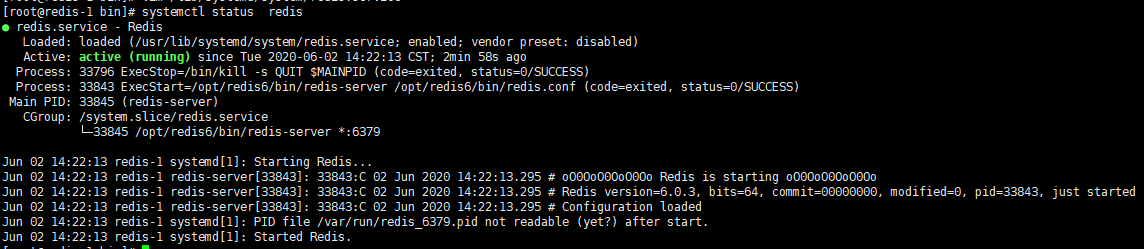
# 查看状态
systemctl status redis
# 关闭开机启动
systemctl disable redis
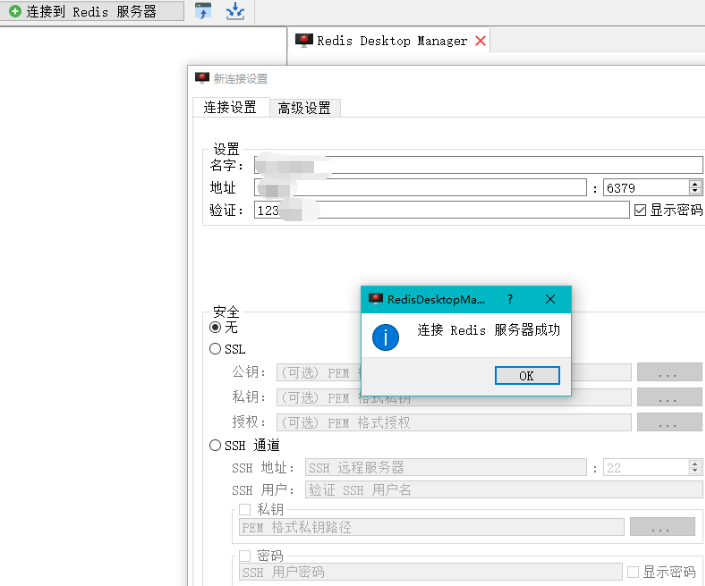
使用Redis Desktop Manager连接Redis
下载安装redis desktop manager:
Github: https://github.com/uglide/RedisDesktopManager
官网: https://redisdesktop.com/
配置防火墙,嫌麻烦直接关闭即可:
#查看防火墙状态
systemctl status firewalld
#关闭防火墙
service firewalld stop
#开启防火墙
service firewalld start
#单独开6379端口
firewall-cmd --permanent --add-port=6379
tcpfirewall-cmd --reload
由于上面的配置我们已经开启了所有IP的监听,因此可以直接连接:
关闭保护模式且无密码模式:
开启保护模式设置密码,以systemctl命令启动和开机自启:
注:redis6之后支持多线程,使用redis6的io多线程的好处?
1,reddis6把多线程用在哪里?
redis运行的瓶颈,通常不在cpu,而在内存和网络I/O
Redis 6 对多线程的启用,主要用在处理网络I/O,
流程就是:把监听到的网络的事件,分发给work thread做处理,
在处理完之后,由主线程负责执行。
说明:这是我们要注意的地方:
redis6对于命令的执行仍然是由主线程执行,
也就是象以前使用的原子性的命令如rpush/lua脚本仍然具有原子性,
不会因为多线程的引入也失效。
2,性能提升显著:
Redis读写网络的 read/write 系统调用在 执行期间占用了大部分 CPU 时间,
所以把网络读写做成多线程的方式对性能会有很大提升,
根据测试,在 4个线程 IO 时,性能相比单线程提高一倍,
是redis6中的最可观的性能提升
3.什么情况适宜启用io多线程?
来自官方配置文件的说明:
默认情况多线程是disabled,当server有至少4个核心或更多时可以启用,
至少留下一个备用的核心。
当设置为多于8个线程时,不会用明显的性能提升
建议当确实遇到性能问题时而且redis的实例能占用cpu时间的一大部分时
再启用threaded I/O,这样会比较有效,
否则没有启用这个功能的必要。
下面是多线程的配置方法:
配置指令一
#io-threads: 启用的io线程数量
io-threads 4
这个值设置为多少?
根据配置文件的说明:
如果你的server有4个核心,尝试把这个值设置为3
如果有8个核心,尝试把这个值设置为6
但这个值不建议超过8
配置指令二:
#读请求也使用io线程
io-threads-do-reads yes
设置为yes即可,配置文件中的说明:
当I/O threads被启用时,线程仅用于写,
如果需要把读数据和协议解析也启用线程,
则需要把io-threads-do-reads也设置为yes
作者认为对读请求启用io-threads得到的帮助不算太多
redis配置多线程注意事项
1.在redis运行时通过config set 来使用线程的配置指令不会生效,
当SSL启用时,多线程也不会生效
2,如果使用redis-benchmark测试redis的速度 ,
需要确认redis-benchmark是多线程模式,
使用 --threads选项来匹配redis的线程数量,
否则不会看到性能有明显提升

 浙公网安备 33010602011771号