
Vue随记
vue前端随记
环境准备
-
下载并安装 Node.js
-
安装vue 环境
# 安装淘宝npm npm install -g cnpm --registry=https://registry.npm.taobao.org # vue-cli 安装依赖包 cnpm install --g vue-cli -
新建项目
# 打开vue的可视化管理工具界面
vue ui	# 注意,要vue3.X 及以上版本,此命令才会生效
运行vue ui之后,会为我们打开一个 http://localhost:8080 的页面.
-
安装element-ui
# 切换到项目根目录
cd vueblog-vue
# 安装element-ui
cnpm install element-ui --save
然后我们打开项目src目录下的main.js,引入element-ui依赖。
import Element from 'element-ui' import "element-ui/lib/theme-chalk/index.css" Vue.use(Element) -
安装axios
cnpm install axios --save然后同样我们在main.js中全局引入axios。
import axios from 'axios'
Vue.prototype.$axios = axios
vue中设置height:100%无效的问题及解决方法
这时候设置height: 100%;是无效的,在chrome的Elements中发现height仍然是0px.
设置高度100%时,div的高度会等同于其父元素的高度。而上面中id为app的div(vue挂载的div)的父节点是body标签,body标签的父节点是html标签。在默认情况下html和body标签的高度为auto,而浏览器是不会自动给标签添加高度的,所以html和body标签就为0,自然子div的高度设置为100%就不起作用了。
此时应该在App.vue文件style中添加如下代码:
html,body,#app{

  height:100%;

}
vue 打包部署 Nginx 步骤
- 项目的根目录下创建 vue.config.js 文件
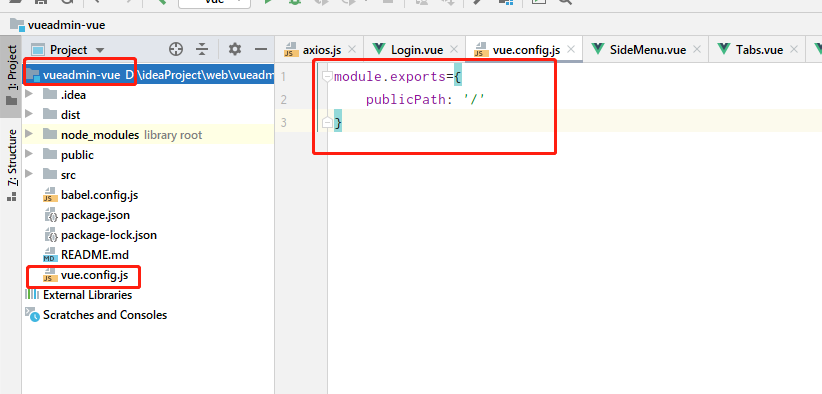
vue.config.js
module.exports={
    publicPath: '/'
}
-
在控制台执行
npm run build命令 -
将生成的文件夹 dist 里面的文件拷贝到 Nginx html 文件夹下面.
-
修改 Nginx 配置文件.
nginx.conf
server { listen 80; server_name 120.77 .158 .169; # 指定允许跨域的方法, * 代表所有 add_header Access - Control - Allow - Methods * ; # 预检命令的缓存, 如果不缓存每次会发送两次请求 add_header Access - Control - Max - Age 3600; # 不带cookie请求, 并设置为false add_header Access - Control - Allow - Credentials false; # 表示允许这个域跨域调用( 客户端发送请求的域名和端口) # $http_origin动态获取请求客户端请求的域 不用 * 的原因是带cookie的请求不支持 * 号 add_header Access - Control - Allow - Origin $http_origin; # 表示请求头的字段 动态获取 add_header Access - Control - Allow - Headers $http_access_control_request_headers; # OPTIONS预检命令, 预检命令通过时才发送请求 # 检查请求的类型是不是预检命令 if ($request_method = OPTIONS) { return 200; } #charset koi8 - r; #access_log logs / host.access.log main; location / { root / www / server / nginx / html; try_files $uri $uri / /index.html last; index / index.htm; #配置跨域请求 location /sku { proxy_pass http: //39.98.123.211:8216/; } -
启动Nginx, 测试访问即可.
Linux 下安装Nginx 服务
-
去官网下载安装包 http://nginx.org/en/download.html nginx-1.21.3.tar.gz, 解压后上传到 Linux 服务器上.
-
进入Nginx 文件夹下, 执行配置命令:
./configure --prefix=/usr/local/nginx当报错 :
Permission denied拒绝访问的时候, 执行下面命令chmod +x ./configure然后重试
./configure --prefix=/usr/local/nginx配置的时候可能会出现类似这样的信息
./configure: error: the HTTP rewrite module requires the PCRE library.
You can either disable the module by using --without-http_rewrite_module
option, or install the PCRE library into the system, or build the PCRE library
statically from the source with nginx by using --with-pcre=<path> option.
安装pcre-devel解决问题
yum -y install pcre-devel安装完成后再执行
./configure --prefix=/usr/local/nginx执行完后还有可能会出现这样的问题:
checking for PCRE JIT support ... not found
checking for system md library ... not found
checking for system md5 library ... not found
checking for OpenSSL md5 crypto library ... not found
checking for sha1 in system md library ... not found
checking for OpenSSL sha1 crypto library ... not found
checking for zlib library ... found
解决办法:
yum -y install openssl openssl-devel安装完成后再执行
./configure --prefix=/usr/local/nginx出现这个说明, 说明配置成功
Configuration summary + using system PCRE library + OpenSSL library is not used + using system zlib library nginx path prefix: "/usr/local/nginx" nginx binary file: "/usr/local/nginx/sbin/nginx" nginx modules path: "/usr/local/nginx/modules" nginx configuration prefix: "/usr/local/nginx/conf" nginx configuration file: "/usr/local/nginx/conf/nginx.conf" nginx pid file: "/usr/local/nginx/logs/nginx.pid" nginx error log file: "/usr/local/nginx/logs/error.log" nginx http access log file: "/usr/local/nginx/logs/access.log" nginx http client request body temporary files: "client_body_temp" nginx http proxy temporary files: "proxy_temp" nginx http fastcgi temporary files: "fastcgi_temp" nginx http uwsgi temporary files: "uwsgi_temp" nginx http scgi temporary files: "scgi_temp" -
执行安装命令
make && make install出现类似这种说明, 就表示安装成功了.
cp conf/nginx.conf '/usr/local/nginx/conf/nginx.conf.default'
test -d '/usr/local/nginx/logs' \
	|| mkdir -p '/usr/local/nginx/logs'
test -d '/usr/local/nginx/logs' \
	|| mkdir -p '/usr/local/nginx/logs'
test -d '/usr/local/nginx/html' \
	|| cp -R html '/usr/local/nginx'
test -d '/usr/local/nginx/logs' \
	|| mkdir -p '/usr/local/nginx/logs'

make[1]: Leaving directory '/myweb/nginx-1.21.3'
安装完后/usr/local/nginx 后出现几个文件夹conf、html、logs、sbin
-
启动Nginx
./usr/nginx/sbin/nginx此时,访问 Nginx 默认的 80 端口, 就会出现成功的页面
停止nginx

nginx -s stop

重启nginx

nginx -s reload


总结:在linux下安装nginx,首先需要安装 gcc-c++编译器。然后安装nginx依赖的pcre和zlib包。最后安装nginx即可。
vue启动项目命令
在控制台输入: npm run serve
D:\ideaProject\web\vueadmin-vue> npm run serve

 浙公网安备 33010602011771号