
持续集成:通过Jenkins API创建项目和节点
我在持续集成:Jenkins API使用方法详细介绍中介绍了jenkins API的使用方法,比如使用API读取jenkins项目相关信息、触发构建等操作,除此之外,还可以直接使用API来创建项目、新建节点。
创建slave节点
1. 节点配置文件
要通过jenkins REST API创建节点,需要先准备节点的配置文件,例如Windows节点配置:
{
    "name": "win_slave",
    "nodeDescription": "192.168.30.100",
    "numExecutors": "1",
    "remoteFS": "D:\\jenkins",
    "labelString": "win_slave",
    "mode": "NORMAL",
    "": [
        "hudson.slaves.JNLPLauncher",
        "hudson.slaves.RetentionStrategy$Always"
    ],
    "launcher": {
        "stapler-class": "hudson.slaves.JNLPLauncher",
        "$class": "hudson.slaves.JNLPLauncher",
        "workDirSettings": {
            "disabled": false,
            "workDirPath": "D:\\jenkins",
            "internalDir": "remoting",
            "failIfWorkDirIsMissing": false
        },
        "webSocket": false,
        "tunnel": "",
        "vmargs": ""
    },
    "retentionStrategy": {
        "stapler-class": "hudson.slaves.RetentionStrategy$Always",
        "$class": "hudson.slaves.RetentionStrategy$Always"
    },
    "nodeProperties": {
        "stapler-class-bag": "true"
    },
    "type": "hudson.slaves.DumbSlave"
}
节点配置文件可使用抓包工具来获取,比如Charles、fiddler等,也可以直接使用浏览器的开发者工具获取,下面演示如何使用Edge浏览器来获取Linux节点的json格式节点配置文件:
1、创建新节点
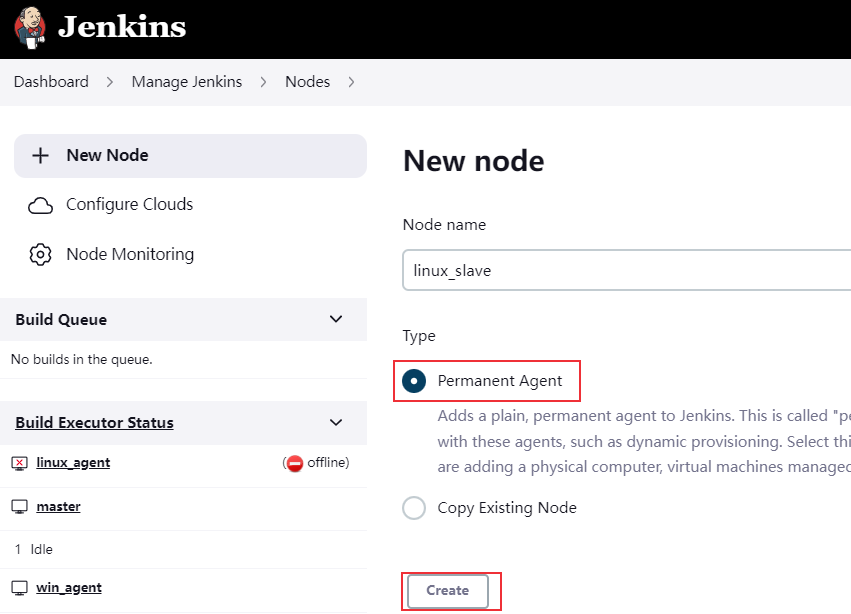
2、填写配置信息
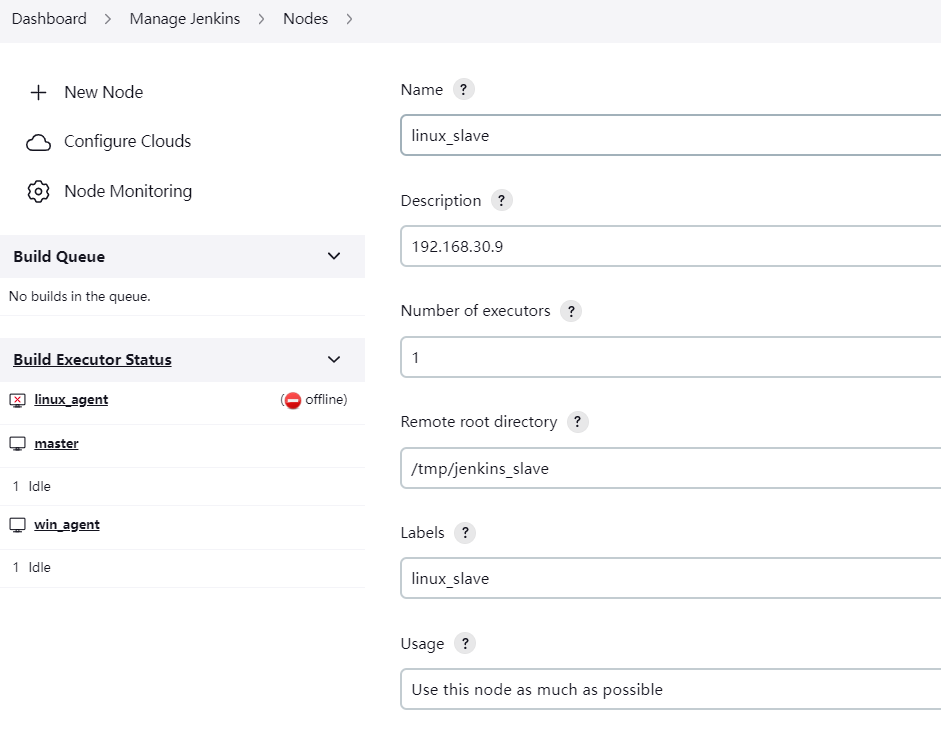
3、打开浏览器开发人员工具控制台
右键->点击检查,或者F12
4、点击保存
点击保存后,可在控制台中看到doCreateItem这个接口请求:
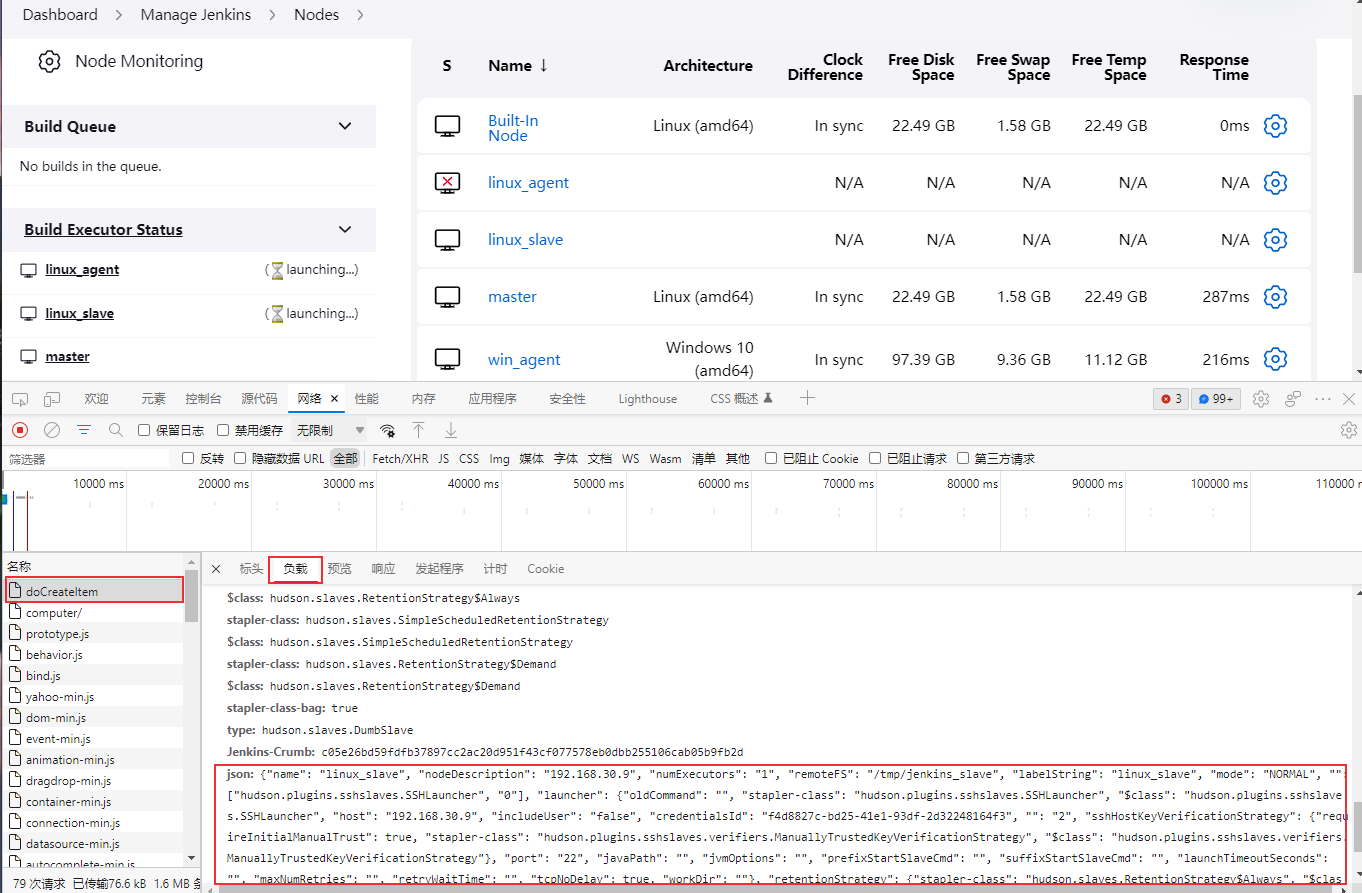
复制json字段的值即可。
{
    "name":"linux_slave",
    "nodeDescription":"192.168.30.9",
    "numExecutors":"1",
    "remoteFS":"/tmp/jenkins_slave",
    "labelString":"linux_slave",
    "mode":"NORMAL",
    "":[
        "hudson.plugins.sshslaves.SSHLauncher",
        "0"
    ],
    "launcher":{
        "oldCommand":"",
        "stapler-class":"hudson.plugins.sshslaves.SSHLauncher",
        "$class":"hudson.plugins.sshslaves.SSHLauncher",
        "host":"192.168.30.9",
        "includeUser":"false",
        "credentialsId":"f4d8827c-bd25-41e1-93df-2d32248164f3",
        "":"2",
        "sshHostKeyVerificationStrategy":{
            "requireInitialManualTrust":true,
            "stapler-class":"hudson.plugins.sshslaves.verifiers.ManuallyTrustedKeyVerificationStrategy",
            "$class":"hudson.plugins.sshslaves.verifiers.ManuallyTrustedKeyVerificationStrategy"
        },
        "port":"22",
        "javaPath":"",
        "jvmOptions":"",
        "prefixStartSlaveCmd":"",
        "suffixStartSlaveCmd":"",
        "launchTimeoutSeconds":"",
        "maxNumRetries":"",
        "retryWaitTime":"",
        "tcpNoDelay":true,
        "workDir":""
    },
    "retentionStrategy":{
        "stapler-class":"hudson.slaves.RetentionStrategy$Always",
        "$class":"hudson.slaves.RetentionStrategy$Always"
    },
    "nodeProperties":{
        "stapler-class-bag":"true"
    },
    "type":"hudson.slaves.DumbSlave",
    "Jenkins-Crumb":"c05e26bd59fdfb37897cc2ac20d951f43cf077578eb0dbb255106cab05b9fb2d"
}
2. 创建节点
使用jenkinsAPI创建节点之前,需要生成一个用户的API Token:
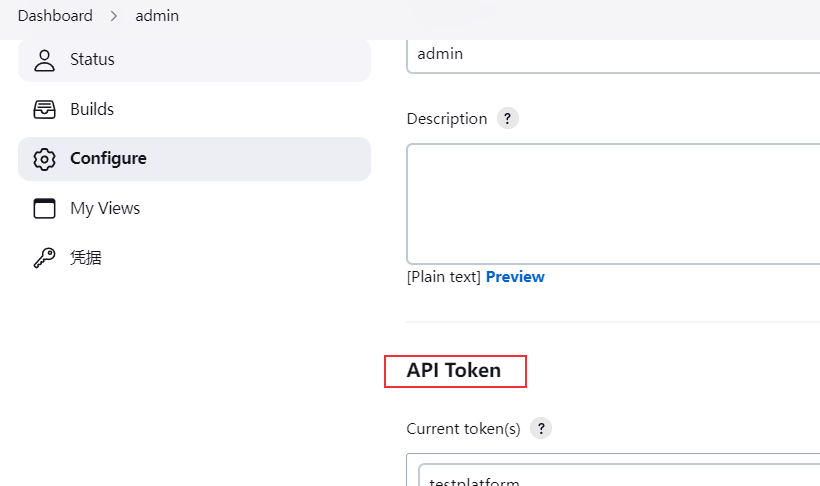
下面使用Python的requests库进行接口请求,其它语言类似,下面以添加windows节点为例:
import json
import requests

headers = {
    'Content-Type': 'application/x-www-form-urlencoded',
}

with open('win_slave.json', 'r') as load_f:
    postdata = json.load(load_f)

url = 'http://admin:11108c1d093a24fcebe11e945de3bcece4@192.168.30.8:8080/computer/doCreateItem?name=win_slave&type=hudson.slaves.DumbSlave'
response = requests.post(url, data=f'json={json.dumps(postdata)}', headers=headers)
assert response.status_code==200
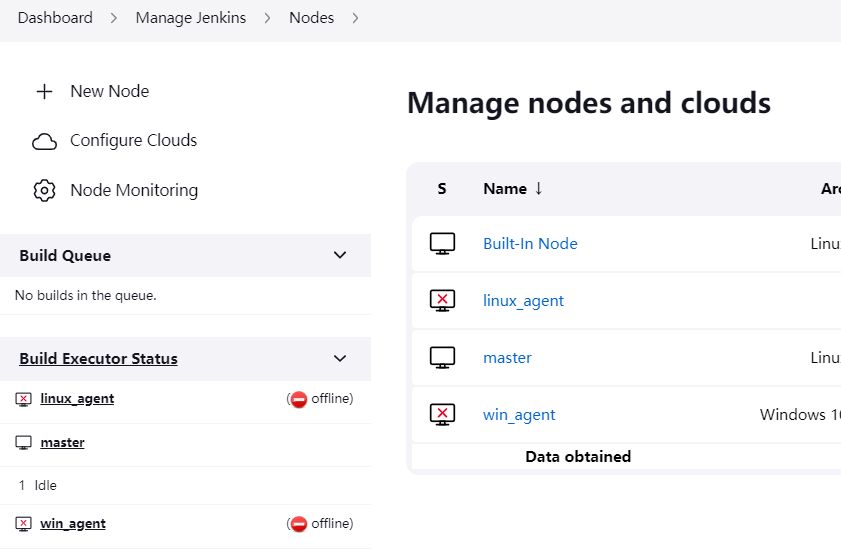
当前jenkins的节点:
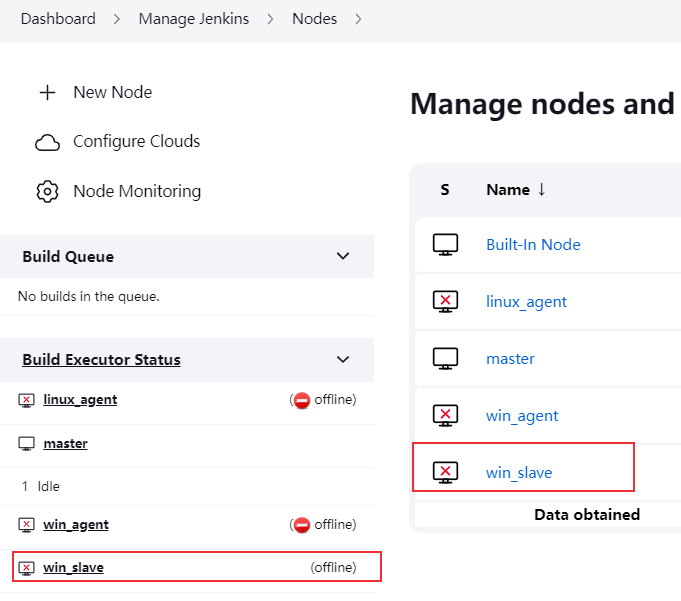
执行脚本后可以看到节点win_slave创建成功了:
进入win_slave节点,可看到提示信息:
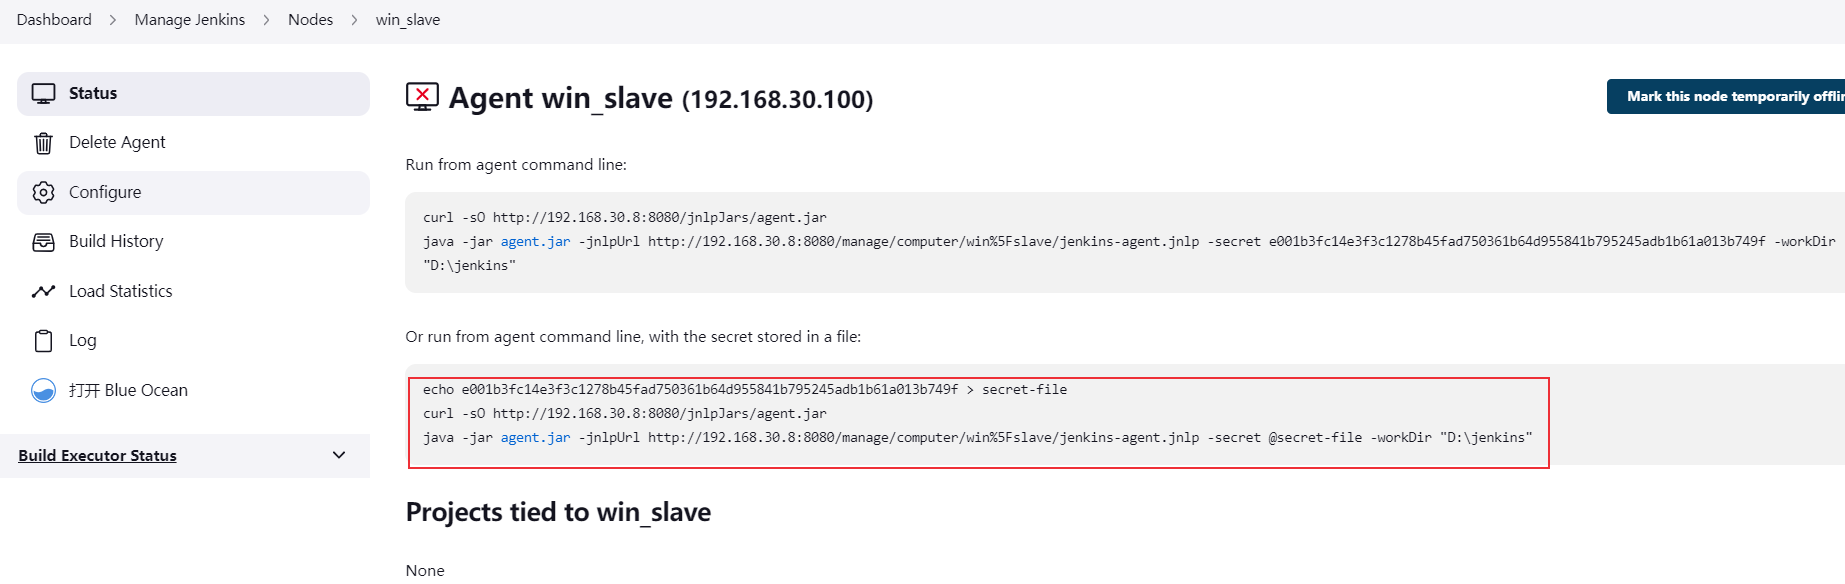
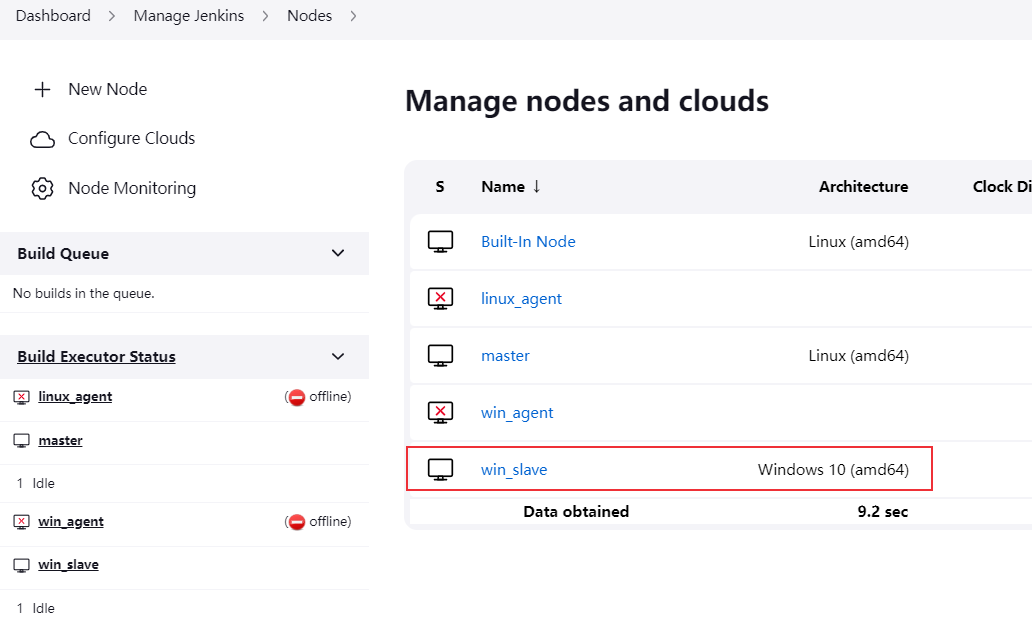
在节点机上执行命令就可以注册到jenkins了。
获取JNLP节点秘钥
Windows节点通常是通过JNLP(Java Network Launching Protocol )的方式注册到jenkins的,要成功连接需要知道jenkins生成的秘钥,也就是前面启动节点中secret:
echo e001b3fc14e3f3c1278b45fad750361b64d955841b795245adb1b61a013b749f > secret-file
curl -sO http://192.168.30.8:8080/jnlpJars/agent.jar
java -jar agent.jar -jnlpUrl http://192.168.30.8:8080/manage/computer/win%5Fslave/jenkins-agent.jnlp -secret @secret-file -workDir "D:\jenkins"
通过jenkins API创建windows节点之后,我们可以访问jenkins页面来获取这个秘钥,如果想通过接口的方式获取也是可以的。
秘钥信息是存储在jenkins-agent.jnlp文件(或者slave-agent.jnlp)中的,路径为http://192.168.30.8:8080/manage/computer/win_slave/jenkins-agent.jnlp,其实就是上面代理机启动命令中的 jnlpUrl 参数值。
jnlp文件内容如下:
<jnlp><application-desc><argument>e001b3fc14e3f3c1278b45fad750361b64d955841b795245adb1b61a013b749f</argument><argument>win_slave</argument><argument>-workDir</argument><argument>D:\jenkins</argument><argument>-internalDir</argument><argument>remoting</argument><argument>-url</argument><argument>http://192.168.30.8:8080/</argument></application-desc></jnlp>
因此,可以通过解析jnlp文件来获取秘钥值。使用curl命令获取:
$ curl -L -s -u admin:11108c1d093a24fcebe11e945de3bcece4 -X GET http://192.168.30.8:8080/manage/computer/win_slave/jenkins-agent.jnlp | sed "s/.*<application-desc><argument>\([a-z0-9]*\).*/\1/"
e001b3fc14e3f3c1278b45fad750361b64d955841b795245adb1b61a013b749f
创建项目
除了手动在jenkins页面创建项目外,也可以使用jenkins API直接创建jenkins项目(job),下面演示pipeline项目的创建步骤。
创建项目的curl命令格式如下:
curl -X POST --USER {username}:{api token} {jenkins URL}/createItem?name={jobName} --header "Content-Type:text/xml" --data-binary @config.xml
- username:用户名
- api token:用户API TOKEN
- jenkins URL:jenkins地址
- jobName为项目名
1. 项目配置文件
config.xml配置文件就是pipeline项目配置文件,配置文件可通过如下方式获取:
- 手动在jenkins创建一个pipeline项目,例如我创建并配置了一个名为pipeline_demo的job。
- 访问192.168.30.8:8080/job/pipeline_demo/config.xml,这个就是pipeline_demo的配置文件,保存到本地,然后修改对应内容即可。
配置文件内容如下:
<?xml version='1.1' encoding='UTF-8'?>
<flow-definition plugin="workflow-job@1232.v5a_4c994312f1">
<actions>
<org.jenkinsci.plugins.pipeline.modeldefinition.actions.DeclarativeJobAction plugin="pipeline-model-definition@2.2114.v2654ca_721309"/>
<org.jenkinsci.plugins.pipeline.modeldefinition.actions.DeclarativeJobPropertyTrackerAction plugin="pipeline-model-definition@2.2114.v2654ca_721309">
<jobProperties/>
<triggers/>
<parameters/>
<options/>
</org.jenkinsci.plugins.pipeline.modeldefinition.actions.DeclarativeJobPropertyTrackerAction>
</actions>
<description>a pipeline demo</description>
<keepDependencies>false</keepDependencies>
<properties>
<hudson.plugins.jira.JiraProjectProperty plugin="jira@3.8"/>
<org.jenkinsci.plugins.workflow.job.properties.PipelineTriggersJobProperty>
<triggers>
<hudson.triggers.TimerTrigger>
<spec>30 22 * * *</spec>
</hudson.triggers.TimerTrigger>
</triggers>
</org.jenkinsci.plugins.workflow.job.properties.PipelineTriggersJobProperty>
</properties>
<definition class="org.jenkinsci.plugins.workflow.cps.CpsFlowDefinition" plugin="workflow-cps@2759.v87459c4eea_ca_">
<script>pipeline {
agent any
stages {
stage('begin') {
steps {
echo 'Hello pipeline'
}
}
}
post {
always {
echo 'say goodbay'
}
}
}</script>
<sandbox>true</sandbox>
</definition>
<triggers/>
<disabled>false</disabled>
</flow-definition>
2. 创建项目
执行如下命令:
$ curl -X POST --USER admin:11108c1d093a24fcebe11e945de3bcece4 http://192.168.30.8:8080/createItem?name=pipeline_demo2 --header "Content-Type:text/xml" --data-binary @pipeline_demo_config.xml
# 或者
$ curl -X POST http://admin:11108c1d093a24fcebe11e945de3bcece4@192.168.30.8:8080/createItem?name=pipeline_demo2 --header "Content-Type:text/xml" --data-binary @pipeline_demo_config.xml
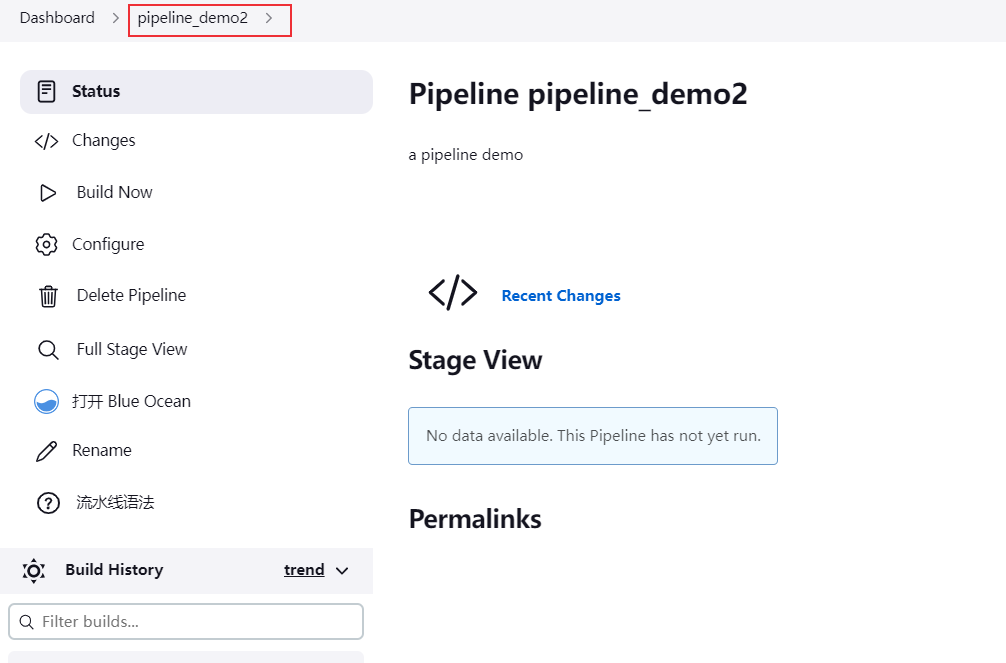
执行完成后访问jenkins可发现创建了一个名为pipeline_demo2的job,配置和配置文件相同:
更新项目
jenkins API能创建job,当然也能更新job,命令如下:
$ curl -X POST --USER admin:11108c1d093a24fcebe11e945de3bcece4 http://192.168.30.8:8080/job/pipeline_demo2/config.xml --header "Content-Type:text/xml" --data-binary @pipeline_demo_config_new.xml
pipeline_demo_config_new.xml为更新之后的配置文件。
其实若真正有才华,运气并不是那么重要。——东野圭吾《解忧杂货店》

 浙公网安备 33010602011771号