Netty学习——入门实例之实现时间协议服务
时间协议服务介绍
时间协议会发送一条包含32位整数的消息,而不接收任何请求,并在消息发送后关闭连接。在本例中,将演示如何构造和发送消息,以及如何在完成时关闭连接。
由于时间协议将忽略任何收到的消息,而是在建立连接后立即发送消息,因此我们这里不使用channelRead()方法,而是使用channelActive()方法,像下面代码这样:
package server;

import io.netty.buffer.ByteBuf;
import io.netty.channel.ChannelFuture;
import io.netty.channel.ChannelFutureListener;
import io.netty.channel.ChannelHandlerContext;
import io.netty.channel.ChannelInboundHandlerAdapter;

/**
 * 时间服务器处理类
 * @author 胡海龙
 *
 */
public class TimeServerHandler extends ChannelInboundHandlerAdapter {

	@Override
	public void channelActive(final ChannelHandlerContext ctx) throws Exception {	//(1)
		final ByteBuf time = ctx.alloc().buffer(4);									//(2)
		time.writeInt((int)(System.currentTimeMillis() / 1000L + 2208988800L));
		final ChannelFuture f = ctx.writeAndFlush(time);							//(3)
		f.addListener(new ChannelFutureListener() {
			public void operationComplete(ChannelFuture future) throws Exception {
				assert f == future;
				ctx.close();
			}
		});																			//(4)
	}

	@Override
	public void exceptionCaught(ChannelHandlerContext ctx, Throwable cause) throws Exception {
		cause.printStackTrace();
		ctx.close();
	}
}
代码解析
channelActive()方法将会在连接建立时被调用。- 要发送一条新的消息时我们需要分配一个新的缓冲区来包含该消息,由于我们要写一个32位的整数,因此我们需要容量至少为4字节字节缓冲器。通过
ChannelHandlerContext的alloc()方法可以获取当前字节缓冲分配器,并分配一个新的缓冲区。 - 构造并刷新消息。注意:使用
Java NIO来操作I/O时常会用到filp()方法,而netty是不需要的,这是因为ByteBuf有俩个指针,一个用作读取操作,一个用作写入操作。当我们像字节缓冲器中写入数据时写入操作指针的索引会增加,而读取操作指针的索引不会改变。
另外需要注意的一点是ChannelHandlerContext的write()方法和writeAndFlush()方法返回的ChannelFuture表示未发生的I/O操作,这意味着可能没有执行任何请求操作,因为Netty中所有的操作都是异步的,例如下面的代码可能在发送消息前关闭:
Channel ch = ...;
ch.writeAndFlush(message);
ch.close();
因此我们需要在ChannelFuture完成后调用close()方法
4. 如何实现ChannelFuture完成后调用关闭方法?这里我们为它添加一个监听的匿名内部类,在操作完成后关闭该Channel。也可以使用预定义的监听器——f.addListener(ChannelFutureListener.CLOSE);来简化代码。
服务端代码
服务端代码和前面丢弃协议和Echo协议的服务端代码基本相同,只要改一下childHandler()方法里的处理类即可。
package server;

import io.netty.bootstrap.ServerBootstrap;
import io.netty.channel.ChannelFuture;
import io.netty.channel.ChannelInitializer;
import io.netty.channel.ChannelOption;
import io.netty.channel.EventLoopGroup;
import io.netty.channel.nio.NioEventLoopGroup;
import io.netty.channel.socket.SocketChannel;
import io.netty.channel.socket.nio.NioServerSocketChannel;

/**
 * 时间服务器
 *
 * @author 胡海龙
 *
 */
public class TimeServer {

	public void run(int port) throws InterruptedException {
		EventLoopGroup bossGroup = new NioEventLoopGroup();
		EventLoopGroup workerGroup = new NioEventLoopGroup();
		try {
			ServerBootstrap b = new ServerBootstrap();
			b.group(bossGroup, workerGroup).channel(NioServerSocketChannel.class)
					.childHandler(new ChannelInitializer<SocketChannel>() {

						@Override
						protected void initChannel(SocketChannel ch) throws Exception {
							ch.pipeline().addLast(new TimeServerHandler());
						}
					}).option(ChannelOption.SO_BACKLOG, 128).childOption(ChannelOption.SO_KEEPALIVE, true);
			ChannelFuture f = b.bind(port).sync();
			f.channel().closeFuture().sync();
		} finally {
			bossGroup.shutdownGracefully();
			workerGroup.shutdownGracefully();
		}
	}

	public static void main(String[] args) throws InterruptedException {
		new TimeServer().run(8080);
		;
	}
}
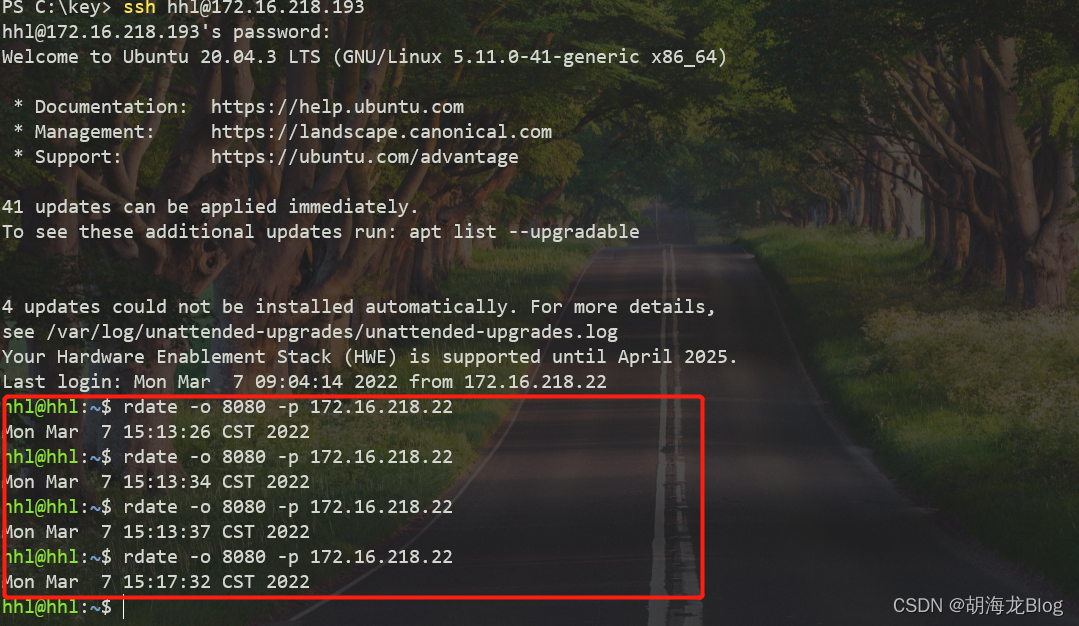
到这里服务端的代码已经完成,这时候我们可以使用rdate命令来验证我们的服务(没有rdate命令环境的可以使用下面的编写客户端验证)。我使用Ubuntu下的终端验证该服务,截图如下:
编写客户端
上面我们使用了rdate命令来验证,除此之外我们也可以使用客户端来处理接收到的消息。接下来是Netty创建客户端的部分。
Netty的服务端和客户端最大的区别就是使用不同的Bootstrap和Channel。代码如下:
TimeClient.java
package server;

import io.netty.bootstrap.Bootstrap;
import io.netty.channel.ChannelFuture;
import io.netty.channel.ChannelInitializer;
import io.netty.channel.ChannelOption;
import io.netty.channel.EventLoopGroup;
import io.netty.channel.nio.NioEventLoopGroup;
import io.netty.channel.socket.SocketChannel;
import io.netty.channel.socket.nio.NioSocketChannel;

/**
 * 时间协议客户端
 *
 * @author 胡海龙
 *
 */
public class TimeClient {

	public static void main(String[] args) throws InterruptedException {
		String host = "127.0.0.1";
		int port = 8080;
		EventLoopGroup workerGroup = new NioEventLoopGroup();
		try {
			Bootstrap b = new Bootstrap(); 									// (1)
			b.group(workerGroup); 											// (2)
			b.channel(NioSocketChannel.class); 								// (3)
			b.option(ChannelOption.SO_KEEPALIVE, true); 					// (4)
			b.handler(new ChannelInitializer<SocketChannel>() {

				@Override
				protected void initChannel(SocketChannel ch) throws Exception {
					ch.pipeline().addLast(new TimeClientHandler());
				}
			});
			ChannelFuture f = b.connect(host, port).sync(); 				// (5)
			f.channel().closeFuture().sync();
		} finally {
			workerGroup.shutdownGracefully();
		}
	}
}
代码解析
Bootstrap类似于ServerBootstrap,只不过它只适用于非服务端的通道。- 如果只指定了一个
EventLoopGroup它将同时用作boos和worker组,但是boss组并不在客户端工作。 NioSocketChannel被用作创建客户端的通道。- 需要注意的是这里我们不再使用
childOption()方法来设置而是直接使用option()方法,因为在客户端SocketChannel没有父级。 - 最后使用
connect()方法,而不是使用bind()方法。
TimeClientHandler.java
package server;

import java.util.Date;

import io.netty.buffer.ByteBuf;
import io.netty.channel.ChannelHandlerContext;
import io.netty.channel.ChannelInboundHandlerAdapter;

/**
 * 时间协议客户端处理类
 *
 * @author 胡海龙
 *
 */
public class TimeClientHandler extends ChannelInboundHandlerAdapter {

	@Override
	public void channelRead(ChannelHandlerContext ctx, Object msg) throws Exception {
		ByteBuf buf = (ByteBuf) msg;
		try {
			long currentTimeMillis = (buf.readUnsignedInt() - 2208988800L) * 1000L;
			System.out.println(new Date(currentTimeMillis));
			ctx.close();
		} finally {
			buf.release(); // 释放
		}
	}

	@Override
	public void exceptionCaught(ChannelHandlerContext ctx, Throwable cause) throws Exception {
		cause.printStackTrace();
		ctx.close();
	}

}
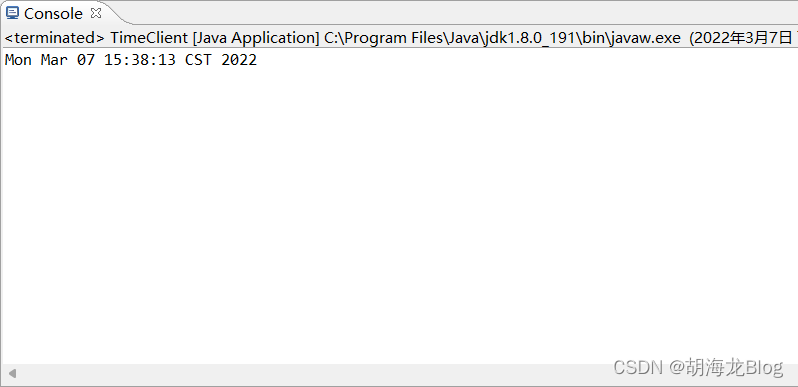
运行客户端验证,如下图:
参考连接:https://netty.io/wiki/user-guide-for-4.x.html

 浙公网安备 33010602011771号