[UWP]使用Picker构建应用内图片公共裁剪组件
在上一篇博文《[UWP]如何实现UWP平台最佳图片裁剪控件》中我讲解了编写ImageCropper控件的过程及知识分享。在那篇文章里,我大言不惭的称其为UWP平台最佳图片裁剪控件(主要是没有别的类似控件来充当对手🤣)。其实写博客时的那个版本连交互动画都还没有,远远称不上“最佳”。
不过,这一个月来ImageCropper经过数次迭代,它已经具有非常棒的体验了!另外还有一件令人兴奋的事,它即将加入WindowsCommunityToolkit中(PR已经接近尾声)!这将让更多UWP开发者可以体验它。
今天这篇博文我来讲下ImageCropper的一个特殊应用实例。
先来思考一下这个问题:
如果我们的应用只有一个界面需要调用图片剪裁,那很好,直接在这个页面嵌入ImageCropper控件就可以轻松完成了。但是,如果这个应用有多处需要裁剪图片的地方(譬如说上传图片、修剪照片、裁剪头像...),我们是否可以为这些需要裁剪图片的地方构建一个公共的可调用组件呢?
事实上,我们可以借助HHChaosToolkit中的Picker组件来完成这一想法。
之前我写过一系列关于Picker的文章,不了解Picker的话建议可以抽时间阅读:
那么,我们今天使用Picker和ImageCropper来为应用构建一个公共裁剪组件。
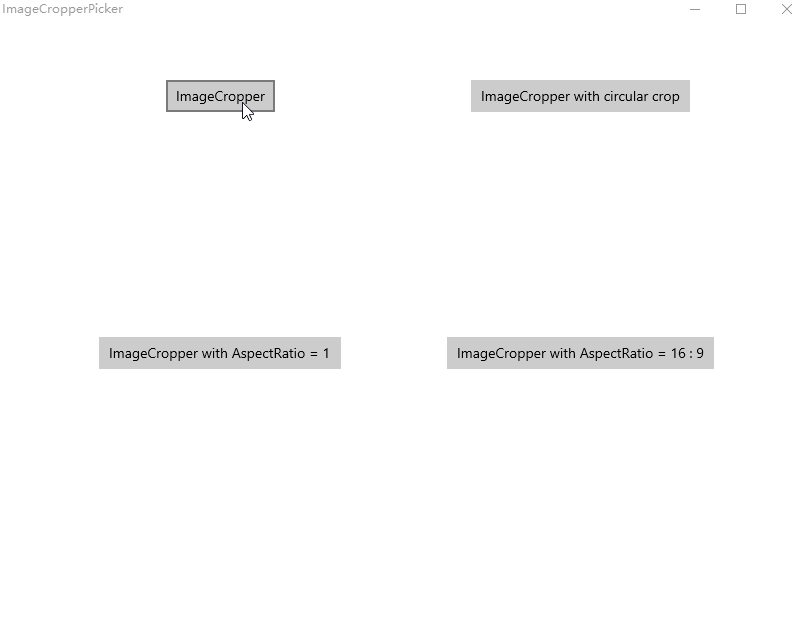
先看下效果图:
如何实现的呢?
项目结构
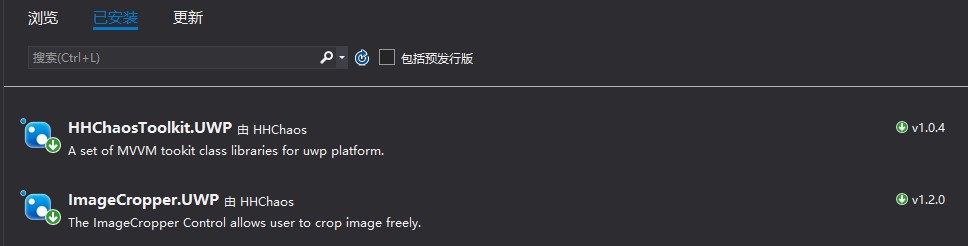
创建一个空白UWP应用项目,并引入了HHChaosToolkit.UWP以及ImageCropper.UWP这两个Nuget包。
我在HHChaosToolkit项目首页写过:
HHChaosToolkit是一套适用于MVVM框架下使用的弹窗层组件库。
HHChaosToolkit其中包含了Picker弹窗组件、SubWindows子窗口组件以及轻量级MVVM框架。我们在这个例子中使用到的是它的Picker以及MVVM部分。
ImageCropper则是这个例子中主要依赖的功能组件。
项目结构如下图:
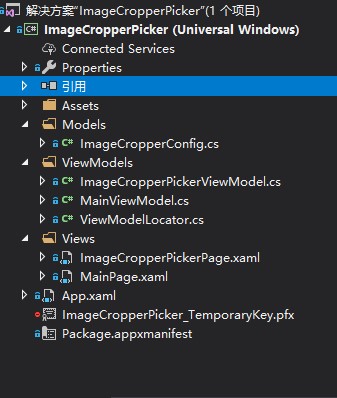
其中包含了两个页面,ImageCropperPickerPage即是这个例子中我们要构建的图片公共裁剪组件,MainPage中包含了调用使用公共裁剪组件的示例,逻辑代码均在其对应的ViewModel中。
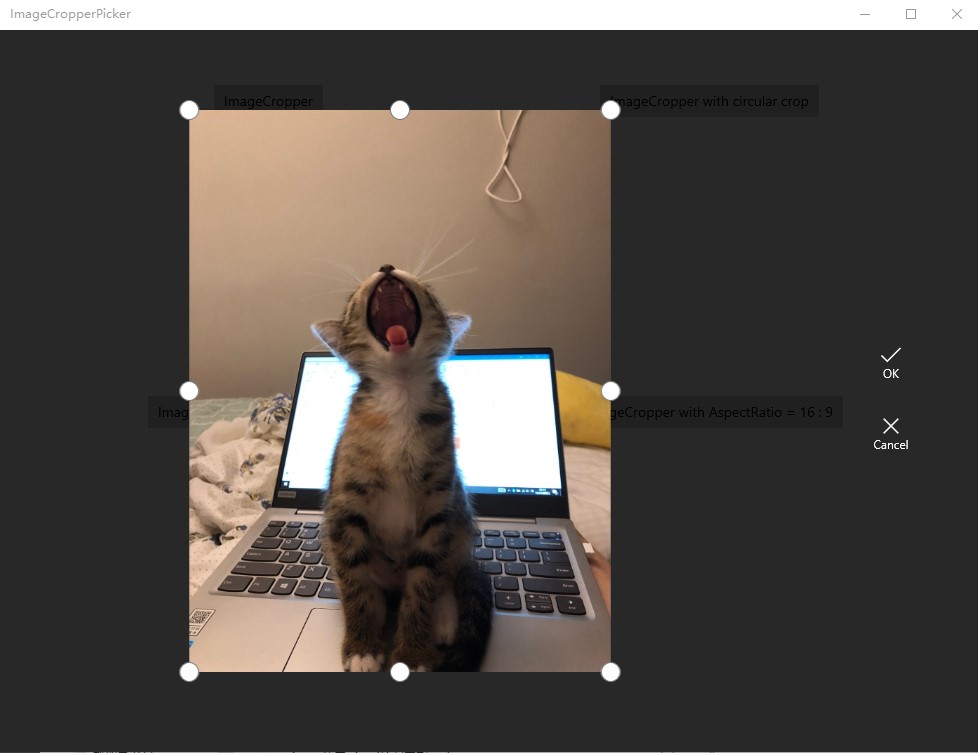
图片裁剪Picker
ImageCropperPicker就是我们想要的图片公共裁剪组件的Picker实现,它可以在任意地方调用(无论是在View还是ViewModel的代码中),且不会中断当前的操作,其调用原理可以查看我之前的博文《[UWP]使用Popup构建UWP Picker》。
这个页面中包含了ImageCropper控件,用于实现图片裁剪功能。
界面布局如下:
<Page
    x:Class="ImageCropperPicker.Views.ImageCropperPickerPage"
    xmlns="http://schemas.microsoft.com/winfx/2006/xaml/presentation"
    xmlns:x="http://schemas.microsoft.com/winfx/2006/xaml"
    xmlns:cropper="using:ImageCropper.UWP"
    xmlns:d="http://schemas.microsoft.com/expression/blend/2008"
    xmlns:local="using:ImageCropperPicker.Views"
    xmlns:mc="http://schemas.openxmlformats.org/markup-compatibility/2006"
    DataContext="{Binding ImageCropperPickerViewModel, Source={StaticResource Locator}}"
    RequestedTheme="Dark"
    mc:Ignorable="d">
    <Grid>
        <Grid.ColumnDefinitions>
            <ColumnDefinition />
            <ColumnDefinition Width="Auto" />
        </Grid.ColumnDefinitions>
        <cropper:ImageCropper
            x:Name="ImageCropper"
            Padding="80"
            AspectRatio="{Binding AspectRatio}"
            Background="Transparent"
            CircularCrop="{Binding CircularCrop}"
            Mask="#af000000"
            SourceImage="{Binding SourceImage}" />
        <Grid Grid.Column="1" Background="#af000000">
            <StackPanel Padding="55" VerticalAlignment="Center">
                <AppBarButton
                    Margin="0,15"
                    Click="Button_Click"
                    Icon="Accept"
                    Label="OK" />
                <AppBarButton
                    Command="{Binding ExitCommand}"
                    Foreground="White"
                    Icon="Cancel"
                    Label="Cancel" />
            </StackPanel>
        </Grid>
    </Grid>
</Page>
逻辑层代码中,我使用ImageCropperConfig类来接受调用方传来的参数,并在打开Picker时读取参数,初始化Picker。
ImageCropperConfig定义如下:
    public class ImageCropperConfig
    {
        public StorageFile ImageFile { get; set; }
        public double AspectRatio { get; set; } = -1;
        public bool CircularCrop { get; set; }
    }
ImageCropperPicker的ViewModel代码:
using HHChaosToolkit.UWP.Mvvm;
using ImageCropperPicker.Models;
using System;
using Windows.UI.Xaml.Media.Imaging;
using Windows.UI.Xaml.Navigation;

namespace ImageCropperPicker.ViewModels
{
    public class ImageCropperPickerViewModel : ObjectPickerBase<WriteableBitmap>
    {
        private WriteableBitmap _sourceImage;
        public WriteableBitmap SourceImage
        {
            get => _sourceImage;
            set => Set(ref _sourceImage, value);
        }
        private double _aspectRatio;
        public double AspectRatio
        {
            get => _aspectRatio;
            set => Set(ref _aspectRatio, value);
        }
        private bool _circularCrop;
        public bool CircularCrop
        {
            get => _circularCrop;
            set => Set(ref _circularCrop, value);
        }
        public async override void OnNavigatedTo(NavigationEventArgs e)
        {
            if (e.Parameter is ImageCropperConfig config)
            {
                var writeableBitmap = new WriteableBitmap(1, 1);
                using (var stream = await config.ImageFile.OpenReadAsync())
                {
                    await writeableBitmap.SetSourceAsync(stream);
                }

                SourceImage = writeableBitmap;
                AspectRatio = config.AspectRatio;
                CircularCrop = config.CircularCrop;
            }
            base.OnNavigatedTo(e);
        }
    }
}
在这里,完成裁剪图片的操作我放在了界面上OK按键的后台代码中(实际上还是调用的Picker中的方法):
        private async void Button_Click(object sender, RoutedEventArgs e)
        {
            var img = await ImageCropper.GetCroppedBitmapAsync();
            ViewModel?.SetResult(img);
        }
应用内调用
调用方法非常的简单,直接使用HHChaosToolkit中的ObjectPickerService来启动Picker,并且等待Picker返回结果即可。
比较特别的是,在这里我通过使用PickerOpenOption让裁剪图片Picker可以覆盖到整个应用界面,UI表现看起来更佳。
调用代码:
        private async Task<ImageSource> CropImage(ImageCropperConfig config)
        {
            var startOption = new PickerOpenOption
            {
                VerticalAlignment = VerticalAlignment.Stretch,
                HorizontalAlignment = HorizontalAlignment.Stretch,
            };
            var ret = await ViewModelLocator.Current.ObjectPickerService.PickSingleObjectAsync<WriteableBitmap>(
                typeof(ImageCropperPickerViewModel).FullName, config, startOption);
            if (!ret.Canceled)
            {
                return ret.Result;
            }
            return null;
        }
是不是看起来很简单?是的,优雅的调用方式就应该这么简单!
结尾
正如我之前所说,Picker组件在很多地方都可以派上用处,我们几乎可以用它来实现一切UWP自定义弹出框,非常欢迎有类似需求的开发者们试用!
这个示例项目开源在Github中,感兴趣的可以自行Clone编译,同时项目中的代码请随意享用,喜欢的话请不要忘记Star!
本篇博客到此结束!谢谢大家阅读!

 浙公网安备 33010602011771号