

Flutter开发相关技巧--持续更新
1.组件之间的通信
子传父,点击子组件,修改父组件的数据


  1 import 'package:flutter/material.dart';
  2
  3 class DeviceDetail extends StatefulWidget {
  4   final Map arguments; //接收参数
  5   const DeviceDetail({super.key, required this.arguments});
  6
  7   @override
  8   State<StatefulWidget> createState() => _DeviceDetailState();
  9 }
 10
 11 class _DeviceDetailState extends State<DeviceDetail> {
 12
 13   @override
 14   void initState() {
 15     print(widget.arguments);
 16   }
 17
 18   void change(int i) async {
 19     print(i);
 20   }
 21
 22   // 取消
 23   void cancel() {
 24     print('取消');
 25     Navigator.pop(context); // 这里返回上一个路由
 26   }
 27
 28   @override
 29   Widget build(BuildContext context) {
 30     return Scaffold(
 31       appBar: AppBar(
 32         leading: BackButton(
 33           onPressed: () {
 34             Navigator.pop(context);
 35           },
 36         ),
 37         elevation: 1,
 38         centerTitle: true,
 39       ),
 40       body: ListView(
 41         children: [
 42           Container(
 43             padding: EdgeInsets.all(16),
 44             child: Column(
 45               crossAxisAlignment: CrossAxisAlignment.start, // 文本文字靠左
 46               children: [
 47                 Text(
 48                   "data",
 49                   style: TextStyle(fontSize: 20, fontWeight: FontWeight.bold),
 50                 ),
 51                 //tab
 52                 Padding(
 53                   padding: EdgeInsets.symmetric(vertical: 16),
 54                   child: Filteritem(changecallback: change),
 55
 56                 ),
 57               ],
 58             ),
 59           ),
 60         ],
 61       ),
 62     );
 63   }
 64 }
 65
 66 // 筛选条
 67 class Filteritem extends StatefulWidget {
 68   final Function(int) changecallback;
 69
 70   const Filteritem({required this.changecallback});
 71
 72   @override
 73   _UnhandState createState() => _UnhandState();
 74 }
 75
 76 class _UnhandState extends State<Filteritem> {
 77   @override
 78   Widget build(BuildContext context) {
 79     return Flex(
 80       direction: Axis.horizontal,
 81       mainAxisAlignment: MainAxisAlignment.spaceBetween,
 82       children: [
 83         Expanded(
 84           child: GestureDetector(
 85             onTap: () {
 86               widget.changecallback(-1);
 87             },
 88             child: Container(
 89               height: 32,
 90               alignment: Alignment.center,
 91               decoration: BoxDecoration(
 92                 border: Border.all(
 93                   color: const Color.fromRGBO(220, 223, 228, 1),
 94                   width: 0.8,
 95                 ), // 设置边框颜色和宽度
 96                 borderRadius: BorderRadius.all(Radius.circular(20)), // 边框圆角
 97               ),
 98               child: Text(
 99                 "全部",
100                 style: TextStyle(
101                   fontSize: 14,
102                 ),
103               ),
104             ),
105           ),
106         ),
107         const SizedBox(width: 8), // 间隔
108         Expanded(
109           child: GestureDetector(
110             onTap: () {
111               widget.changecallback(1005);
112             },
113             child: Container(
114               height: 32,
115               alignment: Alignment.center,
116               decoration: BoxDecoration(
117                 border: Border.all(
118                   color: const Color.fromRGBO(220, 223, 228, 1),
119                   width: 0.8,
120                 ), // 设置边框颜色和宽度
121                 borderRadius: BorderRadius.all(Radius.circular(20)), // 边框圆角
122               ),
123               child: Text(
124                 "离线",
125                 style: TextStyle(
126                   fontSize: 14,
127                 ),
128               ),
129             ),
130           ),
131         ),
132       ],
133     );
134   }
135 }
2.设置Container宽度(占一半以及占满)
一半的设置:
Container(
    color: Colors.white, // 背景色为白色Z
    width: MediaQuery.of(context).size.width / 2, //宽度占一半
)
还可以减去padding或者margin的宽度
width: MediaQuery.of(context).size.width / 3 - 2, // 减去线条的宽度
占满的设置:
Container(
    width: double.infinity, // 这将确保Container占满可用宽度
),
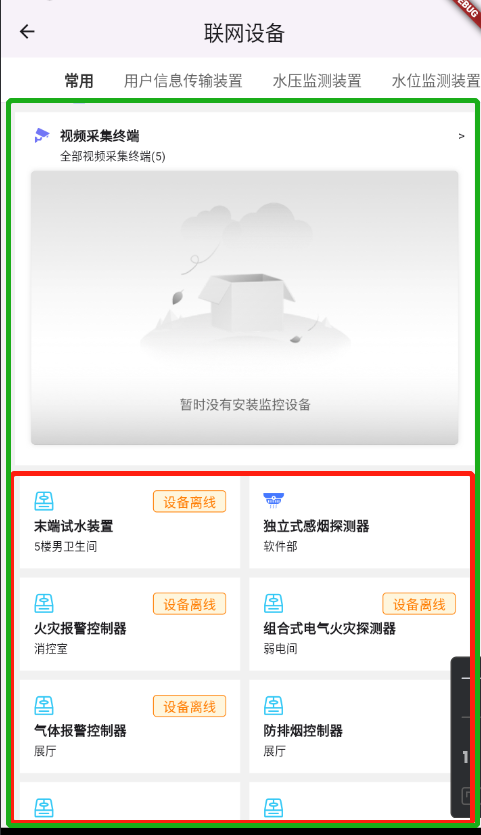
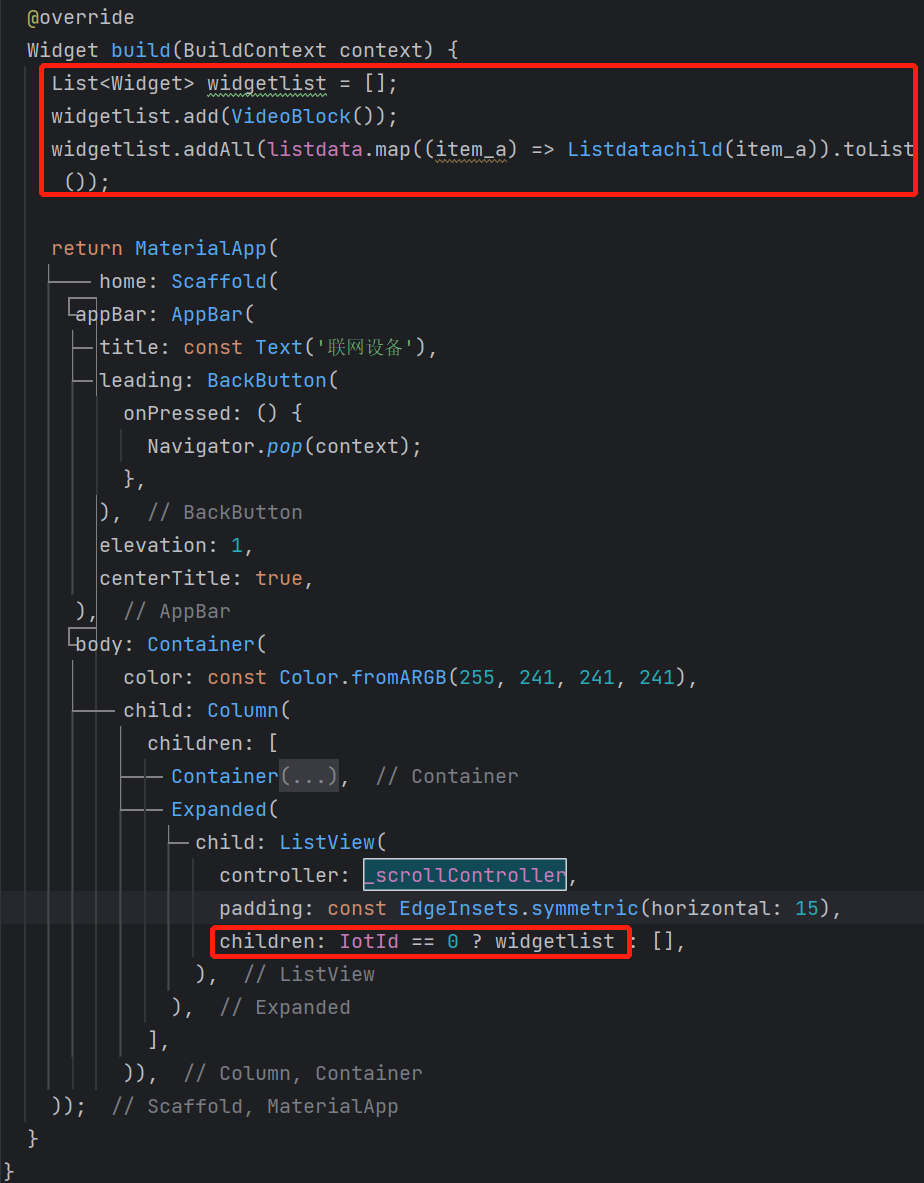
3.ListView加滚动条时,内容不一定非要是列表项
下图中红框为列表项,正常是红框区域可滑动,用List<Widget>包含绿框部分可一起滑动
4.设置Column的内容靠左
可以使用crossAxisAlignment: CrossAxisAlignment.start属性
 const Column(
     crossAxisAlignment:CrossAxisAlignment.start,//将子元素靠左对齐
     children: [
     Text("任务处置分析",
         textAlign: TextAlign.left,
         style: TextStyle(
             fontSize: 16, fontWeight: FontWeight.bold)),
     Text(
       "真警·误报原因处理解决",
       style: TextStyle(fontSize: 12),
     )
   ],
 )

 浙公网安备 33010602011771号