Redis学习(一):CentOS下redis安装和部署
1.基础知识
redis是用C语言开发的一个开源的高性能键值对(key-value)数据库。它通过提供多种键值数据类型来适应不同场景下的存储需求,目前为止redis支持的键值数据类型如下字符串、列表(lists)、集合(sets)、有序集合(sorts sets)、哈希表(hashs)
2.redis的应用场景
缓存(数据查询、短连接、新闻内容、商品内容等等)。(最多使用)
分布式集群架构中的session分离。
聊天室的在线好友列表。
任务队列。(秒杀、抢购、12306等等)
应用排行榜。
网站访问统计。
数据过期处理(可以精确到毫秒)
3.安装redis
下面介绍在CentOS环境下,Redis的安装与部署,使用redis-3.0稳定版,因为redis从3.0开始增加了集群功能。
- 可以通过官网下载 地址:http://download.redis.io/releases/redis-3.0.0.tar.gz
- 使用linux wget命令
wget http://download.redis.io/releases/redis-3.0.0.tar.gz
步骤如下:
将redis-3.0.0.tar.gz拷贝到/usr/local下,然后解压
cp redis-3.0.0.rar.gz /user/local
tar -zxvf redis-3.0.0.tar.gz
由于Redis是用C语言编写,所以编译时需要gcc,
yum install gcc -y
进入解压后的目录进行编译,指定目录安装 如 /usr/local/redis
cd /usr/local/redis-3.0.0
make PREFIX=/usr/local/redis install
可能报如下错误:
zmalloc.h:50:31: error: jemalloc/jemalloc.h: No such file or directory
zmalloc.h:55:2: error: #error “Newer version of jemalloc required”
make[1]: * [adlist.o] Error 1
make[1]: Leaving directory `/data0/src/redis-2.6.2/src’
make: * [all] Error 2
原因分析
在README中有这么一段话:
Allocator
————Selecting a non-default memory allocator when building Redis is done by setting the
MALLOCenvironment variable. Redis is compiled and linked against libc malloc by default, with the exception of jemalloc being the default on Linux systems. This default was picked because jemalloc has proven to have fewer fragmentation problems than libc malloc.To force compiling against libc malloc, use:
% make MALLOC=libcTo compile against jemalloc on Mac OS X systems, use:
% make MALLOC=jemalloc
意思是说关于分配器allocator, 若有MALLOC 这个 环境变量, 会有用这个环境变量的 去建立Redis。
而且libc 并不是默认的分配器, 默认是 jemalloc, 因为 jemalloc 被证明有比libc更少的 fragmentation problems 。
但是如果你又没有jemalloc 而只有 libc 当然 make 出错。
所以在编译的时候需要加一个参数,即:MALLOC=libc
解决办法
make MALLOC=libc
综上,执行如下命令完成安装:
make PREFIX=/usr/local/redis MALLOC=libc install
4.配置Redis
redis.conf是redis的配置文件,redis.conf在redis源码目录。
拷贝配置文件到安装目录下
进入源码目录,里面有一份配置文件 redis.conf,然后将其拷贝到安装路径下
cd /usr/local/redis
cp /usr/local/redis-3.0.0/redis.conf /usr/local/redis/bin
cd /usr/local/redis/bin
进入安装目录bin下,此时的目录结构是这样的
![image image]()
- redis-benchmark redis性能测试工具
- redis-check-aof AOF文件修复工具
- redis-check-rdb RDB文件修复工具
- redis-cli redis命令行客户端
- redis.conf redis配置文件
- redis-sentinal redis集群管理工具
- redis-server redis服务进程
5.启动Redis
1.前端模式启动
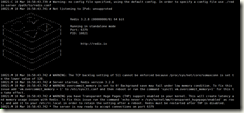
直接运行 ./redis-server将以前端模式启动,前端模式启动的缺点是ssh命令窗口关闭则redis-server程序结束,故不推荐使用此方法。
2.后端模式启动
修改redis.conf配置文件, daemonize yes 以后端模式启动vim /usr/local/redis/bin/redis.conf![]()
执行如下命令启动redis:
cd /usr/local/redis/bin
./redis-server ./redis.conf
连接redis:
**5.关闭redis**
强行终止redis进程可能会导致redis持久化数据丢失。
正确停止Redis的方式应该是向Redis发送SHUTDOWN命令,
命令为:
cd /usr/local/redis
./bin/redis-cli shutdown
强行终止redis
pkill redis-server
让redis开机自启
vim /etc/rc.local
//添加
/usr/local/redis/bin/redis-server /usr/local/redis/etc/redis-conf
至此redis完成安装。


 浙公网安备 33010602011771号