TestLink 使用XAMPP安装
最近由于新项目需要,建立一个TestLink来管理测试。主要用来对测试用例的管理,多人协作。TestLink的安装和配置都比较简单,但是也有一些小坑需要注意。
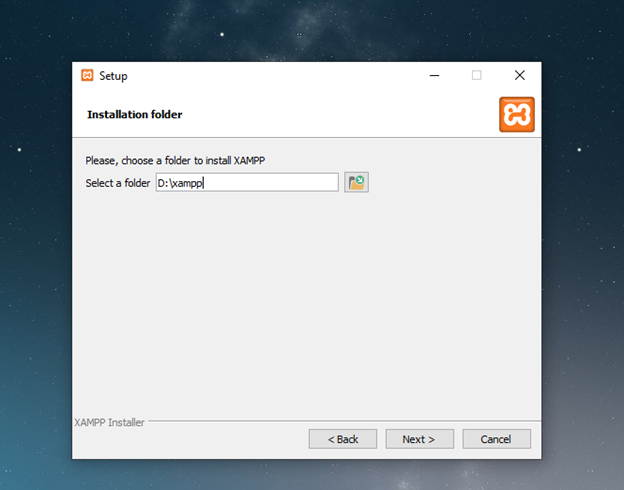
- 官网下载XAMPP。这是TestLink需要的运行环境。如果机器没有安装JDK,需要先安装最新JDK。XAMPP建议不要选择最新的版本,会出现后面安装中MySQL不兼容的问题(应该是TestLink的PHP和XAMPP里面的MYSQL不兼容。选择5.6的最近版本比较好。Download XAMPP, version 5.6.XXX. Install
URL: https://www.apachefriends.org/zh_cn/index.html
- 配置XAMPP。Configure XAMPP for Testlink.
配置Apache的端口,选一个不常用的端口。Config Apache.Config->httpd.conf.
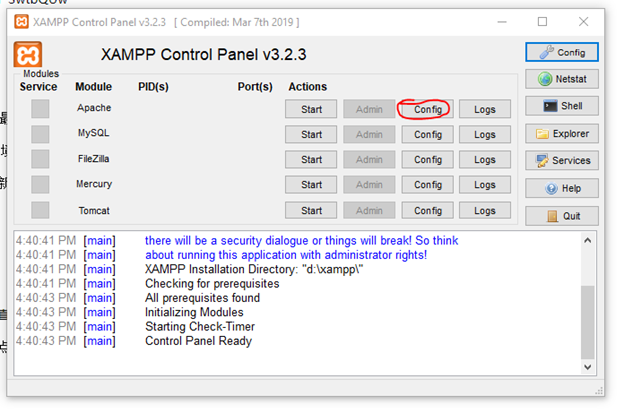
Listen 80 => Listen 8083

ServerName localhost:80 => ServerName localhost:8083
Save and Close.
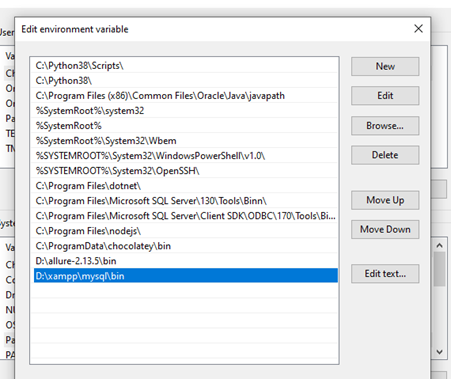
- 把MYSQL加入到系统环境变量里。Add XAMPP mysql to system environment variables.
The bin path, add it to environment variables.
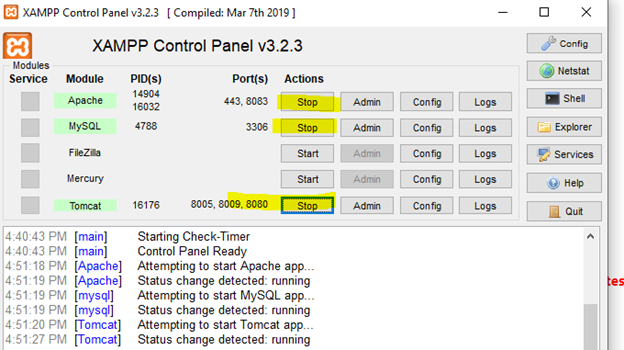
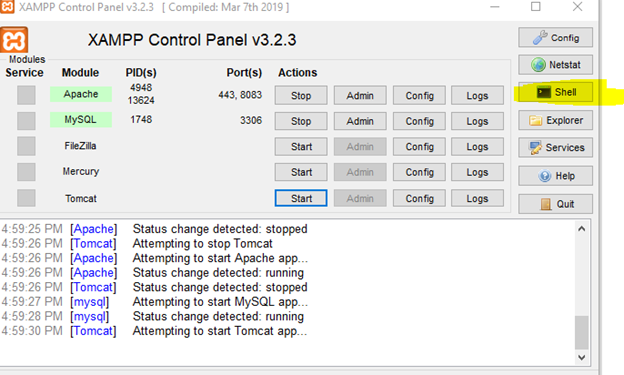
- 启动 Apache, MySQL. Start Apache, MySQL, Tomcat.
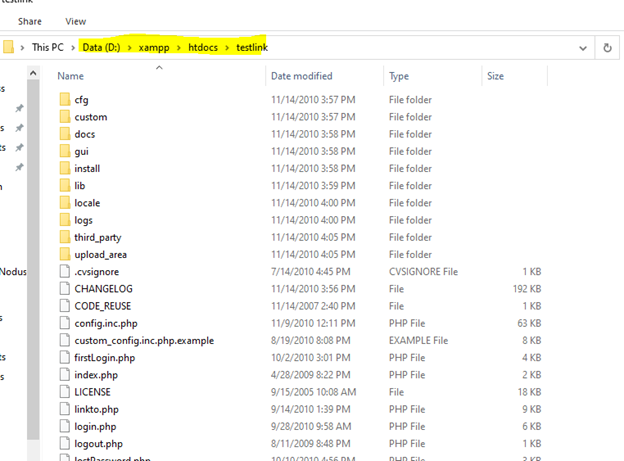
- 下载安装TestLink. 直接解压到XAMPP安装目录的htdocs下面。改下testlink名字,去掉版本信息。 Download TestLink and exact to xampp subfolder htdocs.
Download URL: http://www.testlink.org/
- 配置MySQL, 为testlink创建需要的数据库。Configure MYSQL and create testlink database.
- 建立ROOT用户。Configure root user in Mysql.
CMD: change directory to bin folder.
Run command:

-
- Set password for root user in phpMyAdmin.
D:\xampp\phpMyAdmin
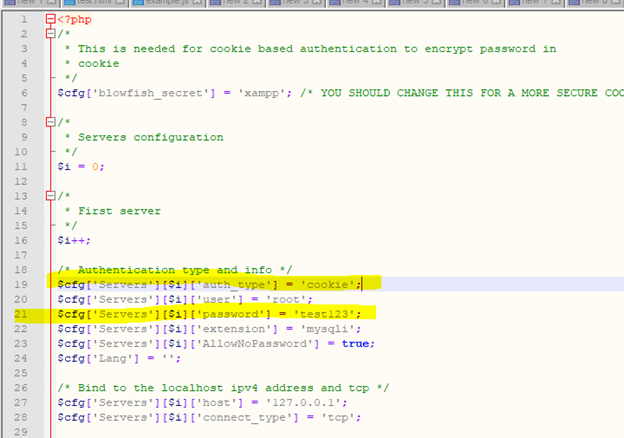
File: config.inc.php

Edit.
Set: $cfg['Servers'][$i]['auth_type'] = 'cookie';
$cfg['Servers'][$i]['password'] = 'password123';
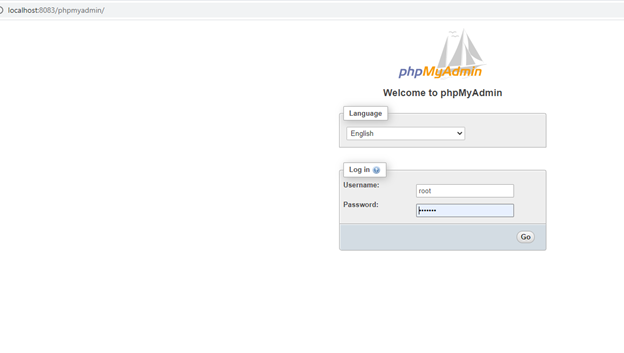
- 重启MySQL, 访问phpMyAdmin页面。Restart mysql and visit. http://localhost:8083/phpmyadmin/
- Create testlink database.
Shell.
Command
mysql -u root
Use mysql;
Create database testlink;
Use testlink
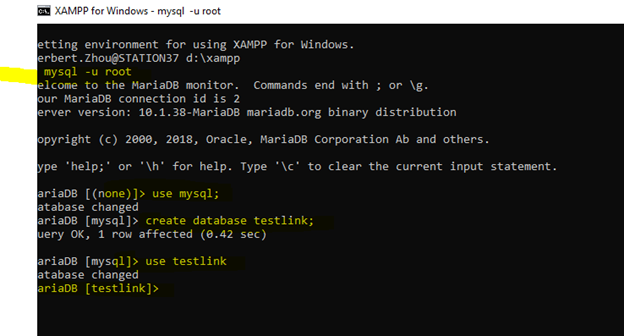
- Check from phpMyAdmin.

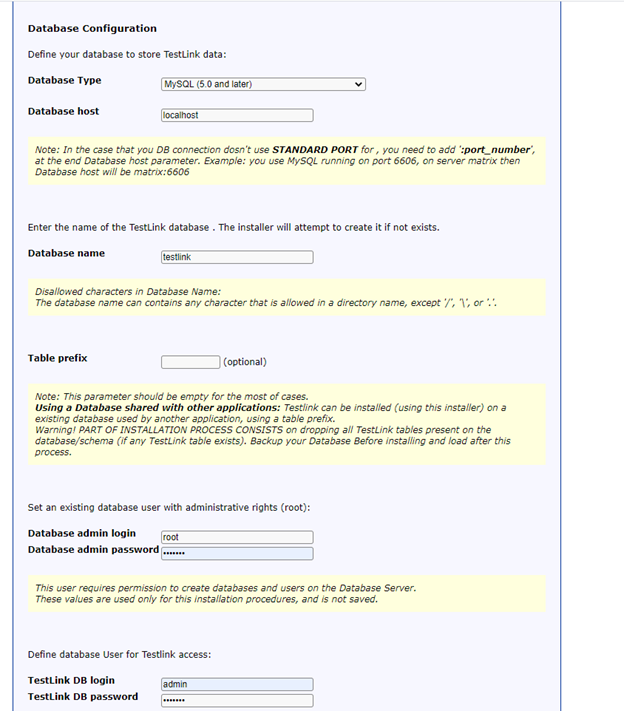
- Add user for testlink DB.
Privileges->Add user account. Go.

- Try installation. Browser visit: http://localhost:8083/testlink

- Agree continue.

- Several issues.
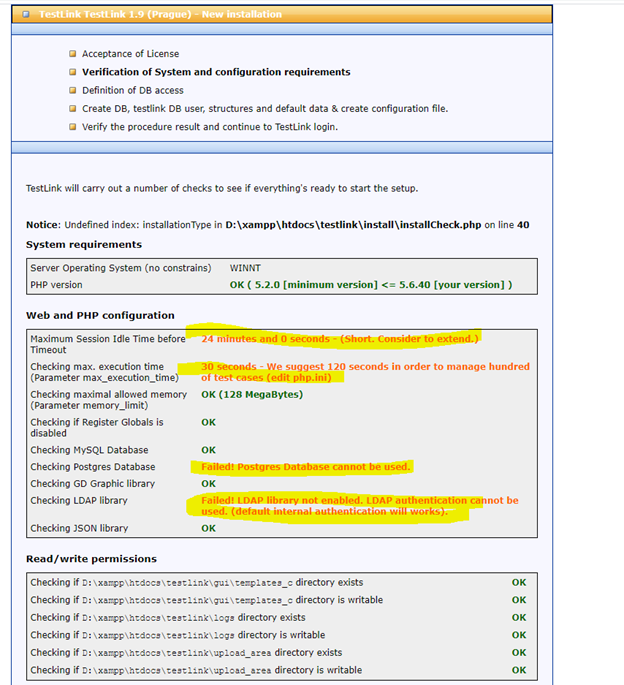
- Update configure file.
D:\xampp\php\php.ini
Maximum Session execution Time:

LDAP:
;extension=php_ldap.dll
Remove”;” on the line.

- Ignore the error for the idle time and the Postgres Database error, because here I use database Mysql not Postgres DB.
- Restart services and close browser and try installation again. OK, continue.

- Database setting.
- Process TestLink Setups. Installation successfully.
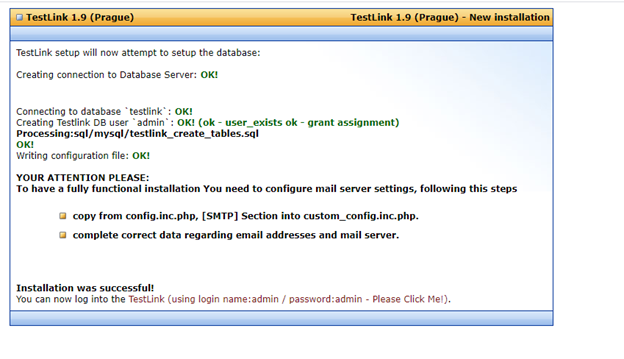
- Great!!


 浙公网安备 33010602011771号