Vue+Element-UI实战项目_电商管理系统
学习了狂神的vue课程后又看了这个vue的项目,因为狂神的很基础而且讲的是vue2,就打算看一个项目再加深一下,从这个课程学到了很多的东西,老师讲解的很细致,我把其中我不太熟悉或者重要的点记录下来。
课程链接:https://www.bilibili.com/video/BV1EE411B7SU?p=12
一:环境搭建(P1-P7)
系统展示:http://118.31.171.210/#/rights
系统功能列表:
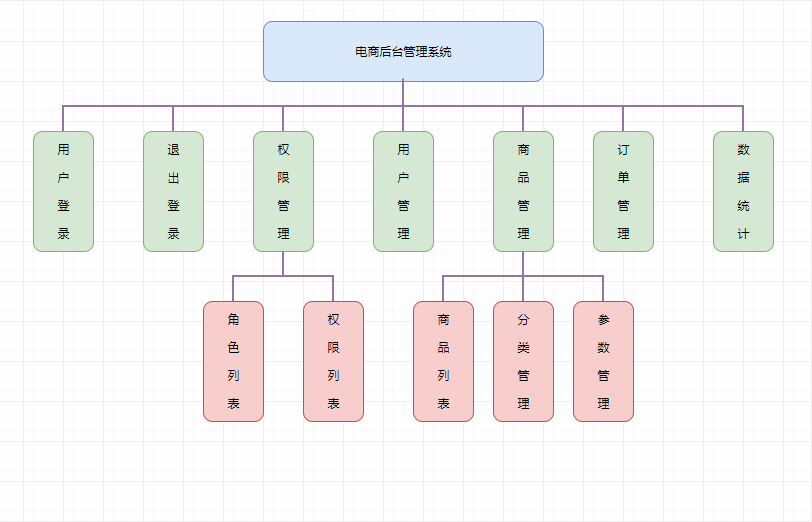
前端项目技术栈
- Vue(vue3)
- Vue-router
- Element-UI
- Axios
- Echarts
后端项目技术栈
-
Node.js
-
Express
-
Jwt
-
Mysql
-
Sequelize
资源下载:
该项目实例: http://shop.liulongbin.top/
前端代码:https://gitee.com/wBekvam/vue-shop-admin.git
后端代码:https://gitee.com/wBekvam/vueShop-api-server.git
页面预览:http://shop.liulongbin.top/
配套资料链接:
https://pan.baidu.com/s/1FX_1sz0Xj-0r1R_E12Qh1g
提取码: 8exy
vue3创建项目
一、3.0 新加入了 TypeScript 以及 PWA 的支持
二、部分命令发生了变化:
1、下载安装 npm install -g vue@cli
2、删除了vue list
3、创建项目 vue create
4、启动项目 npm run serve
三、默认项目目录结构也发生了变化:
1、移除了配置文件目录,config 和 build 文件夹
2、移除了 static 文件夹,新增 public 文件夹,并且 index.html 移动到 public 中
3、在 src 文件夹中新增了 views 文件夹,用于分类 视图组件 和 公共组件
首先 安装npm3.0,在安装之前如果曾经安装过vue-cli2的,由于vue cli 升级到3后,package的名字从 vue-cli 改为了 @vue/cli,装了旧版本的,建议把旧版本的卸载了,再安装新版本。

// 卸载指令如下:

npm uninstall vue-cli -g

or

yarn global remove vue-cli
新版本:
npm install -g @vue/cli
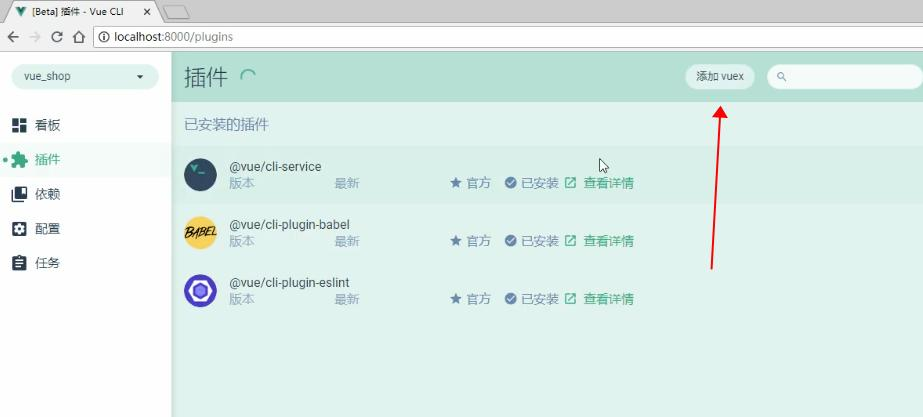
vue3提供了可视化创建项目,非常方便。相关视频:https://www.bilibili.com/video/BV1EE411B7SU?p=5
可视化操作:
win+R 运行cmd
输入vue ui 进入界面
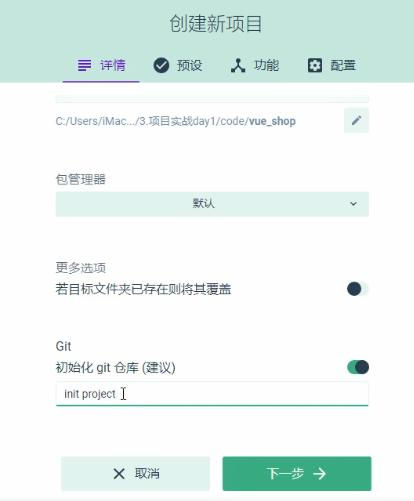
点击创建按钮,进入到目录选择面板(http://localhost:8000/project/select)
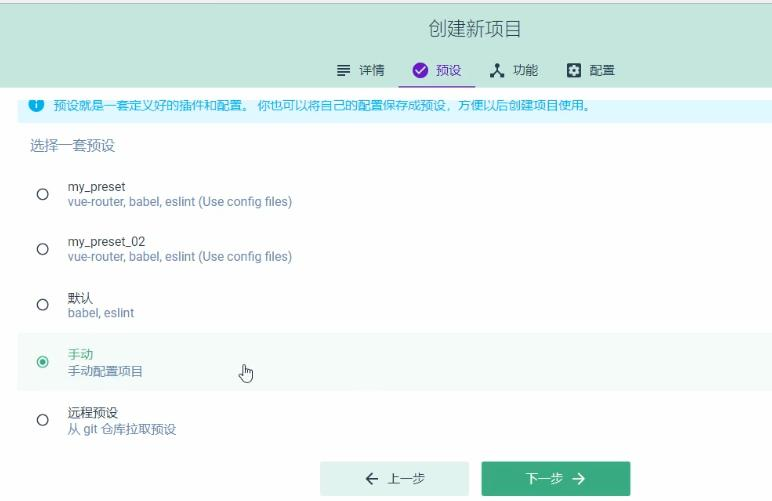
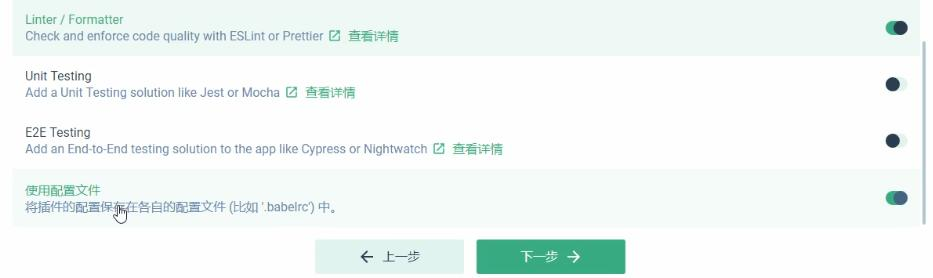
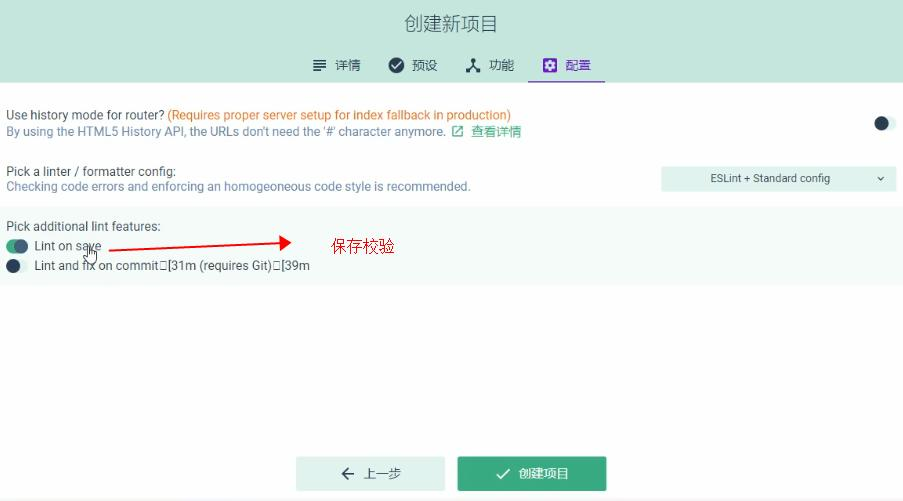
安装babel router formatter
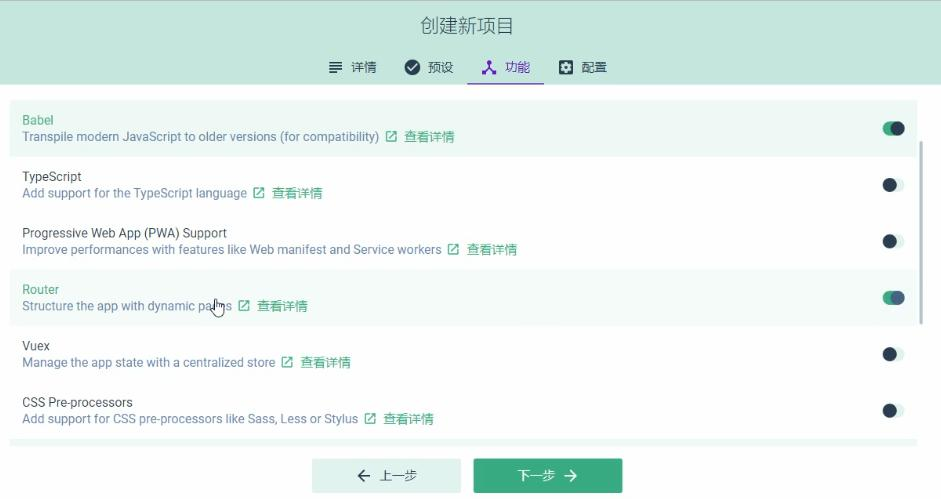
注意下面第一行的Linter不能勾选。很容易出问题、

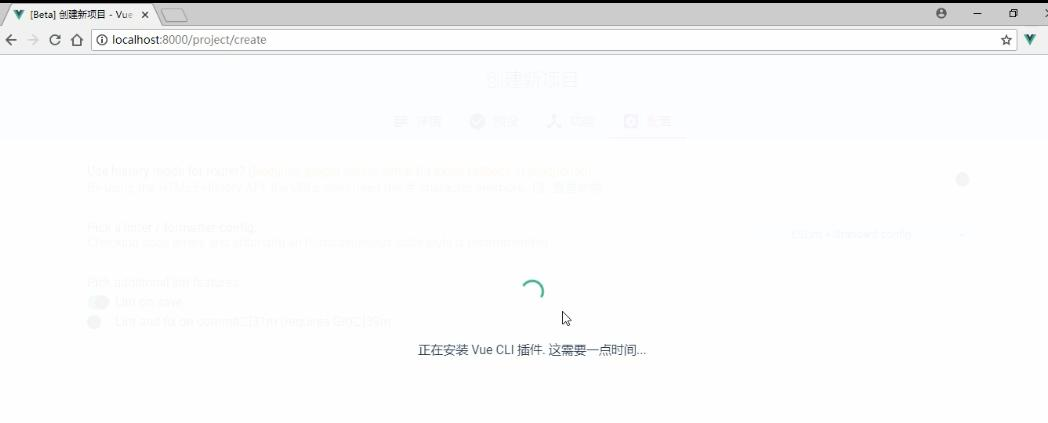
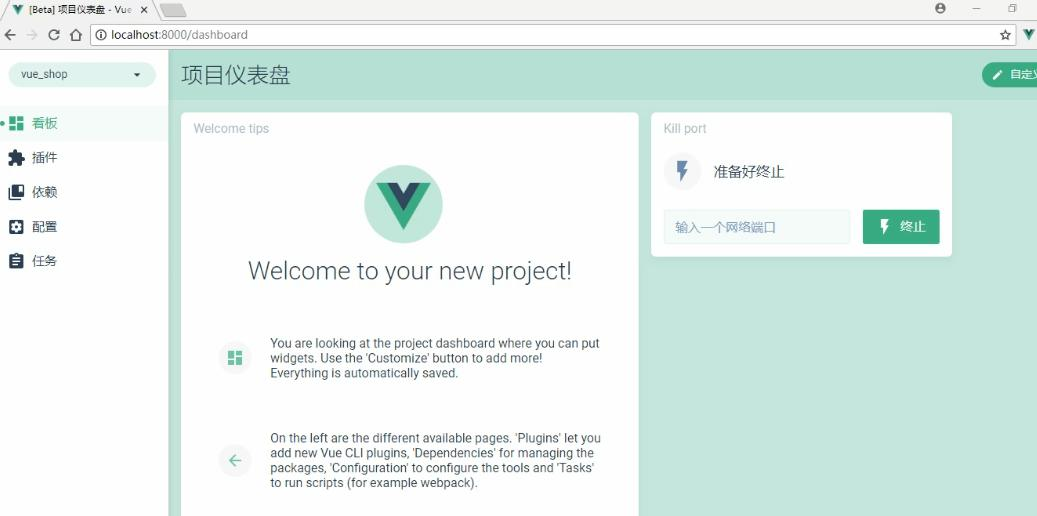
创建完成
配置Element-UI组件

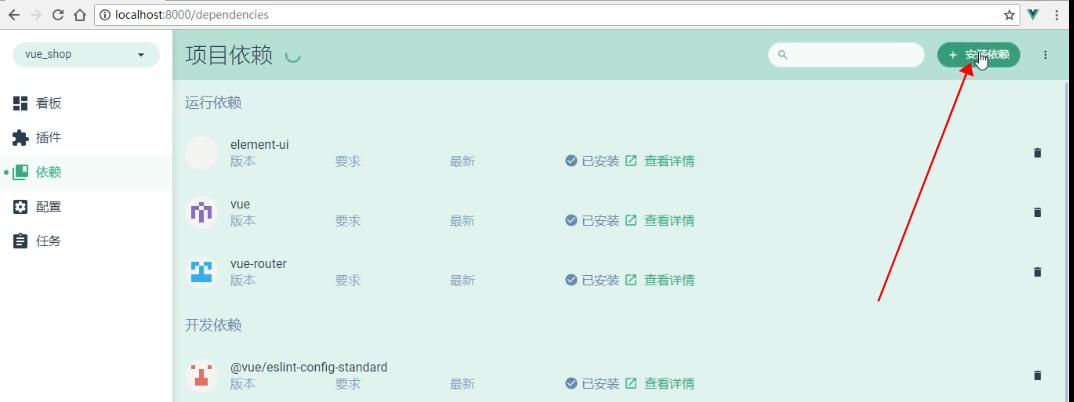
配置axios

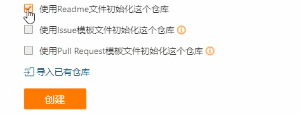
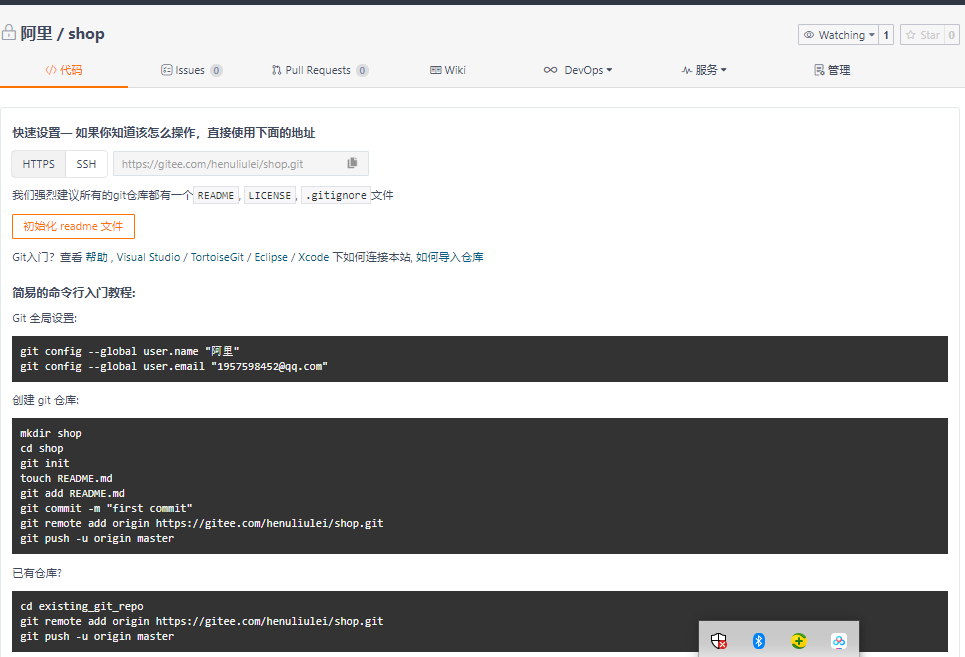
要配置码云,来及时把项目上传和更新到云端。
首先我们要拥有一个码云账号,同时注册的邮箱要设置为公开,配置ssh公钥:https://www.bilibili.com/video/BV1EE411B7SU?p=6
完成后就要把本地项目托管到码云上:课程的视频
注意创建项目时,不能用readme初始化仓库,下面的不要勾选
在工程目录下,shift+右键
Git 全局设置:
git config --global user.name "阿里"
git config --global user.email "1957598452@qq.com"
刚创建的仓库有这个页面
因为我们已有仓库,所以之后要执行图像后三行代码,之前我要要看一下git的状态,并把修改后的在提交到缓存
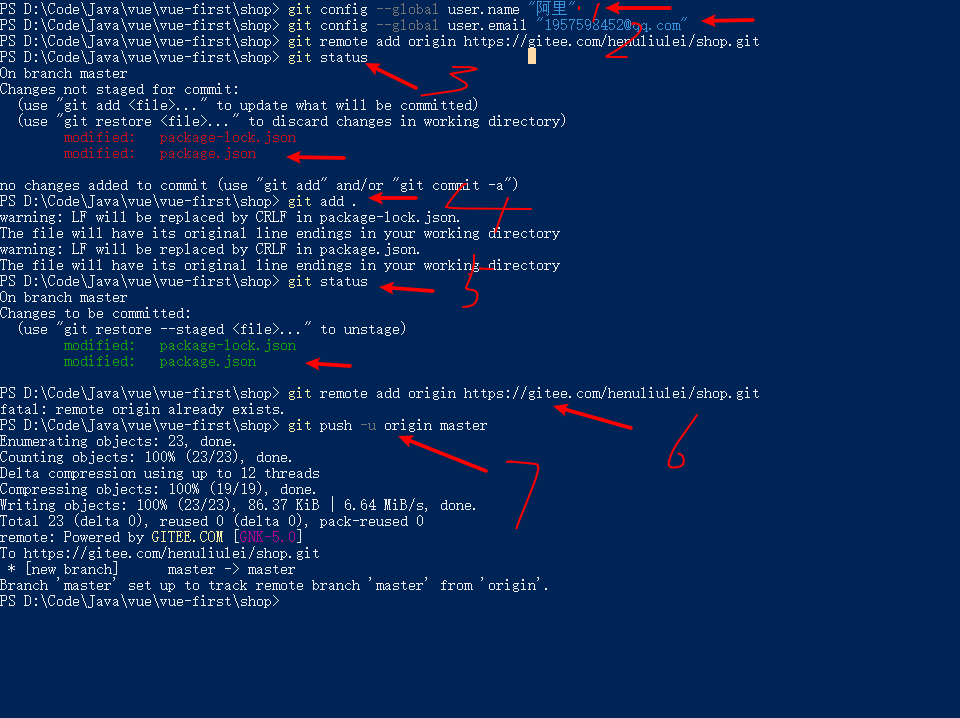
就可以。
之后使用phpmysql程序集成包,导入mysql,https://www.bilibili.com/video/BV1EE411B7SU?p=8
运行后端程序,让后端接口跑起来,这些都是提供好的,直接用,可以用postman直接测试接口,文档里也提供了相关的软件和程序和接口说明。:https://www.bilibili.com/video/BV1EE411B7SU?p=9
token用来维持前端和后端是跨域(不在同一个ip+port)的状态。
用idea打开编译器,在终端把给项目创建切换到分支里面,这样我们以后再更新代码到主分支里面:https://www.bilibili.com/video/BV1EE411B7SU?p=11

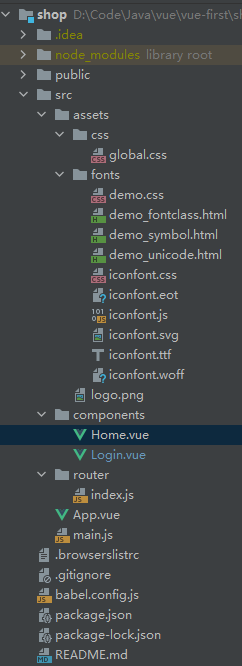
删除项目里面多余的东西,保持项目干净,主要是图像和初始的组件。
项目启动也是在可视化界面进行的。

二:登入退出功能(P8-P29)
打开vue_api_ server 在终端输入node .\app.js启动后端项目,使得前端和后端建立连接,前端可以访问后端接口,文档提供了详细的接口使用说明,可以使用postman直接测试。
先设计登入页面如下:

因为要开发新功能,这时我们可以建立一个分支,在新的分支里面开发,最后merge到主分支里面,,命令为:git checkout -b login, git branch可以查看当前所有的分支。
对于新建的项目,为了后续的开发,删除没有用的项目。
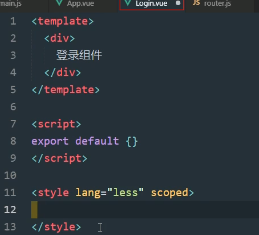
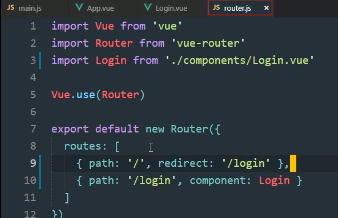
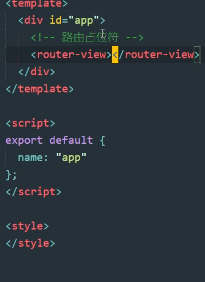
先创建一个登入组件Login.vue,并注册到路由./router/index.js里面,同时为了路由页面都生效,还需要在App.vue里面加入路由占位符。注意初始页面会自动跳转到登入页面
在assets/css/定义一下样式global.css,并导入到main.js入口文件里面
html,body,#app{
    height: 100%;
    margin: 0;
    padding: 0;
}
设计登入页面的样子,使用到了element-ui 的表单和按钮
template的代码如下
<div class="addColor">
 <div class="login_box">
   <div class="avatar_box">
     <img  src="../assets/logo.png">
   </div>
   <el-form ref="loginFormRef" :model="loginForm" label-width="0px" class="login_form" :rules="loginFormRules">
      <!--用户名     -->
     <el-form-item prop="username">
       <el-input  placeholder="用户名" v-model="loginForm.username"
                  prefix-icon="iconfont icon-user">

       </el-input>
     </el-form-item>
      <!--密码     -->
     <el-form-item prop="password" >
       <el-input placeholder="密码"  v-model="loginForm.password" type="password"
                 prefix-icon="iconfont icon-3702mima"></el-input>
     </el-form-item>
      <!--按钮     -->
     <el-form-item class="btn">
       <el-button type="primary" @click="login">登入</el-button>
       <el-button type="info" @click="resetLoginForm" >重置</el-button>
     </el-form-item >

   </el-form>

 </div>
</div>
具体的样式设计的代码如下
<style scoped  Lang="less">
  .addColor{
    background-color: #2b4b6b;
    height: 100%;
  }
  .login_box {
    background-color: white;
    height: 350px;
    width: 450px;

    border-radius: 3px;
    position: absolute;
    top: 50%;
    left: 50%;
    transform: translate(-50%, -50%);
  }
    .avatar_box {
      height: 130px;
      width: 130px;
      border-radius: 50%;
      border: 1px solid white;
      padding: 20px;
      box-shadow: 0 0 10px #ddd;
      position: absolute;
      left: 50%;
      transform: translate(-50%, -50%);
    }
      img{
          height: 100%;
          width: 100%;
          background-color: white;
          border-radius: 50%;
      }
      .btn{
        display: flex;
        justify-content: flex-end;
      }
      .login_form{
        position: absolute;
        bottom: 0;
        width: 100%;
        padding: 0px 20px;
        box-sizing: border-box;
      }
</style>
其中我们给input里面添加了icon,这个icon可以使用element自带的,也可以使用阿里云图标库的,本项目是使用阿里云的,在assets里面导入fonts文件,并在main.js导入,就可以使用prefix-icon加入。
使用v-model进行双向数据绑定,如loginForm

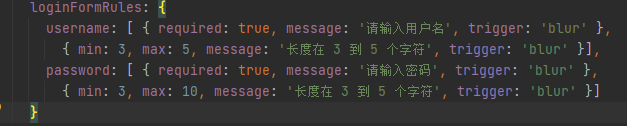
我们使用了element自带的数据验证规则进行验证,使用:rules进行验证
添加重置功能,要先获取form表单对象,添加ref引用,调用重置方法


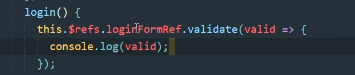
添加表单验证方法
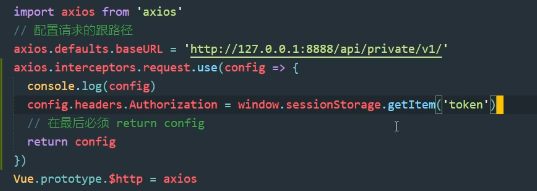
接下来使用axios进行表单验证,现在main.js引入axios
import axios from 'axios'
Vue.prototype.$http= axios
axios.defaults.baseURL = 'http://127.0.0.1:8888/api/private/v1/'
axios向指定路由发请求并传参,同时接受返回值,传参可以直接通过表单双向绑定对象拿到,对返回值类型为promise加入await和async后简化,只获取data数据。(视频链接)
    login(){
      this.$refs.loginFormRef.validate(async valid => {
        if(!valid) return;
        // axios.post(`http://127.0.0.1:8888/api/private/v1/login`).then(Response=>(this.loginForm=Response.data))
        // console.log(this.loginForm.username)
        //解析获取返回值中的data数据
          const {data:res} = await this.$http.post("login",this.loginForm)
          if(res.meta.status !== 200) return this.$message.error("登入失败")
          this.$message.success("登入成功")

        window.sessionStorage.setItem("token",res.data.token)
        this.$router.push("/Home")
      });
    }
element有弹出信息框message提示登入成功与否:
this.$message.error("登入失败"),
this.$message.success("登入成功")
登入成功后,添加token记录,并跳转到home页面(添加并注册),方便后续验证,所以总的 export default为
export default {
  name: "Login",
  data(){
    return{
      loginForm:{
        username:'admin',
        password:'123456'
      },
      loginFormRules: {
        username: [ { required: true, message: '请输入用户名', trigger: 'blur' },
          { min: 3, max: 5, message: '长度在 3 到 5 个字符', trigger: 'blur' }],
        password: [ { required: true, message: '请输入密码', trigger: 'blur' },
          { min: 3, max: 10, message: '长度在 3 到 5 个字符', trigger: 'blur' }]
      }
    }
  },
  methods:{
    resetLoginForm(){
      this.$refs.loginFormRef.resetFields();
    },
    login(){
      this.$refs.loginFormRef.validate(async valid => {
        if(!valid) return;
        // axios.post(`http://127.0.0.1:8888/api/private/v1/login`).then(Response=>(this.loginForm=Response.data))
        // console.log(this.loginForm.username)
        //解析获取返回值中的data数据
          const {data:res} = await this.$http.post("login",this.loginForm)
          if(res.meta.status !== 200) return this.$message.error("登入失败")
          this.$message.success("登入成功")

        window.sessionStorage.setItem("token",res.data.token)
        this.$router.push("/Home")
      });
    }
  }
}
在路由index.js里面,添加路由守卫
router.beforeEach((to, from, next) =>{
  if(to.path === '/login') return next()

  const tokenstr = window.sessionStorage.getItem('token')
  if(!tokenstr) return next('/login')
  next()
})
在home
页面可以登出,定义一个登出功能
<template>
    <div>
       <el-button type="info" @click="logout">退出</el-button>
    </div>
</template>

<script>
export default {
  name: "Home",
  methods:{
    logout(){
      window.sessionStorage.clear()
      this.$router.push("/login")
    }
  }
}
</script>

<style scoped>

</style>
此时登入部分就完成了,现在将本地分支导入到主分支里面。具体过程为
git status查看文件状态。
git add . 将变化的文件提交到缓存区。
git status 在此查看就会发现所以的更新完成
git commit -m '登入部分完成' 把代码提交到本地缓存区。
git checkout master 切换到主分支
git merge mybranch 合并mybranch分支代码
git push 本地主分支推送到云端(因为主分支云端已经存在,所以不需要创建,但是mybranch不存在,所以要创建才可以)
git checkout login 切换到分支
git push -u origin mybranch 将本地分支推送到云端
此时架构
global.css


html,body,#app{
    height: 100%;
    margin: 0;
    padding: 0;
}
Home.vue
<template>
    <div>
       <el-button type="info" @click="logout">退出</el-button>
    </div>
</template>

<script>
export default {
  name: "Home",
  methods:{
    logout(){
      window.sessionStorage.clear()
      this.$router.push("/login")
    }
  }
}
</script>

<style scoped>

</style>
Login.vue
<template>
<div class="addColor">
 <div class="login_box">
   <div class="avatar_box">
     <img  src="../assets/logo.png">
   </div>
   <el-form ref="loginFormRef" :model="loginForm" label-width="0px" class="login_form" :rules="loginFormRules">
      <!--用户名     -->
     <el-form-item prop="username">
       <el-input  placeholder="用户名" v-model="loginForm.username"
                  prefix-icon="iconfont icon-user">

       </el-input>
     </el-form-item>
      <!--密码     -->
     <el-form-item prop="password" >
       <el-input placeholder="密码"  v-model="loginForm.password" type="password"
                 prefix-icon="iconfont icon-3702mima"></el-input>
     </el-form-item>
      <!--按钮     -->
     <el-form-item class="btn">
       <el-button type="primary" @click="login">登入</el-button>
       <el-button type="info" @click="resetLoginForm" >重置</el-button>
     </el-form-item >

   </el-form>

 </div>
</div>

</template>

<script>
import axios from "axios";

export default {
  name: "Login",
  data(){
    return{
      loginForm:{
        username:'admin',
        password:'123456'
      },
      loginFormRules: {
        username: [ { required: true, message: '请输入用户名', trigger: 'blur' },
          { min: 3, max: 5, message: '长度在 3 到 5 个字符', trigger: 'blur' }],
        password: [ { required: true, message: '请输入密码', trigger: 'blur' },
          { min: 3, max: 10, message: '长度在 3 到 5 个字符', trigger: 'blur' }]
      }
    }
  },
  methods:{
    resetLoginForm(){
      this.$refs.loginFormRef.resetFields();
    },
    login(){
      this.$refs.loginFormRef.validate(async valid => {
        if(!valid) return;
        // axios.post(`http://127.0.0.1:8888/api/private/v1/login`).then(Response=>(this.loginForm=Response.data))
        // console.log(this.loginForm.username)
        //解析获取返回值中的data数据
          const {data:res} = await this.$http.post("login",this.loginForm)
          if(res.meta.status !== 200) return this.$message.error("登入失败")
          this.$message.success("登入成功")

        window.sessionStorage.setItem("token",res.data.token)
        this.$router.push("/Home")
      });
    }
  }
}
</script>

<style scoped  Lang="less">
  .addColor{
    background-color: #2b4b6b;
    height: 100%;
  }
  .login_box {
    background-color: white;
    height: 350px;
    width: 450px;

    border-radius: 3px;
    position: absolute;
    top: 50%;
    left: 50%;
    transform: translate(-50%, -50%);
  }
    .avatar_box {
      height: 130px;
      width: 130px;
      border-radius: 50%;
      border: 1px solid white;
      padding: 20px;
      box-shadow: 0 0 10px #ddd;
      position: absolute;
      left: 50%;
      transform: translate(-50%, -50%);
    }
      img{
          height: 100%;
          width: 100%;
          background-color: white;
          border-radius: 50%;
      }
      .btn{
        display: flex;
        justify-content: flex-end;
      }
      .login_form{
        position: absolute;
        bottom: 0;
        width: 100%;
        padding: 0px 20px;
        box-sizing: border-box;
      }
</style>
index.js
import Vue from 'vue'
import VueRouter from 'vue-router'
import Login from "@/components/Login";
import Home from "@/components/Home";

Vue.use(VueRouter)

const routes = [
  {path: "/", redirect: '/login'},
  {path: "/login", component:Login},
  {path: "/Home", component:Home},
]

const router = new VueRouter({
  routes
})

router.beforeEach((to, from, next) =>{
  if(to.path === '/login') return next()

  const tokenstr = window.sessionStorage.getItem('token')
  if(!tokenstr) return next('/login')
  next()
})
export default router
main.js
import Vue from 'vue'
import App from './App.vue'
import router from './router'
import './assets/css/global.css'
import ElementUI from 'element-ui'
import 'element-ui/lib/theme-chalk/index.css'
import './assets/fonts/iconfont.css'
import axios from 'axios'
Vue.prototype.$http= axios
axios.defaults.baseURL = 'http://127.0.0.1:8888/api/private/v1/'
Vue.use(ElementUI)
Vue.config.productionTip = false

new Vue({
  router,
  render: h => h(App)
}).$mount('#app')
App.vue
<template>
  <div id="app">
    <router-view></router-view>
  </div>
</template>
import
<script>
   export default {
     name:"app"
   }
</script>
三:主页设计(P30-P40)
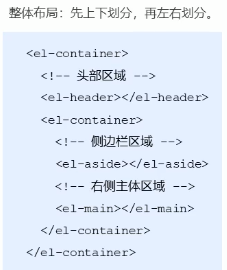
主页布局大致如上。
同时进行了样式的设计主要是颜色和大小的设计
<style scoped>
.el-header{
  background-color: #373d41;
  display: flex;
  justify-content: space-between;
  padding-left: 0;
  align-items: center;
  color: white;
  font-size: 20px;
}
div{
  display: flex;
  align-items: center;
}
span{
  margin-left: 15px;
}
.el-aside{
  background-color: #333744;
}
.el-main {
  background-color: #eaedf1;
}
.home-container{
  height: 100%;
}
.iconfont{
  margin-right: 10px;
}
.el-menu{
  border-right: none;
}
.toggle-button{
  background-color: #4A5064;
  font-size: 10px;
  line-height: 24px;
  color: #fff;
  text-align: right;
  letter-spacing: 0.2em;
  cursor: pointer;
}
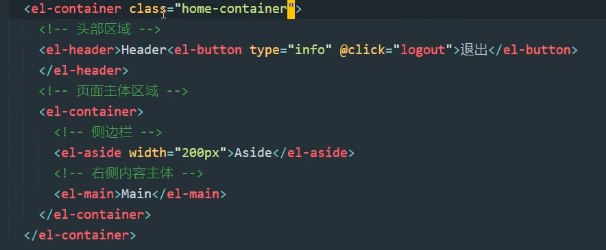
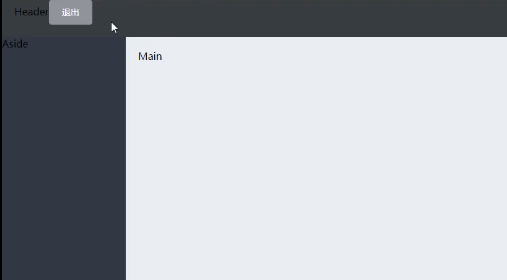
此时布局大致如下
现在对header进行设计,加入图片和文字同时让按钮放置在最右边,效果如下,使用了flex弹性盒模型

header代码为
<el-header>
          <div>
            <img src="../assets/heima.png">
            <span>电商后台管理系统</span>
          </div>
          <el-button type="info" @click="logout">退出</el-button>
</el-header>
样式
.el-header{
  background-color: #373d41;
  display: flex;
  justify-content: space-between;
  padding-left: 0;
  align-items: center;
  color: white;
  font-size: 20px;
}
div{
  display: flex;
  align-items: center;
}
span{
  margin-left: 15px;
}
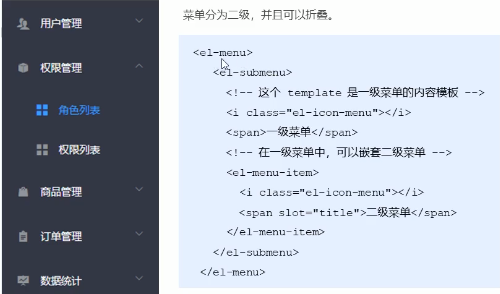
接下来在左侧设计菜单布局,菜单分为两级,可以折叠,使用到了el-menu组件
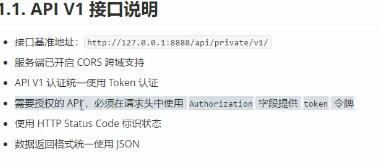
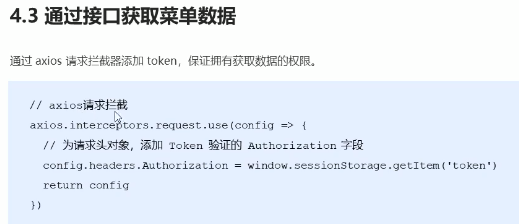
在用axios请求接口的时候,后台接口做了设计,除了登入接口之外,其它的接口你必须拥有添加了Token验证的Authorization字段才可以访问,所以必须在使用axios之前先使用拦截器添加token,保证拥有获取数据的权限
配置请求的根路径,为请求添加令牌
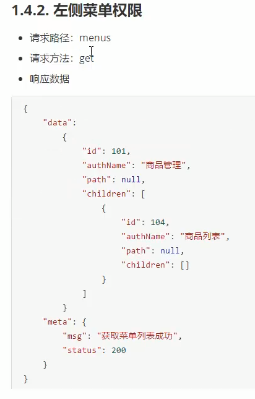
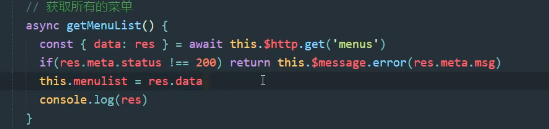
接下来我们要为左侧菜单赋值,那么就要先从后端获取左侧菜单数据(可以为了方便自己直接写死?!!),后端接口如下:
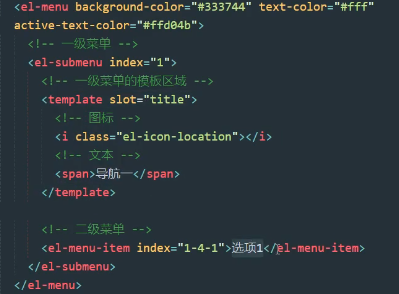
接下来就是把获取的数据渲染到页面上,对于一级菜单,我们要为一级菜单的每一项是唯一所以和item.id进行绑定,同时加index可以打开一级菜单的时候其他一级菜单不会打开,同时也具有唯一性的性质:

二级菜单一样:
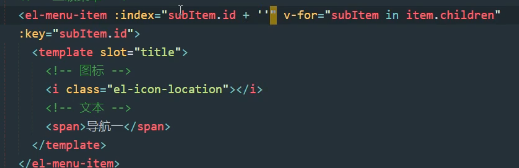
继续优化。为选中项显示选中的颜色 ,二级图标也可以更换
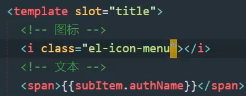 ,继续更换一级菜单的图标,通过每项的唯一id设置图标,
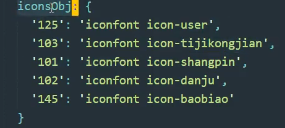

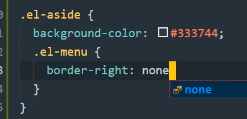
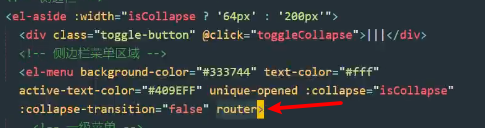
unique-opened可以让保证每次只打开一个一级菜单,只需在el-menu上加入即可。去除侧边栏出现的线条断斜的问题加入
接下来实现左侧侧边栏的收起功能,加入一个如下的按钮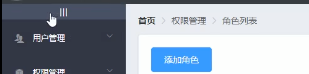
 样式为
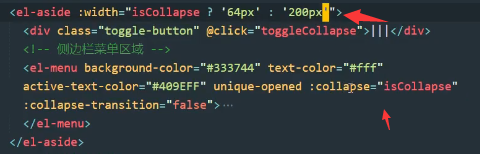
样式为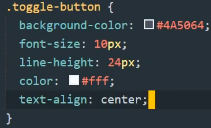 ,定义一个折叠函数点击就让el-menu的折叠或者展开,collpase为true是展开,同时让该属性注册在data里面,同时加入iscollpase动态修改折叠后侧边栏宽度
![]()
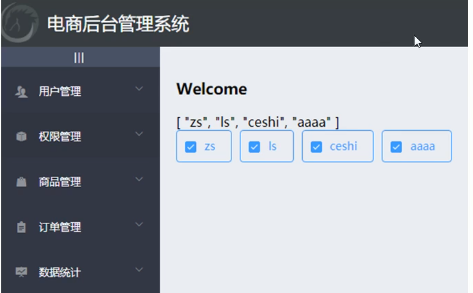
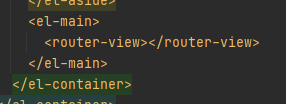
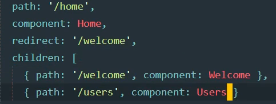
我们希望计入home页面后,home页面显示的是welcome页面,welcome页面定位为home页面的子页面,首先声明weicome页面并注册到index.js,home的孩子就是有welcome,进入home直接跳转到welcome,这样要在主页面设置路由占位符
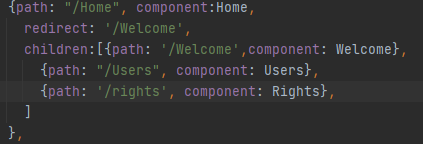
我们希望点击二级菜单可以跳转,此时为菜单设置router属性,就可以点击后跳转到默认路径为localhost:8080/index路径
,注意路径是我们为el-menu-item设置的唯一index,我们改为返回值的path属性

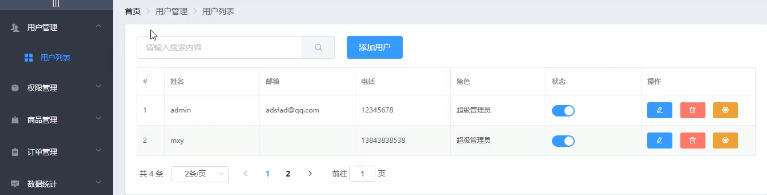
四:用户列表设计(P41-P51)
接下来我们创建用户列表,总体设计如下,首先在components创建user文件夹,同时在该文件夹下创建User文件作为用户列表视图,同时作为子路由放在home路由下面。
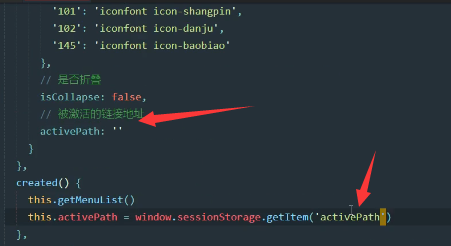
我们希望点击二级菜单的时候菜单变色,这时候给侧边栏使用default-active属性,绑定的值就是每一个二级菜单的唯一index,为每一个二级菜单创建一个点击方法传入点击的是哪一个菜单的index,在方法里面进行注入到session,付给一个值。在data里面创建一个属性等于session存储的值,同时让default-active绑定这个值,这个值可以被点击方法动态更新,同时希望用户第一次进入页面后该属性被上次所处的记录赋值。


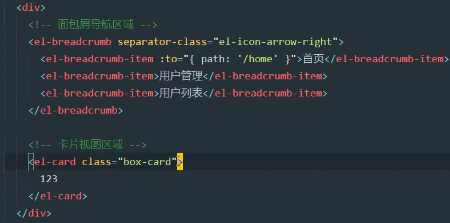
现在绘制用户页面,包含面包屑导航区和卡片视图区域,卡片区域导入数据视图
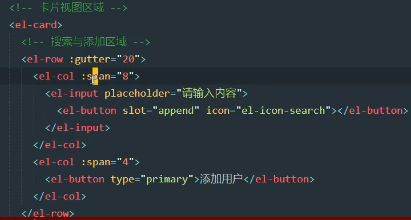
现在在卡片视图区域补充完整按钮和搜索框
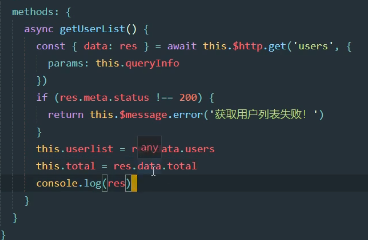
接下来要补充用户数据列表视图,首选获取数据,之后再进行渲染,下面是获取数据的后台接口

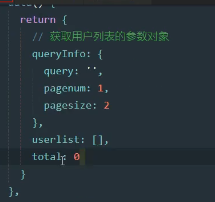
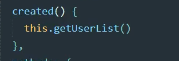
对于传入的参数可以封装成一个数据对象放在data里面,同时,返回的结果也要声明在data里面,创建一个获取用户数据的方法,初始化时就要加载
现在就可以根据获取的数据进行视图渲染,border和stripe是实现加边框线和隔行变色,其中type=index是实现加入一个索引页:

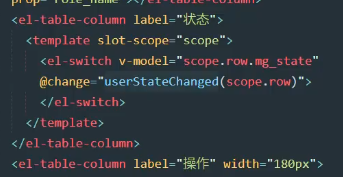
因为状态返回的数据是布尔值,无法直接显示,所以使用一个作用于插槽,把开关按钮加入进去,通过插槽的scope.row.mg_state可以获取当前行的数据,进而获取布尔值进行switch的渲染。
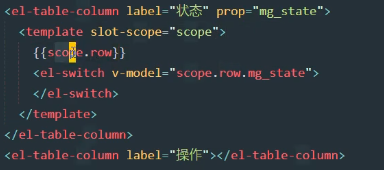
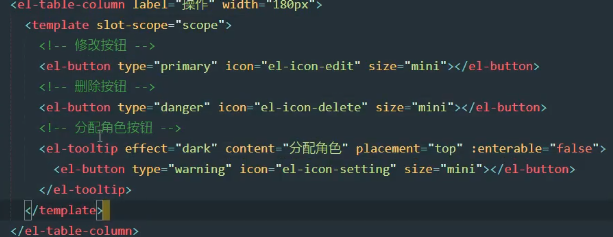
同时对于操作栏我们加入删除,修改,分配角色按钮,同样使用作用域插槽的技术,并为每个按钮加入content内容提示
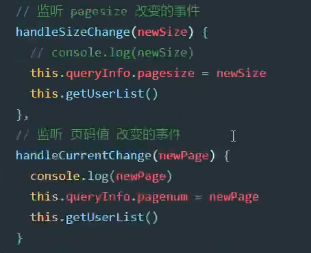
继续实现分页效果,当页面大小和页面切换发生的时候我们调用相应的事件把数据进行更新,同样数据要在data里面注册,然后进行双向数据绑定。


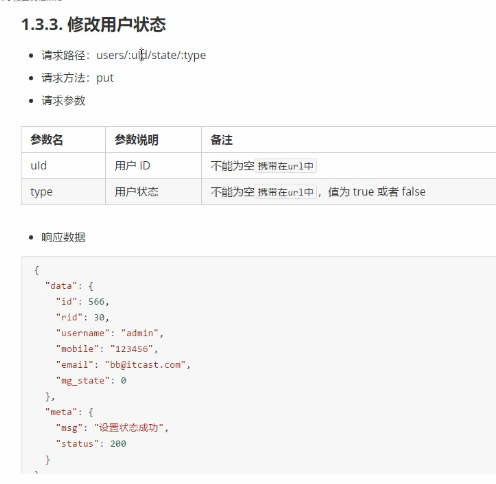
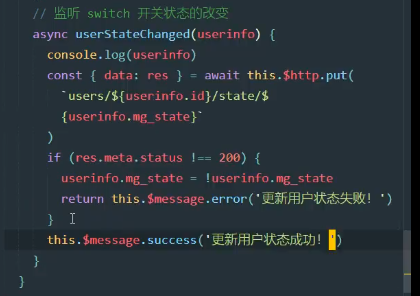
对于状态栏,我们希望用户可以点击开关后,这个状态可以保存到数据库,下次直接从数据库加载,实现数据的记载。修改用户状态的接口如下:
定义一个状态改变的函数,
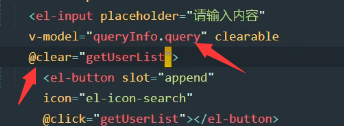
现在实现搜索框功能,只需双向绑定给queryInfo就行,这样用户输入的内容就可以直接通过queryInfo传给后台,后台会进行模糊查询把结果在此返回前台进行渲染,同时实现了清空搜索框的快捷功能。
五:用户列表的增删改(P52-P72)
先去实现用户的添加
先去添加一个对话框,同时在data里面设置addDialogVisible来进行对话框的显示与隐藏。给添加按钮加入事件,控制对话框的显示与否
![]()


现在对话框如上,很简单,我们要继续绘制,实现如下的功能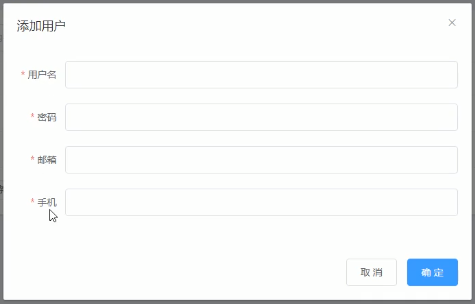
先加入一个表单,在进行表单验证。

 addFormRules: {
        username: [{required: true, message: "请输入用户名", trigger: 'blur'}, {
          min: 3,
          max: 10,
          message: '用户名的长度在3-10',
          trigger: 'blur'
        }],
        password: [{required: true, message: "请输入密码", trigger: 'blur'}, {
          min: 3,
          max: 20,
          message: '密码的长度在3-20',
          trigger: 'blur'
        }],
        email: [{required: true, message: "请输入邮箱", trigger: 'blur'}, {
          min: 6,
          max: 28,
          message: '邮箱的长度在6-28',
          trigger: 'blur'
        }, {validator: checkEmail, trigger: 'blur'}],
        mobile: [{required: true, message: "请输入电话号码", trigger: 'blur'}, {
          min: 3,
          max: 18,
          message: '电话号码的长度在6-18',
          trigger: 'blur'
        }, {validator: checkMobile, trigger: 'blur'}],

      },
注意上面的验证规则里面也加入了自定义验证规则,我们自定义了手机号和邮箱的验证,使用validator加入验证
var checkEmail = (rule, value, cb) => {
      const regEmail = /^[a-zA-Z0-9_-]+@[a-zA-Z0-9_-]+(\.[a-zA-Z0-9_-]+)+$/
      if (regEmail.test(value)) {
        return cb()
      }
      cb(new Error("请输入合法邮箱"))
    }
    var checkMobile = (rule, value, cb) => {
      const regMobile = /^1[3|4|5|7|8][0-9]{9}$/
      if (regMobile.test(value)) {
        return cb()
      }
      cb(new Error("请输入正确的手机号"))
    }
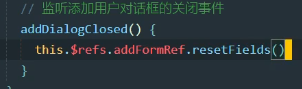
之前表单里面有一个ref属性,拥有这个属性就可以使用refs里面自定义的方法实现相应的功能,注意refs里面包含所有声明的ref对象,这些对象可以使用一些特殊的方法实现特定功能,这时候我们希望关闭对话框后取消保留的内容,就可以调用ref的resetFields方法
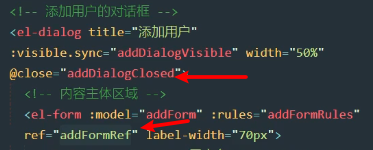
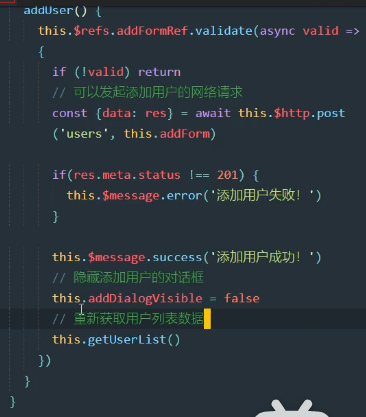
进行校验后,用户点击确认的时候,我们需要根据验证的结果做出相应的操作,所以需要为按钮注册一个验证函数

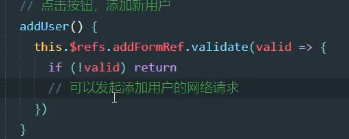
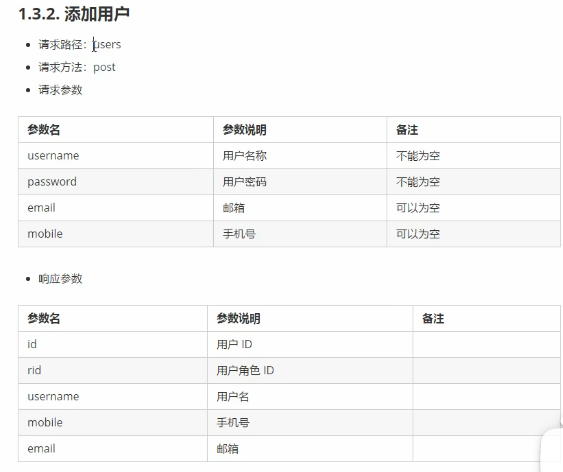
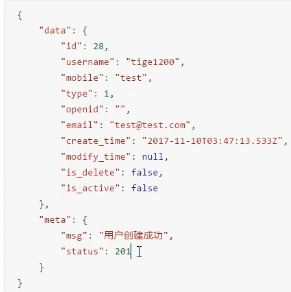
现在实现验证成功后进行表单数据的提交,先来看一下接口说明,然后就可以使用axios来进行数据提交,提交结束重新刷新视图
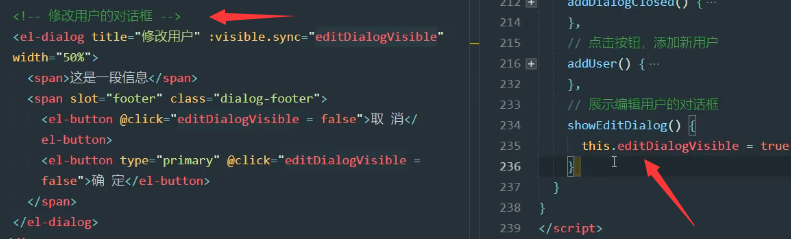
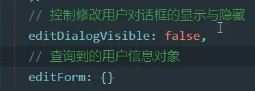
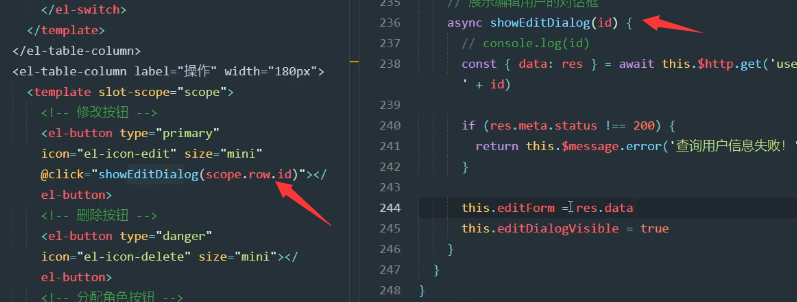
接下来实现修改用户,类似增加用户,也要先创建一个form表单,同时在data里面添加状态属性editDialogVisible,为按钮添加事件
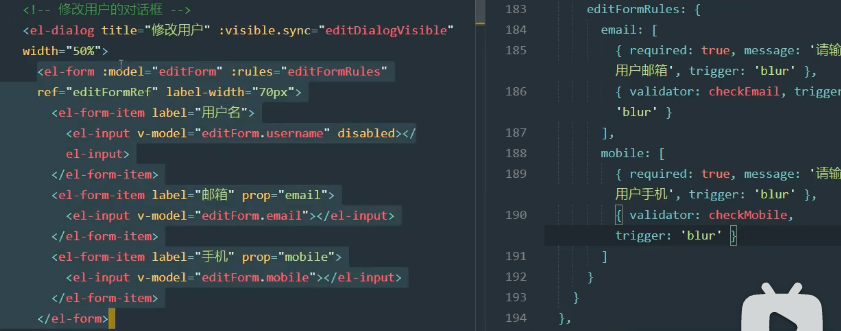
接下来实现内容的填充,先在data里面创建一个存储指定id内容的表单对象editform,同时在表单里面用v-model进行双向数据绑定

先在可以给对话框加入验证
关闭对话框下次打开的时候,希望清空上次的记录

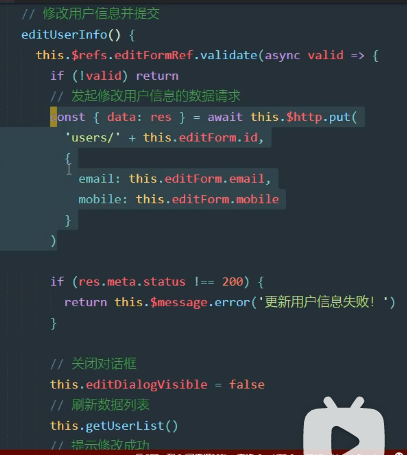
接下来就是提交数据,类似,先为提交按钮加入点击事件,实现提交

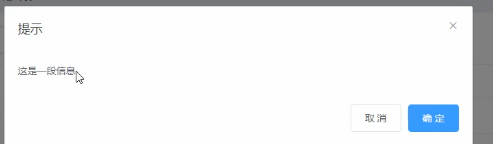
下面就是删除数据,我们先为删除按钮添加删除事件,传入的参数是scope.row.id,当然真正删除数据之前先询问用户是否真的删除,如果是的话就再调用接口删除数据,再重新加载数据。
 async removeUserById(id){
      const confirmResult = await this.$confirm(
          '此操作将永久删除该用户,是否继续?',
          '提示',
          {
            confirmButtonText: '确定',
            cancelButtonText: '取消',
            type:  'warning'
          }
      ).catch(err => err)
      if(confirmResult !== 'confirm'){
        return this.$message.info("已取消删除")
      }
      const {data:res}  = axios.delete('users/' + id)
      // const {data:res}  = this.$http.delete('users/' + id)
      if(res.meta.status !== 200){
        return this.$message.error("删除用户失败")
      }
      this.$message.success("删除用户成功")
      this.getUserList()
      console.log("确认删除")
    }
接下来把我们写的代码再次上传到云端,因为这些代码是user页面的功能,那么我们可以新加一个分支,之后再把主分支合并这个子分支。具体过程和之前的mybranch分支步骤一致,同时我们创建rights分支来进行接下来的操作
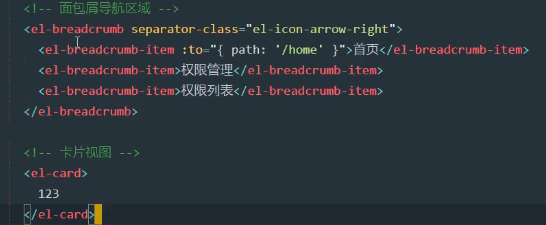
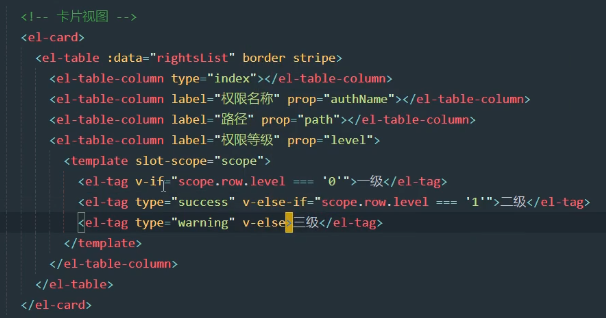
对于权限列表,先创建权限列表页面,注册到home的子路由里面,之后给页面创建视图,先加一个面包屑导航区和卡片视图
获取数据,api如下

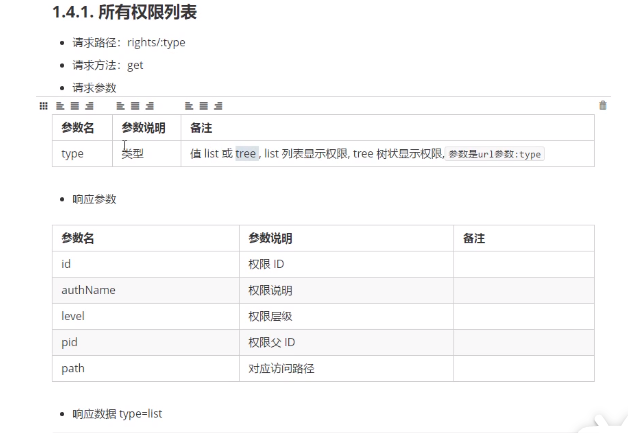

对于卡片视图
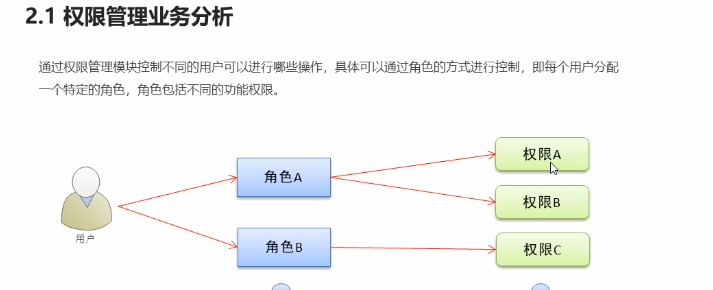
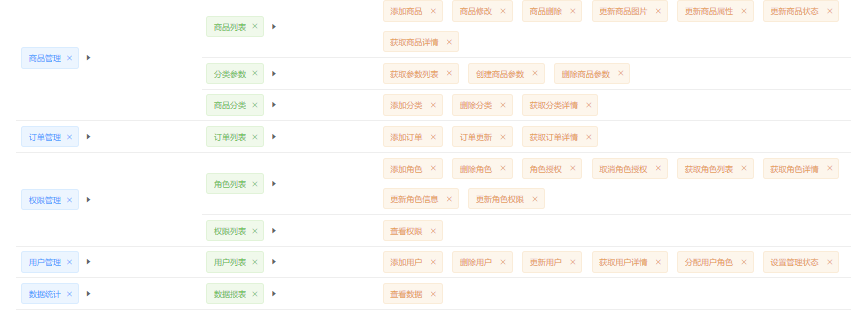
用户和角色和权限的关系如下
此时的代码
Users.vue
<template>
  <div>

    <div>
      <!--  导航栏    -->
      <el-breadcrumb separator-class="el-icon-arrow-right">
        <el-breadcrumb-item :to="{ path: '/Home' }">首页</el-breadcrumb-item>
        <el-breadcrumb-item>用户管理</el-breadcrumb-item>
        <el-breadcrumb-item>列表</el-breadcrumb-item>
      </el-breadcrumb>
      <!--  用户列表区      -->
      <el-card>
        <el-row :gutter="20">
          <el-col :span="8">
            <el-input placeholder="请输入内容" v-model="queryInfo.query" class="input-with-select" clearable
                      @clear="getUserList">
              <el-button slot="append" icon="el-icon-search" @click="getUserList"></el-button>
            </el-input>
          </el-col>
          <el-col span="4">
            <el-button type="primary" @click="addDialogVisible = true">添加用户</el-button>
          </el-col>
        </el-row>

        <el-table :data="userlist" border stripe width="180px">
          <el-table-column type="index" ></el-table-column>
          <el-table-column label="姓名" prop="username"></el-table-column>
          <el-table-column label="邮箱" prop="email"></el-table-column>
          <el-table-column label="电话" prop="mobile"></el-table-column>
          <el-table-column label="角色" prop="role_name"></el-table-column>
          <el-table-column label="状态">
            <template slot-scope="scope">
              <el-switch v-model="scope.row.mg_state" @change="userStateChanged(scope.row)">
              </el-switch>
            </template>
          </el-table-column>
          <el-table-column label="操作" prop="" width="180px">
            <template slot-scope="scope">
              <el-tooltip  class="item" effect="dark" content="修改角色" placement="top"
                           :enterable="false">
                <el-button @click="showEditDialog(scope.row.id)" type="primary" icon="el-icon-edit" size="mini"></el-button>
              </el-tooltip>
              <el-tooltip class="item" effect="dark" content="删除角色" placement="top" :enterable="false">
                <el-button type="danger" @click="removeUserById(scope.row.id)" icon="el-icon-delete" size="mini"></el-button>
              </el-tooltip>
              <el-tooltip class="item" effect="dark" content="分配角色" placement="top" :enterable="false">
                <el-button type="warning" icon="el-icon-setting" size="mini"></el-button>
              </el-tooltip>
            </template>
          </el-table-column>
        </el-table>
        <el-pagination
            @size-change="handleSizeChange"
            @current-change="handleCurrentChange"
            :page-sizes="[1, 2, 3, 4]"
            :page-size="queryInfo.pagesize"
            :current-page="queryInfo.pagenum"
            layout="total, sizes, prev, pager, next, jumper"
            :total="total">
        </el-pagination>
      </el-card>

      <!--      添加用户的对话框-->
      <el-dialog
          title="添加用户"
          :visible.sync="addDialogVisible"
          width="50%"
          :before-close="handleClose"
          @close="addDialogClosed"
      >
        <!-- 嵌套的表单-->
        <el-form :rules="addFormRules" :model="addForm" ref="addFormRef" label-width="70px">
          <el-form-item label="用户名" prop="username">
            <el-input v-model="addForm.username"></el-input>
          </el-form-item>
          <el-form-item label="密码" prop="password">
            <el-input v-model="addForm.password"></el-input>
          </el-form-item>
          <el-form-item label="邮箱" prop="email">
            <el-input v-model="addForm.email"></el-input>
          </el-form-item>
          <el-form-item label="手机" prop="mobile">
            <el-input v-model="addForm.mobile"></el-input>
          </el-form-item>
        </el-form>
        <!--        底部区域-->
        <span slot="footer" class="dialog-footer">
          <el-button @click="addDialogVisible = false">取 消</el-button>
          <el-button type="primary" @click="addUser">确 定</el-button>
     </span>
      </el-dialog>
      <!--      修改用户的对话框-->
      <el-dialog
          title="修改用戶"
          :visible.sync="editDialogVisible"
          width="50%"
          @close="editDialogClosed"
          >
        <el-form ref="editFormRef" :rules="editFormRules" :model="editForm" label-width="80px">
          <el-form-item label="用戶名">
            <el-input v-model="editForm.username" disabled></el-input>
          </el-form-item>
          <el-form-item label="邮箱" prop="email">
            <el-input v-model="editForm.email" ></el-input>
          </el-form-item>
          <el-form-item label="电话号码" prop="mobile">
            <el-input v-model="editForm.mobile" ></el-input>
          </el-form-item>
        </el-form>
        <span slot="footer" class="dialog-footer">
          <el-button @click="editDialogVisible = false">取 消</el-button>
          <el-button type="primary" @click="editUserInfo">确 定</el-button>
        </span>
      </el-dialog>
    </div>

  </div>


</template>

<script>
import axios from "axios";

export default {
  data() {

    var checkEmail = (rule, value, cb) => {
      const regEmail = /^[a-zA-Z0-9_-]+@[a-zA-Z0-9_-]+(\.[a-zA-Z0-9_-]+)+$/
      if (regEmail.test(value)) {
        return cb()
      }
      cb(new Error("请输入合法邮箱"))
    }
    var checkMobile = (rule, value, cb) => {
      const regMobile = /^1[3|4|5|7|8][0-9]{9}$/
      if (regMobile.test(value)) {
        return cb()
      }
      cb(new Error("请输入正确的手机号"))
    }

    return {
      queryInfo: {
        query: '',
        pagenum: 1,
        pagesize: 2
      },
      userlist: [],
      total: 0,
      addDialogVisible: false,
      editDialogVisible:false,
      editForm : {},
      addForm: {
        username: "",
        password: "",
        email: "",
        mobile: "",
      },
      addFormRules: {
        username: [{required: true, message: "请输入用户名", trigger: 'blur'}, {
          min: 3,
          max: 10,
          message: '用户名的长度在3-10',
          trigger: 'blur'
        }],
        password: [{required: true, message: "请输入密码", trigger: 'blur'}, {
          min: 3,
          max: 20,
          message: '密码的长度在3-20',
          trigger: 'blur'
        }],
        email: [{required: true, message: "请输入邮箱", trigger: 'blur'}, {
          min: 6,
          max: 28,
          message: '邮箱的长度在6-28',
          trigger: 'blur'
        }, {validator: checkEmail, trigger: 'blur'}],
        mobile: [{required: true, message: "请输入电话号码", trigger: 'blur'}, {
          min: 3,
          max: 18,
          message: '电话号码的长度在6-18',
          trigger: 'blur'
        }, {validator: checkMobile, trigger: 'blur'}],

      },
      editFormRules:{
        email: [{required: true, message: "请输入邮箱", trigger: 'blur'},{validator: checkEmail, trigger: 'blur'}],
        mobile: [{required: true, message: "请输入电话号码", trigger: 'blur'},{validator: checkMobile, trigger: 'blur'}],
      }

    }
  },


  created() {
    this.getUserList()
  },

  name: "users",

  methods: {
    async getUserList() {
      const {data: res} = await this.$http.get('users', {params: this.queryInfo})

      if (res.meta.status !== 200) return this.$message.error("获取用户列表失败")
      this.userlist = res.data.users
      this.total = res.data.total
      console.log(res)
    },
    handleSizeChange(val) {
      console.log(`每页 ${val} 条`);
      this.queryInfo.pagesize = val
      this.getUserList()
    },
    handleCurrentChange(val) {
      this.queryInfo.pagenum = val
      this.getUserList()
      console.log(`当前页: ${val}`);
    },
    //监听switch开关的变化
    async userStateChanged(userinfo) {
      console.log(userinfo)
      const {data: res} = await this.$http.put(`users/${userinfo.id}/state/${userinfo.mg_state}`)
      if (res.meta.status !== 200) {
        userinfo.mg_state = !userinfo.mg_state
        return this.$message.error("更新用户状态变化")
      } else {
        this.$message.success("更新成功")
      }
    },
    //监听用户对话框的关闭事件
    addDialogClosed() {
      this.$refs.addFormRef.resetFields()
    },
    addUser() {
      this.$refs.addFormRef.validate(async valid => {
        if (!valid) return
        //发起添加用户的网路请求
        const {data: res} = await this.$http.post('users', this.addForm)
        if (res.meta.status !== 201) this.$message.error("添加用户失败")
        if (res.meta.status === 201) this.$message.success("添加用户成功")

        this.addDialogVisible = false
        this.getUserList()
      })
    },
    //展示编辑对话框
    async showEditDialog(id) {

      const {data:res} = await this.$http.get('users/'+id)
      if(res.meta.status !== 200){
        return this.$message.error("查詢用戶失敗")
      }
      this.editForm = res.data
        this.editDialogVisible = true
    },
    editDialogClosed(){
      this.$refs.editFormRef.resetFields()
    },
    editUserInfo(){
       this.$refs.editFormRef.validate(
           async  valid => {
            if(!valid) return
            const {data:res} = await this.$http.put('users/' + this.editForm.id,
                {
                  email:this.editForm.email,
                  mobile:this.editForm.mobile
                }
            )
             if(res.meta.status !== 200){
               return this.$message.error("更新用户失败")
             }

            this.editDialogVisible = false
             this.getUserList()
             this.$message.success("更新用户信息成功")
          }
      )
    },
    async removeUserById(id){
      const confirmResult = await this.$confirm(
          '此操作将永久删除该用户,是否继续?',
          '提示',
          {
            confirmButtonText: '确定',
            cancelButtonText: '取消',
            type:  'warning'
          }
      ).catch(err => err)
      if(confirmResult !== 'confirm'){
        return this.$message.info("已取消删除")
      }
      const {data:res}  = axios.delete('users/' + id)
      // const {data:res}  = this.$http.delete('users/' + id)
      if(res.meta.status !== 200){
        return this.$message.error("删除用户失败")
      }
      this.$message.success("删除用户成功")
      this.getUserList()
      console.log("确认删除")
    }
  }
}

</script>

<style scoped>

</style>
Home.vue
<template>
<el-container class="home-container">
<!-- 头部-->
<el-header>
<div>
<img src="../assets/heima.png">
<span>电商后台管理系统</span>
</div>
<el-button type="info" @click="logout">退出</el-button>
</el-header>
<el-container>
<!-- 侧边栏-->
<el-aside width="isCollapse ? '64px' : '200px'">
<div class="toggle-button" @click="toggleCollpse">点击折叠</div>
<!-- 一级标题-->
<el-menu :unique-opened="true"
background-color="#333744"
text-color="#fff"
:collapse="isCollapse"
:collapse-transition="false"
:router="true"
:default-active="activePath"
active-text-color="#409EFF">
<!-- 二级标题-->
<el-submenu :index="item.id+''" v-for="item in menulist" :key="item.id">
<template slot="title">
<i :class="iconsObj[item.id]"></i>
<span>{{item.authName}}</span>
</template>
<el-menu-item :index=" '/' + subItem.path + ''" v-for="subItem in item.children"
@click="saveNavState('/' + subItem.path)">
<template slot="title">
<i class="el-icon-menu"></i>
<span>{{subItem.authName}}</span>
</template>
</el-menu-item>
</el-submenu>
</el-menu>
</el-aside>
<el-main>
<router-view></router-view>
</el-main>
</el-container>
</el-container>
</template>
<script>
export default {
name: "Home",
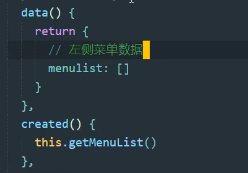
data(){
return {
menulist: [],
iconsObj:{
'125': 'iconfont icon-user',
'103': 'iconfont icon-tijikongjian',
'101': 'iconfont icon-shangpin',
'102': 'iconfont icon-danju',
'145': 'iconfont icon-baobiao',
},
//是否折叠
isCollapse: false,
//被激活的地址
activePath:""
}
},
created() {
this.getMenuList()
this.activePath = window.sessionStorage.getItem('activePath')
},
methods:{
logout(){
window.sessionStorage.clear()
this.$router.push("/login")
},
//获取所有菜单
async getMenuList(){
const {data:res} =await this.$http.get('menus')
if(res.meta.status !== 200) return this.$message.error(res.meta.msg)
this.menulist = res.data
console.log(res)
},
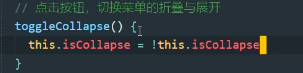
//点击按钮,切换菜单的折叠与展开
toggleCollpse(){
this.isCollapse = !this.isCollapse
},
//保存链接的激活状态
saveNavState(activePath){
window.sessionStorage.setItem('activePath',activePath)
this.activePath = activePath
}
}
}
</script>
<style scoped>
.el-header{
background-color: #373d41;
display: flex;
justify-content: space-between;
padding-left: 0;
align-items: center;
color: white;
font-size: 20px;
}
div{
display: flex;
align-items: center;
}
span{
margin-left: 15px;
}
.el-aside{
background-color: #333744;
}
.el-main {
background-color: #eaedf1;
}
.home-container{
height: 100%;
}
.iconfont{
margin-right: 10px;
}
.el-menu{
border-right: none;
}
.toggle-button{
background-color: #4A5064;
font-size: 10px;
line-height: 24px;
color: #fff;
text-align: right;
letter-spacing: 0.2em;
cursor: pointer;
}
</style>
Rights.vue
<template>
<div>
  <div>
    <el-breadcrumb separator-class="el-icon-arrow-right">
      <el-breadcrumb-item :to="{ path: '/Home' }">首页</el-breadcrumb-item>
      <el-breadcrumb-item>权限管理</el-breadcrumb-item>
      <el-breadcrumb-item>权限列表</el-breadcrumb-item>
    </el-breadcrumb>
    <el-card>
      <el-table :data="rightsList" border stripe>
          <el-table-column type="index" label="#"></el-table-column>
          <el-table-column label="权限名称" prop="authName"></el-table-column>
          <el-table-column label="路径" prop="path"></el-table-column>
          <el-table-column label="权限等级" prop="level">
            <template slot-scope="scope" label="状态">

               <el-tag v-if="scope.row.level === '0'">一级</el-tag>
               <el-tag v-else-if="scope.row.level === '1'" type="success">二级</el-tag>
               <el-tag v-if="scope.row.level === '2'" type="warning">三级</el-tag>
            </template>
          </el-table-column>
      </el-table>
    </el-card>
  </div>

</div>
</template>

<script>
export default {
  name: "Rights",
  data(){
    return {
      rightsList: []
    }
  },
  created() {
    this.getRightsList()
  },
  methods:{
    async getRightsList(){
      const {data: res} = await this.$http.get('rights/list')
      if(res.meta.status !== 200){
        return this.$message.error("获取权限列表失败")
      }
      this.rightsList = res.data
      // console.log(this.rightsList)
    }
  }

}
</script>

<style scoped>

</style>
index.js
import Vue from 'vue'
import VueRouter from 'vue-router'
import Login from "@/components/Login";
import Home from "@/components/Home";
import Welcome from "@/components/Welcome";
import Users from "@/components/user/Users";
import Rights from "@/components/power/Rights";
Vue.use(VueRouter)

const routes = [
  {path: "/", redirect: '/login'},
  {path: "/login", component:Login},
  {path: "/Home", component:Home,
    redirect: '/Welcome',
    children:[{path: '/Welcome',component: Welcome},
      {path: "/Users", component: Users},
      {path: '/rights', component: Rights},
    ]
  },

]

const router = new VueRouter({
  routes
})

router.beforeEach((to, from, next) =>{
  if(to.path === '/login') return next()

  const tokenstr = window.sessionStorage.getItem('token')
  if(!tokenstr) return next('/login')
  next()
})
export default router
main.vue
import Vue from 'vue'
import App from './App.vue'
import router from './router'
import './assets/css/global.css'
import ElementUI from 'element-ui'
import 'element-ui/lib/theme-chalk/index.css'
import './assets/fonts/iconfont.css'
import axios from 'axios'
Vue.prototype.$http= axios
axios.defaults.baseURL = 'http://127.0.0.1:8888/api/private/v1/'
Vue.use(ElementUI)
Vue.config.productionTip = false

axios.interceptors.request.use(
    config => {
      config.headers.authorization = window.sessionStorage.getItem("token")
      return config
    }
)
new Vue({
  router,
  render: h => h(App)
}).$mount('#app')
六:角色列表和分配权限与分配角色(P73-95)
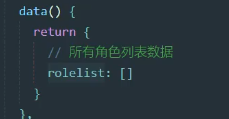
接下来讲解一下角色列表的功能实现,包括展示角色,添加,删除,修改,分配权限等功能。页面效果如下
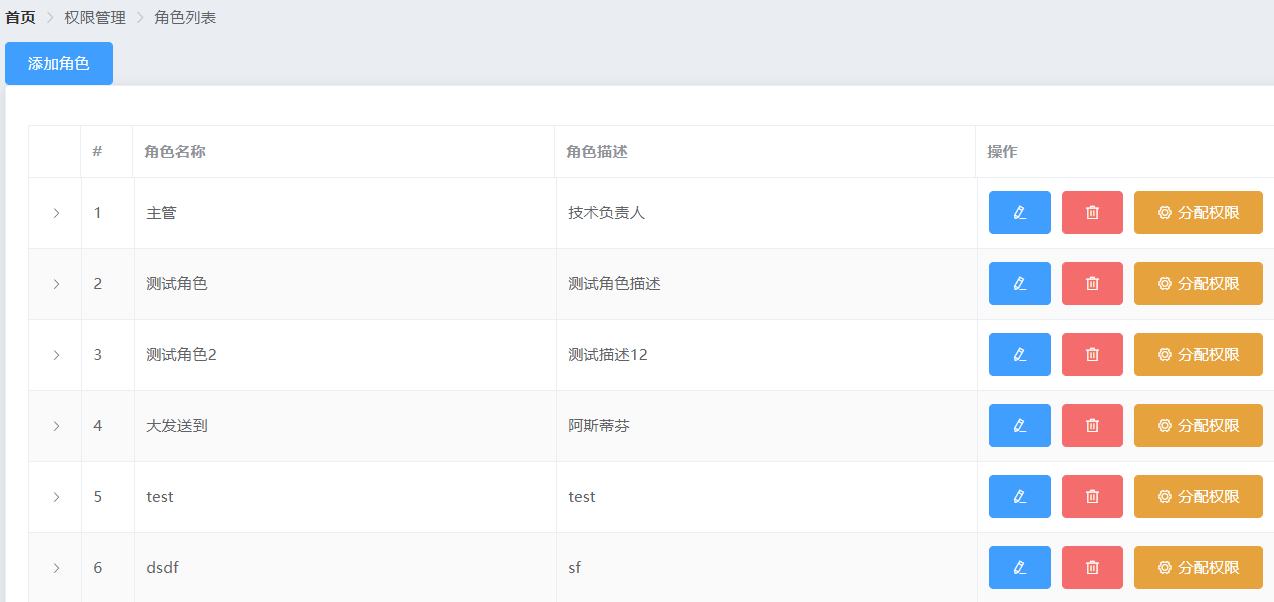
首先就是创建一个Roles文件,然后作为子路由在home路由里面,接下来绘制基本布局,包括面包屑导航,和卡片区。
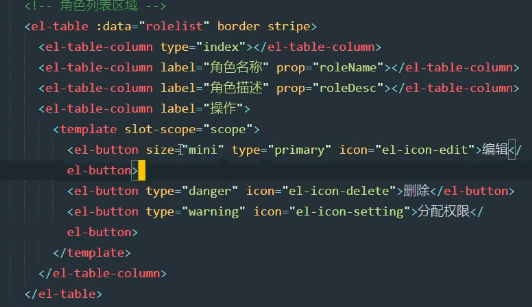
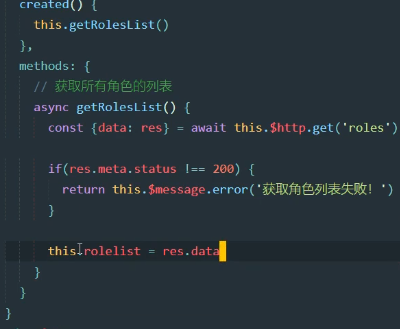
添加,删除,修改之前的代码思路一致直接抄就可以,注意接口别写错就可以。角色列表第一列是一个角色权限的展示,这个功能是分配权限的功能一致,所以我这就没去写,有需求再去看看p77-p84,效果如下
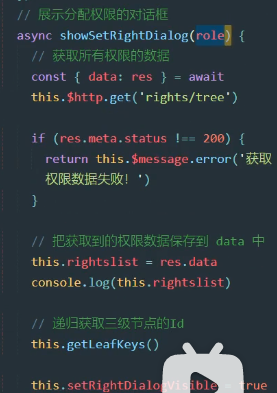
接下来实现分配权限,效果如下:
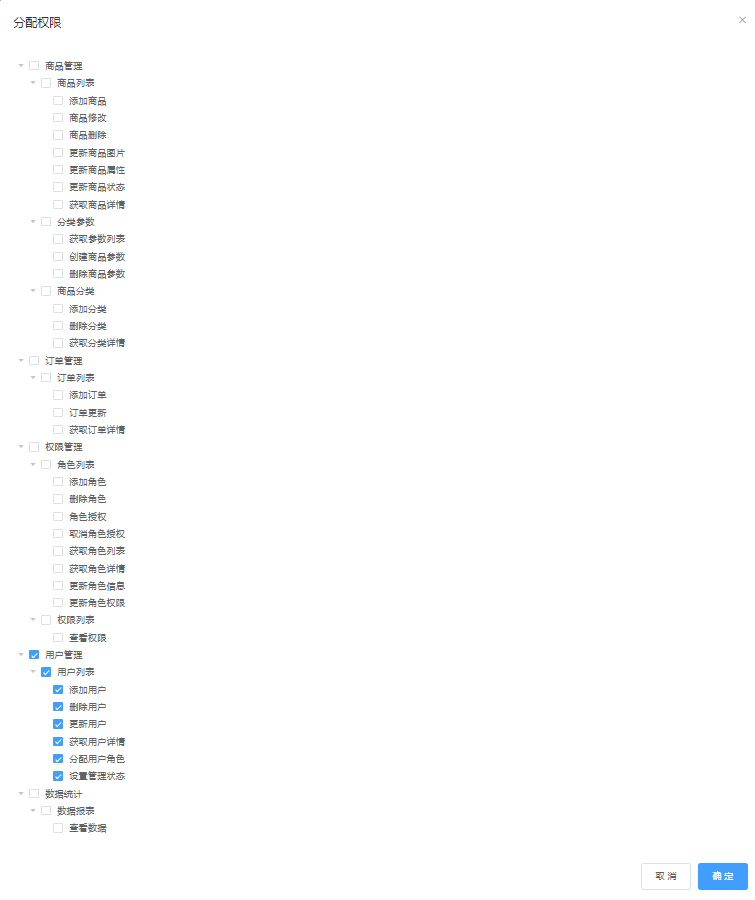
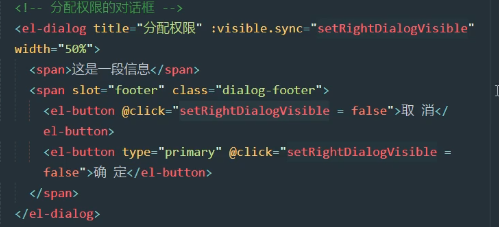
实现分配权限对话框


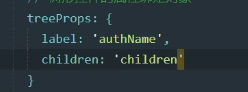
接下来绘制树形结构

优化树形控件,,加入选择框和唯一的key键和默认一次打开所有的树

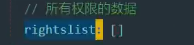
对于用户已有的权限可以,可以把权限对应的数字放在数组里面同时提供给default-checked-keys属性

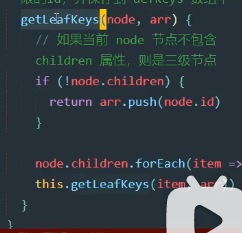
接下来获取树形结构的id,使用递归获取三层结果的数据id数组

每次打开对话框要清空全局数据defkeys,防止上次的数据再次使用

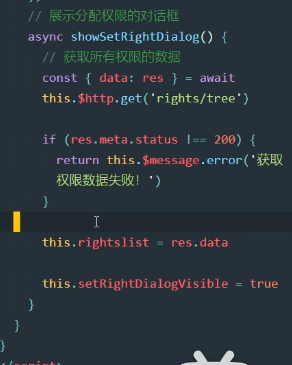
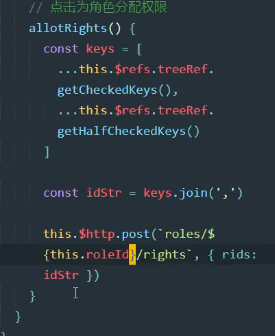
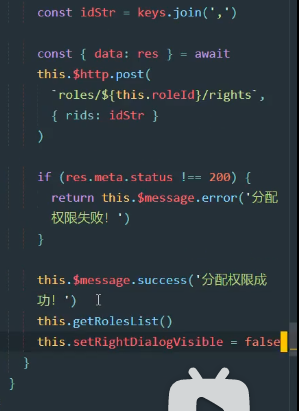
调用api完成权限分配(https://www.bilibili.com/video/BV1EE411B7SU?p=91)


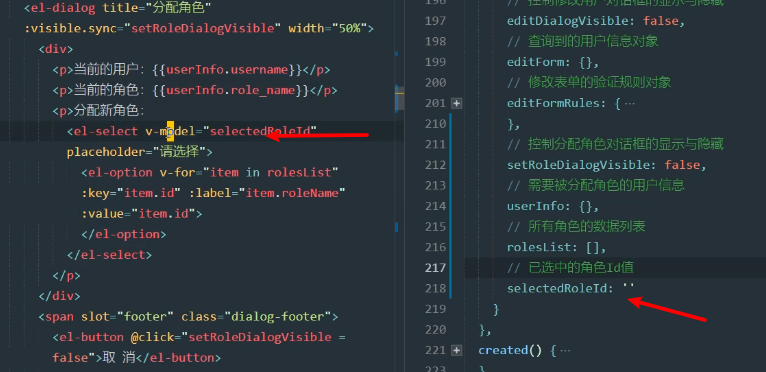
接下来可以完成user页面分配角色按钮,大同小异,不过对话框内加入了一个选择组件
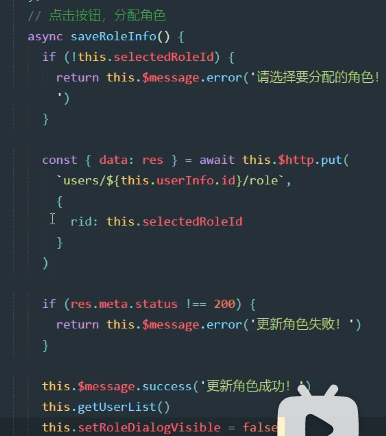
点击按钮分配角色
Rights
<template>
<div>
  <div>
    <el-breadcrumb separator-class="el-icon-arrow-right">
      <el-breadcrumb-item :to="{ path: '/Home' }">首页</el-breadcrumb-item>
      <el-breadcrumb-item>权限管理</el-breadcrumb-item>
      <el-breadcrumb-item>权限列表</el-breadcrumb-item>
    </el-breadcrumb>
    <el-card>
      <el-table :data="rightsList" border stripe>
          <el-table-column type="index" label="#"></el-table-column>
          <el-table-column label="权限名称" prop="authName"></el-table-column>
          <el-table-column label="路径" prop="path"></el-table-column>
          <el-table-column label="权限等级" prop="level">
            <template slot-scope="scope" label="状态">

               <el-tag v-if="scope.row.level === '0'">一级</el-tag>
               <el-tag v-else-if="scope.row.level === '1'" type="success">二级</el-tag>
               <el-tag v-if="scope.row.level === '2'" type="warning">三级</el-tag>
            </template>
          </el-table-column>
      </el-table>
    </el-card>
  </div>

</div>
</template>

<script>
export default {
  name: "Rights",
  data(){
    return {
      rightsList: []
    }
  },
  created() {
    this.getRightsList()
  },
  methods:{
    async getRightsList(){
      const {data: res} = await this.$http.get('rights/list')
      if(res.meta.status !== 200){
        return this.$message.error("获取权限列表失败")
      }
      this.rightsList = res.data
      // console.log(this.rightsList)
    }
  }

}
</script>

<style scoped>

</style>
Roles
<template>
<div>
<div>
<el-breadcrumb separator-class="el-icon-arrow-right">
<el-breadcrumb-item :to="{ path: '/Home' }">首页</el-breadcrumb-item>
<el-breadcrumb-item>权限管理</el-breadcrumb-item>
<el-breadcrumb-item>角色列表</el-breadcrumb-item>
</el-breadcrumb>
<el-col span="4">
<el-button type="primary" @click="addDialogVisible = true">添加角色</el-button>
</el-col>
<el-card>
<el-table :data="rolelist" border stripe>
<el-table-column type="expand"></el-table-column>
<el-table-column type="index" label="#"></el-table-column>
<el-table-column label="角色名称" prop="roleName"></el-table-column>
<el-table-column label="角色描述" prop="roleDesc"></el-table-column>
<el-table-column label="操作" prop="">
<template slot-scope="scope">
<el-tooltip class="item" effect="dark" content="编辑" placement="top"
:enterable="false">
<el-button @click="showEditDialog(scope.row.id)" type="primary" icon="el-icon-edit" ></el-button>
</el-tooltip>
<el-tooltip class="item" effect="dark" content="删除角色" placement="top" :enterable="false">
<el-button type="danger" @click="removeUserById(scope.row.id)" icon="el-icon-delete" ></el-button>
</el-tooltip>
<el-tooltip class="item" effect="dark" content="分配权限" placement="top" :enterable="false">
<el-button type="warning" @click="showSetRightDialog(scope.row)" icon="el-icon-setting" >分配权限</el-button>
</el-tooltip>
</template>
</el-table-column>
</el-table>
</el-card>
<el-dialog
title="添加角色"
:visible.sync="addDialogVisible"
width="50%"
@close="addDialogClosed"
>
<!-- 嵌套的表单-->
<el-form :rules="addFormRules" :model="addForm" ref="addFormRef" label-width="70px">
<el-form-item label="角色名称" prop="roleName">
<el-input v-model="addForm.roleName"></el-input>
</el-form-item>
<el-form-item label="角色描述" prop="roleDesc">
<el-input v-model="addForm.roleDesc"></el-input>
</el-form-item>
</el-form>
<!-- 底部区域-->
<span slot="footer" class="dialog-footer">
<el-button @click="addDialogVisible = false">取 消</el-button>
<el-button type="primary" @click="addUser">确 定</el-button>
</span>
</el-dialog>
<el-dialog
title="修改用戶"
:visible.sync="editDialogVisible"
width="50%"
@close="editDialogClosed"
>
<el-form ref="editFormRef" :rules="editFormRules" :model="editForm" label-width="80px">
<el-form-item label="角色名称" prop="roleName">
<el-input v-model="editForm.roleName" ></el-input>
</el-form-item>
<el-form-item label="角色描述" prop="roleDesc">
<el-input v-model="editForm.roleDesc" ></el-input>
</el-form-item>
</el-form>
<span slot="footer" class="dialog-footer">
<el-button @click="editDialogVisible = false">取 消</el-button>
<el-button type="primary" @click="editUserInfo">确 定</el-button>
</span>
</el-dialog>
<el-dialog
title="分配权限"
:visible.sync="setRightDialogVisible"
width="50%"
@close="setRightDialogClosed"
>
<!-- 嵌套的表单-->
<el-tree :data="rightslist" :props="treeProps" default-expand-all show-checkbox node-key="id"
:default-checked-keys="defKeys" ref="treeRef"></el-tree>
<!-- 底部区域-->
<span slot="footer" class="dialog-footer">
<el-button @click="setRightDialogVisible = false">取 消</el-button>
<el-button type="primary" @click="allotRights">确 定</el-button>
</span>
</el-dialog>
</div>
</div>
</template>
<script>
import axios from "axios";
export default {
name: "Roles",
data(){
return {
rolelist: [],
rightslist: [],
defKeys: [],
addDialogVisible: false,
editDialogVisible: false,
setRightDialogVisible: false,
addForm:{
roleName: "",
roleDesc: "",
},
editForm:{},
addFormRules: {
roleName: [{required: true, message: "请输入角色名", trigger: 'blur'}, {
min: 3,
max: 10,
message: '角色名的长度在3-10',
trigger: 'blur'
}],
roleDesc: [{required: true, message: "请输入角色描述", trigger: 'blur'}, {
min: 3,
max: 20,
message: '角色描述的长度在3-20',
trigger: 'blur'
}],},
editFormRules: {
roleName: [{required: true, message: "请输入角色名", trigger: 'blur'}, {
min: 2,
max: 10,
message: '角色名的长度在2-10',
trigger: 'blur'
}],
roleDesc: [{required: true, message: "请输入角色描述", trigger: 'blur'}, {
min: 2,
max: 20,
message: '角色描述的长度在2-20',
trigger: 'blur'
}],},
treeProps:{
label: 'authName',
children: 'children',
},
roleId: '',
}
},
created() {
this.getRolesList()
},
methods:{
async getRolesList(){
const {data: res} = await this.$http.get('roles')
if(res.meta.status !== 200){
return this.$message.error("获取角色列表失败")
}
this.rolelist = res.data
console.log(this.rolelist)
},
addDialogClosed() {
this.$refs.addFormRef.resetFields()
},
editDialogClosed(){
this.$refs.editFormRef.resetFields()
},
addUser() {
this.$refs.addFormRef.validate(async valid => {
if (!valid) return
//发起添加用户的网路请求
const {data: res} = await this.$http.post('roles', this.addForm)
if (res.meta.status !== 201) this.$message.error("添加角色失败")
if (res.meta.status === 201) this.$message.success("添加角色成功")
this.addDialogVisible = false
this.getRolesList()
})
},
editUserInfo(){
this.$refs.editFormRef.validate(
async valid => {
if(!valid) return
console.log(this.editForm.id)
const {data:res} = await this.$http.put('roles/' + this.editForm.roleId,
{
roleName:this.editForm.roleName,
roleDesc:this.editForm.roleDesc
}
)
console.log(res)
if(res.meta.status !== 200){
return this.$message.error("更新角色失败")
}
this.editDialogVisible = false
this.getRolesList()
this.$message.success("更新角色信息成功")
}
)
},
async showEditDialog(id) {
console.log(id)
const {data:res} = await this.$http.get('roles/'+id)
if(res.meta.status !== 200){
return this.$message.error("查詢角色失敗")
}
this.editForm = res.data
console.log(this.editForm)
this.editDialogVisible = true
},
async removeUserById(id){
const confirmResult = await this.$confirm(
'此操作将永久删除该用户,是否继续?',
'提示',
{
confirmButtonText: '确定',
cancelButtonText: '取消',
type: 'warning'
}
).catch(err => err)
if(confirmResult !== 'confirm'){
return this.$message.info("已取消删除")
}
const {data:res} = axios.delete('roles/' + id)
// const {data:res} = this.$http.delete('users/' + id)
if(res.meta.status !== 200){
return this.$message.error("删除用户失败")
}
this.$message.success("删除用户成功")
this.getRolesList()
console.log("确认删除")
},
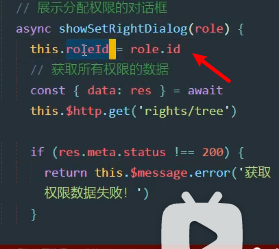
async showSetRightDialog(role){
this.roleId = role.id
const {data:res} = await axios.get('rights/tree')
if (res.meta.status !== 200){
return this.$message.error("获取权限数据失败")
}
this.rightslist = res.data
this.getLeafKeys(role,this.defKeys)
this.setRightDialogVisible = true
console.log(res)
},
setRightDialogClosed(){ //每次使用完毕清空数组
this.defKeys = [];
},
getLeafKeys(node,arr){
if(!node.children){
return arr.push(node.id)
}
node.children.forEach(item => this.getLeafKeys(item,arr))
},
async allotRights(){
const keys =[
...this.$refs.treeRef.getCheckedKeys(),
...this.$refs.treeRef.getHalfCheckedKeys(),
]
console.log(this.roleId)
const idstr = keys.join(',')
const {data: res} = await axios.post(`roles/${this.roleId}/rights`,{rids:idstr})
console.log(res)
if(res.meta.status !== 200){
return this.$message.error("分配权限失败")
}
this.$message.success("分配权限成功")
this.getRolesList()
this.setRightDialogVisible = false
}
}
}
</script>
<style scoped>
</style>
Users
<template>
  <div>

    <div>
      <!--  导航栏    -->
      <el-breadcrumb separator-class="el-icon-arrow-right">
        <el-breadcrumb-item :to="{ path: '/Home' }">首页</el-breadcrumb-item>
        <el-breadcrumb-item>用户管理</el-breadcrumb-item>
        <el-breadcrumb-item>列表</el-breadcrumb-item>
      </el-breadcrumb>
      <!--  用户列表区      -->
      <el-card>
        <el-row :gutter="20">
          <el-col :span="8">
            <el-input placeholder="请输入内容" v-model="queryInfo.query" class="input-with-select" clearable
                      @clear="getUserList">
              <el-button slot="append" icon="el-icon-search" @click="getUserList"></el-button>
            </el-input>
          </el-col>
          <el-col span="4">
            <el-button type="primary" @click="addDialogVisible = true">添加用户</el-button>
          </el-col>
        </el-row>

        <el-table :data="userlist" border stripe width="180px">
          <el-table-column type="index" ></el-table-column>
          <el-table-column label="姓名" prop="username"></el-table-column>
          <el-table-column label="邮箱" prop="email"></el-table-column>
          <el-table-column label="电话" prop="mobile"></el-table-column>
          <el-table-column label="角色" prop="role_name"></el-table-column>
          <el-table-column label="状态">
            <template slot-scope="scope">
              <el-switch v-model="scope.row.mg_state" @change="userStateChanged(scope.row)">
              </el-switch>
            </template>
          </el-table-column>
          <el-table-column label="操作" prop="" width="180px">
            <template slot-scope="scope">
              <el-tooltip  class="item" effect="dark" content="修改角色" placement="top"
                           :enterable="false">
                <el-button @click="showEditDialog(scope.row.id)" type="primary" icon="el-icon-edit" size="mini"></el-button>
              </el-tooltip>
              <el-tooltip class="item" effect="dark" content="删除角色" placement="top" :enterable="false">
                <el-button type="danger" @click="removeUserById(scope.row.id)" icon="el-icon-delete" size="mini"></el-button>
              </el-tooltip>
              <el-tooltip class="item" effect="dark" content="分配角色" placement="top" :enterable="false">
                <el-button type="warning" icon="el-icon-setting" size="mini" @click="setRole(scope.row)" @close="setRoleDialogClosed"></el-button>
              </el-tooltip>
            </template>
          </el-table-column>
        </el-table>
        <el-pagination
            @size-change="handleSizeChange"
            @current-change="handleCurrentChange"
            :page-sizes="[1, 2, 3, 4]"
            :page-size="queryInfo.pagesize"
            :current-page="queryInfo.pagenum"
            layout="total, sizes, prev, pager, next, jumper"
            :total="total">
        </el-pagination>
      </el-card>

      <!--      添加用户的对话框-->
      <el-dialog
          title="添加用户"
          :visible.sync="addDialogVisible"
          width="50%"
          @close="addDialogClosed"
      >
        <!-- 嵌套的表单-->
        <el-form :rules="addFormRules" :model="addForm" ref="addFormRef" label-width="70px">
          <el-form-item label="用户名" prop="username">
            <el-input v-model="addForm.username"></el-input>
          </el-form-item>
          <el-form-item label="密码" prop="password">
            <el-input v-model="addForm.password"></el-input>
          </el-form-item>
          <el-form-item label="邮箱" prop="email">
            <el-input v-model="addForm.email"></el-input>
          </el-form-item>
          <el-form-item label="手机" prop="mobile">
            <el-input v-model="addForm.mobile"></el-input>
          </el-form-item>
        </el-form>
        <!--        底部区域-->
        <span slot="footer" class="dialog-footer">
          <el-button @click="addDialogVisible = false">取 消</el-button>
          <el-button type="primary" @click="addUser">确 定</el-button>
     </span>
      </el-dialog>
      <!--      修改用户的对话框-->
      <el-dialog
          title="修改用戶"
          :visible.sync="editDialogVisible"
          width="50%"
          @close="editDialogClosed"
          >
        <el-form ref="editFormRef" :rules="editFormRules" :model="editForm" label-width="80px">
          <el-form-item label="用戶名">
            <el-input v-model="editForm.username" disabled></el-input>
          </el-form-item>
          <el-form-item label="邮箱" prop="email">
            <el-input v-model="editForm.email" ></el-input>
          </el-form-item>
          <el-form-item label="电话号码" prop="mobile">
            <el-input v-model="editForm.mobile" ></el-input>
          </el-form-item>
        </el-form>
        <span slot="footer" class="dialog-footer">
          <el-button @click="editDialogVisible = false">取 消</el-button>
          <el-button type="primary" @click="editUserInfo">确 定</el-button>
        </span>
      </el-dialog>
<!--      分配角色-->
      <el-dialog
          title="分配角色"
          :visible.sync="setRoleDialogVisible"
          width="50%"
          @close="setRoleDialogClosed"
          :before-close="handleClose">
        <div>
          <p>当前的用户:{{userInfo.username}}}</p>
          <p>当前的角色:{{userInfo.role_name}}</p>
          <p>分配新角色:
            <template>
              <el-select v-model="selectRoleId" placeholder="请选择">
                <el-option
                    v-for="item in roleslist"
                    :key="item.id"
                    :label="item.roleName"
                    :value="item.id">
                </el-option>
              </el-select>
            </template></p>
        </div>
        <span slot="footer" class="dialog-footer">
          <el-button @click="setRoleDialogVisible = false">取 消</el-button>
          <el-button type="primary" @click="saveRoleInfo">确 定</el-button>
      </span>
      </el-dialog>
    </div>

  </div>


</template>

<script>
import axios from "axios";

export default {
  data() {

    var checkEmail = (rule, value, cb) => {
      const regEmail = /^[a-zA-Z0-9_-]+@[a-zA-Z0-9_-]+(\.[a-zA-Z0-9_-]+)+$/
      if (regEmail.test(value)) {
        return cb()
      }
      cb(new Error("请输入合法邮箱"))
    }
    var checkMobile = (rule, value, cb) => {
      const regMobile = /^1[3|4|5|7|8][0-9]{9}$/
      if (regMobile.test(value)) {
        return cb()
      }
      cb(new Error("请输入正确的手机号"))
    }

    return {
      queryInfo: {
        query: '',
        pagenum: 1,
        pagesize: 2
      },
      userlist: [],
      roleslist: [],
      total: 0,
      selectRoleId:"",
      addDialogVisible: false,
      editDialogVisible:false,
      setRoleDialogVisible:false,
      editForm : {},
      userInfo:{},
      addForm: {
        username: "",
        password: "",
        email: "",
        mobile: "",
      },
      addFormRules: {
        username: [{required: true, message: "请输入用户名", trigger: 'blur'}, {
          min: 3,
          max: 10,
          message: '用户名的长度在3-10',
          trigger: 'blur'
        }],
        password: [{required: true, message: "请输入密码", trigger: 'blur'}, {
          min: 3,
          max: 20,
          message: '密码的长度在3-20',
          trigger: 'blur'
        }],
        email: [{required: true, message: "请输入邮箱", trigger: 'blur'}, {
          min: 6,
          max: 28,
          message: '邮箱的长度在6-28',
          trigger: 'blur'
        }, {validator: checkEmail, trigger: 'blur'}],
        mobile: [{required: true, message: "请输入电话号码", trigger: 'blur'}, {
          min: 3,
          max: 18,
          message: '电话号码的长度在6-18',
          trigger: 'blur'
        }, {validator: checkMobile, trigger: 'blur'}],

      },
      editFormRules:{
        email: [{required: true, message: "请输入邮箱", trigger: 'blur'},{validator: checkEmail, trigger: 'blur'}],
        mobile: [{required: true, message: "请输入电话号码", trigger: 'blur'},{validator: checkMobile, trigger: 'blur'}],
      }

    }
  },


  created() {
    this.getUserList()
  },

  name: "users",

  methods: {
    setRoleDialogClosed(){
      this.selectRoleId=""
      this.userInfo = {}
    },
    async saveRoleInfo(){
      if(!this.selectRoleId){
        return this.$message.error("请选择要分配的角色")
      }
      const {data:res} = await  this.$http.put(`users/${this.userInfo.id}/role`,{rid:this.selectRoleId})
      if(res.meta.status != 200){
        return this.$message.error("更新角色失败")
      }
      this.$message.success("更新成功")
      this.getUserList()
      this.setRoleDialogVisible = false
    },
    async getUserList() {
      const {data: res} = await this.$http.get('users', {params: this.queryInfo})

      if (res.meta.status !== 200) return this.$message.error("获取用户列表失败")
      this.userlist = res.data.users
      this.total = res.data.total
      console.log(res)
    },
    handleSizeChange(val) {
      console.log(`每页 ${val} 条`);
      this.queryInfo.pagesize = val
      this.getUserList()
    },
    handleCurrentChange(val) {
      this.queryInfo.pagenum = val
      this.getUserList()
      console.log(`当前页: ${val}`);
    },
    //监听switch开关的变化
    async userStateChanged(userinfo) {
      console.log(userinfo)
      const {data: res} = await this.$http.put(`users/${userinfo.id}/state/${userinfo.mg_state}`)
      if (res.meta.status !== 200) {
        userinfo.mg_state = !userinfo.mg_state
        return this.$message.error("更新用户状态变化")
      } else {
        this.$message.success("更新成功")
      }
    },
    //监听用户对话框的关闭事件
    addDialogClosed() {
      this.$refs.addFormRef.resetFields()
    },
    addUser() {
      this.$refs.addFormRef.validate(async valid => {
        if (!valid) return
        //发起添加用户的网路请求
        const {data: res} = await this.$http.post('users', this.addForm)
        if (res.meta.status !== 201) this.$message.error("添加用户失败")
        if (res.meta.status === 201) this.$message.success("添加用户成功")

        this.addDialogVisible = false
        this.getUserList()
      })
    },
   async setRole(userInfo){
      this.userInfo = userInfo
      const {data:res} = await axios.get(("roles"))
     if(res.meta.status !== 200){
       return this.$message.error("获取角色列表失败")
     }
     this.roleslist = res.data
      this.setRoleDialogVisible = true
    },
    //展示编辑对话框
    async showEditDialog(id) {

      const {data:res} = await this.$http.get('users/'+id)
      if(res.meta.status !== 200){
        return this.$message.error("查詢用戶失敗")
      }
      this.editForm = res.data
        this.editDialogVisible = true
    },
    editDialogClosed(){
      this.$refs.editFormRef.resetFields()
    },
    editUserInfo(){
       this.$refs.editFormRef.validate(
           async  valid => {
            if(!valid) return
            const {data:res} = await this.$http.put('users/' + this.editForm.id,
                {
                  email:this.editForm.email,
                  mobile:this.editForm.mobile
                }
            )
             if(res.meta.status !== 200){
               return this.$message.error("更新用户失败")
             }

            this.editDialogVisible = false
             this.getUserList()
             this.$message.success("更新用户信息成功")
          }
      )
    },
    async removeUserById(id){
      const confirmResult = await this.$confirm(
          '此操作将永久删除该用户,是否继续?',
          '提示',
          {
            confirmButtonText: '确定',
            cancelButtonText: '取消',
            type:  'warning'
          }
      ).catch(err => err)
      if(confirmResult !== 'confirm'){
        return this.$message.info("已取消删除")
      }
      const {data:res}  = axios.delete('users/' + id)
      // const {data:res}  = this.$http.delete('users/' + id)
      if(res.meta.status !== 200){
        return this.$message.error("删除用户失败")
      }
      this.$message.success("删除用户成功")
      this.getUserList()
      console.log("确认删除")
    }
  }
}

</script>

<style scoped>

</style>
剩余的功能具有重复型,有些新内容暂时不需要,学到这些可以使用vue+element-ui设计简单常见的前端了
剩下效果截图如下,需要时再学。
商品列表

分类参数

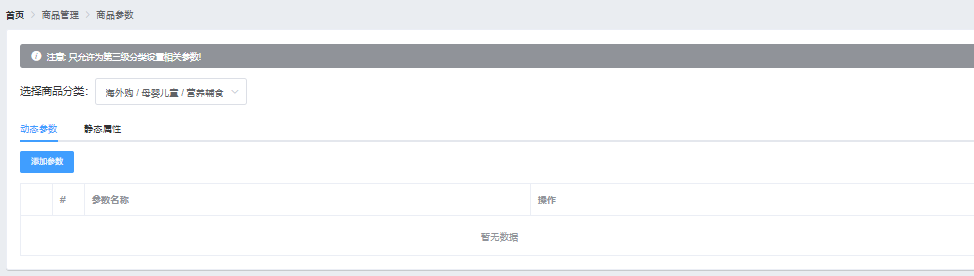
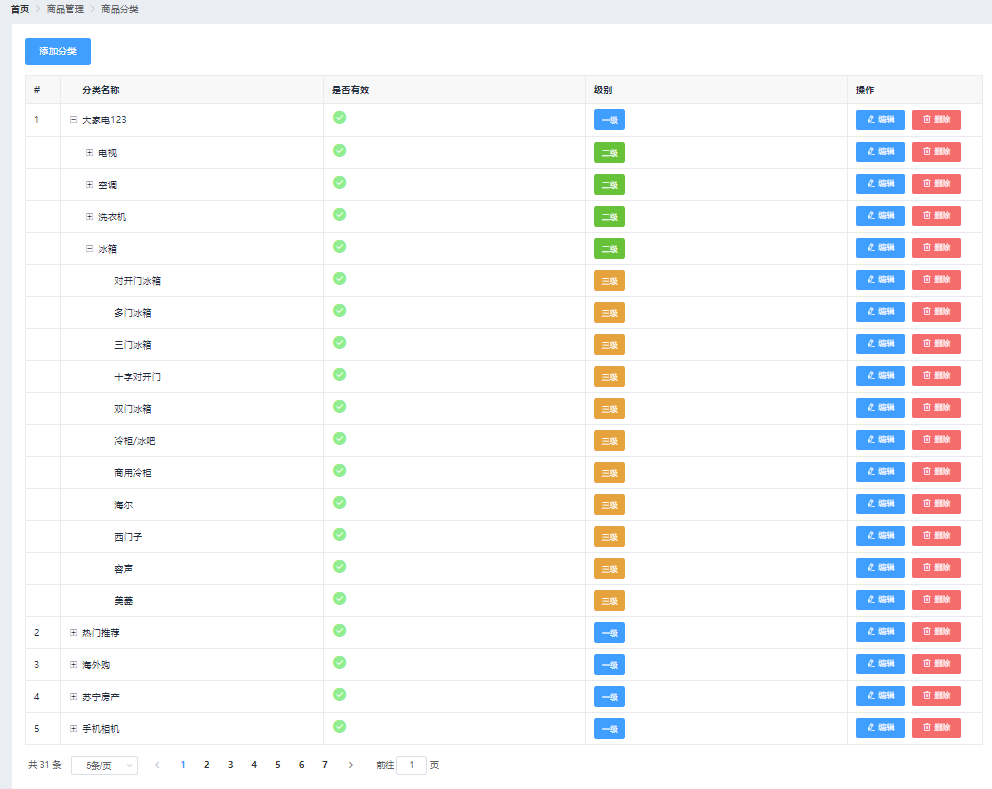
商品分类:
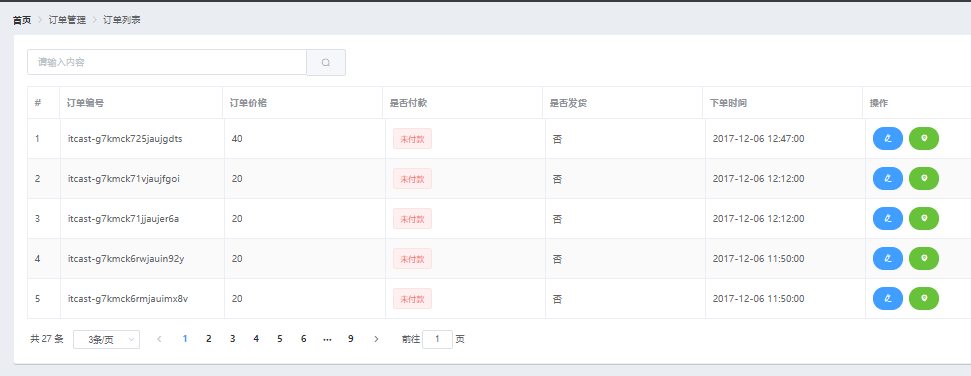
订单分类
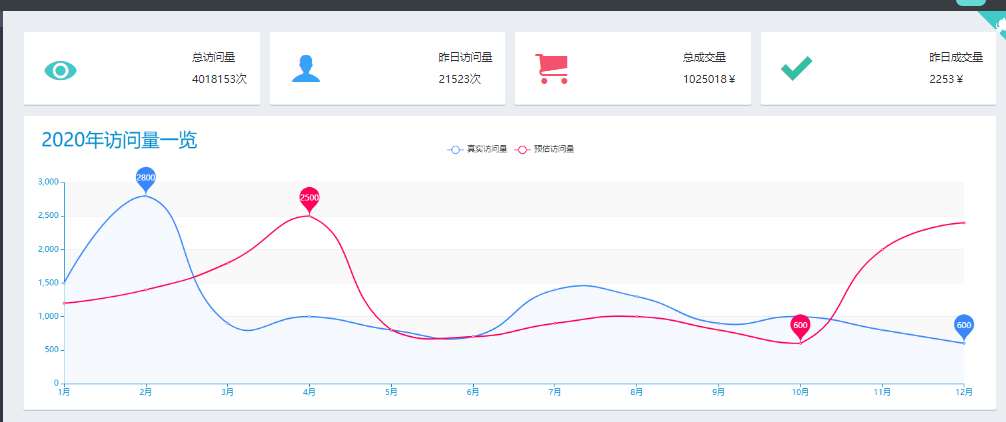
数据视图

 浙公网安备 33010602011771号