android Fragment 笔记
Fragment多用于平板中,Fragment当成Activity的一个界面的一个组成部分,Fragment有自己的生命周期,但是必须依托在Activity中。
参考链接
https://developer.android.com/guide/components/fragments.html?hl=zh-cn
Fragment 生命周期如下

AndroidManifest.xml
<?xml version="1.0" encoding="utf-8"?>
<RelativeLayout xmlns:android="http://schemas.android.com/apk/res/android"
    xmlns:tools="http://schemas.android.com/tools"
    android:layout_width="match_parent"
    android:layout_height="match_parent"
    android:paddingBottom="@dimen/activity_vertical_margin"
    android:paddingLeft="@dimen/activity_horizontal_margin"
    android:paddingRight="@dimen/activity_horizontal_margin"
    android:paddingTop="@dimen/activity_vertical_margin"
    tools:context="com.example.fragmenttest.MainActivity">
    <LinearLayout
        android:layout_width="match_parent"
        android:layout_height="match_parent"
        android:orientation="vertical">

        <Button
            android:id="@+id/button1"
            android:layout_width="match_parent"
            android:layout_height="wrap_content"
            android:text="Fragment 1" />

        <Button
            android:id="@+id/button2"
            android:layout_width="match_parent"
            android:layout_height="wrap_content"
            android:text="Fragment 2" />

        <FrameLayout
            android:id="@+id/fragment_place"
            android:layout_width="match_parent"
            android:layout_height="match_parent"></FrameLayout>


    </LinearLayout>


</RelativeLayout>
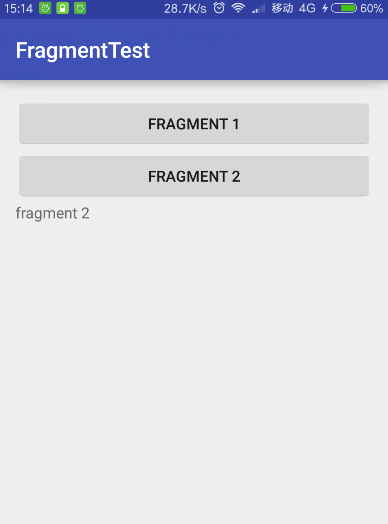
效果图如下:

创建Fragment1
Fragment1.java
package com.example.fragmenttest;

import android.app.Fragment;
import android.content.Context;
import android.net.Uri;
import android.os.Bundle;
import android.view.LayoutInflater;
import android.view.View;
import android.view.ViewGroup;

public class Fragment1 extends Fragment {
    @Override
    public void onCreate(Bundle savedInstanceState) {
        super.onCreate(savedInstanceState);
    }

    @Override
    public View onCreateView(LayoutInflater inflater, ViewGroup container,
                             Bundle savedInstanceState) {
        // Inflate the layout for this fragment
        return inflater.inflate(R.layout.fragment_fragment1, container, false);
    }
}
Fragment1布局
fragment_fragment1.xml
<FrameLayout xmlns:android="http://schemas.android.com/apk/res/android"
    xmlns:tools="http://schemas.android.com/tools"
    android:layout_width="match_parent"
    android:layout_height="match_parent"
    tools:context="com.example.fragmenttest.Fragment1">

    <TextView
        android:layout_width="match_parent"
        android:layout_height="match_parent"
        android:text="fragment 1" />

</FrameLayout>
创建Fragment
Fragment2.java
package com.example.fragmenttest;

import android.app.Fragment;
import android.os.Bundle;
import android.view.LayoutInflater;
import android.view.View;
import android.view.ViewGroup;

public class Fragment2 extends Fragment {
    @Override
    public void onCreate(Bundle savedInstanceState) {
        super.onCreate(savedInstanceState);
    }

    @Override
    public View onCreateView(LayoutInflater inflater, ViewGroup container,
                             Bundle savedInstanceState) {
        // Inflate the layout for this fragment
        return inflater.inflate(R.layout.fragment_fragment2, container, false);
    }
}
fragment_fragment2.xml
<FrameLayout xmlns:android="http://schemas.android.com/apk/res/android"
    xmlns:tools="http://schemas.android.com/tools"
    android:layout_width="match_parent"
    android:layout_height="match_parent"
    tools:context="com.example.fragmenttest.Fragment2">

    <TextView
        android:layout_width="match_parent"
        android:layout_height="match_parent"
        android:text="fragment 2" />

</FrameLayout>
MainActivity.java
package com.example.fragmenttest;

import android.app.Fragment;
import android.app.FragmentManager;
import android.app.FragmentTransaction;
import android.support.v7.app.AppCompatActivity;
import android.os.Bundle;
import android.view.View;
import android.widget.Button;

public class MainActivity extends AppCompatActivity {
    Button btn1, btn2;

    Fragment fr;

    @Override
    protected void onCreate(Bundle savedInstanceState) {
        super.onCreate(savedInstanceState);
        setContentView(R.layout.activity_main);

        btn1 = (Button) findViewById(R.id.button1);
        btn2 = (Button) findViewById(R.id.button2);

        btn1.setOnClickListener(listener);
        btn2.setOnClickListener(listener);
    }

    View.OnClickListener listener = new View.OnClickListener() {
        @Override
        public void onClick(View v) {
            switch (v.getId()) {
                case R.id.button1:
                    fr = new Fragment1();
                    break;
                case R.id.button2:
                    fr = new Fragment2();
                    break;
            }

            FragmentManager fm = getFragmentManager();
            FragmentTransaction fragmentTransaction = fm.beginTransaction();
			// 将activity_main中的fragment转换成fragment1或者fragment2
            fragmentTransaction.replace(R.id.fragment_place, fr);
            fragmentTransaction.commit();

        }
    };

}
管理fragment需要使用FragmentManager.使用getFragmentManager()获得。
操作fragemnt需要使用FragmentTransaction的api。使用beginTransaction()获得。
在用replace函数替换fragment.
应用到 Activity,您必须调用 commit()
运行情况,点击button1

点击button2
Activity通信
片段可以通过 getActivity() 访问 Activity 实例,并轻松地执行在 Activity 布局中查找视图等任务。
View listView = getActivity().findViewById(R.id.list);
Activity 也可以使用 findFragmentById() 或 findFragmentByTag(),通过从 FragmentManager 获取对 Fragment 的引用来调用片段中的方法。例如:
ExampleFragment fragment = (ExampleFragment) getFragmentManager().findFragmentById(R.id.example_fragment);
Tony Liu
2017-3-14, Shenzhen

 浙公网安备 33010602011771号