gitlab的CI/CD实现
1.前言
搭建gitlab服务器至少需要2核4G的服务器,笔者在1核2G的服务器上尝试搭建过,但是基本上完全跑不起来,中途会有各种各样的问题,每次gitlab-ctl reconfigure的时候基本上都会卡死。
2.linux centos8搭建gitlab过程
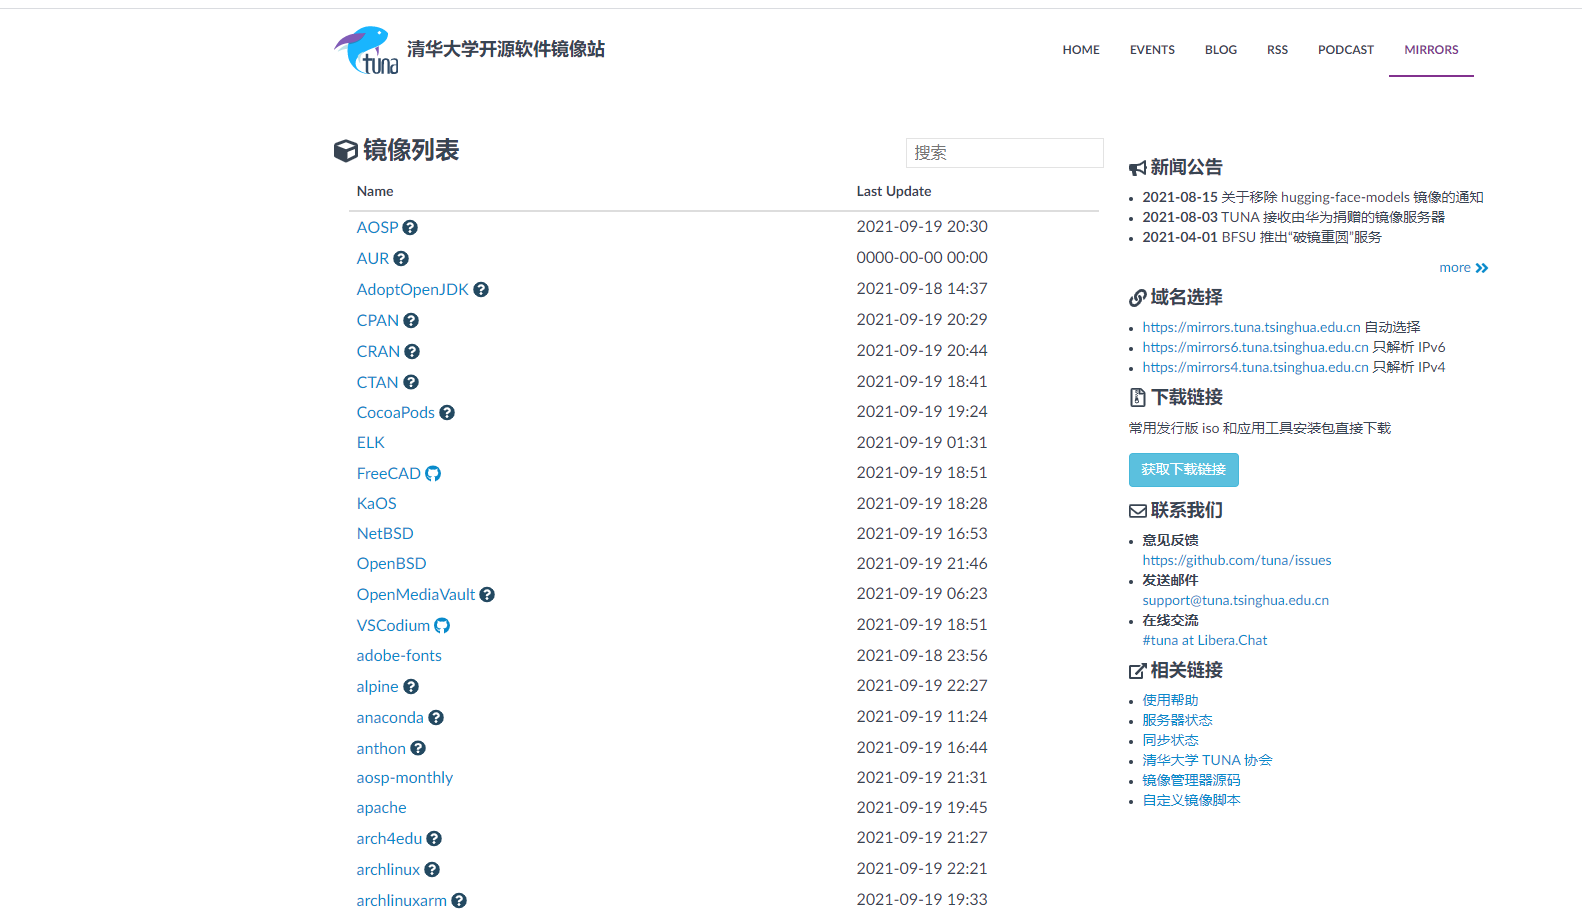
安装gitlab:这里推荐清华大学的开源软件镜像站下载(https://mirrors.tuna.tsinghua.edu.cn/gitlab-ce/yum/el8/)gitlab安装包
wget https://mirrors.tuna.tsinghua.edu.cn/gitlab-ce/yum/el8/gitlab-ce-12.10.0-ce.0.el8.x86_64.rpm

2.1然后安装
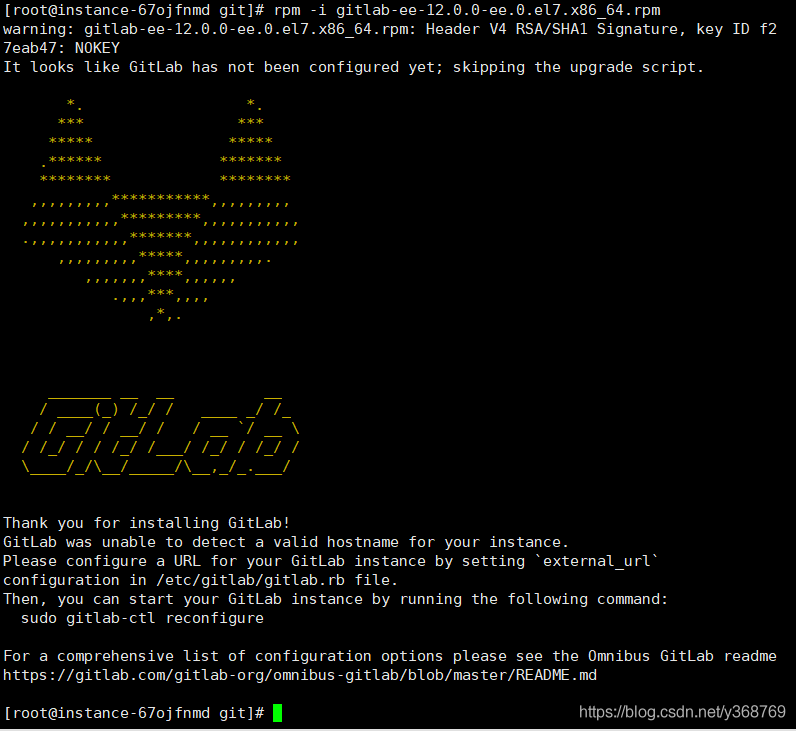
rpm -i gitlab-ce-12.10.0-ce.0.el8.x86_64.rpm
安装成功后会出现这样的一个提示
2.2 如果不是云服务器,则需要打开防火墙,安装postfix等
sudo yum install -y curl policycoreutils-python openssh-server
sudo systemctl enable sshd
sudo systemctl start sshd
sudo firewall-cmd --permanent --add-service=http
sudo systemctl reload firewalld
在执行sudo firewall-cmd --permanent --add-service=http时候有可能出现FirewallD is not running问题:意思是防火墙没有打开
解决方案,执行命令:systemctl start firewalld开启防火墙,截图如下:
2.3 安装Postfix以发送通知电子邮件,依次执行命令
sudo yum install postfix
sudo systemctl enable postfix
sudo systemctl start postfix
gitlab的配置文件目录在/etc/gitlab/gitlab.rb,如果不知道目录,可以用命令 ps aux|grep gitlab 查看进程所在的目录
执行命令:vim  /etc/gitlab/gitlab.rb
找到 external_url 'http://gitlab.example.com'
替换成你的Linux服务器的地址比如说:external_url 'http://192.168.1.1'

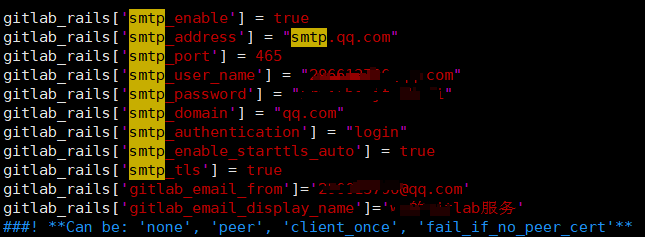
配置发送邮件,注意qq邮箱的smtp_address为smtp.qq.com,smtp_password不是qq的登录密码,而是在qq邮箱设置里面开通smtp服务的授权码。
配置好后可以进行邮件测试
输入命令gitlab-rails console
gitlab-rails console

irb(main):001:0> Notify.test_email('xxxx@qq.com', 'Message Subject', 'Message Body').deliver_now
配置完成后输入命令gitlab-ctl reconfigure
gitlab相关操作及说明
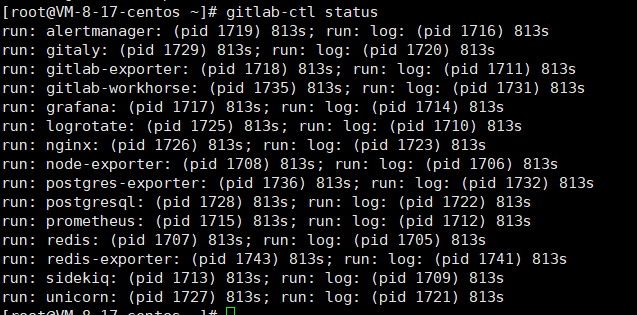
/etc/gitlab/gitlab.rb          #gitlab配置文件
/opt/gitlab                    #gitlab的程序安装目录
/var/opt/gitlab                #gitlab目录数据目录
/var/opt/gitlab/git-data       #存放仓库数据
gitlab-ctl reconfigure         #重新加载配置
gitlab-ctl status              #查看当前gitlab所有服务运行状态
gitlab-ctl stop                #停止gitlab服务
gitlab-ctl stop nginx          #单独停止某个服务
gitlab-ctl tail                #查看所有服务的日志
gitlab-ctl start         #开启gitlab服务
gitlab-ctl restart         #重启gitlab服务

Gitlab的服务构成:
nginx:                 静态web服务器
gitlab-workhorse        轻量级反向代理服务器
logrotate              日志文件管理工具
postgresql             数据库
redis                  缓存数据库
sidekiq                用于在后台执行队列任务(异步执行)
gitlab依赖的服务
3.安装gitlab-runner
3.1 下载gitlab-runner并安装
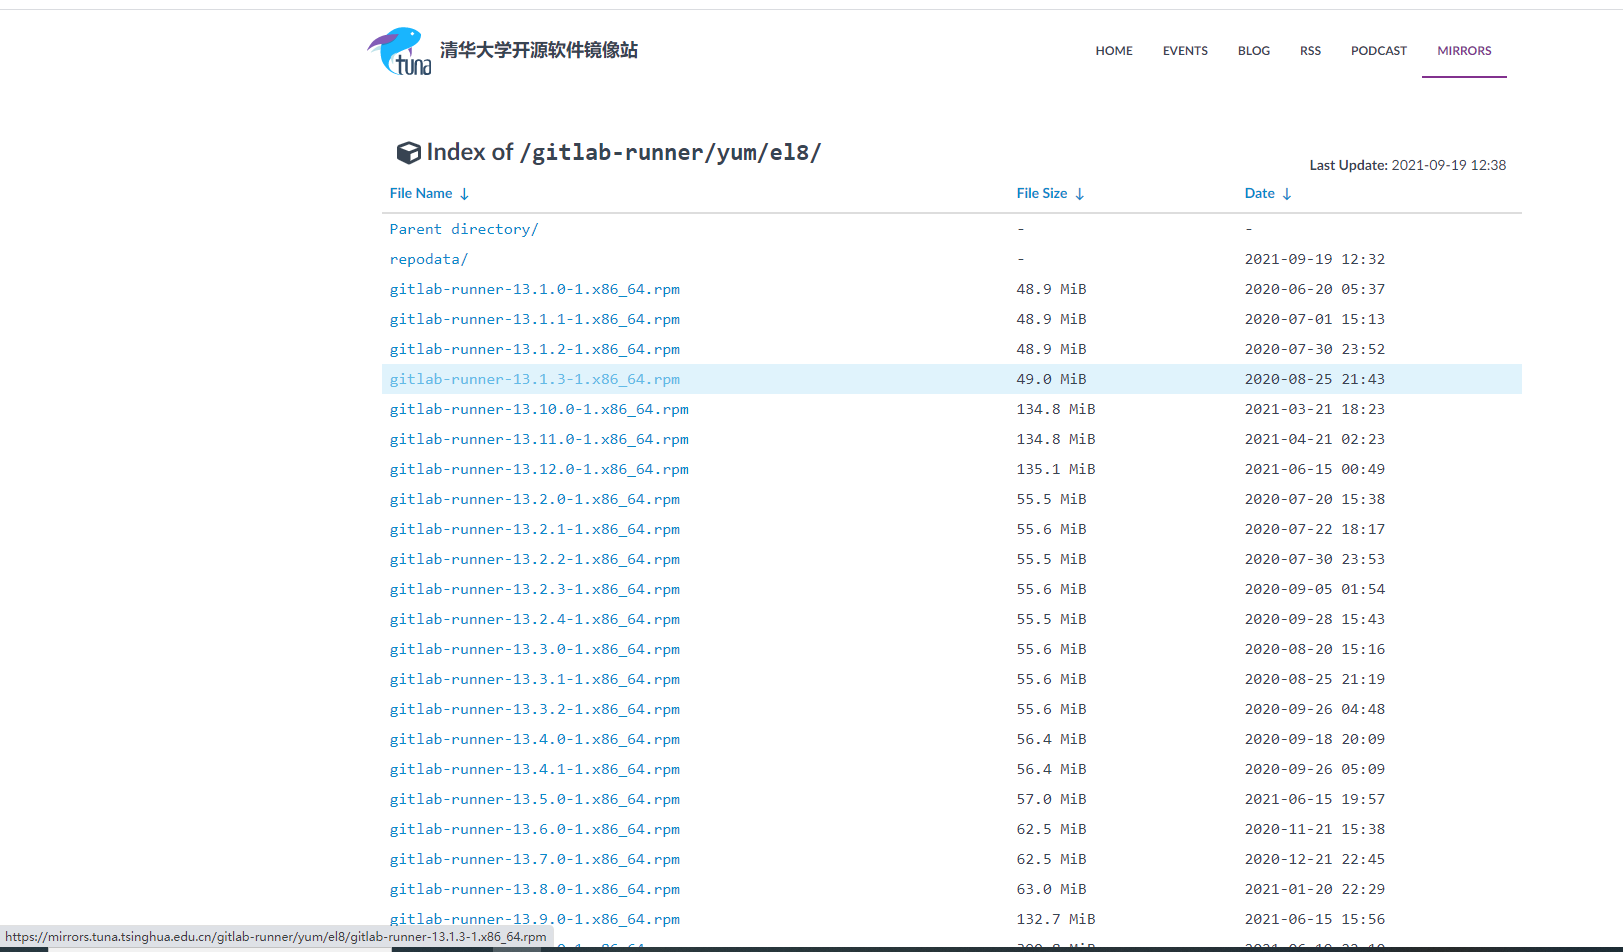
这里我推荐使用清华大学开源镜像官方站点下载安装
 站内搜索到gitlab-runner的地址,下载一个和gitlab版本差不多的
 然后安装
然后安装
# For CentOS
$ curl -L https://mirrors.tuna.tsinghua.edu.cn/gitlab-runner/yum/el8/gitlab-runner-13.1.0-1.x86_64.rpm | sudo bash
$ sudo yum install gitlab-runner
查看服务状态
gitlab-runner status
出现以下说明安装成功

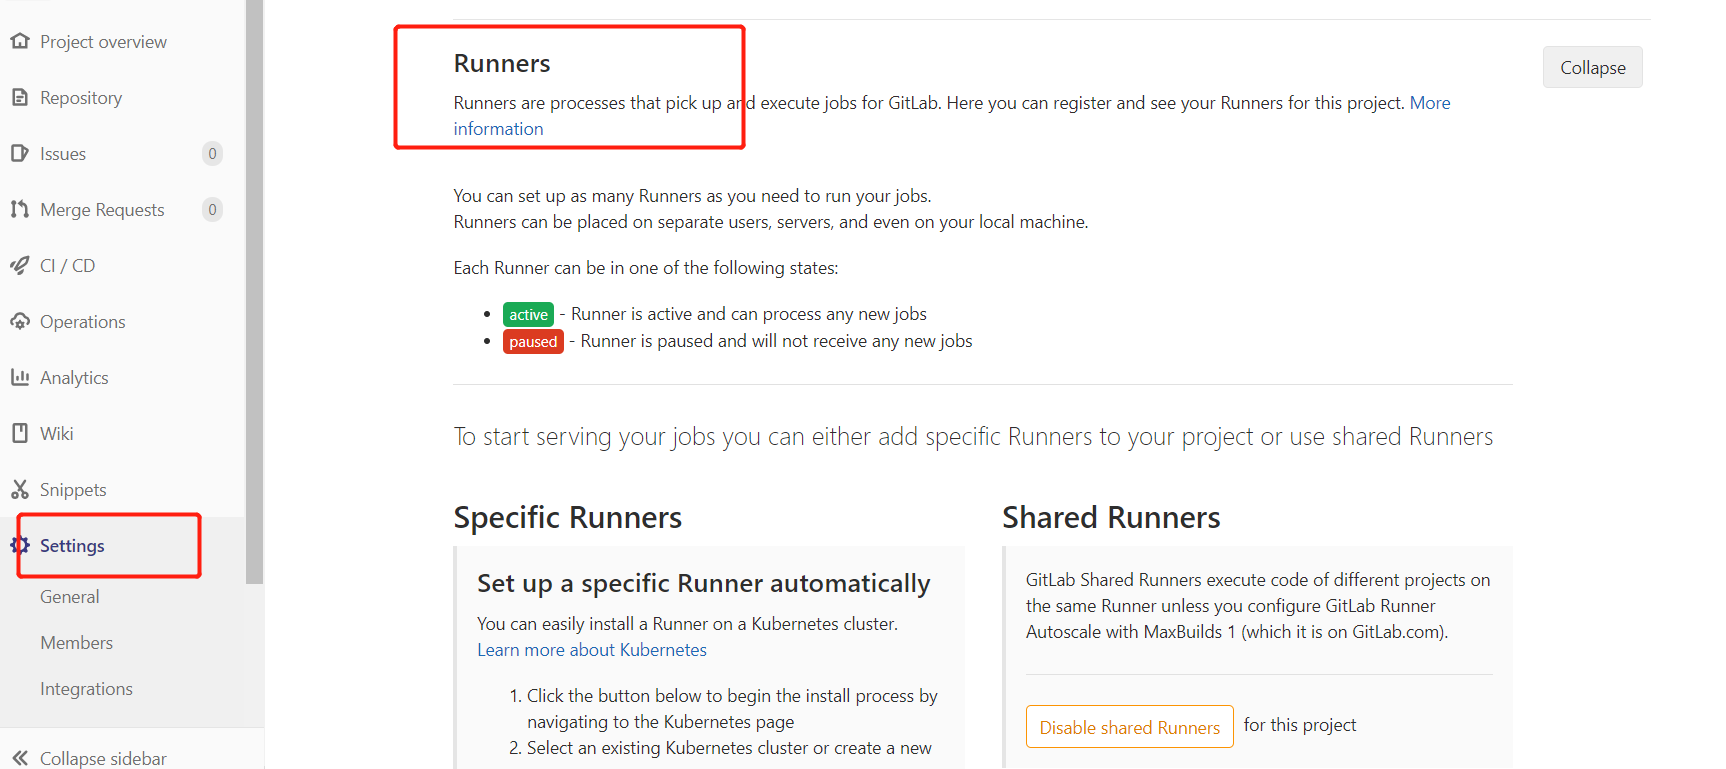
3.2 注册gitlab-runner
安装好 GitLab Runner 之后,我们只要启动 Runner 然后和 CI 绑定就可以了:
-
在安装 GitLab Runner 机器上运行
gitlab-runner register -
输入 CI URL
-
输入 Token
-
输入 Runner 的名字
-
选择 Runner 的类型,简单起见还是选 Shell 吧
-
完成

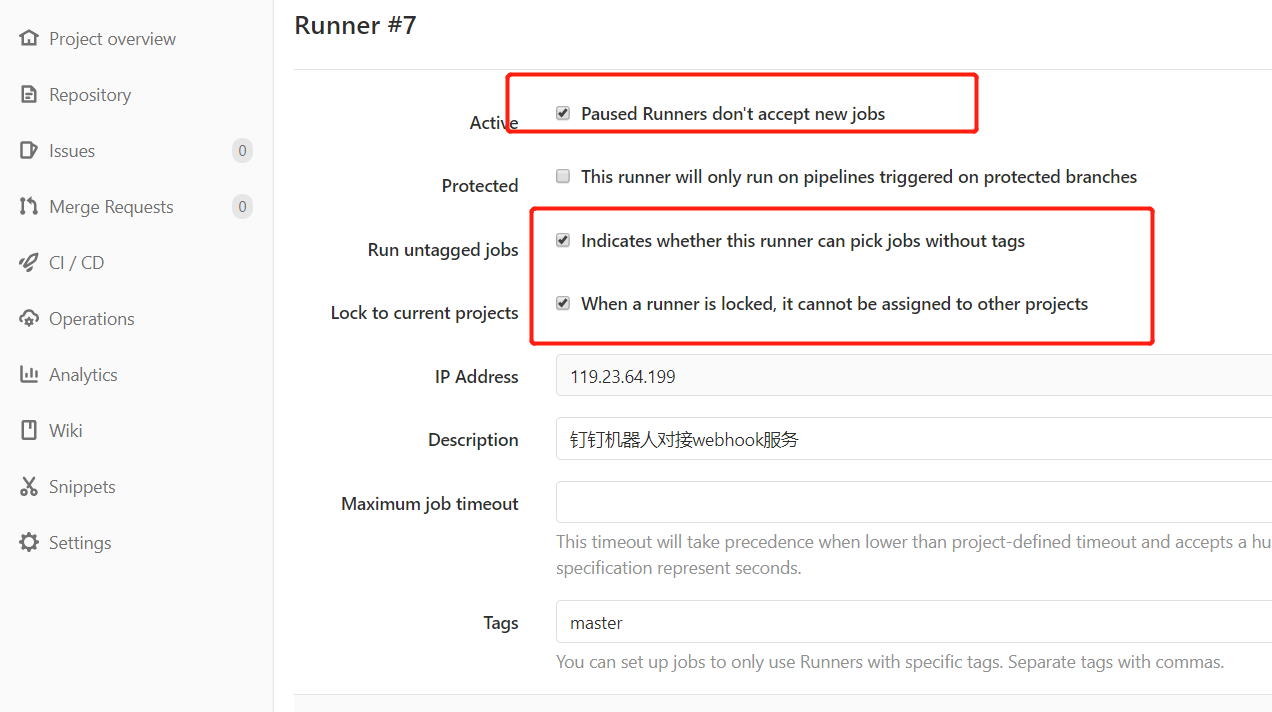
注册好runner之后,用gitlab-runner list查看各个runner的状态

记得要候选Indicates whether this runner can pick jobs without tags,不然提交到gitlab的代码只会在注册runner时标记的tag分支上触发
然后重启gitlab-runner,
gitlab-runner restart
修改默认用户gitlab-runner运行gitlab为root用户运行gitlab-runer
gitlab-ci-multi-runner uninstall
gitlab-ci-multi-runner install -u root
注意这里最好修改为root用户执行gitlab-runner(默认用户是gitlab-runner),不然shell执行PM2命令的时候会出现问题,


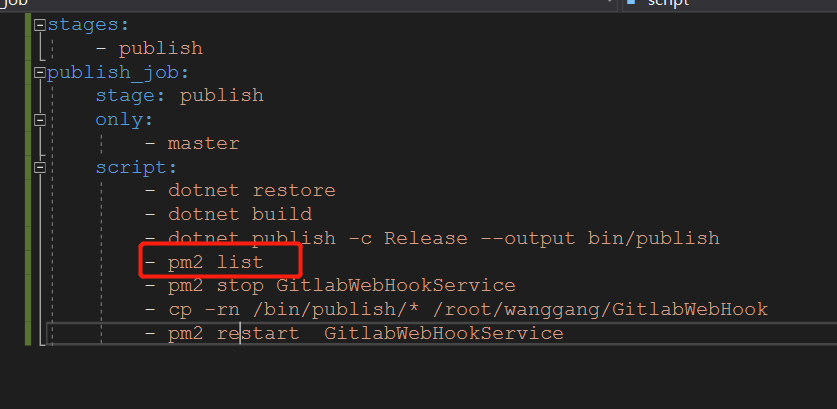
如上图中在CI文件中执行pm2 list时,在xshell中使用root用户能正常得到当前的守护进程服务,但是在gitlab-runner的CI中为空,就是因为用户的问题导致。
3.3 gitlab-runner如何更改执行用户
通过指令 ps aux|grep gitlab-runner可以看到(我这里是已经更改为root用户了,默认的是gitlab-runner)

其中:
--working-directory:设置工作目录, 默认是/home/{执行user}
--config:设置配置文件目录,默认是/etc/gitlab-runner/config.toml
--user:设置执行用户名,默认是gitlab-runner
因此想要更改user为root只需要重新设置--user属性即可,步骤如下
1.删除gitlab-runner
sudo gitlab-runner uninstall
2.安装并设置--user(例如我想设置为root)
gitlab-runner install --working-directory /home/gitlab-runner --user root
3.重启gitlab-runner
sudo service gitlab-runner restart
再次执行ps aux|grep gitlab-runner会发现--user的用户名已经更换成root了
至此gitlab-runner执行.gitlab-ci.yaml时候便是以root用户去执行操作,再也没有繁琐的权限问题了
4.gitlab设置钉钉机器人
常用的钉钉群机器人分为自定义机器人和默认的gitlab机器人(有很多种,可以随便建一个钉钉群然后去看),然后到gitlab的settings->webhooks中去设置
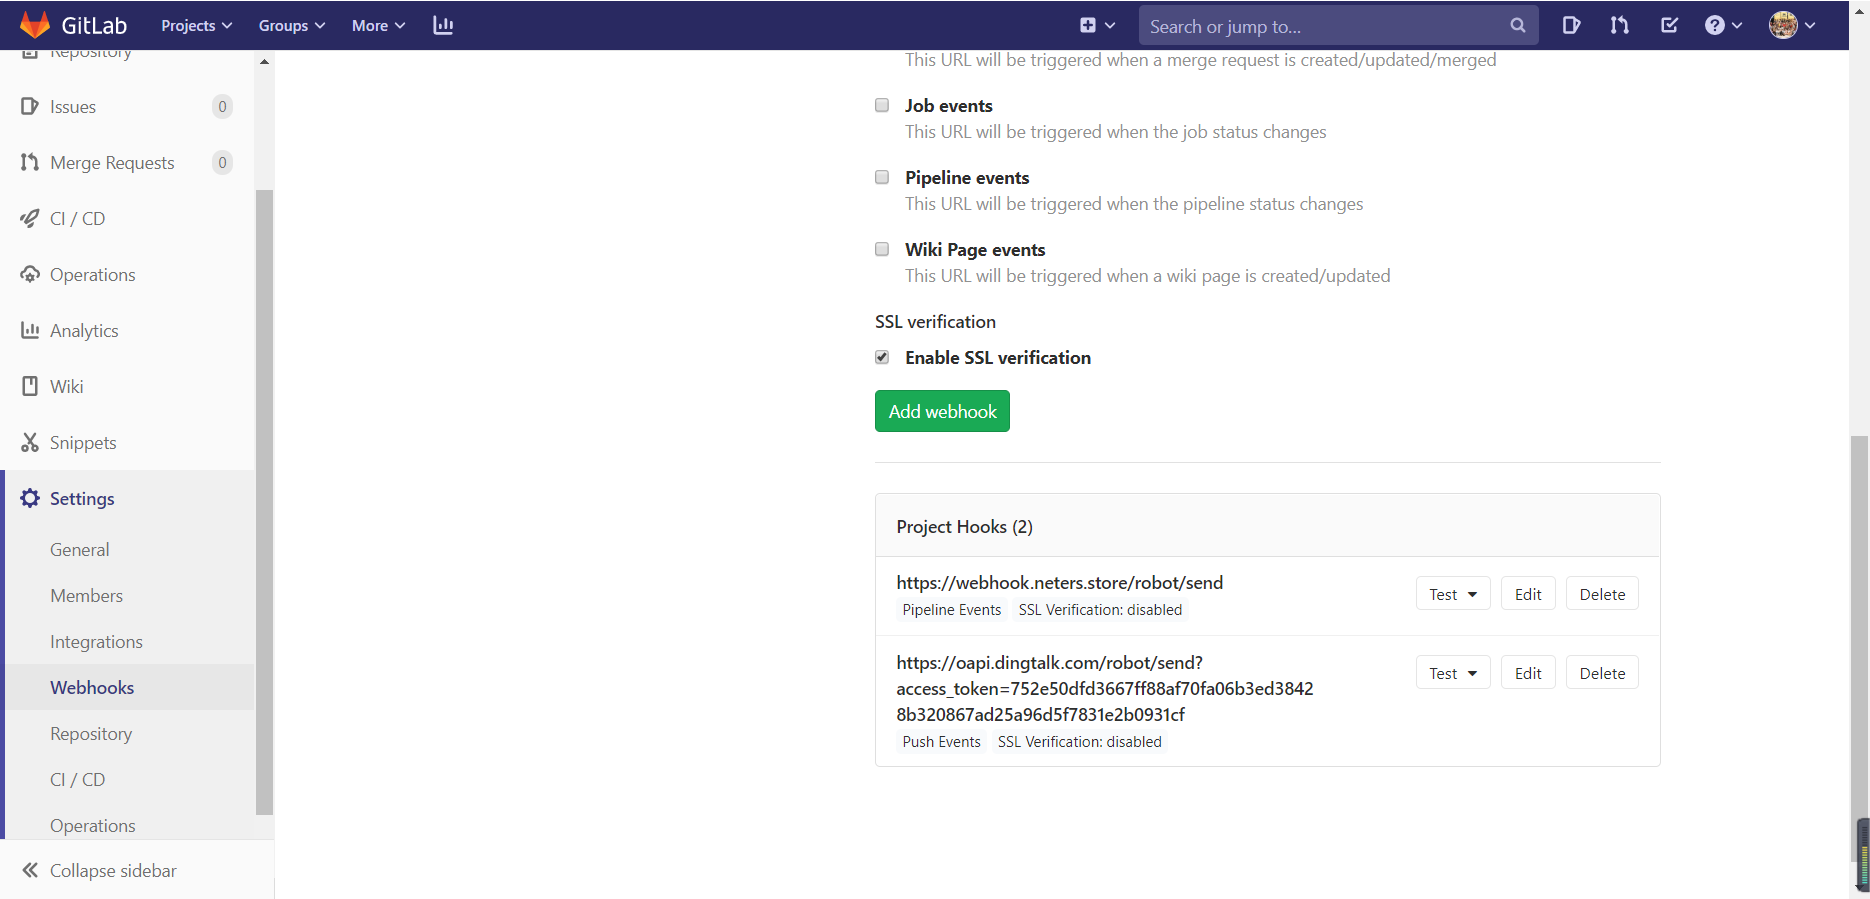
常用的Trigger有push events和pipeline events通知,其中push events可以对当前仓库的提交进行用户通知,pipeline events是针对gitlab CI执行结果的通知,可以看下钉钉机器人官网的介绍
https://developers.dingtalk.com/document/robots/gitlab-robot
本人用C#写了一个自定义机器人的接口服务,用户只需要在gitlab的webhooks页面配置好url和access_token,既可以发送markdown形式的gitlab通知。
本文来自博客园,作者:可乐加冰-Mr-Wang,转载请注明原文链接:https://www.cnblogs.com/helloworld-wang/p/15253541.html

 浙公网安备 33010602011771号