[iOS微博项目 - 1.6] - 自定义TabBar
A.自定义TabBar
1.需求
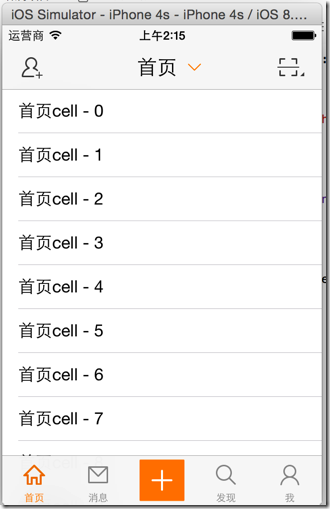
控制TabBar内的item的文本颜色(普通状态、被选中状态要和图标一致)、背景(普通状态、被选中状态均为透明)
重新设置TabBar内的item位置,为下一步在TabBar中部添加“+”按钮做准备
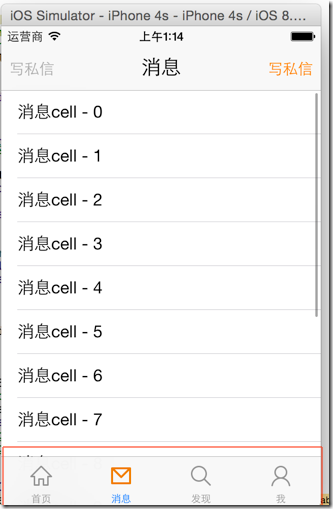
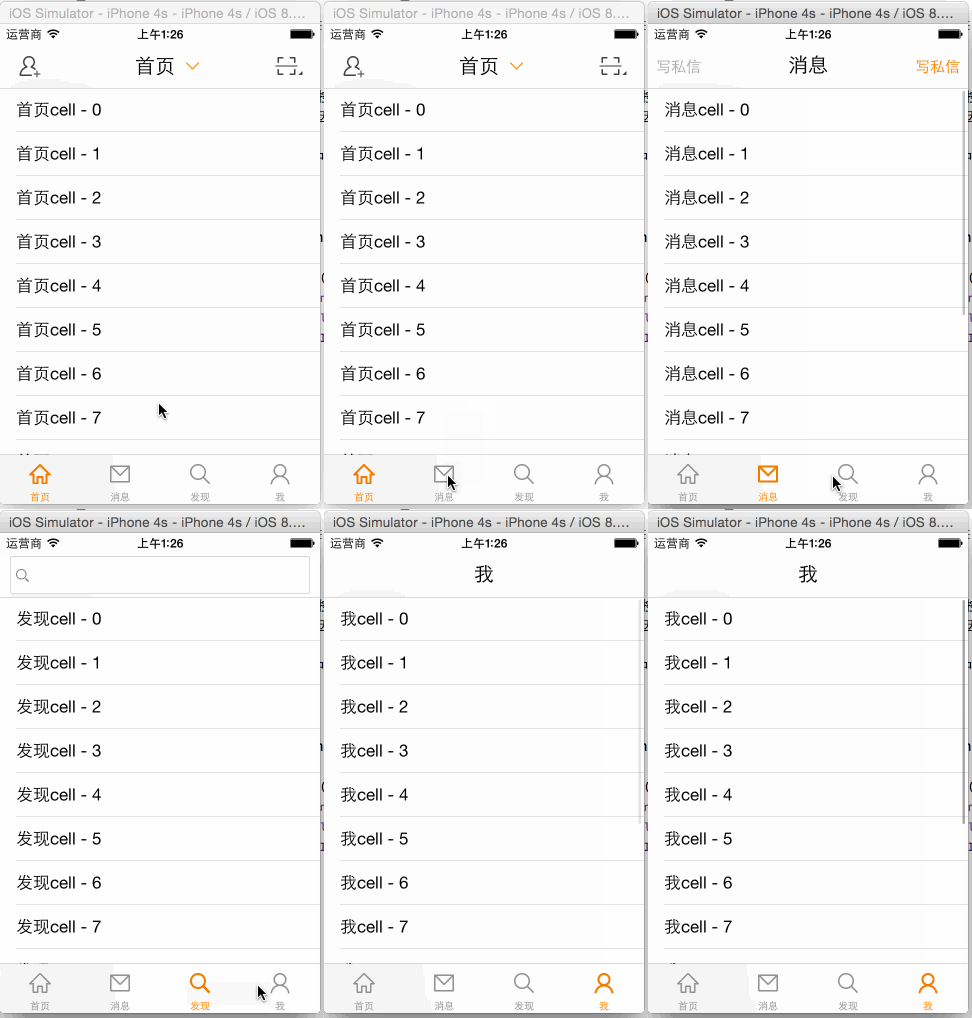
系统默认样式:
- 选中时item字体颜色为蓝色
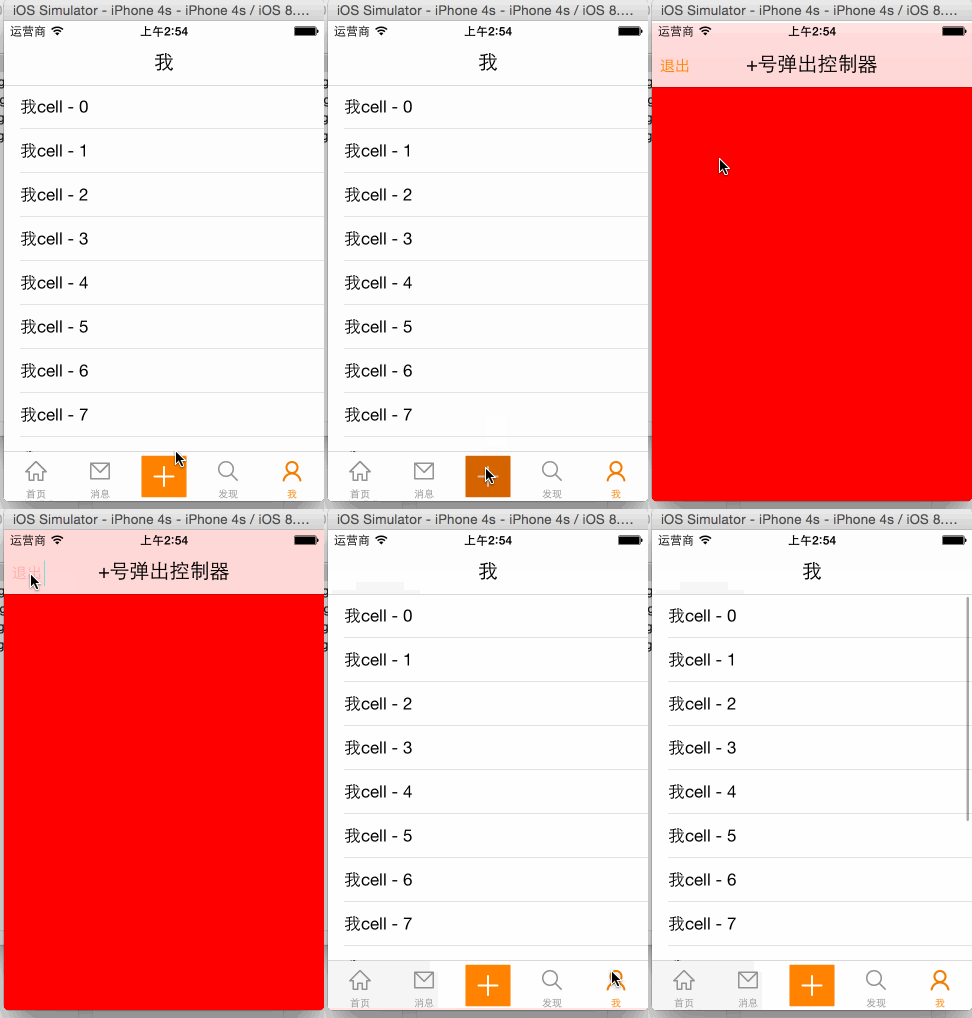
完成之后的样式:
2.思路
封装TabBar,继承UITabBar,重写有关TabBar内部控件的位置设置方法
使用KVC重设UITabBarController中的tabBar成员(因为UITabBarController中的tabBar是只读的,KVC能够直接修改_tabBar)
修改UITabBar的item属性,修改字体(普通、被选中状态)
3.实现探索
(1)修改item的字体颜色
设置UITabBar的代理,监听item选中事件,更改item的字体属性
1 - (void)viewDidAppear:(BOOL)animated {
2     NSMutableDictionary *attr = [NSMutableDictionary dictionary];
3     attr[NSForegroundColorAttributeName] = [UIColor orangeColor];
4
5     for (UITabBarItem *item in self.tabBar.items) {
6         [item setTitleTextAttributes:attr forState:UIControlStateSelected];
7     }
8 }
#mark: 注意,TabBarItem相当于模型数据,TabBar才是view
(2)自定义一个集成UITabBar的类,用来封装定制tabBar
- 封装上述的改变TabBarButton文本颜色的代码
- 重写TabBarButton的位置尺寸,中间空出一个位置放置“+”按钮
 1 //
 2 //  HVWTabBar.m
 3 //  HVWWeibo
 4 //
 5 //  Created by hellovoidworld on 15/2/3.
 6 //  Copyright (c) 2015年 hellovoidworld. All rights reserved.
 7 //
 8
 9 #import "HVWTabBar.h"
10
11 @implementation HVWTabBar
12
13 - (void)layoutSubviews {
14     // 切记一定要调用父类的方法!!!
15     [super layoutSubviews];
16
17     // 设置文本属性
18     [self initTextAttr];
19
20     // 设置BarButton的位置
21     [self initBarButtonPosition];
22
23     // 添加"+"按钮
24     [self addComposeButton];
25 }
26
27 /** 设置文本属性 */
28 - (void) initTextAttr {
29     NSMutableDictionary *attr = [NSMutableDictionary dictionary];
30     attr[NSForegroundColorAttributeName] = [UIColor orangeColor];
31
32     for (UITabBarItem *item in self.items) {
33         // 设置字体颜色
34         [item setTitleTextAttributes:attr forState:UIControlStateSelected];
35     }
36 }
37
38 /** 设置BarButton的位置 */
39 - (void) initBarButtonPosition {
40
41     // 创建一个位置所以,用来定位
42     int index = 0;
43
44     for (UIView *tabBarButton in self.subviews) {
45         if ([tabBarButton isKindOfClass:NSClassFromString(@"UITabBarButton")]) {
46             // 计算尺寸,预留一个“+”号空间
47             CGFloat width = self.width / (self.items.count + 1);
48             tabBarButton.width = width;
49
50             // 计算位置
51             if (index < (int)(self.items.count / 2)) {
52                 tabBarButton.x = width * index;
53             } else {
54                 tabBarButton.x = width * (index + 1);
55             }
56
57             index++;
58         }
59     }
60 }
61
62 /** 添加"+"按钮 */
63 - (void) addComposeButton {
64     // 初始化按钮
65     UIButton *plusButton = [UIButton buttonWithType:UIButtonTypeCustom];
66     [plusButton setBackgroundImage:[UIImage imageWithNamed:@"tabbar_compose_button"] forState:UIControlStateNormal];
67     [plusButton setBackgroundImage:[UIImage imageWithNamed:@"tabbar_compose_button_highlighted"] forState:UIControlStateHighlighted];
68     [plusButton setImage:[UIImage imageWithNamed:@"tabbar_compose_icon_add"] forState:UIControlStateNormal];
69     [plusButton setImage:[UIImage imageWithNamed:@"tabbar_compose_icon_add_highlighted"] forState:UIControlStateHighlighted];
70
71     // 设置位置尺寸
72     CGFloat width = self.width / (self.items.count + 1);
73     CGFloat height = self.height;
74     CGFloat x = (self.items.count / 2) * width;
75     CGFloat y = 0;
76     plusButton.frame = CGRectMake(x, y, width, height);
77
78     // 添加到tabBar上
79     [self addSubview:plusButton];
80 }
81
82 @end
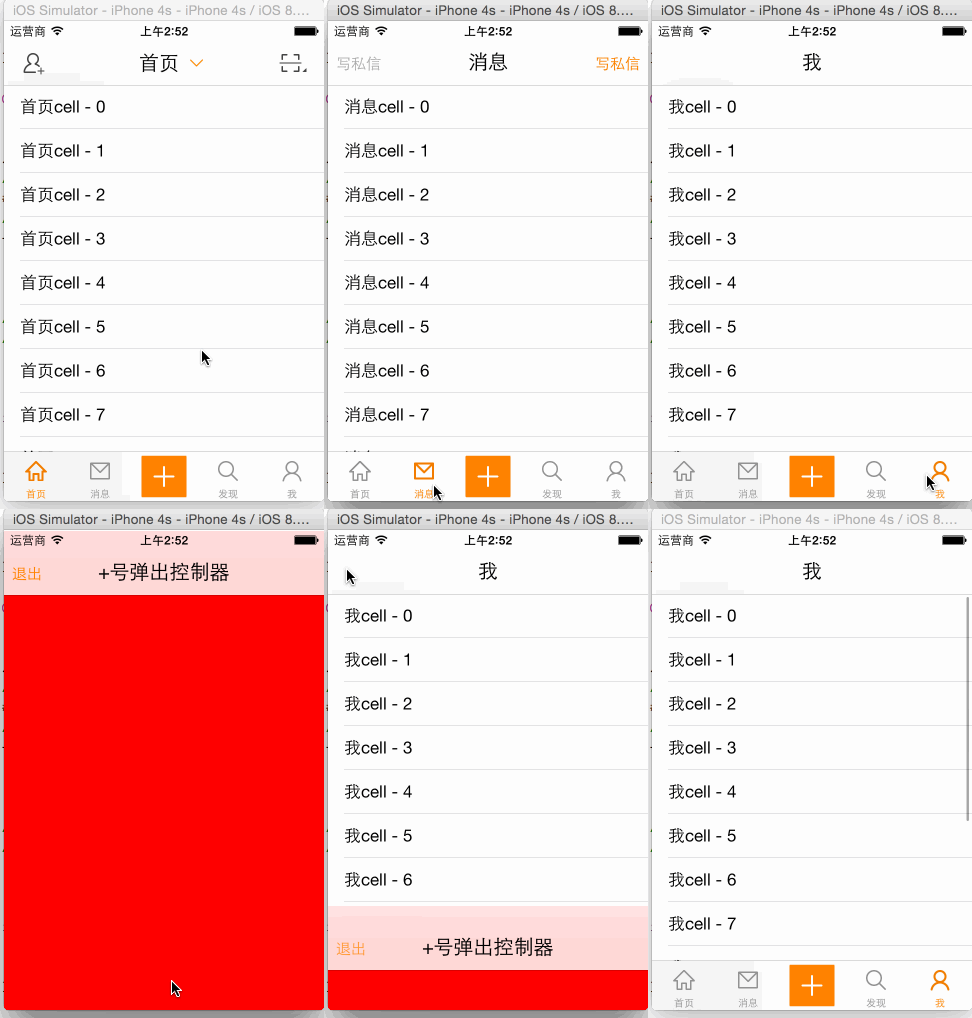
(3)"+"按钮点击事件
- 弹出一个新的界面用来写新微博
- 新建一个目录“compose”专门负责发微博业务
- 创建一个集成UIViewController的HVWComposeViewController
 1 //
 2 //  HVWComposeViewController.m
 3 //  HVWWeibo
 4 //
 5 //  Created by hellovoidworld on 15/2/3.
 6 //  Copyright (c) 2015年 hellovoidworld. All rights reserved.
 7 //
 8
 9 #import "HVWComposeViewController.h"
10
11 @interface HVWComposeViewController ()
12
13 @end
14
15 @implementation HVWComposeViewController
16
17 - (void)viewDidLoad {
18     [super viewDidLoad];
19     // Do any additional setup after loading the view.
20
21     // 初始化一些功能按钮
22     self.view.backgroundColor = [UIColor redColor];
23     self.title = @"+号弹出控制器";
24
25     self.navigationItem.leftBarButtonItem = [[UIBarButtonItem alloc] initWithTitle:@"退出" style:UIBarButtonItemStylePlain target:self action:@selector(dismiss)];
26 }
27
28 - (void) dismiss {
29     [self dismissViewControllerAnimated:YES completion:nil];
30
31 }
32
33 @end
点击“+”方法:
 1 //  HVWTabBarViewController.m
 2 #pragma mark - HVWTabBarDelegate
 3 /** “+”按钮点击代理方法 */
 4 - (void)tabBarDidComposeButtonClick:(HVWTabBar *)tabBar {
 5     HVWComposeViewController *composeView = [[HVWComposeViewController alloc] init];
 6
 7     // tabBarController不是由navigationController弹出来的,没有navigationController
 8 //    [self.navigationController pushViewController:vc animated:YES];
 9 //    HVWLog(@"%@", self.navigationController); // null
10
11     // 为了使用导航栏,使用NavigationController包装一下
12     HVWNavigationViewController *nav = [[HVWNavigationViewController alloc] initWithRootViewController:composeView];
13     // 使用modal方式弹出
14     [self presentViewController:nav animated:YES completion:nil];
15 }



 浙公网安备 33010602011771号