celery设置队列
celery学习笔记——设置队列
从一个简单的例子开始
先演示一个简单的项目让celery跑起来。
项目结构
/proj
-__init__
-app.py                        #实例化celery对象
-celeryconfig.py               #celery的配置文件
-tasks.py                      #celery编写任务文件
#coding:utf-8
from __future__ import absolute_import
from celery import Celery

app = Celery('proj', include=['proj.tasks'])     #实例化celery对象

app.config_from_object('proj.celeryconfig')      #引入配置文件

if __name__ == '__main__':
    app.start()
- proj参数为celery的名字
- include参数为启动时导入的模块列表
Next Steps - Celery 4.0.2 documentation
tasks.py
#coding:utf-8
from __future__ import absolute_import

from proj.app import app
@app.task()
def add(x, y):
    return x + y
celeryconfig.py
#coding:utf-8
from kombu import Queue

BROKER_URL = 'amqp://guest:guest@127.0.0.1:5672//' # 使用RabbitMQ作为消息代理


CELERY_RESULT_BACKEND = 'redis://127.0.0.1:6379/0' # 把任务结果存在了Redis

CELERY_TASK_SERIALIZER = 'msgpack' # 任务序列化和反序列化使用msgpack方案

CELERY_RESULT_SERIALIZER = 'json' # 读取任务结果一般性能要求不高,所以使用了可读性更好的JSON

CELERY_TASK_RESULT_EXPIRES = 60 * 60 * 24 # 任务过期时间,不建议直接写86400,应该让这样的magic数字表述更明显

CELERY_ACCEPT_CONTENT = ['json', 'msgpack'] # 指定接受的内容类型

CELERY_QUEUES = (    #设置add队列,绑定routing_key
    Queue('add', routing_key='xue.add'),
)


CELERY_ROUTES = {   #projq.tasks.add这个任务进去add队列并routeing_key为xue.add
    'projq.tasks.add': {
        'queue': 'add',
        'routing_key': 'xue.add',
    }
}
- CELERY_ACCEPT_CONTENT的类型msgpack为是一种比json更小更快的类型,如果用需要安装相对应的包。
- CELERY_QUEUES设置一个指定routing_key的队列,这个名字可以任意指定。
- CELERY_ROUTES设置路由,对指定的任务名,指定对应的队列和routing_key,注意,这里的routing_key需要和上面参数的一致。
启动
在proj的上层目录输入
celery -A proj.app worker -Q add -l info
显示
 -------------- celery@comboo-pc v4.0.2 (latentcall)
---- **** -----
--- * ***  * -- Linux-4.4.0-3-deepin-amd64-x86_64-with-Deepin-15.3-unstable 2016-12-29 17:25:29
-- * - **** ---
- ** ---------- [config]
- ** ---------- .> app:         proj:0x7fb292caab38
- ** ---------- .> transport:   amqp://guest:**@127.0.0.1:5672//
- ** ---------- .> results:     redis://127.0.0.1:6379/0
- *** --- * --- .> concurrency: 2 (prefork)
-- ******* ---- .> task events: OFF (enable -E to monitor tasks in this worker)
--- ***** -----
 -------------- [queues]
                .> add              exchange=(direct) key=xue.add


[tasks]
  . proj.tasks.add

[2016-12-29 17:25:29,745: INFO/MainProcess] Connected to amqp://guest:**@127.0.0.1:5672//
[2016-12-29 17:25:29,758: INFO/MainProcess] mingle: searching for neighbors
[2016-12-29 17:25:30,803: INFO/MainProcess] mingle: all alone
[2016-12-29 17:25:30,831: INFO/MainProcess] celery@comboo-pc ready.
- proj.tasks.add为任务名称,也就是在CELERY_ROUTES设置的那个名称
- add是设置的queue,key=xue.add是设置的routing_key
发布任务
In [20]: from proj.tasks import add

In [21]: add.delay(2,3)
Out[21]: <AsyncResult: 9ebc7b77-aa25-4b61-a0bb-29c7e7be5666>
执行
[2016-12-29 17:28:19,118: INFO/PoolWorker-1] Task proj.tasks.add[9ebc7b77-aa25-4b61-a0bb-29c7e7be5666] succeeded in 0.010207166022155434s: 5
发现执行成功
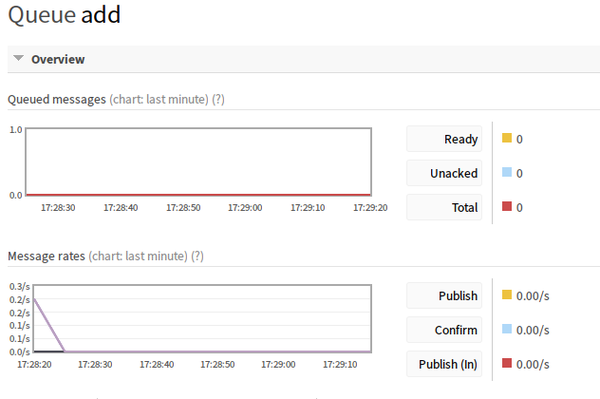
再看rabbitmq
结束
写爬虫用到了celery,之前的用法,每次增加一个网站就引用一次celery实例化对象,每次发布任务就启动相应的任务脚本。这样就造成了一个问题,如果有几千个网站,每天都需要自己手动管理启动。
通过设置队列,只需要启动一次,任务会自动到自己的队列开始执行。
posted on 2017-08-31 22:24 myworldworld 阅读(1689) 评论(0) 收藏 举报


 浙公网安备 33010602011771号