利用Hexo+gitee搭建个人博客
1 前言
本文将介绍利用Hexo+gitee搭建个人博客。
原理是将markdown文件生成静态页面,发布到gitee上,利用git page服务提供静态页面访问。
这样的话不需要花费一分钱即可搭建一个自己的博客。
我是博客地址:https://heliufang.gitee.io
2 环境
node.js:因为Hexo是基于node的
git:主要用来推送静态页面
Hexo:将markdown文件转化成静态页面
2.1 node安装
略。网上有很多,安装也很简单
可以参考菜鸟教程:https://www.runoob.com/nodejs/nodejs-install-setup.html
2.2 git安装
略。win、mac各个平台有不同的软件,我是win平台所以用的是Git-2.13.0-64-bit.exe
参考菜鸟教程:https://www.runoob.com/git/git-install-setup.html
2.3 Hexo安装
- 全局安装Hexo
npm install hexo-cli -g
-
在win磁盘上建立一个文件夹,并进入这个文件夹,在这个文件夹中右键-git bash here,调出git窗口
-
在黑窗口中运行命令,等待hexo初始化完成
hexo init
- 初始化完成后下载依赖
npm install
npm install --save hexo-renderer-pug
2.3.1 测试
- 清除生成的静态文件,以后每次发布博客都要执行此操作
hexo clean
- 重新生成静态文件
hexo g
- 启动hexo服务,这样在浏览器中访问localhost:4000就可以看到默认的博客了
hexo s
说明:hexo安装完成后默认会在 \source_posts\中生成hello-world.md文章,启动后默认就是看到这个。
3 Hexo配置
根目录下的_config.yml为全局配置文件,相关的配置可以参考官网:
3.1 网站配置
title: 贺刘芳的网络日志 #网站大标题
subtitle: '每天多学一点知识,就少写一行代码' #网站子标题
description: '贺刘芳的网络日志'    #这个是seo搜索引擎用的,很重要
keywords:
author: 贺刘芳
language: zh-CN   #网站语言 zh-CN为中文
timezone: ''
3.2 主题配置
#theme: landscape #默认是 landscape 主题,个人觉得不好看
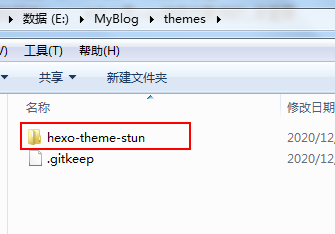
theme: hexo-theme-stun #我使用的是stun这个主题
注意:这里这个名字如:hexo-theme-stun 要和/themes/下的主题文件夹的名称对应
3.3 写作图片配置
- 安装图片插件
npm install hexo-asset-image --save
- 修改
_config.yml
post_asset_folder: true # 将这个改为true默认是false
- 打开
/node_modules/hexo-asset-image/index.js修改内容如下
'use strict';
var cheerio = require('cheerio');

// http://stackoverflow.com/questions/14480345/how-to-get-the-nth-occurrence-in-a-string
function getPosition(str, m, i) {
  return str.split(m, i).join(m).length;
}

var version = String(hexo.version).split('.');
hexo.extend.filter.register('after_post_render', function(data){
  var config = hexo.config;
  if(config.post_asset_folder){
        var link = data.permalink;
    if(version.length > 0 && Number(version[0]) == 3)
       var beginPos = getPosition(link, '/', 1) + 1;
    else
       var beginPos = getPosition(link, '/', 3) + 1;
    // In hexo 3.1.1, the permalink of "about" page is like ".../about/index.html".
    var endPos = link.lastIndexOf('/') + 1;
    link = link.substring(beginPos, endPos);

    var toprocess = ['excerpt', 'more', 'content'];
    for(var i = 0; i < toprocess.length; i++){
      var key = toprocess[i];

      var $ = cheerio.load(data[key], {
        ignoreWhitespace: false,
        xmlMode: false,
        lowerCaseTags: false,
        decodeEntities: false
      });

      $('img').each(function(){
        if ($(this).attr('src')){
            // For windows style path, we replace '\' to '/'.
            var src = $(this).attr('src').replace('\\', '/');
            if(!/http[s]*.*|\/\/.*/.test(src) &&
               !/^\s*\//.test(src)) {
              // For "about" page, the first part of "src" can't be removed.
              // In addition, to support multi-level local directory.
              var linkArray = link.split('/').filter(function(elem){
                return elem != '';
              });
              var srcArray = src.split('/').filter(function(elem){
                return elem != '' && elem != '.';
              });
              if(srcArray.length > 1)
                srcArray.shift();
              src = srcArray.join('/');
              $(this).attr('src', config.root + link + src);
              console.info&&console.info("update link as:-->"+config.root + link + src);
            }
        }else{
            console.info&&console.info("no src attr, skipped...");
            console.info&&console.info($(this));
        }
      });
      data[key] = $.html();
    }
  }
});
然后就可以插入图片了。
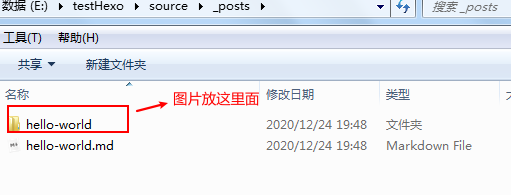
注意:博客文件也就是md文件放在/source/_posts下
md文件名要和图片文件夹的名称一样而且是同级。
md文件引用图片:如
4 git配置和推送
-
首先得申请gitee一个账号
-
然后新增一个空仓库heliufang,并把仓库的设为
公开 -
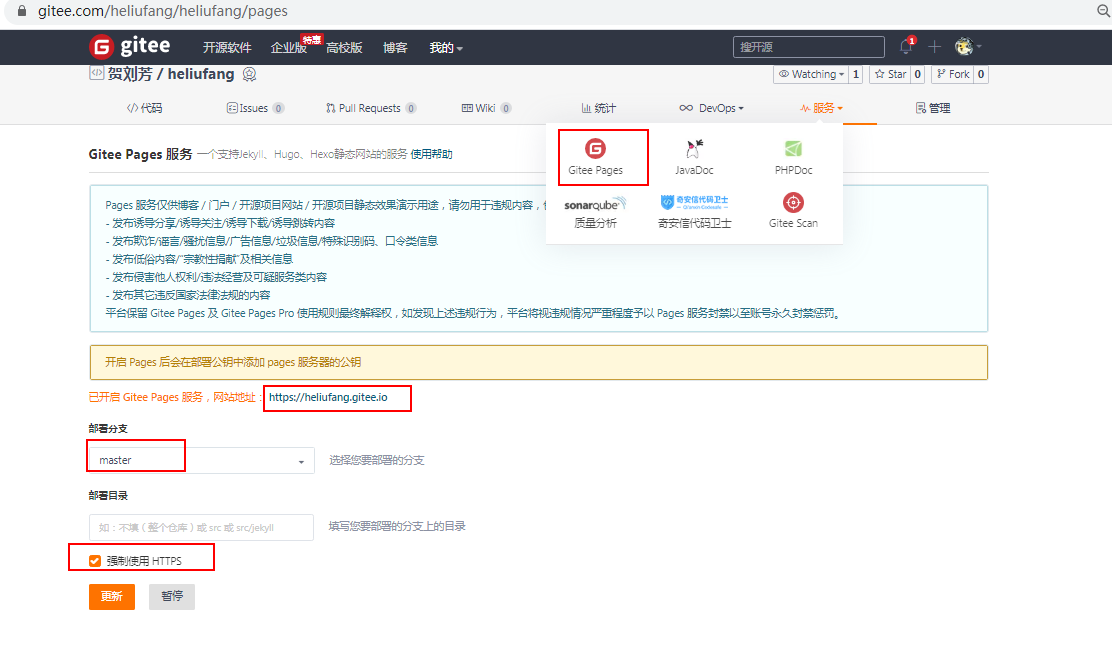
开启git page服务
- 安装hexo安装git依赖,不按照此依赖hexo没法推送静态页面到gitee
npm install hexo-deployer-git --save
- 修改根目录下的
_config.yml全局配置文件中的url
# URL
## If your site is put in a subdirectory, set url as 'http://example.com/child' and root as '/child/'
url:  https://heliufang.gitee.io #注意:这里为启动git page服务后分配的地址
root: /
permalink: :year/:month/:day/:title/
- 修改根目录下的
_config.yml全局配置文件中的deploy,配置仓库地址和分支
# Deployment
## Docs: https://hexo.io/docs/one-command-deployment
deploy:
  type: git #这里为git
  repo: https://gitee.com/heliufang/heliufang.git #仓库的地址,注意属性名称是repo不是repository
  branch: master # 主分支
注意:网络上很多文档写的仓库地址的属性名repository,可能是以前的hexo版本配置。这里被坑到了,导致总是推送不上去。然后去看官方文档才知道仓库地址的属性名称是repo ╮(╯▽╰)╭
- hexo推送到gitee
先重新生成静态页面
hexo clean
hexo g
推送,输入下面的命名,然后会让你输入gitee的账号密码,完之后不出意外就推送上去了。
hexo d
注意:推送上去之后访问地址为:启动git page服务后分配的地址,比如我的https://heliufang.gitee.io
推送后要到gitee的git page页面点击更新按钮,不然看不到最新的页面!!!
推送后要到gitee的git page页面点击更新按钮,不然看不到最新的页面!!!
推送后要到gitee的git page页面点击更新按钮,不然看不到最新的页面!!!
重要的事情说三遍。
5 主题配置
默认的主题不是特别美观,可以去官网选择合适的主题,然后下载到本地。
主题官网地址:https://hexo.io/themes/
主题中文官网: https://hexo.bootcss.com/
我用的是这个主题(stun):https://github.com/liuyib/hexo-theme-stun/
stun主题文档:https://theme-stun.github.io/docs/zh-CN/guide/primary.html#配置文件
未完...待有时间再完善这一块
6 写作
-
可以将写好的md文件放入/source/_post/下
-
也可以通过命令创建。这样就会在/source/_post/下创建md文件以及同名的文件夹
hexo new '文章名称' #注意这里不要加后缀
- 在md文件的头部加上文章的标题、标签、分类、时间,这样发布后就有相关的信息
---
title: 利用Hexo+gitee搭建个人博客
tags:
  - 标签1
  - 标签2
category:
  - 分类生活
date: 2020-12-24 17:55:19
---
7 参考文献
使用Hexo+服务器搭建个人博客: https://www.jianshu.com/p/6ae883f9291c
基于Gitee+Hexo搭建个人博客: https://segmentfault.com/a/1190000018662692
HEXO插入图片(详细版): https://www.jianshu.com/p/f72aaad7b852

 浙公网安备 33010602011771号