PXE部署,忘记从哪来的教程了,感谢作者
PXE Server 部署
一、简要描述
PXE(Preboot eXecution Environment) 支持客户端通过网络从服务器端下载系统镜像,并进行安装。在安装过程中,可以通过 Kickstart 配置文件实现无人值守安装,并定制操作系统。
二、PXE服务器组件
DHCP : 负责分配网络 IP 地址,并通过 DHCP 包来指定系统启动文件的。
syslinux: 预启动程序
TFTP: PXE 客户端通过 TFTP 获取启动文件。
FTP: PXE 客户端通过 FTP 下载系统镜像内容。
三、初始化服务器
1、为 PXE Server 配置固定 IP 地址
[it@pxesvr ~]$ cat /etc/sysconfig/network-scripts/ifcfg-ens192
TYPE=Ethernet
PROXY_METHOD=none
BROWSER_ONLY=no
BOOTPROTO=static
DEFROUTE=yes
IPV4_FAILURE_FATAL=no
NAME=ens192
DEVICE=ens192
ONBOOT=yes
IPADDR=10.10.10.53
PREFIX=24
GATEWAY=10.10.10.1
DNS1=10.10.10.1
2、关闭SELinux、防火墙
sed -i 's/=enforcing/=disabled/i' /etc/selinux/config
四、搭建配置DHCP服务器
1、安装DHCP服务器
[it@pxesvr ~]$ sudo yum install dhcp-server -y
2、配置DHCP
[it@pxesvr ~]$ sudo cat /etc/dhcp/dhcpd.conf | grep -Ev '^#|^$'
allow bootp;
allow booting;
default-lease-time 600;
max-lease-time 7200;
option space pxelinux;
option pxelinux.magic code 208 = string;
option pxelinux.configfile code 209 = text;
option pxelinux.pathprefix code 210 = text;
option pxelinux.reboottime code 211 = unsigned integer 32;
option architecture-type code 93 = unsigned integer 16;
subnet 10.10.10.0 netmask 255.255.255.0 {
 option routers 10.10.10.1;
 range 10.10.10.100 10.10.10.199;
 class "pxeclients" {
   match if substring (option vendor-class-identifier, 0, 9) = "PXEClient";
   next-server 10.10.10.53;         #pxe server IP
   if option architecture-type = 00:07 {
     filename "uefi/BOOTX64.EFI";     # UEFI boot
     } else {
     filename "/pxelinux.0";          # BIOS boot
   }
}
}
3、启动 DHCP 服务,并配置开机启动
[it@pxesvr ~]$ sudo systemctl enable dhcpd.service
[it@pxesvr ~]$ sudo systemctl start  dhcpd.service
五、配置syslinux
1、安装syslinux-tftpboot
[it@pxesvr ~]$ sudo yum install syslinux-tftpboot -y
2、配置启动菜单
只有两个菜单,一个 Install Red Hat Enterprise Linux 8.0,一个是 Boot from local drive(默认选择),并在第一个菜单配置启动系统镜像所需的文件,以及下载系统镜像的目录。
* 启动菜单文件 default 你可以通过示例文件修改获得,也可以自己新建获得
[it@pxesvr ~]$ sudo mkdir /tftpboot/pxelinux.cfg
[it@pxesvr ~]$ sudo cp /os/isolinux/isolinux.cfg /tftpboot/pxelinux.cfg/default
[it@pxesvr ~]$ sudo vim /tftpboot/pxelinux.cfg/default
[it@pxesvr ~]$ sudo cat /tftpboot/pxelinux.cfg/default
default vesamenu.c32
timeout 600

display boot.msg

menu title Red Hat Enterprise Linux 8.0

# Do not display the actual menu unless the user presses a key. All that is displayed is a timeout message.

menu tabmsg Press Tab for full configuration options on menu items.

menu separator # insert an empty line
menu separator # insert an empty line

label linux
  menu label ^Install Red Hat Enterprise Linux 8.0
  kernel vmlinuz
  append initrd=initrd.img inst.stage2=ftp://10.10.10.53/dvd quiet

label local
  menu label ^Boot from local drive
  menu default
  localboot 0xffff

[it@pxesvr ~]$
3、复制系统镜像启动文件到对应位置
[it@pxesvr ~]$ sudo cp /os/isolinux/{boot.msg,vesamenu.c32} /tftpboot/
[it@pxesvr ~]$ sudo cp /os/images/pxeboot/{vmlinuz,initrd.img} /tftpboot/
六、搭建配置TFTP服务器
1、安装TFTP服务器
pxe 客户端通过 TFTP 获取启动文件
[it@pxesvr ~]$ sudo yum install tftp-server -y
2、配置TFTP服务器
修改 TFTP 的路径为 /tftpboot
[it@pxesvr ~]$ sudo vim /usr/lib/systemd/system/tftp.service
[it@pxesvr ~]$ sudo cat /usr/lib/systemd/system/tftp.service
[Unit]
Description=Tftp Server
Requires=tftp.socket
Documentation=man:in.tftpd

[Service]
ExecStart=/usr/sbin/in.tftpd -s /tftpboot
StandardInput=socket

[Install]
Also=tftp.socket
3、启动TFTP服务,并配置开机启动
[it@pxesvr ~]$ sudo systemctl enable  tftp
[it@pxesvr ~]$ sudo systemctl start   tftp
七、搭建配置FTP服务器
1、安装FTP服务器
用于 pxe client 下载系统镜像文件
[it@pxesvr ~]$ sudo yum install vsftpd -y
2、配置 ftp 服务器
开启匿名访问,指定匿名访问的目录
[it@pxesvr ~]$ sudo vim /etc/vsftpd/vsftpd.conf
[sudo] password for it:
[it@pxesvr ~]$ sudo grep -e anonymous -e anon_root /etc/vsftpd/vsftpd.conf | grep -v ^#
anonymous_enable=YES
anon_root=/var/ftp
3、启动 ftp 服务,并配置开机启动
[it@pxesvr ~]$ sudo systemctl enable  vsftpd.service
[it@pxesvr ~]$ sudo systemctl start   vsftpd.service
4、创建 ftp 匿名访问的目录目录,然后复制系统镜像内容到该目录
[it@pxesvr ~]$ sudo mkdir /var/ftp/dvd
[it@pxesvr ~]$ sudo cp -r /run/media/it/RHEL-8-0-0-BaseOS-x86_64/* /var/ftp/dvd/
八、测试启动
1、通过 BIOS(Legacy ) 的方式启动客户端主机进行测试

2、配置支持UEFI启动
①、配置UEFI启动菜单
it@pxesvr ~]$ sudo mkdir /tftpboot/uefi
[sudo] password for it:
[it@pxesvr ~]$ sudo cp -r /os/EFI/BOOT/* /tftpboot/uefi/
[it@pxesvr ~]$ vim /tftpboot/uefi/grub.cfg
[it@pxesvr ~]$ sudo vim /tftpboot/uefi/grub.cfg
[it@pxesvr ~]$ sudo cat /tftpboot/uefi/grub.cfg
[sudo] password for it:
set default="1"

function load_video {
  insmod efi_gop
  insmod efi_uga
  insmod video_bochs
  insmod video_cirrus
  insmod all_video
}

load_video
set gfxpayload=keep
insmod gzio
insmod part_gpt
insmod ext2

set timeout=60
### END /etc/grub.d/00_header ###

search --no-floppy --set=root -l 'RHEL-8-0-0-BaseOS-x86_64'

### BEGIN /etc/grub.d/10_linux ###
menuentry 'Install Red Hat Enterprise Linux 8.0' --class fedora --class gnu-linux --class gnu --class os {
 linuxefi vmlinuz inst.stage2=ftp://10.10.10.53/dvd quiet
 initrdefi initrd.img
}
menuentry 'Test this media & install Red Hat Enterprise Linux 8.0' --class fedora --class gnu-linux --class gnu --class os {
 linuxefi vmlinuz inst.stage2=ftp://10.10.10.53/dvd quiet
 initrdefi initrd.img
}
②、重启服务
[it@pxesvr ~]$ sudo systemctl restart dhcpd.service
[it@pxesvr ~]$ sudo systemctl restart tftp.socket
③、测试UEFI方式启动客户端主机进行测试
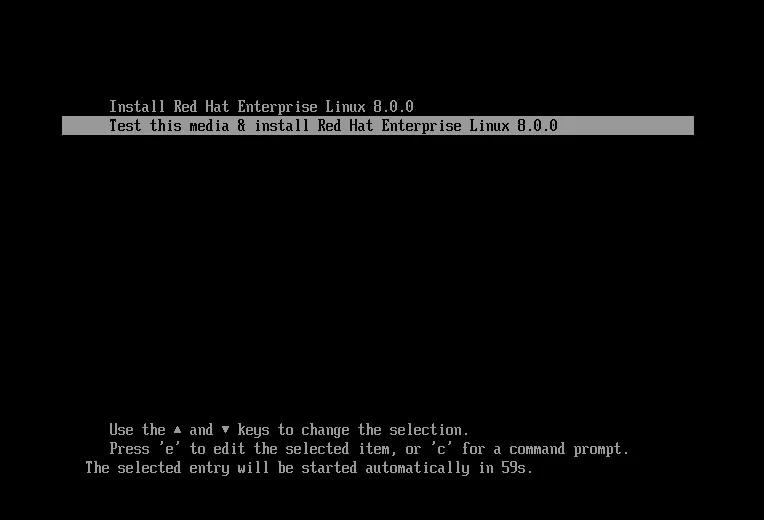
九、Kickstart自动应答
Kickstart 文件是实现系统自动安装的应答文件。
1、示例文件
#version=RHEL8
ignoredisk --only-use=sda
autopart --type=lvm
# Partition clearing information
clearpart --all --initlabel --drives=sda
# Use graphical install
graphical
# Reboot after installation
reboot
repo --name="AppStream" --baseurl=ftp://10.10.10.53/dvd/AppStream
# Use network installation
url --url="ftp://10.10.10.53/dvd"
# Keyboard layouts
keyboard --vckeymap=us --xlayouts='us'
# Run the Setup Agent on first boot
firstboot --disable
# System language
lang en_US.UTF-8

# Network information
network  --bootproto=dhcp --device=ens192 --ipv6=auto --activate
network  --hostname=localhost.localdomain
# Root password
rootpw --iscrypted $6$VrOUsKRz8dywq5D5$1SbE62Vu/YPtzqd.4Y0U/M6fqILDluHAPFU5Kt9GkAS8eZVC7.yA/aBCzkWbNx0MJicFBR2MmipOItFBdqW6X.
# X Window System configuration information
xconfig  --startxonboot
# System services
services --enabled="chronyd"
# System timezone
timezone Asia/Shanghai --isUtc
user --groups=wheel --name=it --password=$6$fI8GAHa5Q6JG1BB3$6/Dv5ndCa4KMIkVFBkmVzvnV.SvwSO5.h0ppaaI75f53G9dH4.l6yUR.IUYGTKX/ctKwyzliKJQtOpV7TAZqI. --iscrypted --gecos="it"

%packages
@^graphical-server-environment
kexec-tools
%end

%addon com_redhat_kdump --enable --reserve-mb='auto'
%end

%anaconda
pwpolicy root --minlen=6 --minquality=1 --notstrict --nochanges --notempty
pwpolicy user --minlen=6 --minquality=1 --notstrict --nochanges --emptyok
pwpolicy luks --minlen=6 --minquality=1 --notstrict --nochanges --notempty
%end
2、Kickstart文件说明
ignoredisk: 在安装过程中控制对磁盘的连接,如果你使用的是自动分区,那么在安装过程中可以通过 ignoredisk --driver=sdc 指定自动分区忽略的磁盘,如果你有多个磁盘,并且只想使用其中一个进行自动分区,并安装操作系统,你可以使用 ignoredisk --only-use=sda 指定只使用 sda 这一个磁盘。
autopart: 自动创建根分区( / ),交换分区(swap)和适当的启动分区(/boot),在足够大的驱动器上,还会创建 /home 分区。通过 --type= 指定分区类型,如示例中使用的lvm。你还可以通过 --fstype= 指定系统文件类型,如 xfs,ext4 等等,默认是 xfs。你还可以通过 --encrypted 选项,对所有分区进行加密。
clearpart: 在分区前,删除现有分区。可以通过 --drives= 指定要删除分区的磁盘,也可以通过 --all 清除所有设备的分区。
graphical: 安装过程以图形化的方式进行,就和手动安装一样。也可以使用 text 命令,以文本的方式显示安装过程。
reboot: 安装完成后重启。
repo: 指定额外的软件包安装源。
url: 通过网络安装时,安装文件的位置。
keyboard: 指定键盘布局。通过 --vckeymap= 指定应使用哪个 VConsole 键盘模式。通过 --xlayouts= 指定键盘的布局。
firstboot: 第一次启动系统时,是否显示 Initial Setup。如果启用,则必须安装 initial-setup 软件包。如果未指定,则默认禁用这个选项。--enable 表示启动 Initial Setup,--disable 表示禁用 Initial Setup。如果你使用 --enable ,你还可以使用 --reconfig 选项在引导系统时启动重配置(reconfiguration)模式。在这个模式下,你可以从新配置系统语言,键盘鼠标,root 密码,系统安全级别,时区以及一些网络配置。
lang: 配置系统语言。
network: 网络配置。使用 --bootproto= 指定计算机获取 IP 的方式,是 dchp 还是 static。使用 --device= 指定要配置的设备名称。使用 --activate 激活该设备。如果你的 --bootproto= 使用的是 static,那么你可以使用 ip= 指定 IP 地址,--netmask= 指定子网掩码,--gateway= 指定网关,--nameserver= 指定 DNS。使用 ipv6= 指定 IPv6 配置,使用auto 表示自动配置。使用 --hostname 配置主机名。
rootpw: 指定 root 用户的密码。--iscrypted 表示密码以密文的方式显示。--plaintext 表示以明文的方式显示密码。你还可以使用 --lock 锁定 root 用户。
* 当你使用 --iscrypted 时,可以在一台已经安装好系统的机器上,通过 python 生成密码的密文(如果是 Python 3,则对应的命令应该是 python3.)。
$ python -c 'import crypt; print(crypt.crypt("My Password"))'
xconfig: 配置 X Windows 系统。--startxonboot 表示在安装的系统中使用图形界面登录。
services: 配置服务的默认状态。--disabled= 指定默认禁用的服务,使用 --enabled= 指定默认启用的服务。
timezone: 指定时区。
user: 添加额外的用户。通过 --name= 指定用户名,通过 --groups= 指定用户要添加的组(除默认组),通过 --password= 指定该用户的密码,--iscrypted 表示以密文的方式,通过--gecos= 定义用户的 GECOS信息,如,用户的全名等等。
%packages 表示要安装的软件包。
通过 @ 指定软件包组,如:
%packages
@core
@X Window System
@Desktop
%end
通过 @^ 指定环境组,如:
%packages
@^graphical-server-environment
%end
直接输入软件包名,指定独立的软件包,如:
%packages
@core
@desktop
sqlite
curl
%end
通过 - 号排错软件包组中的某个软件包
%packages
@Development Tools
-pkgconf
-pkgconf-m4
-pkgconf-pkg-config
-redhat-rpm-config
%end
* %package 要以 %end 结尾
%addon 配置 kdump。--enable 表示开启,并通过 --reserve-mb= 指定为 kdump 预留的内存大小,auto 表示自动。要以 %end结束。
%anaconda 部分指定了 password 策略,同样以 %end 结束。
你还可以通过 %pre 指定在磁盘分区前要执行的脚本,通过 %post 指定系统安装完成后要执行的脚本。这些模块都需要 %end 结束。
更多关于 kickstart 应答文件的语法可以参考官方网站的系统安装指南。到目前为止,红帽官网还没有关于 RHEL 8 的安装指南,你可以参考 RHEL 7 的安装指南进行编写。
3、在启动菜单文件中添加 kickstart 应答路径
编辑好 kickstart 应答文件后,将其保存成 ks.cfg (文件名可以自定义),上传到 ftp 根目录中(路径也是自定义的),如该示例的文件路径是:ftp://10.10.10.53/ks.cfg
①、BISO(Legacy)方式启动:
[it@pxesvr ~]$ sudo vim /tftpboot/pxelinux.cfg/default
[it@pxesvr ~]$ sudo cat /tftpboot/pxelinux.cfg/default
... ... ... ...
... ... ... ...
label linux
  menu label ^Install Red Hat Enterprise Linux 8.0
  kernel vmlinuz
  append initrd=initrd.img inst.stage2=ftp://10.10.10.53/dvd inst.ks=ftp://10.10.10.53/ks.cfg quiet
... ... ... ...
... ... ... ...
②、UEFI 方式启动:
[it@pxesvr ~]$ sudo vim /tftpboot/uefi/grub.cfg
[it@pxesvr ~]$ sudo cat /tftpboot/uefi/grub.cfg
[sudo] password for it:
... ... ... ...
... ... ... ...
### BEGIN /etc/grub.d/10_linux ###
menuentry 'Install Red Hat Enterprise Linux 8.0' --class fedora --class gnu-linux --class gnu --class os {
 linuxefi vmlinuz inst.stage2=ftp://10.10.10.53/dvd inst.ks=ftp://10.10.10.53/ks.cfg quiet
 initrdefi initrd.img
}
... ... ... ...
... ... ... ...
至此,你就可以通过 PXE Server 进行自动安装 RHEL 8 操作系统了。

 浙公网安备 33010602011771号