

CentOS 7.2配置LAMP环境——yum版
环境:CentOS 7.2 采用putty连接
方法:采用yum安装方法
目的:搭建Apache+MySQL+PHP环境
1、安装Apache
yum install httpd //默认情况下,选择Y,进行安装
安装成功后,默认情况下是禁止外部IP访问的,需要进行配置
vim /etc/httpd/conf/httpd.conf //进入配置文件
找到
<Directory />
AllowOverride none
Require all denied
</Directory >
修改为:
<Directory />
AllowOverride none
Require all granted
</Directory >
systemctl start httpd.service //启动
systemctl restart httpd.service //停止
systemctl status httpd.service //查看状态
systemctl restart httpd.service //重启
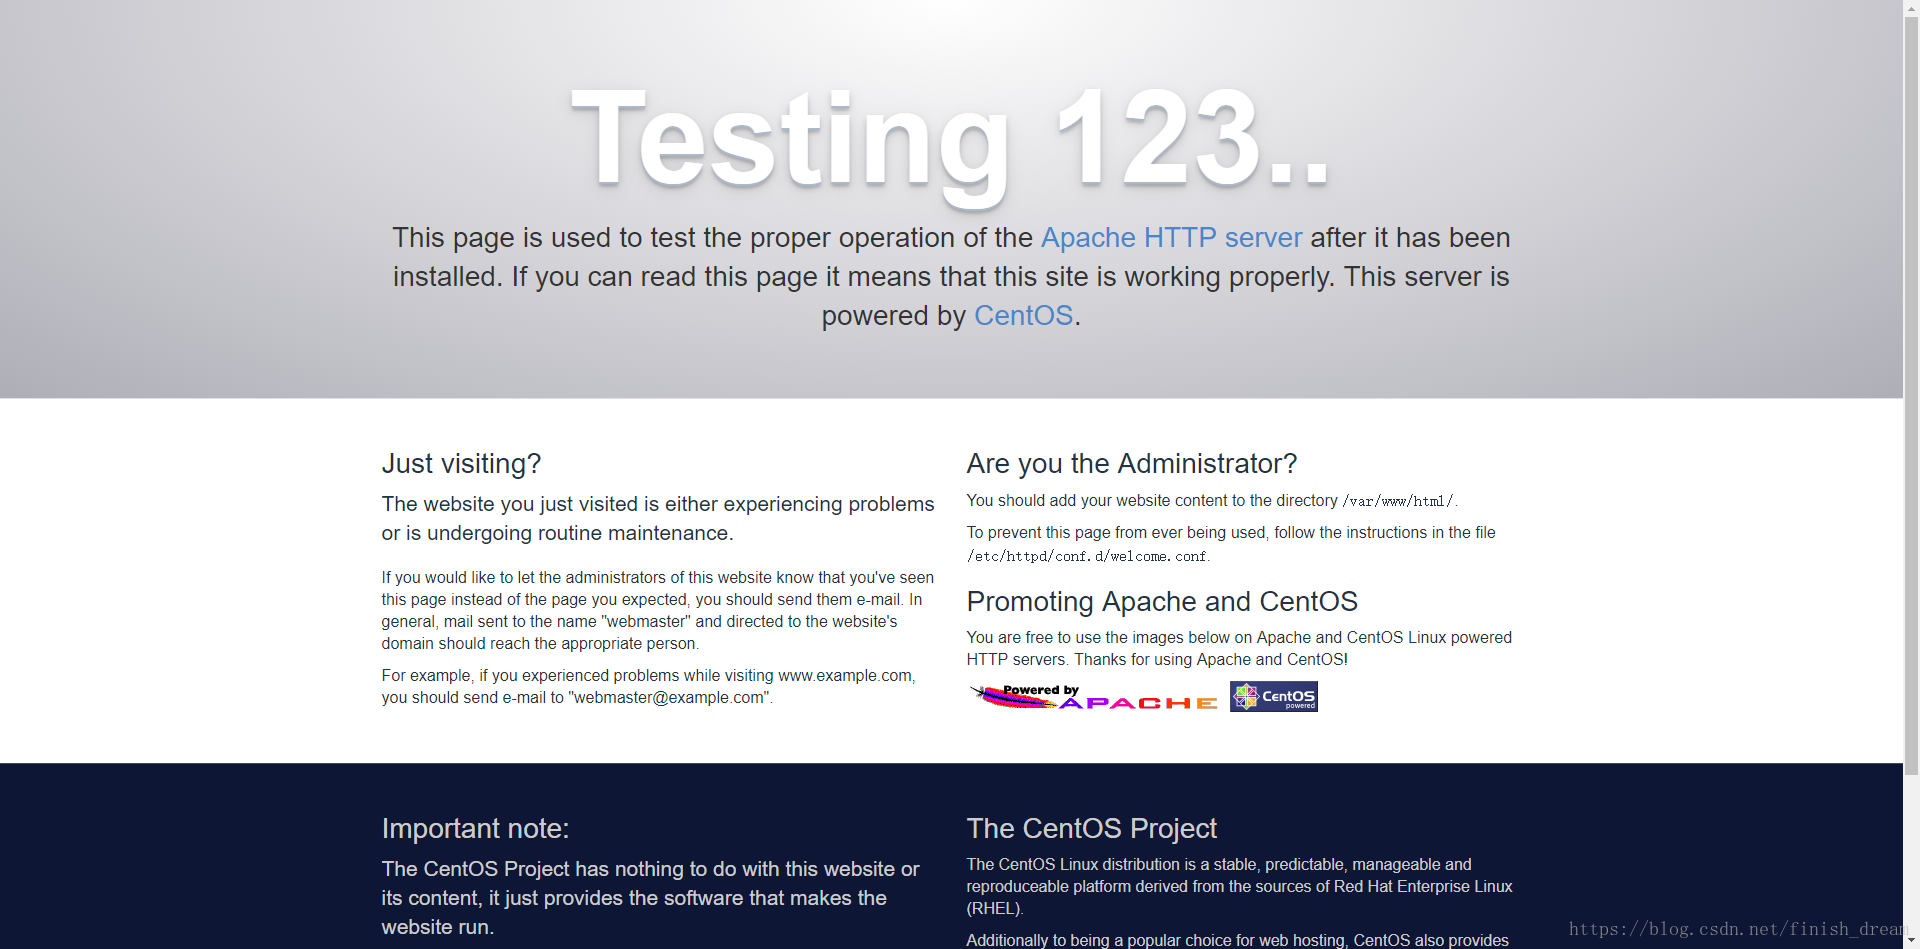
systemctl enable httpd.service //开机启动访问服务IP,如果显示测试界面,则安装成功:
2、安装PHP
yum install php  //默认选择Y安装

在Apche的目录下面新建一文件test.php

cd /var/www/html
vim test.php

可以键入相关PHP代码,以输入hello world为例,
<?php
    echo "hello world";
?>

如果显示“echo "hello world"”则解析失败,需要继续进行配置,在httpd.conf中添加以下代码。

<IfModule mod_php5.c>
  AddType application/x-httpd-php .php
 AddType application/x-httpd-php .html .htm
</IfModule>

访问网站192.168.199.235/test.php,如果正常解析,显示"hello world",则说明PHP环境完成。
3、安装MySQL
在CentOS7中,Mariadb代替了MySQL,其实Mariadb只是一个MySQL的一个分支,由于MySQL旧部员工不满Oracle收购MySQL导致更新速度变慢,又重新开发了和MySQL类似的开源数据库。来应对Oracle的MySQL。
安装MariaDB
[root@www~]# yum -y install mariadb-server
[root@www~]# vi /etc/my.cnf
# add follows within [mysqld] section
[mysqld]
character-set-server=utf8
[root@www~]# systemctl start mariadb
[root@www~]# systemctl enable mariadb
ln -s '/usr/lib/systemd/system/mariadb.service' '/etc/systemd/system/
multi-user.target.wants/mariadb.service'
初始化MariaDB
[root@www~]# mysql_secure_installation #和MySQL一样,一路y连接MariaDB
[root@www~]# mysql -u root -p
Enter password:
Welcome to the MariaDB monitor.  Commands end with ; or \g.
Your MariaDB connection id is 1023
Server version: 5.5.50-MariaDB MariaDB Server

Copyright (c) 2000, 2016, Oracle, MariaDB Corporation Ab and others.

Type 'help;' or '\h' for help. Type '\c' to clear the current input statement.

MariaDB [(none)]> select user,host,password from mysql.user;
+-----------+-----------+-------------------------------------------+
| user      | host      | password                                  |
+-----------+-----------+-------------------------------------------+
| root      | localhost | *F1DAE8BCDFCA7A57F246E0F834AC35830A3D640E |
| root      | 127.0.0.1 | *F1DAE8BCDFCA7A57F246E0F834AC35830A3D640E |
| root      | ::1       | *F1DAE8BCDFCA7A57F246E0F834AC35830A3D640E |
+-----------+-----------+-------------------------------------------+
5 rows in set (0.00 sec)
MariaDB [(none)]> show databases;
+--------------------+
| Database           |
+--------------------+
| information_schema |
| mysql              |
| performance_schema |
+--------------------+
5 rows in set (0.05 sec)
MariaDB [(none)]> exit;
Bye
配置MariaDB远程访问
安装成功后,root用户默认密码为空且仅限本机登陆
首先配置允许访问的用户,采用授权的方式给用户权限
GRANT ALL PRIVILEGES ON *.* TO 'root'@'%'IDENTIFIED BY '123456' WITH GRANT OPTION;说明:root是登陆数据库的用户,123456是登陆数据库的密码,*就是意味着任何来源任何主机反正就是权限很大的样子。
最后配置好权限之后不应该忘记刷新使之生效:
flush privileges;再次访问就可以了,这样任意IP就可以通过mysql -h 192.168.199.235 -u root -p 访问服务器数据库了。当然为了安全起见,指定特定主机访问数据库服务器。
安装PHP扩展,支持mariadb
yum install php-mysql
在网站目录下新建测试数据库文件,例如
<?php
   $con = mysql_connect('localhost','root','root');
   if(!$con){
      die("connet mysql failed".mysql.error());
    }
   echo "connet mysql successful";
?>

默认情况下,php没有打开错误调试,需要在/etc/php.ini中将错误调试打开,即
;dispaly_errors
;error_reporting
前面的;去掉。
至此,简单的LAMP环境搭建成功!

 浙公网安备 33010602011771号