

前言
chatgpt做为近期爆火的人工智能服务,其账号和api接口的价格水涨船高。这里给出一个粗略的api部署方法,仅供参考。
文章结构:
-
注册ChatGPT
-
安装nginx
-
安装python3
-
安装flask
-
安装gunicorn
-
设计html页面
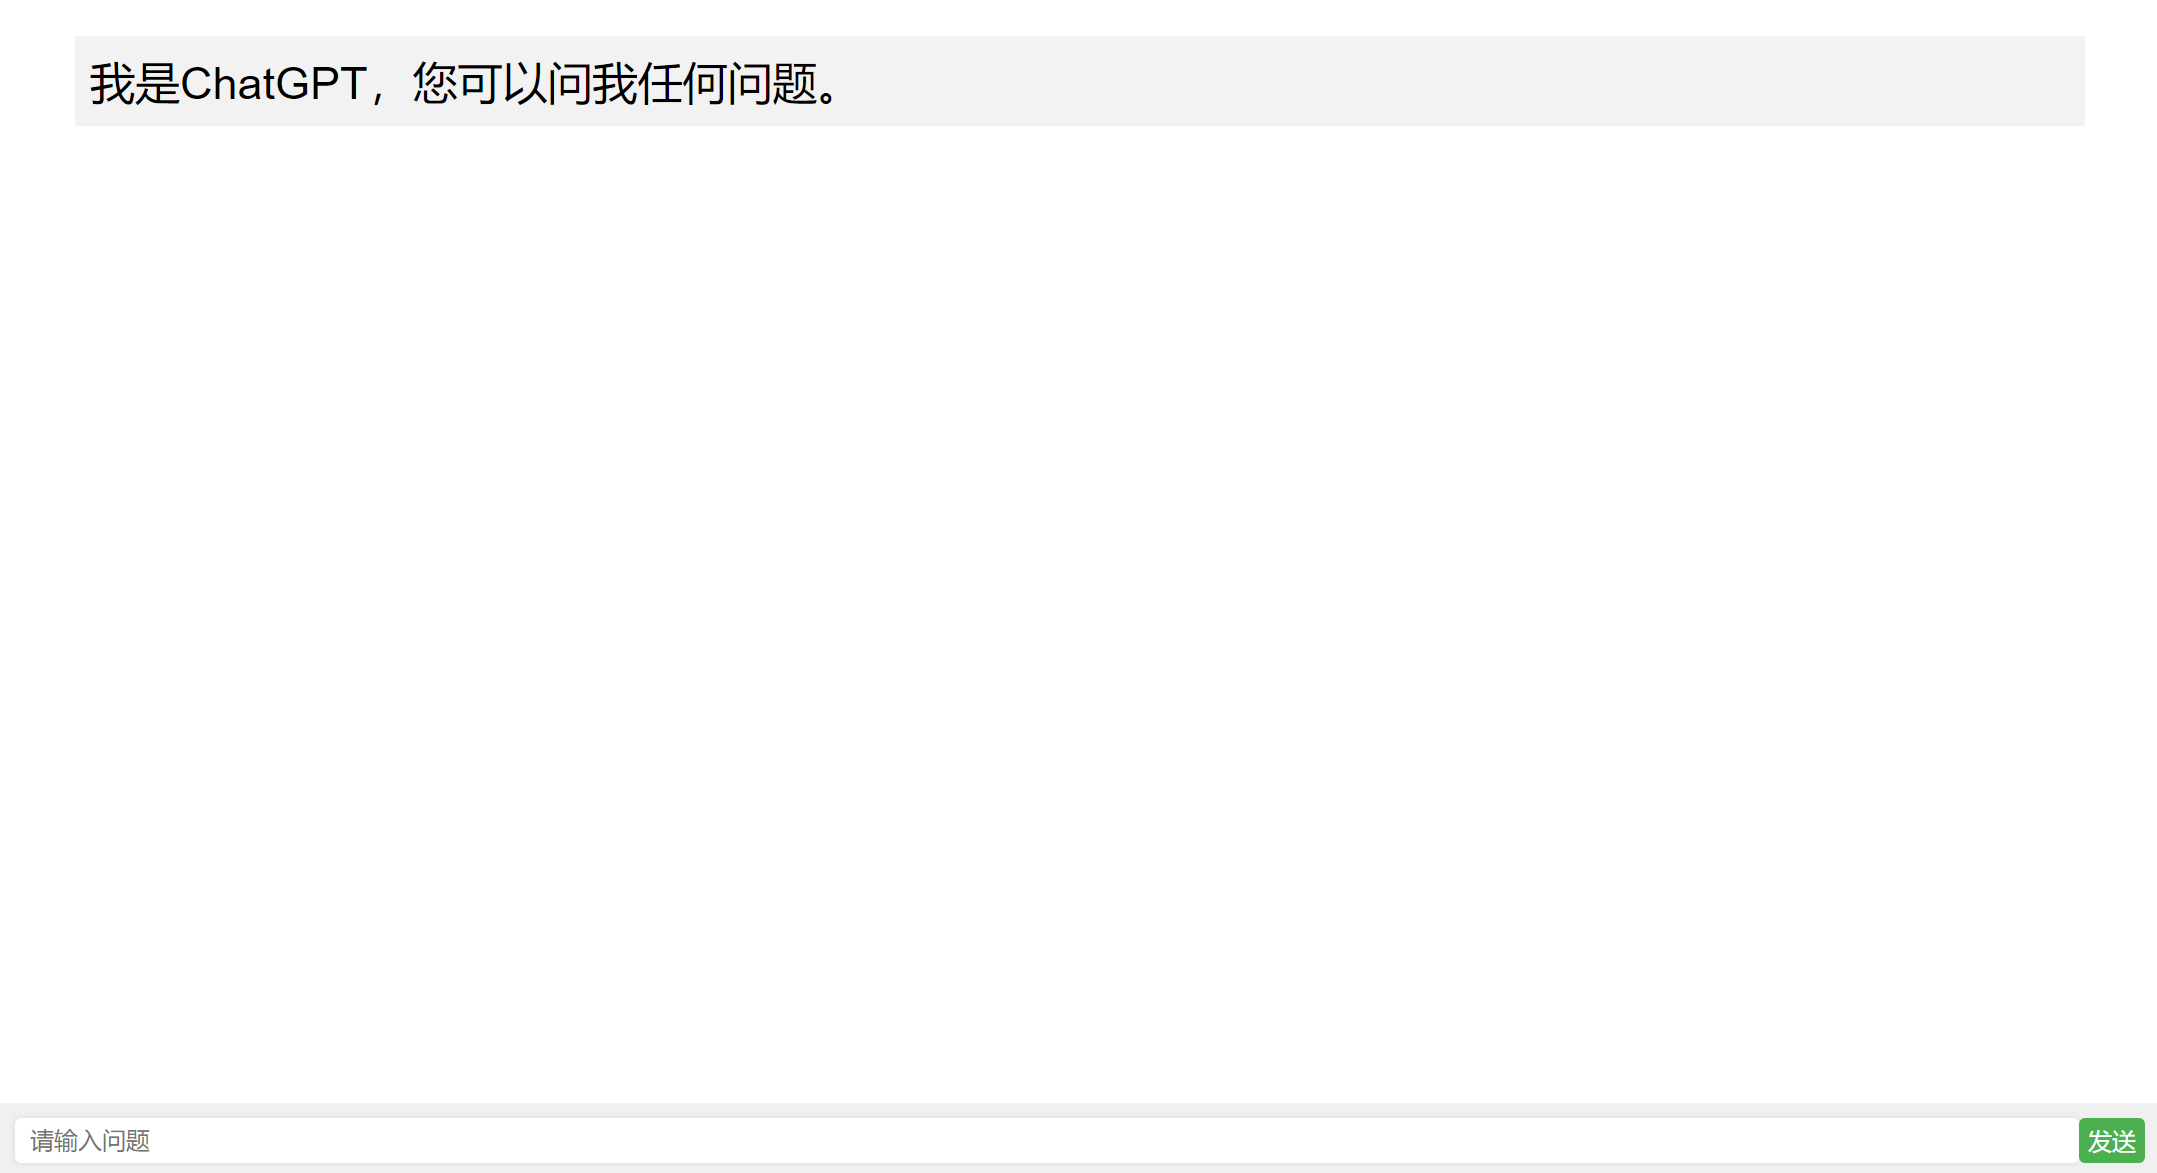
最终成品页面:
ChatGPT注册
云服务器环境准备
说明:服务器版本centos7,莫斯科服务器,为了能够确保能够正常访问ChatGPT的api接口,请使用国外服务器
安装nginx
安装依赖
yum install -y gcc gcc-c++ make libtool wget pcre pcre-devel zlib zlib-devel openssl openssl-devel
nginx下载
wget http://nginx.org/download/nginx-1.18.0.tar.gz
解压
tar -zxvf nginx-1.18.0.tar.gz
安装
cd nginx-1.18.0
./configure
make && make install
最终nginx会安装在/usr/local目录下
nginx基础命令
普通启动服务:
/usr/local/nginx/sbin/nginx
配置文件启动:
/usr/local/nginx/sbin/nginx -c /usr/local/nginx/conf/nginx.conf
重新加载进程:
/usr/local/nginx/sbin/nginx -s reload
查看相关进程:
ps -ef | grep nginx
nginx启动服务提示98: Address already in use错误:
查看80端口
netstat -tnulp|grep 80
杀掉占用80端口的进程
kill -9 xxxx
最后启动nginx
无法打开网页情况:
检查nginx是否正常运行
ps aux|grep nginx
检查80端口是否分配给nginx
netstat -ntlp
设置80防火墙
firewall-cmd --zone=public --add-port=80/tcp --permanent
重启防火墙
systemctl restart firewalld.service
说明:
firewall-cmd --reload # 配置nginx环境时,此命令无法生效
安装python3
yum -y install gcc zlib* openssl-devel
wget https://www.python.org/ftp/python/3.7.8/Python-3.7.8.tar.xz
tar xvf Python-3.7.8.tar.xz
cd Python-3.7.8
./configure --with-ssl
make && make install
软连接重命名
mv /usr/bin/python /usr/bin/python.bak
链接至python3
ln -s /usr/local/bin/python3 /usr/bin/python
将以下两个文件中#!/usr/bin/python 改为 #!/usr/bin/python2.7
vi /usr/bin/yum
vi /usr/libexec/urlgrabber-ext-down
配置flask
安装flask
pip install flask
安装flask-cors
目的是为了实现XHR跨域拿到后端的python数据
pip install flask-cors
为方便管理,建议在nginx的文件夹内放置flask的.py文件
该文件配置如下
from flask import Flask
from flask import request
from flask_cors import CORS
import openai
openai.api_key = "chatgpt的api"

app = Flask(__name__)
CORS(app, resource=r'/*')

@app.route("/post", methods=["POST"])
def chat():
    if request.method == "POST":
        name = request.form.get("name")
        completion = openai.ChatCompletion.create(
            model="gpt-3.5-turbo",
            messages=[
                {"role": "user", "content": name}
            ]
        )
        return completion['choices'][0]['message']['content']


if __name__ == "__main__":
    app.run(host='0.0.0.0', port=81)
记得把81端口打开
安装和配置gunicorn
pip install gunicorn
在与flask同目录下创建一个gunicorn的python文件,并写入
bind = "0.0.0.0:81"
daemon = True
# 端口须和flask一致
用gunicorn启动flask
gunicorn -c gunicorn的python文件 flask的python文件名称:app
示例:
gunicorn -c gunicorn_test.py flask_test:app
参考文章:
通过Nginx部署flask项目 - 神雕爱大侠 - 博客园
前端设计
由于设计仓促,有些变量只是随便声明,有空再修改
创建名为chatgpt的HTML、CSS和JS文件
.chat-container {
	display: flex;
    flex-direction: column;
    height: 100vh;
}
.chat-box {
		flex-grow: 1;
		padding: 50px;
		height: calc(100% - 50px);
		overflow-y: auto;
	}
.chat-messages {
	    background-color: #f2f2f2;
	    padding: 10px;
	    margin-bottom: 5px;
	}
.chat-messages p {
	white-space: pre-line;
}
.chat-input {
	height: 50px;
	position: fixed;
	bottom: 0;
    left: 0;
    width: 100%;
    background-color: #f0f0f0;
    padding: 10px;
    box-sizing: border-box;
	display: flex;
}
.chat-input input[type=text] {
	flex-grow: 1;
	padding: 10px;
	font-size: 16px;
	border: none;
	border-radius: 4px;
	background-color: white;
	box-shadow: 0px 0px 5px rgba(0,0,0,0.1);
	margin-right: 10px;
}
.chat-input button {
	font-size: 16px;
	border: none;
	border-radius: 4px;
	background-color: #4CAF50;
	color: white;
	cursor: pointer;
}
.chat-input button:hover {
	background-color: #3E8E41;
}
@media screen and (max-width: 1200px) {
	.chat-container {
		position: relative;
		overflow: hidden;
	}
	.chat-box {
		padding-bottom: 200px;
	}
	.chat-messages {
		overflow-y: scroll;
		box-sizing: border-box;
		margin-bottom: 20px;
	}
	.chat-messages p {
		font-size: 40px;
	}
	.chat-input {
		height: 8vh;
	}
	.chat-input input[type=text] {
	  font-size: 40px;
	}
	.chat-input button {
	  padding: 10px 20px;
	  font-size: 40px;
	}
}
HTML代码
<!DOCTYPE html>
<html>
	<head>
		<meta charset="utf-8" />
		<title>ChatGPT</title>
		<link rel="stylesheet" type="text/css" href="../css/chatgpt.css">
	</head>
	<style>
	body {
	margin: 0;
	padding: 0;
	font-family: Arial, sans-serif;
	}
	</style>
	<body>
	<div class="chat-container">
		<div class="chat-box">
			<div class="chat-messages">
				<p>我是ChatGPT,您可以问我任何问题。</p>
			</div>
		</div>

	</div>
	<div class="chat-input">
		<input type="text" placeholder="请输入问题">
		<button>发送</button>
	</div>
	</body>
	<script type="text/javascript" src="../js/chatgpt.js"></script>
</html>
js代码
const chatBox = document.querySelector('.chat-box');
const chatInput = document.querySelector('.chat-input input');
const sendButton = document.querySelector('.chat-input button');

function add(mes, direc){
   const message = document.createElement('div');
   message.classList.add('chat-messages');
   message.innerHTML = mes;
   chatBox.appendChild(message);
   chatBox.scrollTop = chatBox.scrollHeight;

   if (direc == "bot"){
	   message.innerHTML = '正在思考中...';
	   var ajax = null;
	   if(window.XMLHttpRequest){
	   	ajax = new XMLHttpRequest();
	   }else{
	   	ajax = new ActiveXObject("Mincrosoft.XMLHTTP");
	   };
	   ajax.open("POST","请求链接");
	   ajax.setRequestHeader("Content-type","application/x-www-form-urlencoded");
	   ajax.send('value='+mes);

	   ajax.onreadystatechange = function(){
	   	if(ajax.readyState == 4&& ajax.status ==200){
	   		botMes = ajax.responseText;
	   		message.innerHTML = ajax.responseText;
	    }}
   }
};

sendButton.addEventListener('click', () => {
	var input = chatInput.value
  if (input.trim() !== '') {
	add(input, "user");
	add(input, "bot");
	chatInput.value = "";
    }
});
chatInput.addEventListener('keydown', (event) => {
  if (event.key === 'Enter') {
	event.preventDefault();
	sendButton.click();
  }
});
参考的文章:

 浙公网安备 33010602011771号