GitLab 服务搭建
1. GitLab 概述
GitLab 是一个用于仓库管理系统的开源项目,使用 Git 作为代码管理工具,并在此基础上搭建起来的 web 服务。GitLab 产品将分为三个发行版本
-
CE(社区版):发行版将继续在全球范围内提供
-
EE(企业版):发行版仅在中国境外出售
-
JH(JiHu版):发行版仅在中国销售
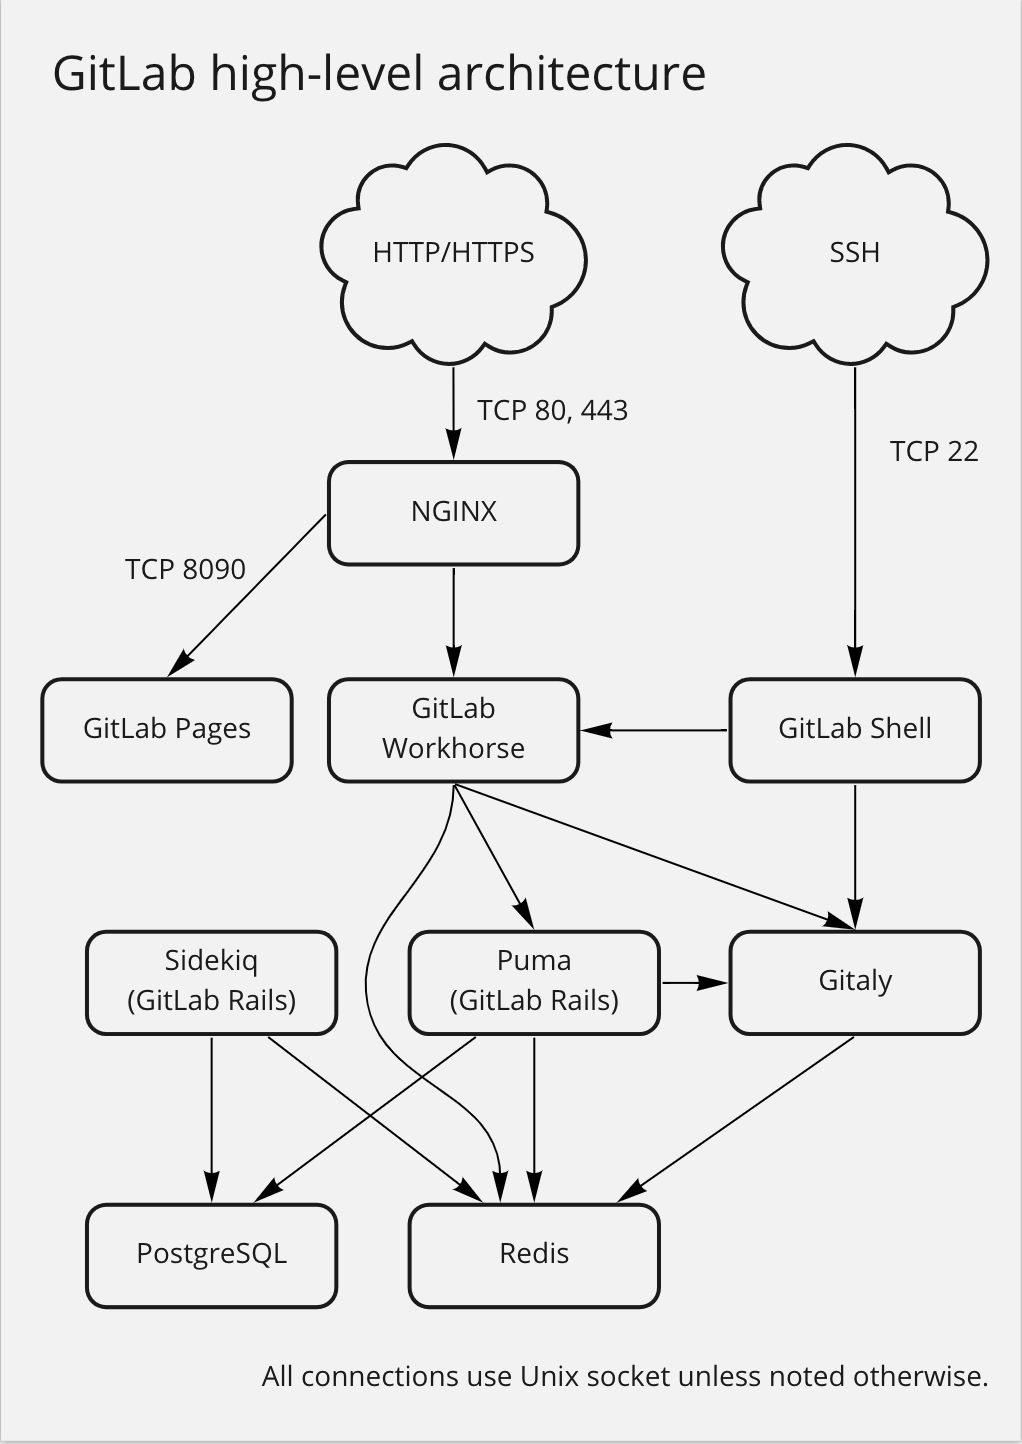
GitLab 的架构图(来源官网:https://docs.gitlab.com/ee/development/architecture.html)
2. 安装 GitLab
CentOS 安装 gitlab-ce 比较方便的方式有
2.1. rpm 包安装
-
下载安装包
https://packages.gitlab.com/gitlab/gitlab-ce
https://mirrors.tuna.tsinghua.edu.cn/help/gitlab-ce/
使用命令
wget https://mirrors.tuna.tsinghua.edu.cn/gitlab-ce/yum/el8/gitlab-ce-14.9.2-ce.0.el8.x86_64.rpm
使用清华的镜像仓库,下载相对较快
安装 gitlab-ce
rpm -ivh gitlab-ce-14.9.2-ce.0.el8.x86_64.rpm
这种安装方式需要先安装相关依赖包,否则安装报错。
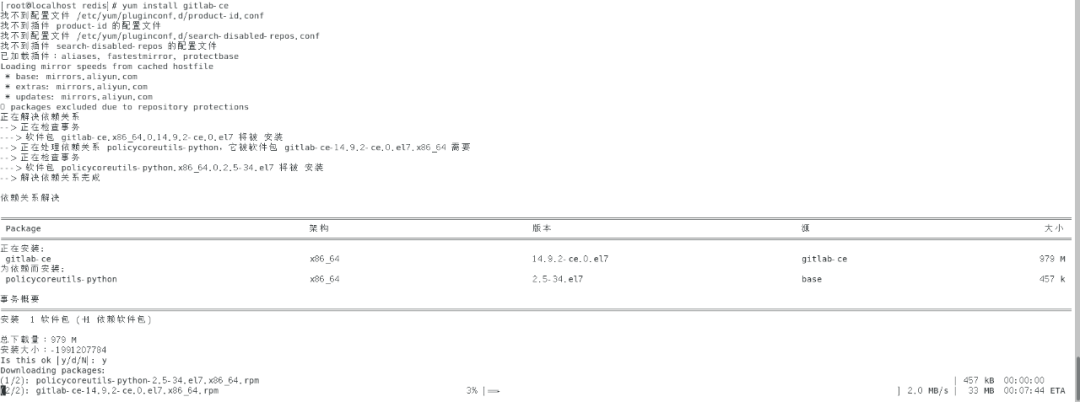
2.2. yum 安装
使用如下命令安装
yum install -y gitlab-ce
3. 配置 GitLab 并启动
修改 gitlab 配置文件指定服务器 ip 和自定义端口
vim /etc/gitlab/gitlab.rb

重置 gitlab
gitlab-ctl reconfigure

启动 gitlab
gitlab-ctl start
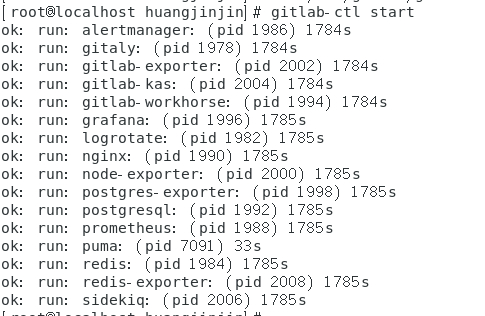
启动时间可能有点慢,因为需要启动的服务比较多;查看启动日志
gitlab-ctl tail
在访问过程中,可能遇到如下错误
Whoops, GitLab is taking too much time to respond.
出现该问题的原因比较多,以下两种比较常见
-
可能系统内存不够 使用
free -m查看内存使用情况 -
可能是配置的端口和访问的端口不一致;或者端口冲突
external_url 'http://192.168.10.8:8987'
nginx['listen_port'] = 8987     # 两个端口一定要一致
4. 访问 GitLab
GitLab 的访问地址是external_url配置的地址,所以访问
http://192.168.10.8:8987
GitLab 安装初始化后,默认账户名是 root,密码存放在配置文件
cat /etc/gitlab/initial_root_password

登录后
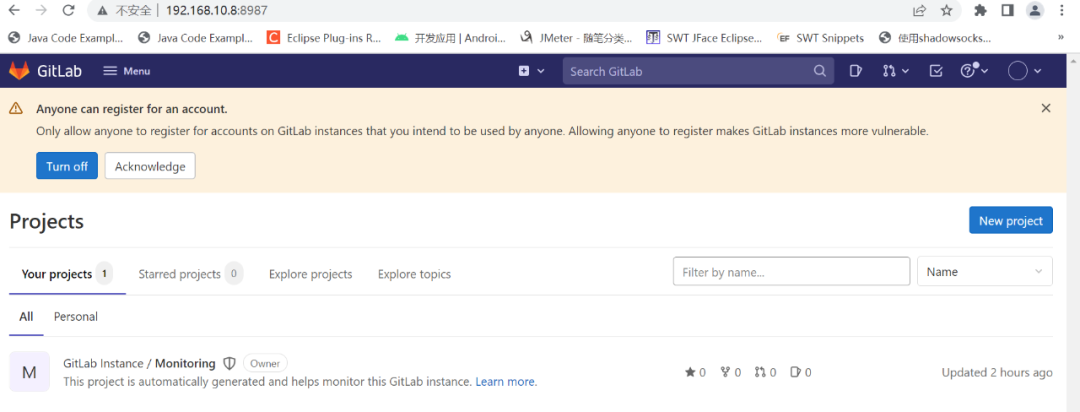
至此,GitLab安装完毕。
5. 附:GitLab 常用命令
-
启动所有 GitLab 组件
gitlab-ctl start
-
停止所有 GitLab 组件
gitlab-ctl stop
-
重启所有 GitLab 组件
gitlab-ctl restart
-
查看 GitLab 服务状态
gitlab-ctl status
-
重构配置 GitLab
如果更改了主配置文件 /etc/gitlab/gitlab.rb,需要使用以下这个命令,使配置文件生效;但是会初始化除了gitlab.rb之外的所有文件
gitlab-ctl reconfigure
-
查看日志(查看 GitLab 所有的日志)
sudo gitlab-ctl tail
参考:https://docs.gitlab.cn/jh/install/
 浙公网安备 33010602011771号