Spring Boot核心(基本配置)
上一篇Spring Boot我们简单讲了如何快速创建一个SpringBoot项目。大家都知道SpringBoot非常强大,可以轻松与各种工具集成,但是我们知其然,也必须知其所以然。今天开始就和大家一起学习一下SpringBoot核心,核心由于过于重要,需要分成好几章,今天我们先来看看基本配置。
入口类和@SpringBootApplication
使用过或者瞄过一眼Spring Boot工程的小伙伴都知道,
SpringBoot有一个特别显著的特点,
就是每个SpringBoot工程都会有一个入口类,
在这个入口类上都会有这么一个注解@SpringBootApplication。

这个类中有一个main方法,main方法中使用
SpringApplication.run(*Application.class,args),
用来启动SpringBoot项目。如下所示:
    public static void main(String[] args) {
		SpringApplication.run(Createproject2Application.class, args);
	}
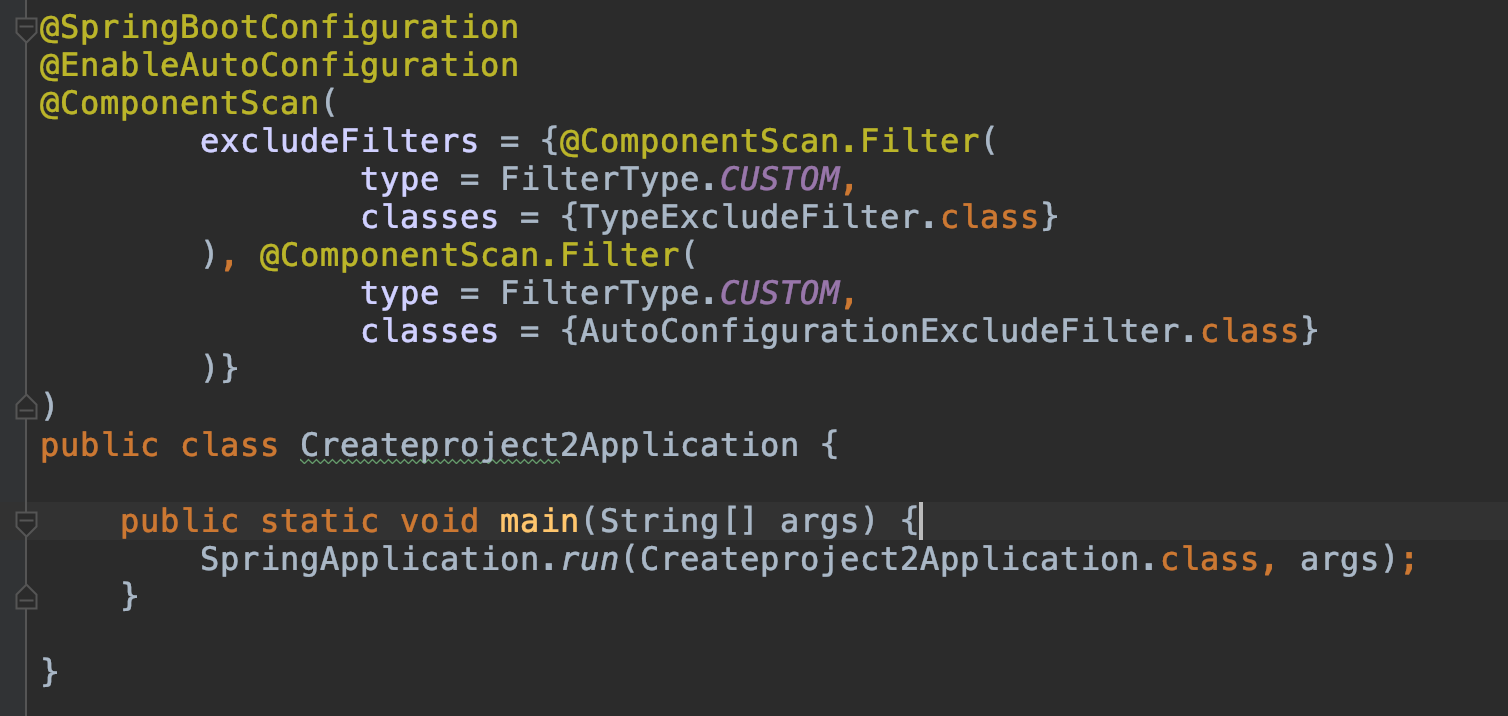
@SpringBootApplication
@SpringBootApplication是Spring Boot的核心注解,
它是一个组合注解
(通常我们称由多个注解组成的注解叫组合注解)。点进去瞧一眼
@Target({ElementType.TYPE})
@Retention(RetentionPolicy.RUNTIME)
@Documented
@Inherited
@SpringBootConfiguration
@EnableAutoConfiguration
@ComponentScan(
    excludeFilters = {@Filter(
    type = FilterType.CUSTOM,
    classes = {TypeExcludeFilter.class}
), @Filter(
    type = FilterType.CUSTOM,
    classes = {AutoConfigurationExcludeFilter.class}
)}
)
public @interface SpringBootApplication {
@SpringBootApplication注解主要(我这里说了主要喔)组合了
@Configuration,@EnableAutoConfiguration,@ComponentScan
言外之意就是可以将这三个注解直接替换@SpringBootApplication
- @EnableAutoCOnfiguration让Spring Boot根据类路径中的jar包依赖为当前项目进行自动配置。例如添加了spring-boot-starter-web依赖,会自动添加Tomcat和Spring MVC的依赖,Spring Boot就会对Tomcat和Spring MVC进行自动配置。
2.@ComponentScan 让Spring Boot去扫描与入口类同级以及以下包的Bean(使用注解配置的),把他们添加到Spring容器,若为JPA项目还可以扫描标注@Entity的实体类。
3.@Configuration 表示当前是一个配置类,也会被Spring进行加载
关闭特定的自动配置
SpringBoot为我们提供了自动化配置,但是在某些特定的场景下,
我们可能不需要某个自动配置,
这时可以在@SpringBootApplication中配置
@SpringBootApplication(exclude = {DataSourceAutoConfiguration.class})
定制Banner
什么是Banner呢,
就是在Spring Boot项目启动的时候最开始显示的横幅。
我记得我第一次启动Spring Boot项目的时候印象最深的就是这个横幅
内心不断OS(wc这么酷炫的吗)。
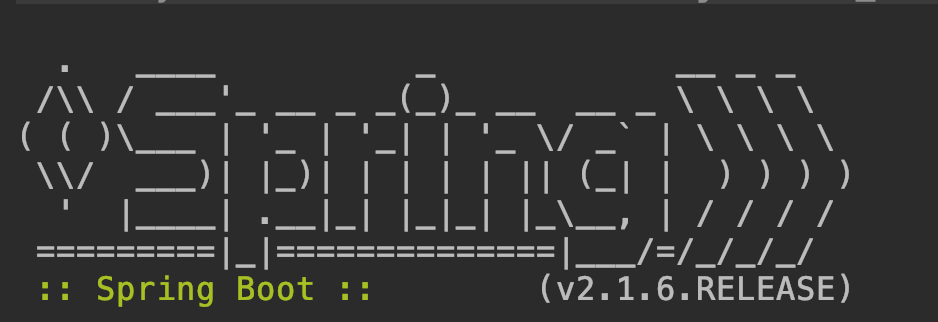
下面我们看看怎么自定义横幅吧。如果不自定义,默认显示下面图案
修改Banner
- 我们在src/main/sources下新建一个banner.txt
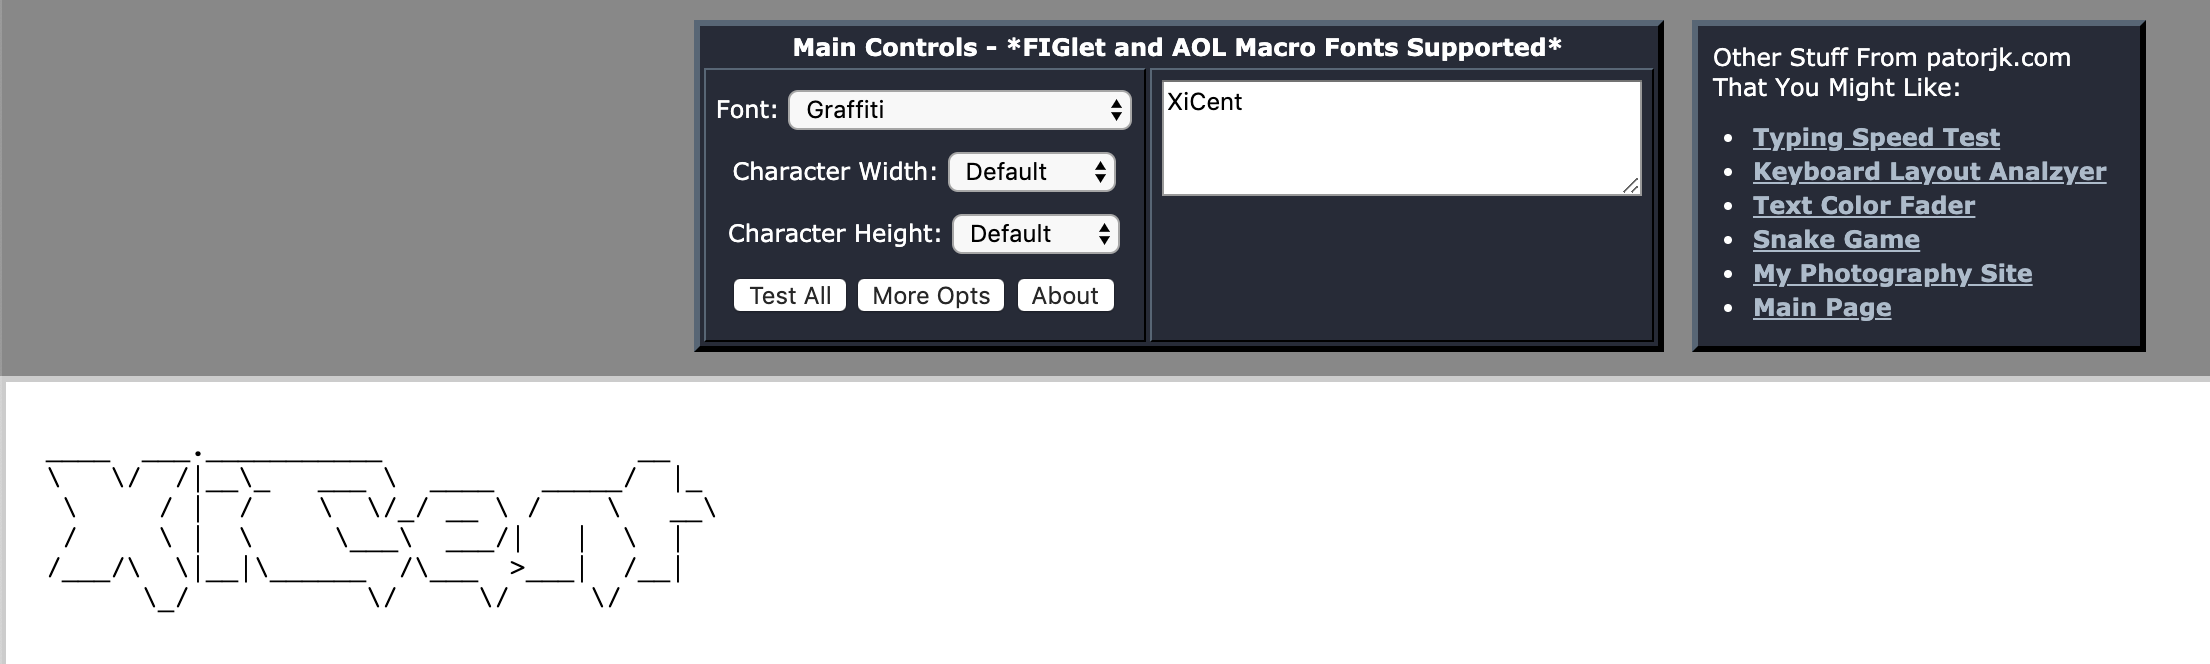
- 登录http://patorjk.com/software/taag 生成我们自己想要的图案
![image]()
- 复制图案到banner.txt中
![image]()
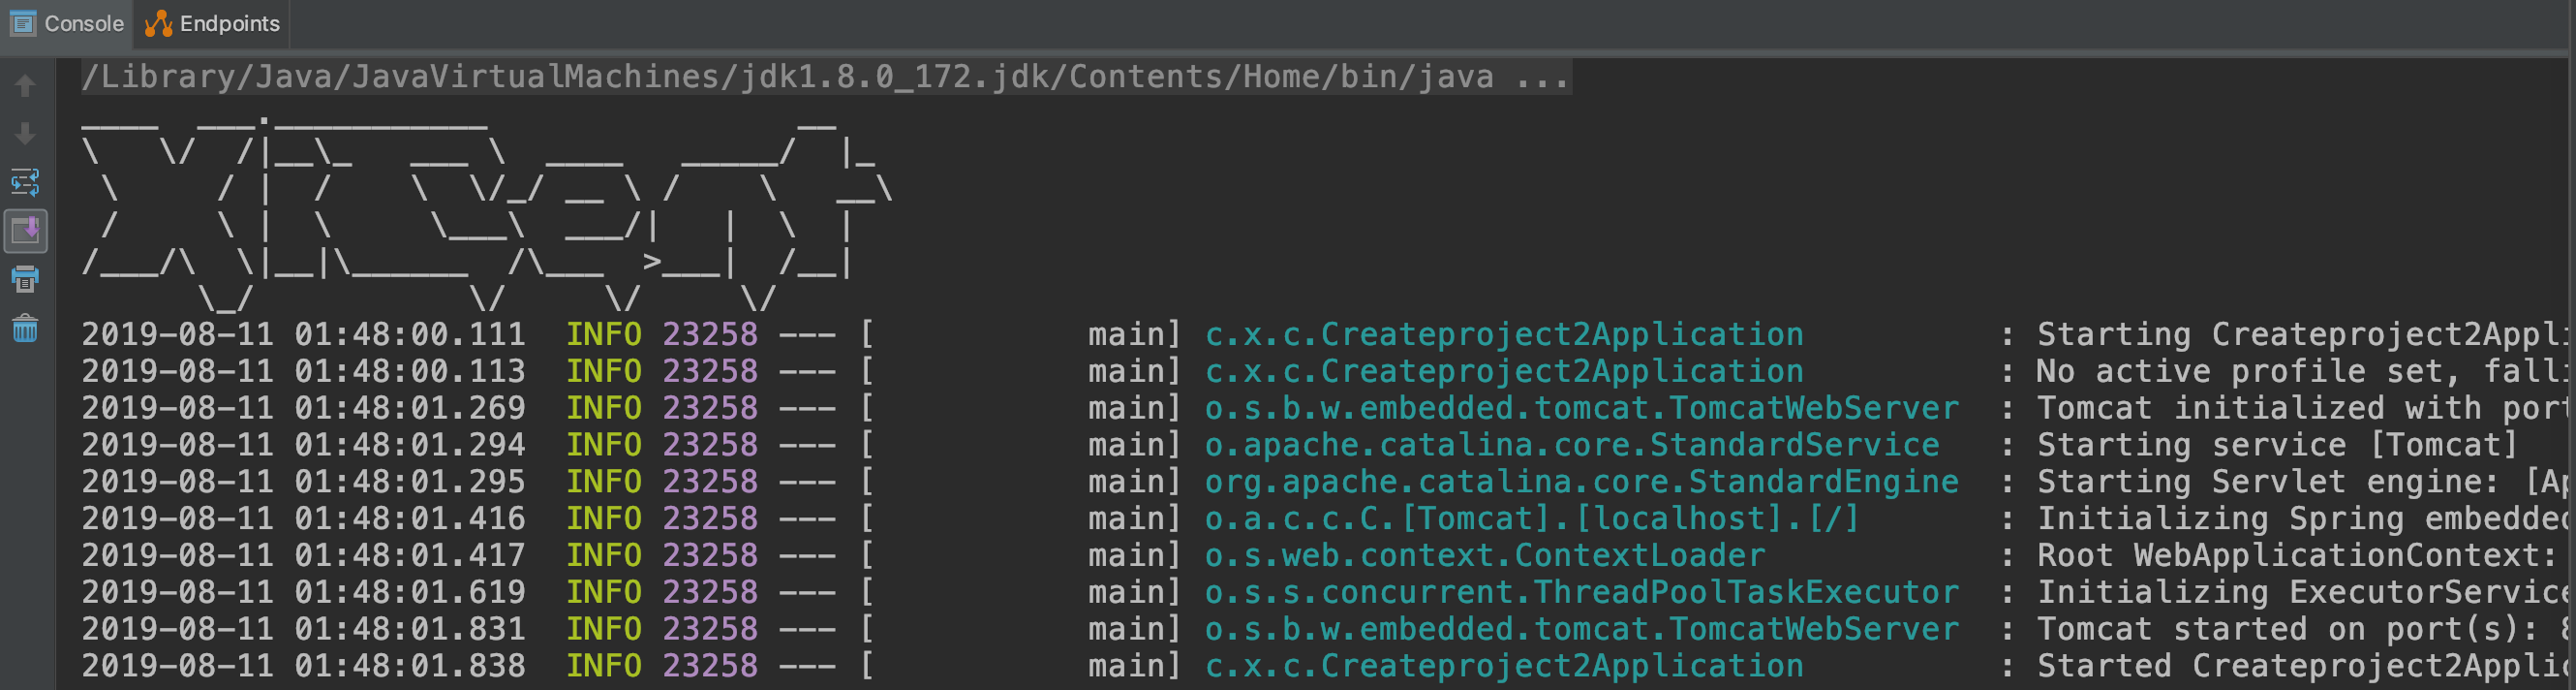
- 启动项目验证
![image]()

关闭banner
当然了,这个banner也不是必须要显示的,我们可以手动关闭它。
-
修改启动类中的main方法
  SpringApplication app = new SpringApplication(Createproject2Application.class);
		app.setBannerMode(Banner.Mode.OFF);
		app.run(args);
Spring Boot的配置文件
Spring Boot在src/main/resources下有一个全局的配置文件
application.properties或application.yml

说到yml这种配置文件,是有点东西的。全称为yaml,是以数据为中心,
支持多种数据格式(如数组),在配置数据的时候具有面向对象的特征。
简单示例
在两种配置文件中配置Tomcat的端口号和默认的访问路径
- application.properties中可以如下配置:
server.port=8888
server.servlet.context-path=/xicent
- application.yml中可以如下配置:
server:
  port: 8888
  servlet:
    context-path: /xicent
其实我们从简单的实例中可以看出,yaml的格式更加清晰,所有配置看过去一目了然。并且它是有序的。
在以前idea中是不支持yml提示的,现在也都支持了。
但是yaml却引来了另一个问题,yaml格式有严格的要求,稍有配错都有可能出现问题。
因此在项目中看我们如何去取舍了,目前默认还是以properties为主。
使用xml配置
Spring Boot提倡的是0配置,即无xml配置,但是在实际开发中,
我们有时难免会需要加载xml配置,
这时我们就可以通过Spring提供的@ImportResource来加载xml配置
例如:
@ImportResource({"classpath:some-context.xml"})
这样我们就成功加载xml配置啦。
命令行参数配置
在Spring Boot中,我们大部分配置都写在了配置文件中,
但是有些配置我们可能需要启动时才能确定,
因此Spring Boot还提供了一种命令行配置方式
下面演示如何在运行jar包的时候,配置Tomcat的端口号
java -jar xx.jar --server.port=8888
常规属性配置
在常规的Spring环境中,如果我们想加载某个properties文件,
获取其中的配置。通常的做法是在类上加注解@PropertiesSource()
指定配置文件的位置。
然后在类中使用@Value()加载属性。

在Spring Boot中,
我们只需在application.properties中定义属性,
直接用@Value注入即可。
1.application.properties增加属性
xicent.author=kris
xicent.age=1
2.修改入口类
@Value("${xicent.author}")
String name;

@Value("${xicent.age}")
int age;

@RequestMapping("/")
String index(){
    return "author is"+name+",age is"+age;
}
获取其他属性
通用我们用@Value都是获取properties配置文件中配置的属性,
但是@Value的功能可不远远不止这一点喔。
通过@Value注解,
我们还能获取系统属性,url,随机数,文字流等等。
//  普通字符串
    @Value("xicent")
    private String str;

//  操作系统名称
    @Value("#{systemProperties['os.name']}")
    private String osName;

//    随机数
    @Value("#{T(java.lang.Math).random()*168.0}")
    private double randomNumber;

//  其他bean的属性
    @Value("#{demoService.another}")
    private String fromAnother;

//  获取文件资源
    @Value("classpath:banner.txt")
    private Resource file;

//   获取地址资源
    @Value("http://www.baidu.com")
    private Resource url;

    public void testValue() throws IOException {
        System.out.println(getStr());
        System.out.println(getOsName());
        System.out.println(getRandomNumber());
        System.out.println(getFromAnother());
        System.out.println(IOUtils.toString(file.getInputStream(),"UTF-8"));
        System.out.println(IOUtils.toString(url.getInputStream()));
    }

//省略getter,setter方法
访问接口
    @RequestMapping("/testvalue")
	void testValue() throws IOException {
		xicentBean.testValue();
	}

类型安全的配置(基于properties)
上面的例子,我们每个属性都要使用@Value注解会显得格外的麻烦,
我们配置的属性通常会是许多个。
在Spring Boot中使用@ConfigurationProperties
将配置与bean相关联,
这就是所谓的类型安全的配置。

这里将配置配在一个专门的properties文件中,
当然也能直接配置在application.properties中
1.resources文件夹下新增xicent.properties文件,添加如下属性
xicent.author=kris
xicent.age=1
2.创建一个类
@Component
@PropertySource("classpath:xicent.properties")
@ConfigurationProperties(prefix = "xicent")
public class XicentBean {
    private String author;
    private int age;
代码解释:@PropertySource可以指定我们需要加载的文件的路径。@ConfigurationProperties指定我们属性配置的前缀
3.创建接口访问
    @Autowired
	XicentBean xicentBean;

	@RequestMapping("/xicent")
	XicentBean getXicent(){
		return xicentBean;
	}
4.请求接口

Profile配置
Profile是Spring用来针对不同环境使用不同的配置文件。
一般命名为:application-{profile}.properties
(如application-prod.properties)。

然后在application.properties中
设置spring.profiles.active=prod来指定活动的Profile。
下面演示生产环境(prod)使用8888端口,
开发环境(dev)使用9999端口
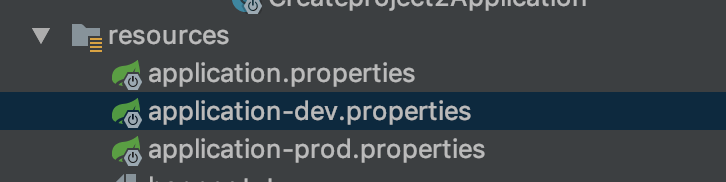
1.创建application-prod.properties,配置生产环境的端口
server.port=8888
2.创建application-dev.properties,配置开发环境的端口
server.port=9999
3.application.properties中指定生效的profile
spring.profiles.active=prod
4.启动项目,可以看到prod配置文件生效了,绑定端口为8888

疑问:如果我application.properties和application-prod.properties都配了端口,哪个会生效呢? 答案是prod的会生效
ok,今天就暂时分享这么多啦,以上讲的是Spring Boot中的基本配置,其中有很多地方都是可以深挖单独拿出来讲的。
今天这里只讲了一些基本的,比较常用的基本配置,后续我们还会再详细分享。
自定义Spring Boot Starter
1、SpringBoot starter机制
SpringBoot中的starter是一种非常重要的机制,能够抛弃以前繁杂的配置,将其统一集成进starter,应用者只需要在maven中引入starter依赖,
SpringBoot就能自动扫描到要加载的信息并启动相应的默认配置。starter让我们摆脱了各种依赖库的处理,需要配置各种信息的困扰。
SpringBoot会自动通过classpath路径下的类发现需要的Bean,并注册进IOC容器。SpringBoot提供了针对日常企业应用研发各种场景的spring-boot-starter依赖模块。
所有这些依赖模块都遵循着约定成俗的默认配置,并允许我们调整这些配置,即遵循“约定大于配置”的理念。
2、为什么要自定义starter
在我们的日常开发工作中,经常会有一些独立于业务之外的配置模块,我们经常将其放到一个特定的包下,然后如果另一个工程需要复用这块功能的时候,需要将代码硬拷贝到另一个工程,
重新集成一遍,麻烦至极。如果我们将这些可独立于业务代码之外的功配置模块封装成一个个starter,复用的时候只需要将其在pom中引用依赖即可,SpringBoot为我们完成自动装配,简直不要太爽。
3、自定义starter的命名规则
SpringBoot提供的starter以spring-boot-starter-xxx的方式命名的。官方建议自定义的starter使用xxx-spring-boot-starter命名规则。以区分SpringBoot生态提供的starter。
4、代码地址
https://gitee.com/tenic/demo-spring-boot-starter.git
5、代码具体实现
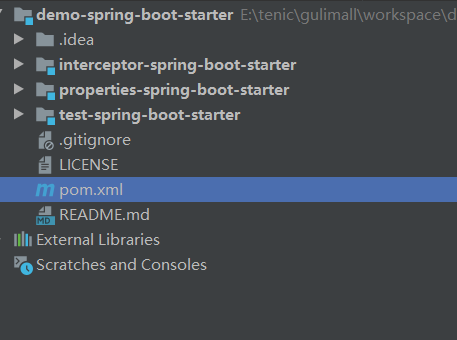
- 目录结构如下图所示,其中demo-spring-boot-starter为父工程,properties-spring-boot-starter,interceptor-spring-boot-starter是我们今天要实现的2个自定义starter,
test-spring-boot-starter是我们的测试工程![]()
- demo-spring-boot-starter 创建
-
我们创建一个空的springboot项目,我们依赖的版本是2.3.7.RELEASE, 具体的POM文件依赖内容如下代码所示:
<?xml version="1.0" encoding="UTF-8"?>
<project xmlns="http://maven.apache.org/POM/4.0.0"
         xmlns:xsi="http://www.w3.org/2001/XMLSchema-instance"
         xsi:schemaLocation="http://maven.apache.org/POM/4.0.0 http://maven.apache.org/xsd/maven-4.0.0.xsd">
    <modelVersion>4.0.0</modelVersion>
    <packaging>pom</packaging>
    <!--子模块工程-->
    <modules>
        <module>properties-spring-boot-starter</module>
        <module>test-spring-boot-starter</module>
        <module>interceptor-spring-boot-starter</module>
    </modules>

    <parent>
        <groupId>org.springframework.boot</groupId>
        <artifactId>spring-boot-starter-parent</artifactId>
        <version>2.3.7.RELEASE</version>
    </parent>
    <groupId>com.demo</groupId>
    <artifactId>demo-spring-boot-starter</artifactId>
    <version>0.0.1-RELEASE</version>

    <name>demo-spring-boot-starter</name>
    <description>Demo project for Spring Boot</description>

    <properties>
        <java.version>1.8</java.version>
    </properties>

    <dependencies>
        <dependency>
            <groupId>org.springframework.boot</groupId>
            <artifactId>spring-boot-starter</artifactId>
        </dependency>
        <dependency>
            <groupId>org.springframework.boot</groupId>
            <artifactId>spring-boot-starter-web</artifactId>
        </dependency>
        <dependency>
            <groupId>org.springframework.boot</groupId>
            <artifactId>spring-boot-autoconfigure</artifactId>
        </dependency>
    </dependencies>

</project>
-
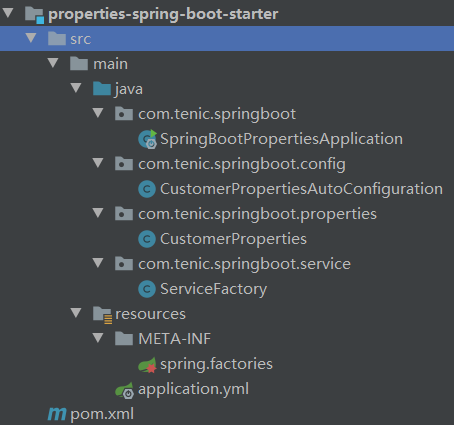
- properties-spring-boot-starter创建,
-
我们这里创建一个父工程的子模块,具体模块划分如下图所示
![]()
-
因为我们依赖父工程,且父工程已经依赖了我们需要的基本的jar包,所以我们的POM文件相对简单一点
<?xml version="1.0" encoding="UTF-8"?> <project xmlns="http://maven.apache.org/POM/4.0.0" xmlns:xsi="http://www.w3.org/2001/XMLSchema-instance" xsi:schemaLocation="http://maven.apache.org/POM/4.0.0 http://maven.apache.org/xsd/maven-4.0.0.xsd"> <parent> <artifactId>demo-spring-boot-starter</artifactId> <groupId>com.demo</groupId> <version>0.0.1-RELEASE</version> </parent> <modelVersion>4.0.0</modelVersion> <artifactId>properties-spring-boot-starter</artifactId> <packaging>jar</packaging> </project> -
创建一个Properties相关的类,用来使用配置相关的信息
package com.tenic.springboot.properties; import org.springframework.boot.context.properties.ConfigurationProperties; @ConfigurationProperties(prefix = "tenic") public class CustomerProperties { private String username; private String password; private String driver; private String url; // ... 省略 有参,无参 构造函数 getter/setter方法 ... } -
创建一个使用到Properties信息的一个类,比如我们创建一个工厂类ServiceFactory
package com.tenic.springboot.service; import com.tenic.springboot.properties.CustomerProperties; public class ServiceFactory { public ServiceFactory(CustomerProperties customerProperties) { System.out.println(customerProperties.toString()); } } -
创建一个自动装配的类,将我们上边的ServiceFactory生成Bean 放入到我们的Spring 容器里面来
package com.tenic.springboot.config; import com.tenic.springboot.properties.CustomerProperties; import com.tenic.springboot.service.ServiceFactory; import org.springframework.beans.factory.annotation.Autowired; import org.springframework.boot.context.properties.EnableConfigurationProperties; import org.springframework.context.annotation.Bean; import org.springframework.context.annotation.Configuration; @Configuration @EnableConfigurationProperties({CustomerProperties.class}) public class CustomerPropertiesAutoConfiguration { @Autowired CustomerProperties properties; @Bean public ServiceFactory getServiceFactory(){ return new ServiceFactory(properties); } } -
在resource目录下创建一个META-INF/spring.factories的文件,文件的内容就是我们要自动装配的具体的信息
org.springframework.boot.autoconfigure.EnableAutoConfiguration=\ com.tenic.springboot.config.CustomerPropertiesAutoConfiguration -
在resource目录下创建一个application.yml的文件,配置上我们需要的配置信息
server: port: 9091 tenic: username: tenic password: 123456 driver: com.tenic.springboot url: www.cnblogs.com/tenic -
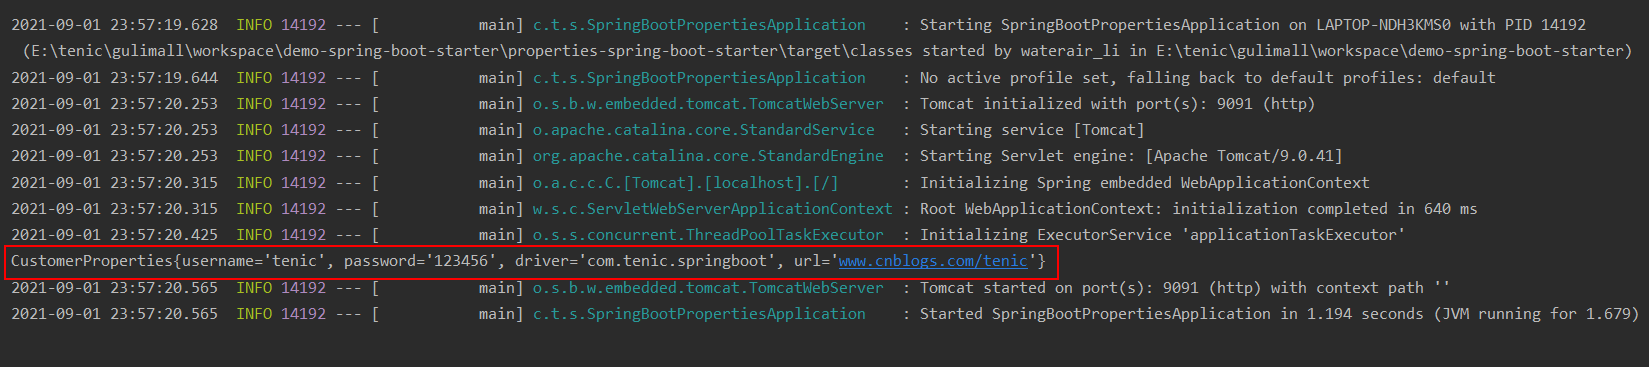
启动模块的启动类, 可以看到控制台上打印出来了我们配置的具体信息,说明已经将具体的配置信息自动装配进去了
![]()
-
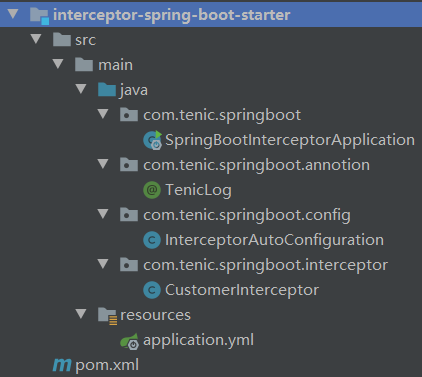
- interceptor-spring-boot-starter 创建
- 我们这里来实现一个对接口调用统计时间的一个starter, 具体我们是使用到了拦截器的机制,在执行前确定是啥时候开始,执行后确定啥时候结束,统计花费时长。
我们也同样创建一个父工程的子模块,具体的目录结构如下图所示![]()
- 具体的POM文件内容
<?xml version="1.0" encoding="UTF-8"?> <project xmlns="http://maven.apache.org/POM/4.0.0" xmlns:xsi="http://www.w3.org/2001/XMLSchema-instance" xsi:schemaLocation="http://maven.apache.org/POM/4.0.0 http://maven.apache.org/xsd/maven-4.0.0.xsd"> <parent> <artifactId>demo-spring-boot-starter</artifactId> <groupId>com.demo</groupId> <version>0.0.1-RELEASE</version> </parent> <modelVersion>4.0.0</modelVersion> <packaging>jar</packaging> <artifactId>interceptor-spring-boot-starter</artifactId> </project> - 我们创建一个注解,帮我们在相应的方法上打上标记
package com.tenic.springboot.annotion; import java.lang.annotation.*; @Target(ElementType.METHOD) @Retention(RetentionPolicy.RUNTIME) @Documented @Inherited public @interface TenicLog { String desc() default ""; } - 创建自定义的拦截器,在拦截器中记录上我们请求的地址,接口,花费时长等信息
package com.tenic.springboot.interceptor; import com.tenic.springboot.annotion.TenicLog; import org.springframework.web.method.HandlerMethod; import org.springframework.web.servlet.ModelAndView; import org.springframework.web.servlet.handler.HandlerInterceptorAdapter; import javax.servlet.http.HttpServletRequest; import javax.servlet.http.HttpServletResponse; public class CustomerInterceptor extends HandlerInterceptorAdapter { private final ThreadLocal<Long> threadLocal = new ThreadLocal<>(); @Override public boolean preHandle(HttpServletRequest request, HttpServletResponse response, Object handler) throws Exception { HandlerMethod handlerMethod = (HandlerMethod) handler; TenicLog tenicLog = handlerMethod.getMethodAnnotation(TenicLog.class); if(tenicLog!=null) { threadLocal.set(System.currentTimeMillis()); } return true; } @Override public void postHandle(HttpServletRequest request, HttpServletResponse response, Object handler, ModelAndView modelAndView) throws Exception { HandlerMethod handlerMethod = (HandlerMethod) handler; TenicLog tenicLog = handlerMethod.getMethodAnnotation(TenicLog.class); if(tenicLog!=null){ Long costTime = System.currentTimeMillis()-threadLocal.get(); String desc = tenicLog.desc(); String name = handlerMethod.getMethod().getDeclaringClass()+" " +handlerMethod.getMethod().getName(); StringBuffer requestURL = request.getRequestURL(); System.out.println("请求地址为:"+ requestURL +" 方法是:"+ name +" 描述信息是:"+ desc +" 总耗时:" + costTime + "ms"); } } } - 创建自动装配类,并将拦截器注册到容器中
package com.tenic.springboot.config; import com.tenic.springboot.interceptor.CustomerInterceptor; import org.springframework.context.annotation.Configuration; import org.springframework.web.servlet.config.annotation.InterceptorRegistry; import org.springframework.web.servlet.config.annotation.WebMvcConfigurer; @Configuration public class InterceptorAutoConfiguration implements WebMvcConfigurer { @Override public void addInterceptors(InterceptorRegistry registry) { registry.addInterceptor(new CustomerInterceptor()); } } - 在resource目录下创建一个application.yml的文件,配置上我们需要的配置信息
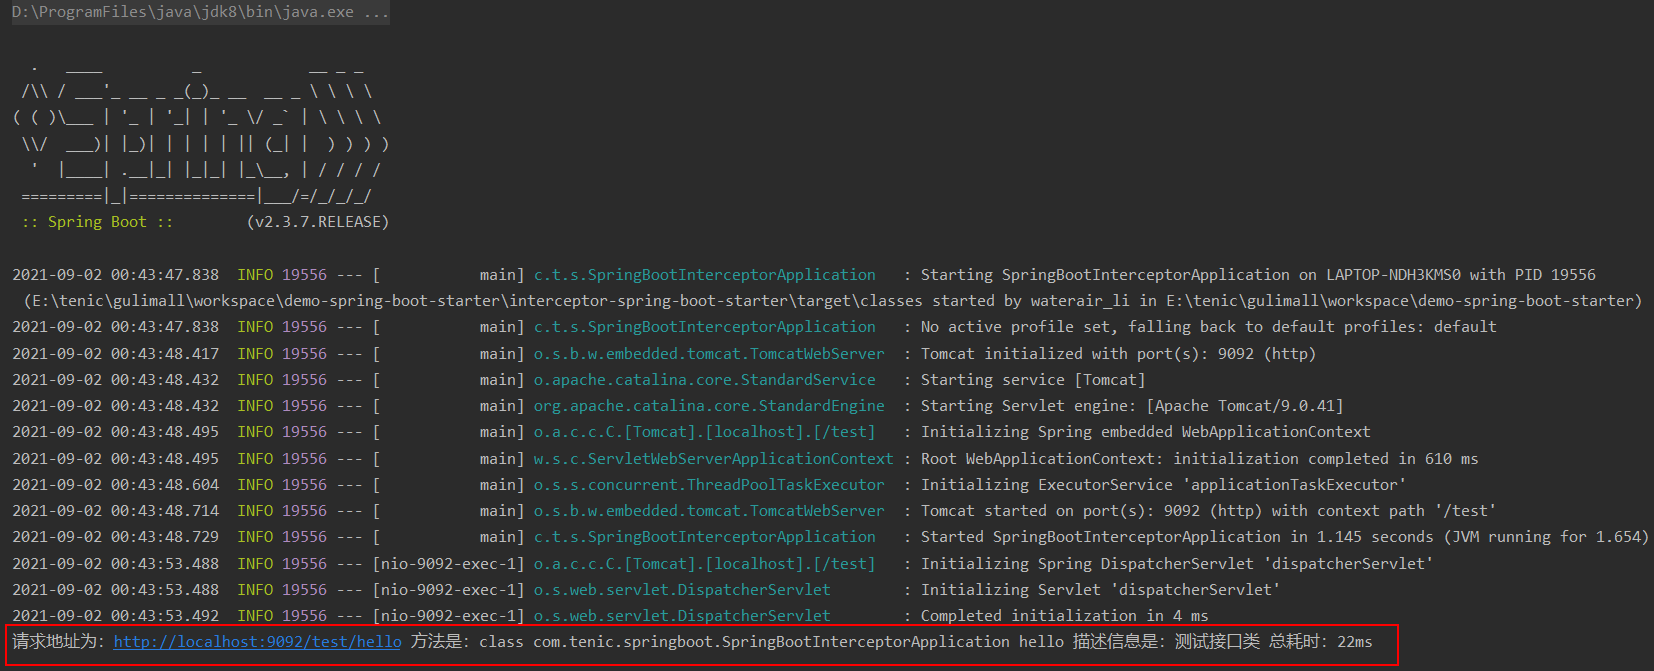
server: port: 9092 servlet: context-path: /test - 启动模块的启动类,在浏览器中调用我们的接口 http://localhost:9092/test/hello ,可以在控制台中查看到具体的日志信息
package com.tenic.springboot; import com.tenic.springboot.annotion.TenicLog; import org.springframework.boot.SpringApplication; import org.springframework.boot.autoconfigure.SpringBootApplication; import org.springframework.web.bind.annotation.GetMapping; import org.springframework.web.bind.annotation.ResponseBody; import org.springframework.web.bind.annotation.RestController; @SpringBootApplication //@RestController public class SpringBootInterceptorApplication { public static void main(String[] args) { SpringApplication.run(SpringBootInterceptorApplication.class); } /** * 供测试使用 */ // @GetMapping("/hello") // @TenicLog(desc = "测试接口类") // public String hello() { // return "hello world!"; // } }![]()
- 我们这里来实现一个对接口调用统计时间的一个starter, 具体我们是使用到了拦截器的机制,在执行前确定是啥时候开始,执行后确定啥时候结束,统计花费时长。
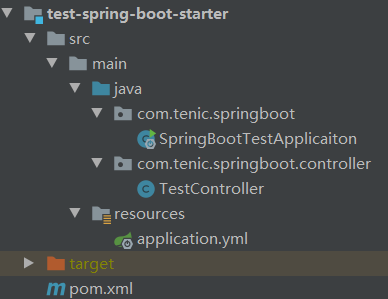
- test-spring-boot-starter 创建
- 我们这里只是验证上边2个starter,创建一个父工程的子模块,验证模块的目录结构比较简单,如下图所示
![]()
- 我们依赖了父工程,验证上边2个模块,所以也要添加上边的模块到maven中,具体的POM文件内容如下
<?xml version="1.0" encoding="UTF-8"?> <project xmlns="http://maven.apache.org/POM/4.0.0" xmlns:xsi="http://www.w3.org/2001/XMLSchema-instance" xsi:schemaLocation="http://maven.apache.org/POM/4.0.0 http://maven.apache.org/xsd/maven-4.0.0.xsd"> <parent> <artifactId>demo-spring-boot-starter</artifactId> <groupId>com.demo</groupId> <version>0.0.1-RELEASE</version> </parent> <modelVersion>4.0.0</modelVersion> <artifactId>test-spring-boot-starter</artifactId> <dependencies> <dependency> <groupId>com.demo</groupId> <artifactId>properties-spring-boot-starter</artifactId> <version>0.0.1-RELEASE</version> </dependency> <dependency> <groupId>com.demo</groupId> <artifactId>interceptor-spring-boot-starter</artifactId> <version>0.0.1-RELEASE</version> </dependency> </dependencies> </project> - 在resource目录下创建一个application.yml的文件,配置上我们需要的配置信息
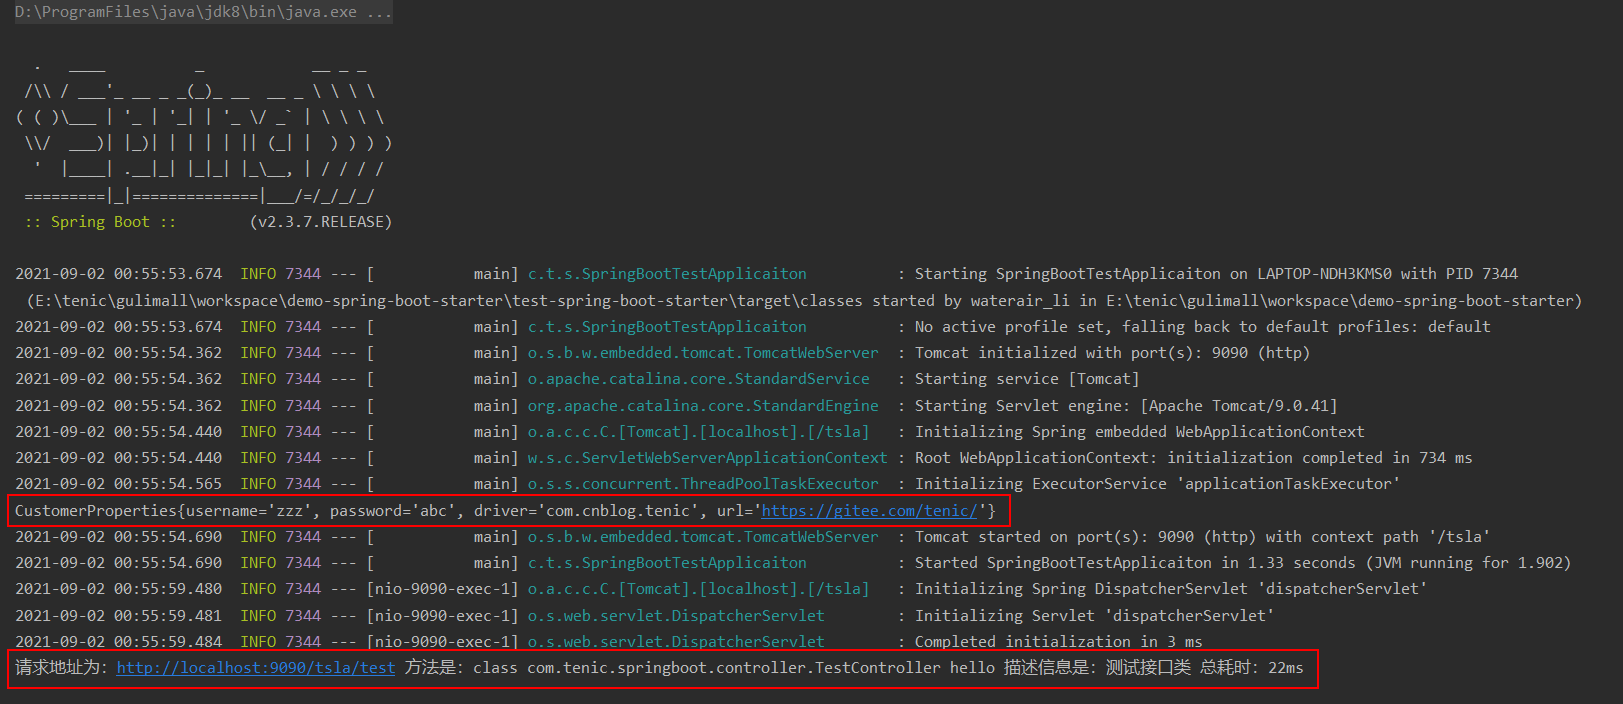
server: port: 9090 servlet: context-path: /tsla tenic: username: zzz password: abc driver: com.cnblog.tenic url: https://gitee.com/tenic/ - 创建一个启动类和一个controller类,创建好之后,启动一下,访问http://localhost:9090/tsla/test, 看以在日志上看到我们的接口调用信息
package com.tenic.springboot.controller; import com.tenic.springboot.annotion.TenicLog; import org.springframework.web.bind.annotation.GetMapping; import org.springframework.web.bind.annotation.RestController; @RestController public class TestController { @GetMapping("/test") @TenicLog(desc = "测试接口类") public String hello(){ return "hello world!"; } }package com.tenic.springboot; import org.springframework.boot.SpringApplication; import org.springframework.boot.autoconfigure.SpringBootApplication; @SpringBootApplication public class SpringBootTestApplicaiton { public static void main(String[] args) { SpringApplication.run(SpringBootTestApplicaiton.class); } }![]()
- 我们这里只是验证上边2个starter,创建一个父工程的子模块,验证模块的目录结构比较简单,如下图所示

 浙公网安备 33010602011771号