Spring5

Spring

1, Spring

image-20220402114445146

1.1 简介:

Spring创始人:Rod Johnson

官网地址:https://spring.io/projects/spring-framework

官方文档:https://docs.spring.io/spring-framework/docs/current/reference/html/core.html

GitHub:https://github.com/spring-projects/spring-framework

视频地址:https://www.bilibili.com/video/BV1WE411d7Dv
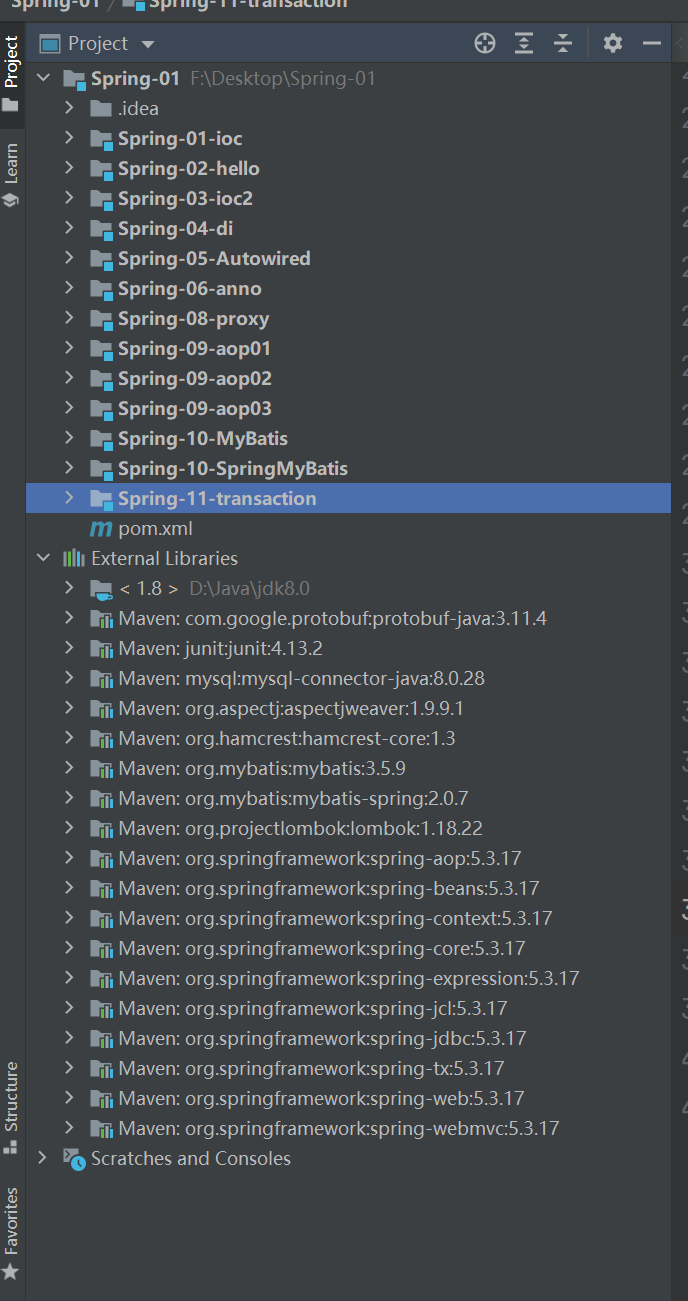
项目结构:

image-20220407225201406

本人练习代码下载地址:

阿里云:

链接:https://pan.baidu.com/s/1igtSaMC1UosehZuyTVpEqg 提取码:dyb2


Maven依赖:

<dependency>
   <groupId>org.springframework</groupId>
   <artifactId>spring-webmvc</artifactId>
   <version>5.3.17</version>
</dependency>

<dependency>
   <groupId>org.springframework</groupId>
   <artifactId>spring-jdbc</artifactId>
   <version>5.3.17</version>
</dependency>

父类Maven依赖:

<?xml version="1.0" encoding="UTF-8"?>
<project xmlns="http://maven.apache.org/POM/4.0.0"
        xmlns:xsi="http://www.w3.org/2001/XMLSchema-instance"
        xsi:schemaLocation="http://maven.apache.org/POM/4.0.0 http://maven.apache.org/xsd/maven-4.0.0.xsd">
   <modelVersion>4.0.0</modelVersion>

   <groupId>org.example</groupId>
   <artifactId>Spring-01</artifactId>
   <packaging>pom</packaging>
   <version>1.0-SNAPSHOT</version>
   <modules>
       <module>Spring-01-ioc</module>
       <module>Spring-02-hello</module>
       <module>Spring-03-ioc2</module>
       <module>Spring-04-di</module>
       <module>Spring-05-Autowired</module>
       <module>Spring-06-anno</module>
       <module>Spring-08-proxy</module>
       <module>Spring-09-aop01</module>
       <module>Spring-09-aop02</module>
       <module>Spring-09-aop03</module>
       <module>Spring-10-MyBatis</module>
       <module>Spring-10-SpringMyBatis</module>
       <module>Spring-11-transaction</module>
   </modules>

   <properties>
       <maven.compiler.source>8</maven.compiler.source>
       <maven.compiler.target>8</maven.compiler.target>
   </properties>

   <dependencies>
       <dependency>
           <groupId>org.springframework</groupId>
           <artifactId>spring-webmvc</artifactId>
           <version>5.3.17</version>
       </dependency>

       <dependency>
           <groupId>junit</groupId>
           <artifactId>junit</artifactId>
           <version>4.13.2</version>
           <scope>test</scope>
       </dependency>

       <!-- https://mvnrepository.com/artifact/org.aspectj/aspectjweaver -->
       <dependency>
           <groupId>org.aspectj</groupId>
           <artifactId>aspectjweaver</artifactId>
           <version>1.9.9.1</version>
       </dependency>

       <dependency>
           <groupId>org.projectlombok</groupId>
           <artifactId>lombok</artifactId>
           <version>1.18.22</version>
       </dependency>

   </dependencies>

</project>

Mybatis整合子类Maven:

<?xml version="1.0" encoding="UTF-8"?>
<project xmlns="http://maven.apache.org/POM/4.0.0"
        xmlns:xsi="http://www.w3.org/2001/XMLSchema-instance"
        xsi:schemaLocation="http://maven.apache.org/POM/4.0.0 http://maven.apache.org/xsd/maven-4.0.0.xsd">
   <parent>
       <artifactId>Spring-01</artifactId>
       <groupId>org.example</groupId>
       <version>1.0-SNAPSHOT</version>
   </parent>
   <modelVersion>4.0.0</modelVersion>

   <artifactId>Spring-11-transaction</artifactId>

   <dependencies>
       <dependency>
           <groupId>org.mybatis</groupId>
           <artifactId>mybatis</artifactId>
           <version>3.5.9</version>
       </dependency>

       <dependency>
           <groupId>mysql</groupId>
           <artifactId>mysql-connector-java</artifactId>
           <version>8.0.28</version>
       </dependency>

       <dependency>
           <groupId>org.springframework</groupId>
           <artifactId>spring-jdbc</artifactId>
           <version>5.3.17</version>
       </dependency>

       <!-- https://mvnrepository.com/artifact/org.mybatis/mybatis-spring -->
       <dependency>
           <groupId>org.mybatis</groupId>
           <artifactId>mybatis-spring</artifactId>
           <version>2.0.7</version>
       </dependency>
   </dependencies>

   <build>
       <resources>
           <resource>
               <directory>src/main/resources</directory>
               <includes>
                   <include>**/*.properties</include>
                   <include>**/*.xml</include>
               </includes>
               <filtering>true</filtering>
           </resource>
           <resource>
               <directory>src/main/java</directory>
               <includes>
                   <include>**/*.properties</include>
                   <include>**/*.xml</include>
               </includes>
               <filtering>true</filtering>
           </resource>
       </resources>
   </build>
   
   <properties>
       <maven.compiler.source>8</maven.compiler.source>
       <maven.compiler.target>8</maven.compiler.target>
   </properties>

</project>


1.2 优点:

  • Spring是一个开源的免费的框架(容器)!

  • Spring是一个轻量级,非入侵式的框架!

  • 控制反转(IOC), 面向切面编程(AOP)!

  • 支持事务的处理, 对框架整合的支持!

总结一句话:Spring就是一个轻量级的控制反转(IOC) 和面向切面编程(AOP)的框架!


2, 控制翻转

控制反转IoC(Inversion of Control),是一种设计思想,DI(依赖注入)是实现IoC的一种方法,也有人认为DI只是IoC的另一种说法。没有IoC的程序中 , 我们使用面向对象编程 , 对象的创建与对象间的依赖关系完全硬编码在程序中,对象的创建由程序自己控制,控制反转后将对象的创建转移给第三方,个人认为所谓控制反转就是:获得依赖对象的方式反转了。

image-20220402115014007

UserDao

package top.hanbing777.dao;

public interface UserDao {
   void getUser();
}

UserDaoImp

package top.hanbing777.dao;

public class UserDaoImpl implements UserDao{

   @Override
   public void getUser() {
       System.out.println("获取用户信息");
  }
}

UserMysqlImpl

package top.hanbing777.dao;

public class UserMysqlImpl implements UserDao{
   @Override
   public void getUser() {
       System.out.println("获取Mysql数据");
  }
}

Test

@Test
public void test01(){
   UserService userService = new UserServiceImpl();

  ((UserServiceImpl) userService).setUserDao(new UserDaoImpl());
   userService.getUser();
}


3, Hello Spring

image-20220402115039049

实体类User

package top.hanbing777.pojo;

public class Hello {
   private String hello;

   public String getHello() {
       return hello;
  }

   public void setHello(String hello) {
       this.hello = hello;
  }

}

配置xml(beans.xml)

<?xml version="1.0" encoding="UTF-8"?>
<beans xmlns="http://www.springframework.org/schema/beans"
xmlns:xsi="http://www.w3.org/2001/XMLSchema-instance"
xsi:schemaLocation="http://www.springframework.org/schema/beans
https://www.springframework.org/schema/beans/spring-beans.xsd">

<bean id="hello" class="top.hanbing777.pojo.Hello">
<property name="hello" value="Hello Spring!"/>
</bean>
</beans>

Test

import org.junit.Test;
import org.springframework.context.ApplicationContext;
import org.springframework.context.support.ClassPathXmlApplicationContext;
import top.hanbing777.pojo.Hello;

public class MyTest {

@Test
public void test01(){
ApplicationContext context = new ClassPathXmlApplicationContext("beans.xml");
Hello hello = (Hello) context.getBean("hello");
System.out.println(hello.getHello());
}
}

总结

相当于xml文件帮你new一个对象,通过set方法注入值, 然后放入池子中. 后Hello hello1 = (Hello) context.getBean("hello"); 和 Hello hello2 = (Hello) context.getBean("hello");是同一个对象,这里也可以获得不同的对象,后面会说到.

4,IOC创建对象的方式

4.1 通过无惨构造方法创建

User.java

package top.hanbing777.pojo;

public class User1 {

private String name;

public User1(){
System.out.println("user无参构造方法");
}

public void setName(String name) {
this.name = name;
}

public void show(){
System.out.println("name1="+name);
}

}

xml

<?xml version="1.0" encoding="UTF-8"?>
<beans xmlns="http://www.springframework.org/schema/beans"
xmlns:xsi="http://www.w3.org/2001/XMLSchema-instance"
xsi:schemaLocation="http://www.springframework.org/schema/beans
https://www.springframework.org/schema/beans/spring-beans.xsd">
<bean id="user1" class="top.hanbing777.pojo.User1">
<property name="name" value="韩冰"/>
</bean>
</beans>

Test

@Test
public void test01(){
ApplicationContext context = new ClassPathXmlApplicationContext("beans1.xml");
User1 user1 = (User1) context.getBean("user1");
user1.show();
}

结果

image-20220402121456540

4.2 通过有参构造方法来创建

User.java

package top.hanbing777.pojo;

public class User2 {
private String name;

public User2(String name) {
this.name = name;
}

public void show(){
System.out.println("name2="+name);
}
}

xml(有三种写法)

<?xml version="1.0" encoding="UTF-8"?>
<beans xmlns="http://www.springframework.org/schema/beans"
xmlns:xsi="http://www.w3.org/2001/XMLSchema-instance"
xsi:schemaLocation="http://www.springframework.org/schema/beans
https://www.springframework.org/schema/beans/spring-beans.xsd">
<!--方法一-->
<bean id="user2" class="top.hanbing777.pojo.User2" name="u2">
<constructor-arg name="name" value="韩冰"/>
</bean>

<!--方法二-->
<bean id="user2" class="top.hanbing777.pojo.User2">
<constructor-arg index="0" value="韩冰"/>
</bean>

<!--方法三-->
<bean id="user2" class="top.hanbing777.pojo.User2">
<constructor-arg type="java.lang.String" value="韩冰"/>
</bean>

</beans>

注意:最常用的还是name=""

Test

@Test
public void test02() {
ApplicationContext context = new ClassPathXmlApplicationContext("beans2.xml");
User2 user2 = (User2) context.getBean("user2");
user2.show();
}

结果

image-20220402132817982

注意:有参构造顶替无参构造,要想继续使用无参构造,需要再添加无参构造方法

5,Spring配置

5.1 别名

<bean id="hello" class="top.hanbing777.pojo.Hello"  name="h1">
<property name="hello" value="Hello Spring!"/>
</bean>

其中 name="h1"就是id="hello"的别名,等价于:

<alias name="hello" alias="h1"/>

5.2 import

把多个beans.xml文件合成一个applicationContext.xml

<import resource="beans1.xml"/>
<import resource="beans2.xml"/>

6, 依赖注入(DI)

6.1 构造器注入

我们在之前的案例4已经详细讲过了

6.2 set注入(重点)

pojo实体类

Address类

package top.hanbing777.pojo;

public class Address {
private String address;

public String getAddress() {
return address;
}

public void setAddress(String address) {
this.address = address;
}

@Override
public String toString() {
return "Address{" +
"address='" + address + '\'' +
'}';
}
}

Student类

package top.hanbing777.pojo;

import java.util.*;

public class Student {
private String name;
private Address address;
private String[] books;
private List<String> hobbies;
private Map<String,String> card;
private Set<String> games;
private String wife;
private Properties info;

public Set<String> getGames() {
return games;
}

public void setGames(Set<String> games) {
this.games = games;
}

public String getName() {
return name;
}

public void setName(String name) {
this.name = name;
}

public Address getAddress() {
return address;
}

public void setAddress(Address address) {
this.address = address;
}

public String[] getBooks() {
return books;
}

public void setBooks(String[] books) {
this.books = books;
}

public List<String> getHobbies() {
return hobbies;
}

public void setHobbies(List<String> hobbies) {
this.hobbies = hobbies;
}

public Map<String, String> getCard() {
return card;
}

public void setCard(Map<String, String> card) {
this.card = card;
}

public String getWife() {
return wife;
}

public void setWife(String wife) {
this.wife = wife;
}

public Properties getInfo() {
return info;
}

public void setInfo(Properties info) {
this.info = info;
}

@Override
public String toString() {
return "Student{" +
"name='" + name + '\'' +
", address=" + address +
", books=" + Arrays.toString(books) +
", hobbies=" + hobbies +
", card=" + card +
", games=" + games +
", wife='" + wife + '\'' +
", info=" + info +
'}';
}
}

xml

<?xml version="1.0" encoding="UTF-8"?>
<beans xmlns="http://www.springframework.org/schema/beans"
xmlns:xsi="http://www.w3.org/2001/XMLSchema-instance"
xsi:schemaLocation="http://www.springframework.org/schema/beans
https://www.springframework.org/schema/beans/spring-beans.xsd">


<bean id="student" class="top.hanbing777.pojo.Student">

<!--Sting-->
<property name="name" value="韩冰"/>

<!--引用类型address-->
<property name="address" ref="address"/>

<!--数组-->
<property name="books">
<array>
<value>西游记</value>
<value>三国演义</value>
</array>
</property>

<!--列表-->
<property name="hobbies">
<list>
<value>唱歌</value>
<value>爬山</value>
</list>
</property>

<!--map-->
<property name="card">
<map>
<entry key="姓名" value="韩冰"/>
<entry key="年龄" value="21"/>
</map>
</property>

<!--set-->
<property name="games">
<set>
<value>LOL</value>
<value>COC</value>
</set>
</property>

<!--空注入-->
<property name="wife">
<null/>
</property>

<!--配置类型注入-->
<property name="info">
<props>
<prop key="user">root</prop>
<prop key="pwd">root</prop>
</props>
</property>
</bean>

<!--address类-->
<bean id="address" class="top.hanbing777.pojo.Address">
<property name="address" value="开封"/>
</bean>

</beans>

Test

@Test
public void test03(){
ApplicationContext context = new ClassPathXmlApplicationContext("beans.xml");
Student student = (Student) context.getBean("student");
System.out.println(student);
}

结果

image-20220402135757725

image-20220402135724081

6.3 拓展注入实现

User类

package top.hanbing777.pojo;

public class User {
private String name;
private int age;

public User(String name, int age) {
this.name = name;
this.age = age;
}

public User() {
}

public String getName() {
return name;
}

public void setName(String name) {
this.name = name;
}

public int getAge() {
return age;
}

public void setAge(int age) {
this.age = age;
}

@Override
public String toString() {
return "User{" +
"name='" + name + '\'' +
", age=" + age +
'}';
}
}

xml

<?xml version="1.0" encoding="UTF-8"?>
<beans xmlns="http://www.springframework.org/schema/beans"
xmlns:xsi="http://www.w3.org/2001/XMLSchema-instance"
xmlns:p="http://www.springframework.org/schema/p"
xmlns:c="http://www.springframework.org/schema/c"
xsi:schemaLocation="http://www.springframework.org/schema/beans
https://www.springframework.org/schema/beans/spring-beans.xsd">

<!--导入约束 : xmlns:p="http://www.springframework.org/schema/p"-->
<!--P(属性: properties)命名空间 , 属性依然要设置set方法-->
<bean id="user1" class="top.hanbing777.pojo.User" p:name="韩冰" p:age="18" scope="singleton"/>

<!--导入约束 : xmlns:c="http://www.springframework.org/schema/c"-->
<!--C(构造: Constructor)命名空间 , 属性依然要设置set方法-->
<bean id="user2" class="top.hanbing777.pojo.User" c:name="韩冰" c:age="18" scope="prototype"/>

</beans>

Test

@Test
public void test02(){
ApplicationContext context = new ClassPathXmlApplicationContext("beansPC.xml");
User user1 = (User) context.getBean("user1");
User user2 = (User) context.getBean("user2");

System.out.println(user1.getName());
System.out.println(user2.getName());
}

结果

image-20220402140620493

6.4 Bean的作用域

在Spring中,那些组成应用程序的主体及由Spring IoC容器所管理的对象,被称之为bean。简单地讲,bean就是由IoC容器初始化、装配及管理的对象

image-20220402140802487

6.4.1 Singleton(默认)

当一个bean的作用域为Singleton,那么Spring IoC容器中只会存在一个共享的bean实例,并且所有对bean的请求,只要id与该bean定义相匹配,则只会返回bean的同一实例。Singleton是单例类型,就是在创建起容器时就同时自动创建了一个bean的对象,不管你是否使用,他都存在了,每次获取到的对象都是同一个对象。注意,Singleton作用域是Spring中的缺省作用域。要在XML中将bean定义成singleton,可以这样配置:

<bean id="user1" class="top.hanbing777.pojo.User" p:name="韩冰" p:age="18" scope="singleton"/>

Test

@Test
public void test02(){
ApplicationContext context = new ClassPathXmlApplicationContext("beansPC.xml");
User user1 = (User) context.getBean("user1");
User user2 = (User) context.getBean("user1");

System.out.println(user1==user2);
}

结果是true

image-20220402141432369

因为user1和user2本质上还是一个, Spring池子并没有重新new一个新的User类

6.4.2 Prototype

<bean id="user1" class="top.hanbing777.pojo.User" p:name="韩冰" p:age="18" scope="prototype"/>
@Test
public void test02(){
ApplicationContext context = new ClassPathXmlApplicationContext("beansPC.xml");
User user1 = (User) context.getBean("user1");
User user2 = (User) context.getBean("user1");

System.out.println(user1==user2);
}

结果会false

image-20220402141708912

因为当scope为prototype是, 每次获取User类的时候,池子都会重新new一个User类

6.4.3 Reques

当一个bean的作用域为Request,表示在一次HTTP请求中,一个bean定义对应一个实例;即每个HTTP请求都会有各自的bean实例,它们依据某个bean定义创建而成。该作用域仅在基于web的SpringApplicationContext情形下有效。考虑下面bean定义:

<bean id="loginAction" class="cn".csdn.LoginAction" scope="request"/>

针对每次HTTP请求,Spring容器会根据loginAction bean的定义创建一个全新的LoginAction bean实例,且该loginAction bean实例仅在当前HTTP request内有效,因此可以根据需要放心的更改所建例的内部状态,而其他请求中根据loginAction bean定义创建的实例,将不会看到这些特定于某个请的状态变化。当处理请求结束,request作用域的bean实例将被销毁。

6.4.4 Session

当一个bean的作用域为Session,表示在一个HTTP Session中,一个bean定义对应一个实例。该作用域仅在基于web的Spring ApplicationContext情形下有效。考虑下面bean定义:

<bean id="userPreferences" class="com.foo.UserPreferences" scope="session"/>

针对某个HTTP Session,Spring容器会根据userPreferences bean定义创建一个全新的userPreferences bean实例,且该userPreferences bean仅在当前HTTP Session内有效。与request作用域一样,可以根据需要放心的更改所创建实例的内部状态,而别的HTTP Session中根据userPreferences创建的实例,将不会看到这些特定于某个HTTP Session的状态变化。当HTTPSession最终被废弃的时候,在该HTTP Session作用域内的bean也会被废弃掉。

7, Bean的自动装配

  • 自动装配是使用spring满足bean依赖的一种方法

  • spring会在应用上下文中为某个bean寻找其依赖的bean。

Spring中bean有三种装配机制,分别是:

  1. 在xml中显式配置;

  2. 在java中显式配置;

  3. 隐式的bean发现机制和自动装配。

这里我们主要讲第三种:自动化的装配bean。

Spring的自动装配需要从两个角度来实现,或者说是两个操作:

  1. 组件扫描(component scanning):spring会自动发现应用上下文中所创建的bean;

  2. 自动装配(autowiring):spring自动满足bean之间的依赖,也就是我们说的IoC/DI;

组件扫描和自动装配组合发挥巨大威力,使的显示的配置降低到最少

推荐不使用自动装配xml配置,而使用注解

使用注解必须加上这个约束:context:annotation-config/

<?xml version="1.0" encoding="UTF-8"?>
<beans xmlns="http://www.springframework.org/schema/beans"
xmlns:xsi="http://www.w3.org/2001/XMLSchema-instance"
xmlns:context="http://www.springframework.org/schema/context"
xsi:schemaLocation="http://www.springframework.org/schema/beans
https://www.springframework.org/schema/beans/spring-beans.xsd
http://www.springframework.org/schema/context
https://www.springframework.org/schema/context/spring-context.xsd
">

<context:annotation-config/>
</beans>


7.1 byName&&byType

pojo类

Cat类:

public class Cat {
public void shout(){
System.out.println("miao~");
}
}

Dog类

public class Dog {
public void shout(){
System.out.println("wang~");
}
}

People类

import org.springframework.beans.factory.annotation.Autowired;
import org.springframework.beans.factory.annotation.Qualifier;

import javax.annotation.Resource;

public class People {

private Cat cat;
private Dog dog;
private String name;

public Cat getCat() {
return cat;
}

public void setCat(Cat cat) {
this.cat = cat;
}

public Dog getDog() {
return dog;
}

public void setDog(Dog dog) {
this.dog = dog;
}

public String getName() {
return name;
}

public void setName(String name) {
this.name = name;
}

@Override
public String toString() {
return "People{" +
"cat=" + cat +
", dog=" + dog +
", name='" + name + '\'' +
'}';
}
}

xml

<?xml version="1.0" encoding="UTF-8"?>
<beans xmlns="http://www.springframework.org/schema/beans"
xmlns:xsi="http://www.w3.org/2001/XMLSchema-instance"
xmlns:context="http://www.springframework.org/schema/context"
xsi:schemaLocation="http://www.springframework.org/schema/beans
https://www.springframework.org/schema/beans/spring-beans.xsd
http://www.springframework.org/schema/context
https://www.springframework.org/schema/context/spring-context.xsd
">

<context:annotation-config/>

<!--byName-->
<bean id="cat" class="Cat"></bean>
<bean id="dog" class="Dog"></bean>
<bean id="people" class="People" autowire="byName">
<property name="name" value="韩冰"/>
<!--这里的cat和dog被自动注入了-->
</bean>


<!--byType-->
<bean class="Cat"></bean>
<bean class="Dog"></bean>
<bean id="people" class="People" autowire="byType">
<property name="name" value="韩冰"/>
<!--这里的cat和dog被自动注入了-->
</bean>

</beans>

Test

@Test
public void test01(){
ApplicationContext context = new ClassPathXmlApplicationContext("beans.xml");
People people = context.getBean("people",People.class);
System.out.println(people.getName());
people.getDog().shout();
people.getCat().shout();
}

7.2 @Autowired && @Qualifier

java: @Autowired

@Autowired //加入这个才能自动装配
@Qualifier(value = "cat") //指定一个类注入进去
private Cat cat;
@Autowired
@Qualifier(value = "dog")
private Dog dog;
private String name;

7.3 @Resource(name="xxx")

@Resource(name="cat")
private Cat cat;
@Resource(name = "dog")
private Dog dog;
private String name;

注意:这两个的效果类似, 但是官方推荐的是@Autowired


xml:

<bean id="cat" class="Cat"></bean>
<bean id="cat1" class="Cat"></bean>
<bean id="dog1" class="Dog"></bean>
<bean id="dog" class="Dog"></bean>
<bean id="people" class="People">
<property name="name" value="韩冰"/>
</bean>

Test:

@Test
public void test01(){
ApplicationContext context = new ClassPathXmlApplicationContext("beans.xml");
People people = context.getBean("people",People.class);
System.out.println(people.getName());
people.getDog().shout();
people.getCat().shout();
}

8, 注解开发

image-20220402200433911

8.1 说明

在配置文件当中,还得要引入一个context约束

<?xml version="1.0" encoding="UTF-8"?>
<beans xmlns="http://www.springframework.org/schema/beans"
xmlns:xsi="http://www.w3.org/2001/XMLSchema-instance"
xmlns:context="http://www.springframework.org/schema/context"
xsi:schemaLocation="http://www.springframework.org/schema/beans
https://www.springframework.org/schema/beans/spring-beans.xsd
http://www.springframework.org/schema/context
https://www.springframework.org/schema/context/spring-context.xsd
">

</beans>


8.2 Bean的实现(@Component)

我们之前都是使用 bean 的标签进行bean注入,但是实际开发中,我们一般都会使用注解!

  1. 配置扫描哪些包下的注解,指定要扫描的包

    <!--指定要扫描的包-->
    <context:component-scan base-package="top.hanbing777"/>
  2. 在指定包下编写类,增加注解,还可以有@Scope("prototype") @Value("韩冰")的注解

    package top.hanbing777.pojo;

    import org.springframework.beans.factory.annotation.Value;
    import org.springframework.context.annotation.Scope;
    import org.springframework.stereotype.Component;


    // 相当于配置文件中 <bean id="user" class="当前注解的类"/>
    //不加括号里的值,默认为首字母小写的实体类名
    @Component("user")

    @Scope("prototype") //指定范围
    public class User {
    private String name;


    public String getName() {
    return name;
    }

    @Value("韩冰") //相当于在bean.xml中set进去值
    public void setName(String name) {
    this.name = name;
    }
    }
  3. 测试

    import org.junit.Test;
    import org.springframework.context.ApplicationContext;
    import org.springframework.context.support.ClassPathXmlApplicationContext;
    import top.hanbing777.pojo.User;

    public class Mytest {
    @Test
    public void test01(){
    ApplicationContext context = new ClassPathXmlApplicationContext("beans.xml");
    User user = context.getBean("user", User.class);
    System.out.println(user.getName());
    }
    }
  4. 结果

    image-20220402193351337

8.3 属性注入

就是8.2提到的@Value,相当于在bean.xml中set进去值

8.4 衍生注解

我们这些注解,就是替代了在配置文件当中配置步骤而已!更加的方便快捷!

@Component三个衍生注解

为了更好的进行分层,Spring可以使用其它三个注解,功能一样,目前使用哪一个功能都一样。

  • @Controller:web层

  • @Service:service层

  • @Repository:dao层

写上这些注解,就相当于将这个类交给Spring管理装配了!

8.5 自动装配注解 (7.2,7.3已经提到了)

@Autowired && @Qualifier

@Resource(name="xxx")

在Bean的自动装配已经讲过了

8.6 作用域(8.2提到了)

@scope

  • singleton:默认的,Spring会采用单例模式创建这个对象。关闭工厂 ,所有的对象都会销毁。

  • prototype:多例模式。关闭工厂 ,所有的对象不会销毁。内部的垃圾回收机制会回收

8.7 小结

XML与注解比较

  • XML可以适用任何场景 ,结构清晰,维护方便

  • 注解不是自己提供的类使用不了,开发简单方便

xm与注解整合开发:推荐最佳实践

  • xml管理Bean

  • 注解完成属性注入

  • 使用过程中, 可以不用扫描,扫描是为了类上的注解

作用:

  • 进行注解驱动注册,从而使注解生效

  • 用于激活那些已经在spring容器里注册过的bean上面的注解,也就是显示的向Spring注册

  • 如果不扫描包,就需要手动配置bean

  • 如果不加注解驱动,则注入的值为null!

8.8 基于Java类进行配置(@Bean)

JavaConfifig 原来是 Spring 的一个子项目,它通过 Java 类的方式提供 Bean 的定义信息,在 Spring4 的版本, JavaConfifig 已正式成为 Spring4 的核心功能 。

实体类Dog

package top.hanbing777.pojo;

import org.springframework.stereotype.Component;

@Component //这里就不用加括号了定义id了,加了也没用
public class Dog {
private String dog="wangwang~~~~";

public String getDog() {
return dog;
}
}

编写一个MyConfifig配置类

package top.hanbing777.MyConfig;


import org.springframework.context.annotation.Bean;
import org.springframework.stereotype.Component;
import top.hanbing777.pojo.Dog;
@Component //加上这个代表一个配置表,但是不加好像也可以
public class MyConfig {
@Bean //加上这个才算
public Dog dog(){
return new Dog();
}
}

Test

@Test
public void test02(){
ApplicationContext context = new AnnotationConfigApplicationContext(MyConfig.class);
Dog dog = context.getBean("dog", Dog.class);
System.out.println(dog.getDog());
}

结果

image-20220402200454031

8.8.1 导入其他的配置文件(@Import)

  1. 在写一个配置类

    package top.hanbing777.MyConfig;

    import org.springframework.stereotype.Component;

    @Component
    public class MyConfig2 {

    }
  2. 用@Import导入

    package top.hanbing777.MyConfig;

    import org.springframework.context.annotation.Bean;
    import org.springframework.context.annotation.Import;
    import org.springframework.stereotype.Component;
    import top.hanbing777.pojo.Dog;

    @Component
    //有时还有会有ComponentScan("类地址")
    @Import(MyConfig2.class)
    public class MyConfig {
    @Bean
    public Dog dog(){
    return new Dog();
    }

    }

    关于这种Java类的配置方式,我们在之后的SpringBoot 和 SpringCloud中还会大量看到,我们需要知道这些注解的作用即可!

9.代理模式(面向切面编程)

代理模式是aop的底层机制

image-20220407194720426

image-20220407193850196

9.1 静态代理

静态代理角色分析

  • 抽象角色 : 一般使用接口或者抽象类来实现

  • 真实角色 : 被代理的角色

  • 代理角色 : 代理真实角色 ; 代理真实角色后 , 一般会做一些附属的操作 .

  • 客户 : 使用代理角色来进行一些操作

静态代理的好处

  • 可以使得我们的真实角色更加纯粹 . 不再去关注一些公共的事情 .

  • 公共的业务由代理来完成 . 实现了业务的分工 ,

  • 公共业务发生扩展时变得更加集中和方便

缺点:

类多了 , 多了代理类 , 工作量变大了 . 开发效率降低 .

我们想要静态代理的好处,又不想要静态代理的缺点,所以 , 就有了动态代理 !


代码实现1

Rent 出租类接口

package top.hanbing777.demo01;

public interface Rent {
void rent();
}

接口实现类,房东租房

package top.hanbing777.demo01;

public class Host implements Rent{

@Override
public void rent() {
System.out.println("房屋出租");
}
}

中介代理出租房屋

package top.hanbing777.demo01;

public class Proxy implements Rent{
Host host = new Host();
//租房
@Override
public void rent() {
setHouse();
host.rent();
hetong();
fare();
}

//看房
public void setHouse(){
System.out.println("带客人看房");
}

//合同
public void hetong(){
System.out.println("签合同");
}

//收中介费
public void fare(){
System.out.println("收中介费");
}

}

客户租房

package top.hanbing777.demo01;

public class Client {
public static void main(String[] args) {
Proxy proxy = new Proxy();
proxy.rent();
}
}

代码实现2

增删查改接口

package top.hanbing777.demo02;

public interface UserService {
void add();
void delete();
void update();
void query();
}

接口实现类

package top.hanbing777.demo02;

public class UserServiceImpl implements UserService{
@Override
public void add() {
System.out.println("增加");
}

@Override
public void delete() {
System.out.println("删除");
}

@Override
public void update() {
System.out.println("更新");
}

@Override
public void query() {
System.out.println("查找");
}
}

中介调用实现类

package top.hanbing777.demo02;


public class UserServiceProxy implements UserService {
private UserServiceImpl userService;

public void setUserService(UserServiceImpl userService) {
this.userService = userService;
}


@Override
public void add() {
log("add");
userService.add();
}

@Override
public void delete() {
log("delete");
userService.delete();
}

@Override
public void update() {
log("update");
userService.update();
}

@Override
public void query() {
log("query");
userService.query();
}

public void log(String log) {
System.out.println(log);
}
}

最终实现功能

package top.hanbing777.demo02;

public class Client {
public static void main(String[] args) {
UserServiceImpl userService = new UserServiceImpl();
UserServiceProxy userServiceProxy = new UserServiceProxy();
userServiceProxy.setUserService(userService);
userServiceProxy.add();
}
}

9.2 动态代理(利用反射)

好处:

静态代理有的它都有,静态代理没有的,它也有!

  • 可以使得我们的真实角色更加纯粹 . 不再去关注一些公共的事情 .

  • 公共的业务由代理来完成 . 实现了业务的分工 ,

  • 公共业务发生扩展时变得更加集中和方便 .

  • 一个动态代理 , 一般代理某一类业务

  • 一个动态代理可以代理多个类,代理的是接口!


Rent 出租类接口

package top.hanbing777.demo01;

public interface Rent {
void rent();
}

接口实现类,房东租房

package top.hanbing777.demo01;

public class Host implements Rent{

@Override
public void rent() {
System.out.println("房屋出租");
}
}

代理类

package top.hanbing777.demo03;

import java.lang.reflect.InvocationHandler;
import java.lang.reflect.Method;
import java.lang.reflect.Proxy;

public class ProxyInvocationHandler implements InvocationHandler {

//被代理的接口
private Rent rent;

public void setRent(Rent rent){
this.rent = rent;
}

//生成的到代理类
public Object getProxy(){
return Proxy.newProxyInstance(this.getClass().getClassLoader(), rent.getClass().getInterfaces(),this);
}

//处理代理实例,并返回结果
@Override
public Object invoke(Object proxy, Method method, Object[] args) throws Throwable {
//动态代理的本质,就是使用反射机制实现

seeHouse();
Object result = method.invoke(rent, args);
fare();
return result;

}

public void seeHouse(){
System.out.println("中介带你看房子");
}

public void fare(){
System.out.println("付款");
}

}

客户类

package top.hanbing777.demo03;

public class Client {

public static void main(String[] args) {
//真实角色
Host host = new Host();

//代理角色, 现在没有
ProxyInvocationHandler pih = new ProxyInvocationHandler();

//通过调用程序角色来处理我们要调用的接口对象!
pih.setRent(host);
Rent proxy = (Rent) pih.getProxy();
proxy.rent();
}

}

结果:

image-20220407195631015

也可以优化为通用代理类

package top.hanbing777.demo04;

import java.lang.reflect.InvocationHandler;
import java.lang.reflect.Method;
import java.lang.reflect.Proxy;

public class ProxyInvocationHandler implements InvocationHandler {

//被代理的接口
private Object target;

public void setTarget(Object target){
this.target = target;
}

//生成的到代理类
public Object getProxy(){
return Proxy.newProxyInstance(this.getClass().getClassLoader(), target.getClass().getInterfaces(),this);
}

//处理代理实例,并返回结果
@Override
public Object invoke(Object proxy, Method method, Object[] args) throws Throwable {
//动态代理的本质,就是使用反射机制实现
log(method.getName());
Object result = method.invoke(target, args);
return result;
}

public void log(String mgs){
System.out.println("执行了"+mgs+"方法");
}
}

结果:

image-20220407195618347

10.AOP

10.1 什么是AOP

AOP(Aspect Oriented Programming)意为:面向切面编程,通过预编译方式和运行期动态代理实现程序功能的统一维护的一种技术。AOP是OOP的延续,是软件开发中的一个热点,也是Spring框架中的一个重要内容,是函数式编程的一种衍生范型。利用AOP可以对业务逻辑的各个部分进行隔离,从而使得业务逻辑各部分之间的耦合度降低,提高程序的可重用性,同时提高开发的效率。

image-20220407202052612

10.2 Aop在Spring中的作用

提供声明式事务;允许用户自定义切面

  • 横切关注点:跨越应用程序多个模块的方法或功能。即是,与我们业务逻辑无关的,但是我们需要

  • 关注的部分,就是横切关注点。如日志 , 安全 , 缓存 , 事务等等 ....

  • 切面(ASPECT):横切关注点 被模块化 的特殊对象。即,它是一个类。

  • 通知(Advice):切面必须要完成的工作。即,它是类中的一个方法。

  • 目标(Target):被通知对象。

  • 代理(Proxy):向目标对象应用通知之后创建的对象。

  • 切入点(PointCut):切面通知 执行的 “地点”的定义。

  • 连接点(JointPoint):与切入点匹配的执行点。

image-20220407202223467

SpringAOP中,通过Advice定义横切逻辑,Spring中支持5种类型的Advice:

image-20220407202246591

即 Aop 在 不改变原有代码的情况下 , 去增加新的功能 .


10.3 使用Spring实现AOP

【重点】使用AOP织入,需要导入一个依赖包!

<!-- https://mvnrepository.com/artifact/org.aspectj/aspectjweaver -->
<dependency>
<groupId>org.aspectj</groupId>
<artifactId>aspectjweaver</artifactId>
<version>1.9.9.1</version>
</dependency>

方式一:

通过Spring API实现

接口和实现类

package service;

public interface UserService {
void add();
void delete();
void select();
void update();
}
package service;

public class UserServiceImpl implements UserService{

@Override
public void add() {
System.out.println("add方法");
}

@Override
public void delete() {
System.out.println("delete方法");
}

@Override
public void select() {
System.out.println("select方法");
}

@Override
public void update() {
System.out.println("update方法");
}
}

然后去写我们的增强类 , 我们编写两个 , 一个前置增强 一个后置增强

package log;

import org.springframework.aop.MethodBeforeAdvice;

import java.lang.reflect.Method;

public class log implements MethodBeforeAdvice {

//method : 要执行的目标对象的方法
// objects : 被调用的方法的参数
// Object : 目标对象
@Override
public void before(Method method, Object[] args, Object target) throws Throwable {
System.out.println(target.getClass().getName()+"的"+method.getName()+"方法被执行了");
}
}
package log;

import org.springframework.aop.AfterReturningAdvice;

import java.lang.reflect.Method;

public class afterLog implements AfterReturningAdvice {

// returnValue 返回值
// method被调用的方法
// args 被调用的方法的对象的参数
// target 被调用的目标对象

@Override
public void afterReturning(Object returnValue, Method method, Object[] args, Object target) throws Throwable {
System.out.println("执行了"+ method.getName()+"方法,返回结果为:"+returnValue);
}
}

最后去spring的文件中注册 , 并实现aop切入实现 , 注意导入约束

<?xml version="1.0" encoding="UTF-8"?>
<beans xmlns="http://www.springframework.org/schema/beans"
xmlns:xsi="http://www.w3.org/2001/XMLSchema-instance"
xmlns:aop="http://www.springframework.org/schema/aop"
xsi:schemaLocation="http://www.springframework.org/schema/beans
https://www.springframework.org/schema/beans/spring-beans.xsd
http://www.springframework.org/schema/aop
https://www.springframework.org/schema/aop/spring-aop.xsd">

<bean id="userService" class="service.UserServiceImpl"/>
<bean id="log" class="log.log"/>
<bean id="afterLog" class="log.afterLog"/>

<aop:config>
<!--切入点 expression:表达式匹配要执行的方法-->
<aop:pointcut id="pointcut" expression="execution(* service.UserServiceImpl.*(..))"/>
<aop:advisor advice-ref="log" pointcut-ref="pointcut"/>
<aop:advisor advice-ref="afterLog" pointcut-ref="pointcut"/>
</aop:config>

</beans>

测试:

import org.junit.Test;
import org.springframework.context.ApplicationContext;
import org.springframework.context.support.ClassPathXmlApplicationContext;
import service.UserService;

public class Mytest {

@Test
public void test01(){
ApplicationContext context = new ClassPathXmlApplicationContext("applicationContext.xml");
UserService UserService = (UserService)context.getBean("userService");
UserService.add();
}
}

结果:

image-20220407203059460


Spring的Aop就是将公共的业务 (日志 , 安全等) 和领域业务结合起来 , 当执行领域业务时 , 将会把公共业务加进来 . 实现公共业务的重复利用 . 领域业务更纯粹 , 程序猿专注领域业务 , 其本质还是动态代理 .

方法二:

目标业务类不变依旧是userServiceImpl

自定义类来实现Aop

第一步 : 写我们自己的一个切入类

package log;

public class diyLog {
public void before(){
System.out.println("方法执行前");
}

public void after(){
System.out.println("方法执行后");
}

}

Spring配置文件

<?xml version="1.0" encoding="UTF-8"?>
<beans xmlns="http://www.springframework.org/schema/beans"
xmlns:xsi="http://www.w3.org/2001/XMLSchema-instance"
xmlns:aop="http://www.springframework.org/schema/aop"
xsi:schemaLocation="http://www.springframework.org/schema/beans
https://www.springframework.org/schema/beans/spring-beans.xsd
http://www.springframework.org/schema/aop
https://www.springframework.org/schema/aop/spring-aop.xsd">

<bean id="userService" class="service.UserServiceImpl"/>
<bean id="diy" class="log.diyLog"/>

<aop:config>
<aop:aspect ref="diy">
<aop:pointcut id="diyPointcut" expression="execution(* service.UserServiceImpl.*(..))"/>
<aop:before method="before" pointcut-ref="diyPointcut"/>
<aop:after method="after" pointcut-ref="diyPointcut"/>
</aop:aspect>
</aop:config>

</beans>

test:

import org.junit.Test;
import org.springframework.context.ApplicationContext;
import org.springframework.context.support.ClassPathXmlApplicationContext;
import service.UserService;

public class Mytest {

@Test
public void test01(){
ApplicationContext context = new ClassPathXmlApplicationContext("applicationContext.xml");
UserService UserService = (UserService)context.getBean("userService");
UserService.add();
}
}

结果:

image-20220407203602801

方式三(使用注解):

目标业务类不变依旧是userServiceImpl

第一步:编写一个注解实现的增强类

package log;
import org.aspectj.lang.ProceedingJoinPoint;
import org.aspectj.lang.annotation.After;
import org.aspectj.lang.annotation.Around;
import org.aspectj.lang.annotation.Aspect;
import org.aspectj.lang.annotation.Before;

@Aspect
public class AnnotationPointcut {
@Before("execution(* service.UserServiceImpl.*(..))")
public void before(){
System.out.println("方法执行前");
}

@After("execution(* service.UserServiceImpl.*(..))")
public void after(){
System.out.println("方法执行后");
}

@Around("execution(* service.UserServiceImpl.*(..))")
public void around(ProceedingJoinPoint jp) throws Throwable {
System.out.println("环绕前");
System.out.println("签名:"+jp.getSignature());
//执行目标方法
Object proceed = jp.proceed();
System.out.println("环绕后");
System.out.println(proceed);
}
}

Spring配置

<?xml version="1.0" encoding="UTF-8"?>
<beans xmlns="http://www.springframework.org/schema/beans"
xmlns:xsi="http://www.w3.org/2001/XMLSchema-instance"
xmlns:aop="http://www.springframework.org/schema/aop"
xsi:schemaLocation="http://www.springframework.org/schema/beans
https://www.springframework.org/schema/beans/spring-beans.xsd
http://www.springframework.org/schema/aop
https://www.springframework.org/schema/aop/spring-aop.xsd">

<bean id="userService" class="service.UserServiceImpl"/>
<bean id="annotationPointcut" class="log.AnnotationPointcut"/>
<aop:aspectj-autoproxy/>

</beans>

11, 整合Mybatis

Maven环境开头已经列出

11.1 回忆Mybatis

pojo层:

User类:

package top.hanbing777.pojo;


import lombok.Data;

@Data
public class User {
private int id;
private String name;
private String pwd;
}

dao层

UserMapper接口

package top.hanbing777.dao;

import top.hanbing777.pojo.User;

import java.util.List;

public interface UserMapper {
List<User> getUserList();
}

UserMapper.xml

<?xml version="1.0" encoding="UTF-8" ?>
<!DOCTYPE mapper
PUBLIC "-//mybatis.org//DTD Config 3.0//EN"
"http://mybatis.org/dtd/mybatis-3-mapper.dtd">

<mapper namespace="top.hanbing777.dao.UserMapper">
<select id="getUserList" resultType="top.hanbing777.pojo.User">
select * from user
</select>
</mapper>

Mybtais配置文件

mybatis-config.xml

<?xml version="1.0" encoding="UTF-8" ?>
<!DOCTYPE mapper
PUBLIC "-//mybatis.org//DTD Config 3.0//EN"
"http://mybatis.org/dtd/mybatis-3-mapper.dtd">

<mapper namespace="top.hanbing777.dao.UserMapper">
<select id="getUserList" resultType="top.hanbing777.pojo.User">
select * from user
</select>
</mapper>

Test

import org.apache.ibatis.session.SqlSession;
import org.apache.ibatis.session.SqlSessionFactory;
import org.apache.ibatis.session.SqlSessionFactoryBuilder;
import org.junit.Test;

import org.apache.ibatis.io.Resources;
import top.hanbing777.dao.UserMapper;
import top.hanbing777.pojo.User;

import java.io.IOException;
import java.io.InputStream;
import java.util.List;

public class Mytest {

@Test
public void test01() throws IOException {
String resource = "mybatis-config.xml";
InputStream in = Resources.getResourceAsStream(resource);
SqlSessionFactory build = new SqlSessionFactoryBuilder().build(in);
SqlSession sqlSession = build.openSession();
UserMapper mapper = sqlSession.getMapper(UserMapper.class);
List<User> userList = mapper.getUserList();

for (User user : userList) {
System.out.println(user);
}

}
}

结果:

image-20220407220536589

11.2 Mybatis-Spring

官方中文文档发:http://mybatis.org/spring/zh/index.html

引入Spring之前需要了解mybatis-spring包中的一些重要类;

什么是MyBatis-Spring?

MyBatis-Spring 会帮助你将 MyBatis 代码无缝地整合到 Spring 中。

例子:

这里举出两个例子,其中UserMapperImpl实现类需要SqlSession, UserMapperImpl2不需要SqlSession,但是需要sqlSessionFactory

pojo层

User类

package top.hanbing777.pojo;


import lombok.Data;

@Data
public class User {
private int id;
private String name;
private String pwd;
}

dao层:

UserMapper

package top.hanbing777.dao;

import top.hanbing777.pojo.User;

import java.util.List;

public interface UserMapper {
List<User> getUserList();
}

UserMapper.xml

<?xml version="1.0" encoding="UTF8" ?>
<!DOCTYPE mapper
PUBLIC "-//mybatis.org//DTD Config 3.0//EN"
"http://mybatis.org/dtd/mybatis-3-mapper.dtd">

<mapper namespace="top.hanbing777.dao.UserMapper">
<select id="getUserList" resultType="top.hanbing777.pojo.User">
select * from user
</select>


</mapper>

UserMapperImpl

package top.hanbing777.dao;

import org.mybatis.spring.SqlSessionTemplate;
import top.hanbing777.pojo.User;

import java.util.List;

public class UserMapperImpl implements UserMapper {
private SqlSessionTemplate sqlSession;

public void setSqlSession(SqlSessionTemplate sqlSSession) {
this.sqlSession = sqlSSession;
}

@Override
public List<User> getUserList() {
UserMapper mapper = sqlSession.getMapper(UserMapper.class);
return mapper.getUserList();
}
}

UserMapperImpl2

package top.hanbing777.dao;

import org.apache.ibatis.session.SqlSession;
import org.mybatis.spring.support.SqlSessionDaoSupport;
import top.hanbing777.pojo.User;

import java.util.List;

public class UserMapperImpl2 extends SqlSessionDaoSupport implements UserMapper{
@Override
public List<User> getUserList() {
SqlSession sqlSession = getSqlSession();
UserMapper mapper = sqlSession.getMapper(UserMapper.class);
return mapper.getUserList();
}
}

resources:

mybatis-config.xml

<?xml version="1.0" encoding="UTF8" ?>
<!DOCTYPE configuration
PUBLIC "-//mybatis.org//DTD Config 3.0//EN"
"http://mybatis.org/dtd/mybatis-3-config.dtd">
<configuration>


</configuration>

spring-dao.xml

<?xml version="1.0" encoding="UTF8"?>
<beans xmlns="http://www.springframework.org/schema/beans"
xmlns:xsi="http://www.w3.org/2001/XMLSchema-instance"
xsi:schemaLocation="http://www.springframework.org/schema/beans
https://www.springframework.org/schema/beans/spring-beans.xsd">

<!--配置文件-->
<bean id="dataSource" class="org.springframework.jdbc.datasource.DriverManagerDataSource">
<property name="driverClassName" value="com.mysql.cj.jdbc.Driver"/>
<property name="url"
value="jdbc:mysql://47.99.49.255:9000/mybatis?useSSL=true&amp;characterEncoding=UTF-8&amp;useUnicode=true&amp;serverTimezone=GMT"/>
<property name="username" value="root"/>
<property name="password" value="root"/>
</bean>

<!--sqlSessionFactory-->
<bean id="sqlSessionFactory" class="org.mybatis.spring.SqlSessionFactoryBean">
<property name="dataSource" ref="dataSource"/>
<property name="configLocation" value="classpath:mybatis-config.xml"/>
<property name="mapperLocations" value="classpath:top/hanbing777/dao/*.xml"/>
</bean>

<!--sqlSessionTemplate:就是=我们使用的sqlSession-->
<bean id="sqlSession" class="org.mybatis.spring.SqlSessionTemplate">
<!--只能使用构造器注入SQLSession,因为他没有set方法-->
<constructor-arg index="0" ref="sqlSessionFactory"/>
</bean>


<!--UserMapperImpl实现类需要SqlSession-->
<bean id="userMapper" class="top.hanbing777.dao.UserMapperImpl">
<property name="sqlSession" ref="sqlSession"/>
</bean>

<!--UserMapperImpl2不需要SqlSession,但是需要sqlSessionFactory-->
<bean id="userMapper2" class="top.hanbing777.dao.UserMapperImpl2">
<property name="sqlSessionFactory" ref="sqlSessionFactory"/>
</bean>

</beans>

Test

import org.apache.ibatis.io.Resources;
import org.apache.ibatis.session.SqlSession;
import org.apache.ibatis.session.SqlSessionFactory;
import org.apache.ibatis.session.SqlSessionFactoryBuilder;
import org.junit.Test;
import org.springframework.context.ApplicationContext;
import org.springframework.context.support.ClassPathXmlApplicationContext;
import top.hanbing777.dao.UserMapper;
import top.hanbing777.pojo.User;

import java.io.IOException;
import java.io.InputStream;
import java.util.List;

public class Mytest {

@Test
public void test01() throws IOException {

ApplicationContext context = new ClassPathXmlApplicationContext("spring-dao.xml");
UserMapper userMapper = context.getBean("userMapper", UserMapper.class);
List<User> userList = userMapper.getUserList();
for (User user : userList) {
System.out.println(user);
}
}

@Test
public void test02() throws IOException {

ApplicationContext context = new ClassPathXmlApplicationContext("spring-dao.xml");
UserMapper userMapper = context.getBean("userMapper2", UserMapper.class);
List<User> userList = userMapper.getUserList();
for (User user : userList) {
System.out.println(user);
}
}
}

结果:

image-20220407222049044

12, 声明式事务

12.1 回顾事务

  • 事务在项目开发过程非常重要,涉及到数据的一致性的问题,不容马虎!

  • 事务管理是企业级应用程序开发中必备技术,用来确保数据的完整性和一致性。


事务就是把一系列的动作当成一个独立的工作单元,这些动作要么全部完成,要么全部不起作用。


事务四个属性ACID

  1. 原子性(atomicity)

    • 事务是原子性操作,由一系列动作组成,事务的原子性确保动作要么全部完成,要么完全不起作用

  2. 一致性(consistency)

    • 一旦所有事务动作完成,事务就要被提交。数据和资源处于一种满足业务规则的一致性状态中

  3. 隔离性(isolation)

    • 可能多个事务会同时处理相同的数据,因此每个事务都应该与其他事务隔离开来,防止数据损坏

  4. 持久性(durability)

    • 事务一旦完成,无论系统发生什么错误,结果都不会受到影响。通常情况下,事务的结果被写到持久化存储器中


12.2 测试:

pojo层:

User

package top.hanbing777.pojo;

import lombok.AllArgsConstructor;
import lombok.Data;
import lombok.NoArgsConstructor;

@Data
@AllArgsConstructor
@NoArgsConstructor
public class User {
private int id;
private String name;
private String pwd;
}

dao层:

UserMapper

package top.hanbing777.dao;

import top.hanbing777.pojo.User;

import java.util.List;

public interface UserMapper {
List<User> UserList();
int addUser(User user);
int deleteUser(int id);
void tx(User user,int id);
}

实现类UserMapperImpl

package top.hanbing777.dao;

import org.mybatis.spring.support.SqlSessionDaoSupport;
import top.hanbing777.pojo.User;

import java.util.List;

public class UserMapperImpl extends SqlSessionDaoSupport implements UserMapper{

@Override
public List<User> UserList(){
return getSqlSession().getMapper(UserMapper.class).UserList();
}

@Override
public int addUser(User user) {
return getSqlSession().getMapper(UserMapper.class).addUser(user);
}

@Override
public int deleteUser(int id) {
return getSqlSession().getMapper(UserMapper.class).deleteUser(id);
}

@Override
public void tx(User user,int id) {
addUser(user);
deleteUser(id);
}
}

UserMapper.xml

<?xml version="1.0" encoding="UTF8" ?>
<!DOCTYPE mapper
PUBLIC "-//mybatis.org//DTD Config 3.0//EN"
"http://mybatis.org/dtd/mybatis-3-mapper.dtd">

<mapper namespace="top.hanbing777.dao.UserMapper">
<select id="UserList" resultType="top.hanbing777.pojo.User">
select *
from user
</select>

<insert id="addUser" parameterType="top.hanbing777.pojo.User">
insert into user
values (#{id}, #{name}, #{pwd})
</insert>


<!--故意写错delete-->
<delete id="deleteUser">
deletes
from user where id =
#{id}
</delete>

</mapper>

resources:

mybatis-config.xml(里面没有实际内容,可以不写了,但是为了表示这个项目用到了MyBatis, 还是留着为好)

<?xml version="1.0" encoding="UTF8" ?>
<!DOCTYPE configuration
PUBLIC "-//mybatis.org//DTD Config 3.0//EN"
"http://mybatis.org/dtd/mybatis-3-config.dtd">
<configuration>


</configuration>

Sping配置,spring.xml

<?xml version="1.0" encoding="UTF8"?>
<beans xmlns="http://www.springframework.org/schema/beans"
xmlns:xsi="http://www.w3.org/2001/XMLSchema-instance"
xmlns:tx="http://www.springframework.org/schema/tx"
xmlns:aop="http://www.springframework.org/schema/aop"
xsi:schemaLocation="http://www.springframework.org/schema/beans
https://www.springframework.org/schema/beans/spring-beans.xsd
http://www.springframework.org/schema/tx
https://www.springframework.org/schema/tx/spring-tx.xsd
http://www.springframework.org/schema/aop
https://www.springframework.org/schema/aop/spring-aop.xsd">

<!--配置文件-->
<bean id="dataSource" class="org.springframework.jdbc.datasource.DriverManagerDataSource">
<property name="driverClassName" value="com.mysql.cj.jdbc.Driver"/>
<property name="url"
value="jdbc:mysql://47.99.49.255:9000/mybatis?useSSL=true&amp;characterEncoding=UTF-8&amp;useUnicode=true&amp;serverTimezone=GMT"/>
<property name="username" value="root"/>
<property name="password" value="root"/>
</bean>

<!--sqlSessionFactory-->
<bean id="sqlSessionFactory" class="org.mybatis.spring.SqlSessionFactoryBean">
<property name="dataSource" ref="dataSource"/>
<property name="configLocation" value="classpath:mybatis-config.xml"/>
<property name="mapperLocations" value="classpath:top/hanbing777/dao/*.xml"/>
</bean>

<!--sqlSessionTemplate:就是=我们使用的sqlSession-->
<bean id="sqlSession" class="org.mybatis.spring.SqlSessionTemplate">
<!--只能使用构造器注入SQLSession,因为他没有set方法-->
<constructor-arg index="0" ref="sqlSessionFactory"/>
</bean>

<bean id="UserMapper" class="top.hanbing777.dao.UserMapperImpl">
<property name="sqlSessionFactory" ref="sqlSessionFactory"/>
</bean>


<!--配置声明式事务-->
<bean id="transactionManager" class="org.springframework.jdbc.datasource.DataSourceTransactionManager">
<property name="dataSource" ref="dataSource"/>
</bean>

<!--这里是添加的事务,默认就是REQUIRED-->
<tx:advice id="txAdvice" transaction-manager="transactionManager">
<tx:attributes>
<tx:method name="add" propagation="REQUIRED"/>
<tx:method name="delete" propagation="REQUIRED"/>
<tx:method name="update" propagation="REQUIRED"/>
<tx:method name="query" read-only="true"/>
<tx:method name="*" propagation="REQUIRED"/>
</tx:attributes>
</tx:advice>

<aop:config>
<aop:pointcut id="txPointCut" expression="execution(* top.hanbing777.dao.*.*(..))"/>
<aop:advisor advice-ref="txAdvice" pointcut-ref="txPointCut"/>
</aop:config>

</beans>

test:

@Test
public void testTX(){
ApplicationContext context = new ClassPathXmlApplicationContext("spring.xml");
UserMapper userMapper = context.getBean("UserMapper", UserMapper.class);
//增加一个用户6,删除用户3
userMapper.tx(new User(6,"韩冰","123456"),3);
}

结果:

原来的表

image-20220407224620338


运行提示sql删除语句报错

image-20220407225006530


运行之后的表,虽然插入在删除之前,但是因为事务的原因,插入的语句没有提交

image-20220407225024363


posted @ 2022-04-07 22:58  Null777  阅读(88)  评论(0)    收藏  举报