

spring环境搭建和入门示例
1、环境搭建
1、创建mavenweb工程,导入jar包
- spring-context
- spring-web
- spring-webmvc
- commons-logging
- log4j
- javax.servlet-api
- jsp-api
2、在web.xml中配置DispatcherServlet
要配置springmvc.xml的url和DispatcherServlet 所要拦截的url
    <?xml version="1.0" encoding="UTF-8"?>
    <web-app xmlns:xsi="http://www.w3.org/2001/XMLSchema-instance"
    	xmlns="http://xmlns.jcp.org/xml/ns/javaee"
    	xsi:schemaLocation="http://xmlns.jcp.org/xml/ns/javaee http://xmlns.jcp.org/xml/ns/javaee/web-app_3_1.xsd"
    	id="WebApp_ID" version="3.1">

    	<!-- The front controller of this Spring Web application, responsible for
    		handling all application requests -->
    	<servlet>
    		<servlet-name>springDispatcherServlet</servlet-name>
    		<servlet-class>org.springframework.web.servlet.DispatcherServlet</servlet-class>
    		<init-param>
    			<param-name>contextConfigLocation</param-name>
    			<!-- 此为之后要创建的springmvc.xml的位置 -->
    			<param-value>classpath:springmvc.xml</param-value>
    		</init-param>
    		<load-on-startup>1</load-on-startup>
    	</servlet>

    	<!-- Map all requests to the DispatcherServlet for handling -->
    	<servlet-mapping>
    		<servlet-name>springDispatcherServlet</servlet-name>
    		<!--
    			DispatcherServlet所要拦截的url,“/”表示拦截“/index”这样的路径
    			 不会拦截“.jsp”这种带后缀的路径,“/*”会拦截所有路径
    		 -->
    		<url-pattern>/</url-pattern>
    	</servlet-mapping>
    </web-app>
3、配置springmvc.xml
配置注解扫描和视图解析器
    <?xml version="1.0" encoding="UTF-8"?>
    <beans xmlns="http://www.springframework.org/schema/beans"
    	xmlns:xsi="http://www.w3.org/2001/XMLSchema-instance"
    	xmlns:context="http://www.springframework.org/schema/context"
    	xmlns:tx="http://www.springframework.org/schema/tx"
    	xmlns:mvc="http://www.springframework.org/schema/mvc"
    	xsi:schemaLocation="http://www.springframework.org/schema/mvc http://www.springframework.org/schema/mvc/spring-mvc.xsd
    		http://www.springframework.org/schema/beans http://www.springframework.org/schema/beans/spring-beans.xsd
    		http://www.springframework.org/schema/context http://www.springframework.org/schema/context/spring-context.xsd
    		http://www.springframework.org/schema/tx http://www.springframework.org/schema/tx/spring-tx.xsd">

    	<!-- 基本包扫描 -->
    	<context:component-scan
    		base-package="priv.wfq.spring" />
    	<!-- 视图解析器 -->
    	<bean id="internalResourceViewResolver"
    		class="org.springframework.web.servlet.view.InternalResourceViewResolver">
    		<!-- prefix:是指访问页面的前缀,指定页面存放的文件夹 -->
    		<property name="prefix" value="/WEB-INF/view/"></property>
    		<!-- suffix:是指文件的后缀名,常见的后缀名有html,jsp,php,txt,mp3 -->
    		<property name="suffix" value=".jsp"></property>
    	</bean>

    </beans>
4、编写Controller类
    @Controller
    public class IndexController {

	    //该注解表示用户访问url根目录后的路径,如“http://localhost:8080/spring/index”中的“/index”
	    @RequestMapping("/index")
	    public String index() {
		    //返回存放页面的文件夹下的“index.jsp”页面
		    return "index";
	    }
    }
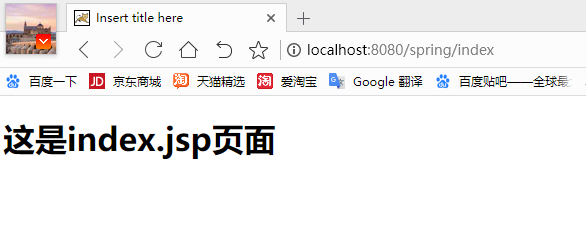
5、编写index.jsp页面
<%@ page language="java" contentType="text/html; charset=UTF-8"
    pageEncoding="UTF-8"%>
<!DOCTYPE html>
<html>
<head>
<meta charset="ISO-8859-1">
<title>Insert title here</title>
</head>
<body>
	<h1>这是index.jsp页面</h1>
</body>
</html>
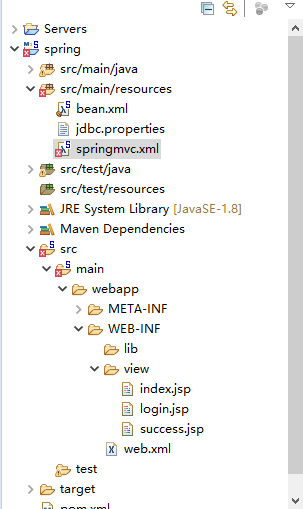
6、工程结构,仅供参考
2、测试

 浙公网安备 33010602011771号