


Linux上安装部署VNC远程服务
1、查看是否已经安装tigervnc-server
[root@localhost ~]# rpm -aq|grep tiger
tigervnc-license-1.8.0-5.el7.noarch
tigervnc-server-minimal-1.8.0-5.el7.x86_64
2、安装tigervnc-server
[root@localhost ~]# yum install -y tigervnc-server
已加载插件:fastestmirror, langpacks
Loading mirror speeds from cached hostfile
 * base: mirrors.aliyun.com
 * extras: mirrors.bupt.edu.cn
 * updates: mirrors.aliyun.com
正在解决依赖关系
--> 正在检查事务
---> 软件包 tigervnc-server.x86_64.0.1.8.0-22.el7 将被 安装
--> 解决依赖关系完成

依赖关系解决

================================================================================================================================================
 Package                                架构                          版本                                 源                              大小
================================================================================================================================================
正在安装:
 tigervnc-server                        x86_64                        1.8.0-22.el7                         updates                        211 k

事务概要
================================================================================================================================================
安装  1 软件包

总下载量:211 k
安装大小:498 k
Downloading packages:
警告:/var/cache/yum/x86_64/7/updates/packages/tigervnc-server-1.8.0-22.el7.x86_64.rpm: 头V3 RSA/SHA256 Signature, 密钥 ID f4a80eb5: NOKEY
tigervnc-server-1.8.0-22.el7.x86_64.rpm 的公钥尚未安装
tigervnc-server-1.8.0-22.el7.x86_64.rpm                                                                                  | 211 kB  00:00:00
从 file:///etc/pki/rpm-gpg/RPM-GPG-KEY-CentOS-7 检索密钥
导入 GPG key 0xF4A80EB5:
 用户ID     : "CentOS-7 Key (CentOS 7 Official Signing Key) <security@centos.org>"
 指纹       : 6341 ab27 53d7 8a78 a7c2 7bb1 24c6 a8a7 f4a8 0eb5
 软件包     : centos-release-7-5.1804.el7.centos.x86_64 (@anaconda)
 来自       : /etc/pki/rpm-gpg/RPM-GPG-KEY-CentOS-7
Running transaction check
Running transaction test
Transaction test succeeded
Running transaction
  正在安装    : tigervnc-server-1.8.0-22.el7.x86_64                                                                                         1/1
  验证中      : tigervnc-server-1.8.0-22.el7.x86_64                                                                                         1/1

已安装:
  tigervnc-server.x86_64 0:1.8.0-22.el7

完毕!
[root@localhost ~]# rpm -aq|grep tiger
tigervnc-license-1.8.0-5.el7.noarch
tigervnc-server-1.8.0-22.el7.x86_64
tigervnc-server-minimal-1.8.0-5.el7.x86_64
3、配置vncserver服务脚本
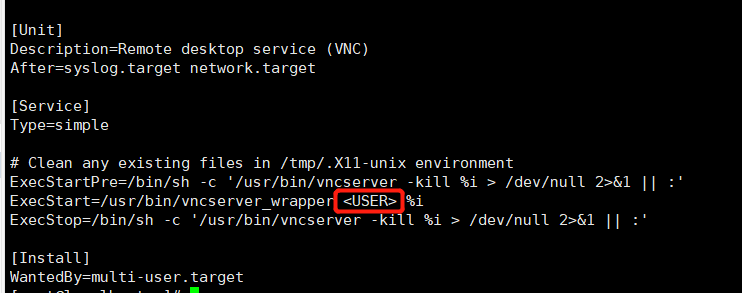
打开/etc/systemd/system/vncserver@:2.service,找到<USER>,用自己的用户名替换掉。
[root@localhost ~]# cp /lib/systemd/system/vncserver@.service /etc/systemd/system/vncserver@:2.service
[root@localhost ~]# vi /etc/systemd/system/vncserver@:2.service
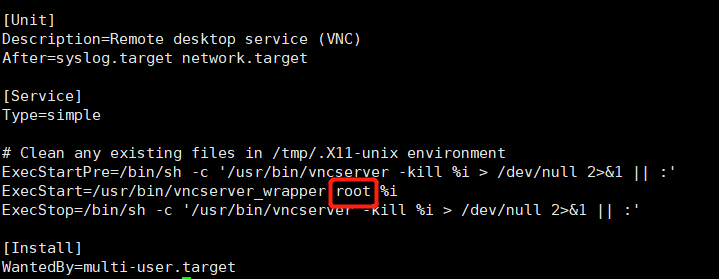
替换成
4、设置vnc密码
[root@localhost ~]# vncpasswd
Password:
Verify:
Would you like to enter a view-only password (y/n)? y
Password:
Verify:
5、设置开机启动
[root@localhost ~]# systemctl daemon-reload
[root@localhost ~]# systemctl enable vncserver@\:2.service
Created symlink from /etc/systemd/system/multi-user.target.wants/vncserver@:2.service to /etc/systemd/system/vncserver@:2.service.
[root@localhost ~]#
6、开启服务
[root@localhost ~]# systemctl start vncserver@\:2.service
[root@localhost ~]# systemctl status vncserver@\:2.service
这里启动失败的话,可以执行执行vncserver来启动vnc服务:
[root@localhost ~]# vncserver

New 'localhost.localdomain:2 (root)' desktop is localhost.localdomain:2

Creating default startup script /root/.vnc/xstartup
Creating default config /root/.vnc/config
Starting applications specified in /root/.vnc/xstartup
Log file is /root/.vnc/localhost.localdomain:2.log
7、查看启动的vnc服务
[root@localhost ~]# vncserver -list

TigerVNC server sessions:

X DISPLAY #    PROCESS ID
:2        137456
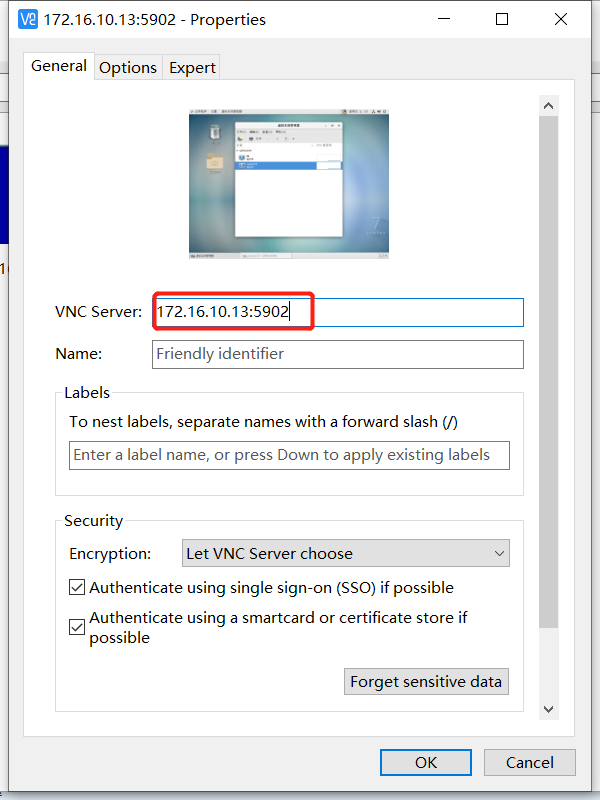
注:这里:1对应远程连接端口5901,如果为:2则远程连接端口为5902,依次类推。
此时可以通过ss命令查看到5902端口已经有了:
[root@localhost ~]# ss -tanp |grep 590
LISTEN     0      128    127.0.0.1:5900                     *:*                   users:(("qemu-kvm",pid=72041,fd=14))
LISTEN     0      128    127.0.0.1:5901                     *:*                   users:(("qemu-kvm",pid=92724,fd=14))
LISTEN     0      5            *:5902                     *:*                   users:(("Xvnc",pid=137456,fd=9))
LISTEN     0      5           :::5902                    :::*                   users:(("Xvnc",pid=137456,fd=10))
到这里,vnc服务已经启动,如果端口没被禁的话,已经可以远程连接上来了
8、最后开端口,590x开放,以5902为例
若系统使用的是firewalld服务,开放端口则可以:
[root@localhost ~]# firewall-cmd --zone=public --add-port=5902/tcp --permanent
success
[root@localhost ~]# firewall-cmd --reload
success
[root@localhost ~]# firewall-cmd --zone=public --list-ports
5902/tcp
9、vnc viewer连接远程
参考连接:https://blog.csdn.net/weixin_42915431/article/details/121660998

 浙公网安备 33010602011771号