

VSCode 打包 Java Maven 项目
1、若出现 命令未找到 的字体,说明环境变量未配置或配置的不对
具体方法详见: https://www.cnblogs.com/hailexuexi/p/19058872
2、执行 打包命令
mvn package
注:目录一定要在 pom.xml 所在的目录


出现 SUCCESS 字样说明 打包成功
3、执行 打包好的 .jar 文件
创建一个文本文件 更名为 *.bat 如 CtiServiceToDataBase.bat
用文本文件打来,写入
java -jar CtiServiceToDataBase.jar
pause

注:这两个文件必须放在同一目录下
若出现 没有主清单属性

则 在 pom.xml 中配置 Maven 打包插件
填写 主类 如: com.CtiServiceToDataBase.App
<build>
  <plugins>
    <!-- 其他插件... -->

    <!-- 配置JAR打包插件,指定主类 -->
    <plugin>
      <groupId>org.apache.maven.plugins</groupId>
      <artifactId>maven-jar-plugin</artifactId>
      <version>3.3.0</version> <!-- 使用最新稳定版本 -->
      <configuration>
        <archive>
          <manifest>
            <!-- 启用主清单属性 -->
            <mainClass>com.CtiServiceToDataBase.App</mainClass> <!-- 替换为你的主类全路径 -->
            <!-- 可选:如果需要依赖包也打包进去(通常用于简化运行) -->
            <addClasspath>true</addClasspath>
            <classpathPrefix>lib/</classpathPrefix>
          </manifest>
        </archive>
      </configuration>
    </plugin>
  </plugins>
</build>

再一次 执行 mvn package 或 点击
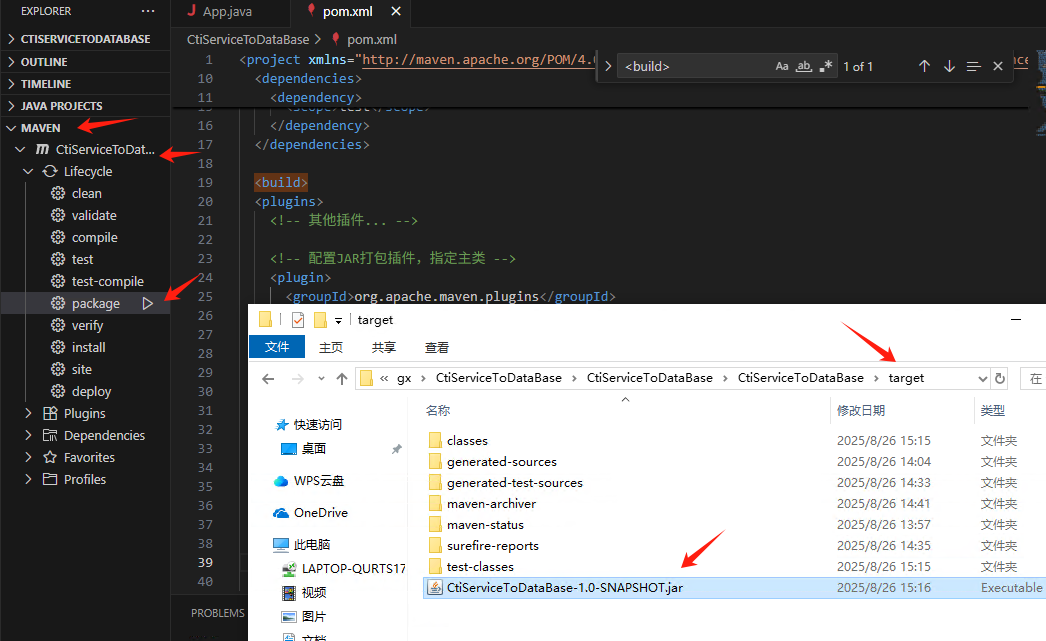
在 target 出现 *.jar 文件 。 用 bat文件执行它则

打包成功!
4、带有资源文件和要将资源包也一起打包的方法
Maven 有默认的资源处理规则,如果你不显式配置 <resources>,它会自动包含 src/main/resources 目录下的所有文件
所以在 src/main/ 下创建资源文件夹为 resources

想要把 所有依赖到JAR 中去 需要加入 org.apache.maven.plugins 插件
下面是完整的 pom.xml 代码
<project xmlns="http://maven.apache.org/POM/4.0.0" xmlns:xsi="http://www.w3.org/2001/XMLSchema-instance"
  xsi:schemaLocation="http://maven.apache.org/POM/4.0.0 http://maven.apache.org/maven-v4_0_0.xsd">
  <modelVersion>4.0.0</modelVersion>
  <groupId>com.CtiServiceToDataBase</groupId>
  <artifactId>CtiServiceToDataBase</artifactId>
  <packaging>jar</packaging>
  <version>1.0-SNAPSHOT</version>
  <name>CtiServiceToDataBase</name>
  <url>http://maven.apache.org</url>
  <dependencies>
    <dependency>
      <groupId>junit</groupId>
      <artifactId>junit</artifactId>
      <version>3.8.1</version>
      <scope>test</scope>
    </dependency>

     <dependency>
      <groupId>org.apache.logging.log4j</groupId>
      <artifactId>log4j-core</artifactId>
      <version>2.17.2</version>
    </dependency>
    <dependency>
      <groupId>org.apache.logging.log4j</groupId>
      <artifactId>log4j-slf4j-impl</artifactId>
      <version>2.17.2</version>
    </dependency>
  </dependencies>

 <!-- 属性定义必须放在这里,build标签之前 -->
  <properties>
    <main.class>com.CtiServiceToDataBase.App</main.class>
  </properties>

<build>
  <plugins>
    <!-- 其他插件... -->
    <!-- 配置JAR打包插件,指定主类 -->
    <plugin>
      <groupId>org.apache.maven.plugins</groupId>
      <artifactId>maven-jar-plugin</artifactId>
      <version>3.3.0</version> <!-- 使用最新稳定版本 -->
      <configuration>
        <archive>
          <manifest>
            <!-- 启用主清单属性 -->
            <mainClass>${main.class}</mainClass> <!-- 替换为你的主类全路径 -->
            <!-- 可选:如果需要依赖包也打包进去(通常用于简化运行) -->
            <addClasspath>true</addClasspath>
            <classpathPrefix>lib/</classpathPrefix>
          </manifest>
        </archive>
      </configuration>
    </plugin>
     <!-- 可选:显式配置资源插件,确保编码生效 -->
      <plugin>
        <groupId>org.apache.maven.plugins</groupId>
        <artifactId>maven-resources-plugin</artifactId>
        <version>3.3.1</version>
        <configuration>
          <encoding>UTF-8</encoding> <!-- 强制资源文件使用UTF-8编码 -->
        </configuration>
      </plugin>
       <!-- 新增:打包所有依赖到JAR中 -->
      <plugin>
        <groupId>org.apache.maven.plugins</groupId>
        <artifactId>maven-assembly-plugin</artifactId>
        <version>3.6.0</version>
        <configuration>
          <descriptorRefs>
            <descriptorRef>jar-with-dependencies</descriptorRef> <!-- 关键:包含所有依赖 -->
          </descriptorRefs>
          <archive>
            <manifest>
              <mainClass>${main.class}</mainClass> <!-- 再次指定主类 -->
            </manifest>
          </archive>
        </configuration>
        <executions>
          <execution>
            <id>make-assembly</id>
            <phase>package</phase> <!-- 绑定到package阶段 -->
            <goals>
              <goal>single</goal>
            </goals>
          </execution>
        </executions>
      </plugin>
  </plugins>

</build>
</project>
执行打包命令后,在 target 目录下生成 两个 .jar 文件
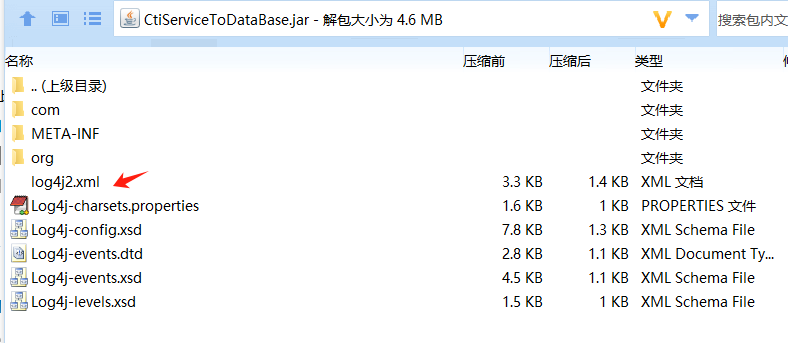
CtiServiceToDataBase-1.0-SNAPSHOT-jar-with-dependencies.jar 这个带有 with-dependencies 就是包含所有依赖的 .jar 文件
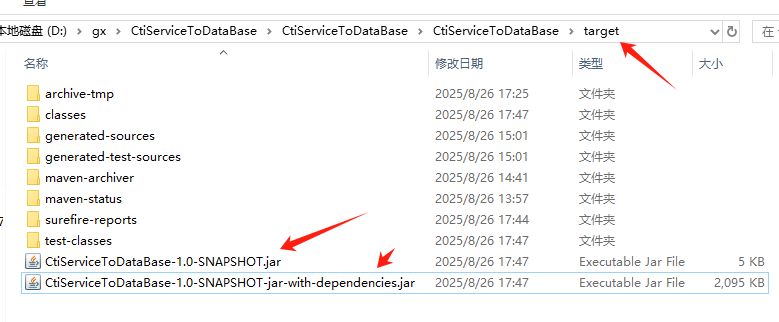
用压缩软件打开就能看到 src/main/resources 目录下配置文件也在里面

 浙公网安备 33010602011771号