
一分钟带你了解下Spring Security!
一、什么是Spring Security?
Spring Security是一个功能强大且高度可定制的身份验证和访问控制框架,它是用于保护基于Spring的应用程序的实际标准。
Spring Security是一个框架,致力于为Java应用程序提供身份验证和授权。与所有Spring项目一样,Spring Security的真正强大之处在于可以轻松扩展以满足自定义要求。
更多信息可以查看官网:https://spring.io/projects/spring-security
二、Spring Security的主要功能
- 认证:验证用户名和密码是否合法(是否系统中用户)
- 授权:是系统用户不代表你能使用某些功能,因为你可能没有权限
- 防御会话固定,点击劫持,跨站点请求伪造等攻击
- Servlet API集成
- 与Spring Web MVC的可选集成
三、快速入门
新建一个SpringBoot的web项目spring-boot-security。
案例1:接口不添加保护
pom文件中不引入Spring Security,然后新建一个controller:
@RestController
public class AppController {

    @GetMapping("/hello")
    public String hello() {
        return "Hello,spring security!";
    }
}
然后打开浏览器访问:http://localhost:8080/hello,成功后返回:
Hello,spring security!
案例2:接口添加保护
- pom文件添加依赖
pom文件中引入Spring Security的starter:
<dependency>
            <groupId>org.springframework.boot</groupId>
            <artifactId>spring-boot-starter-security</artifactId>
        </dependency>
- 访问接口
打开浏览器再次访问http://localhost:8080/hello,会被重定向到登录页http://localhost:8080/login,截图如下:
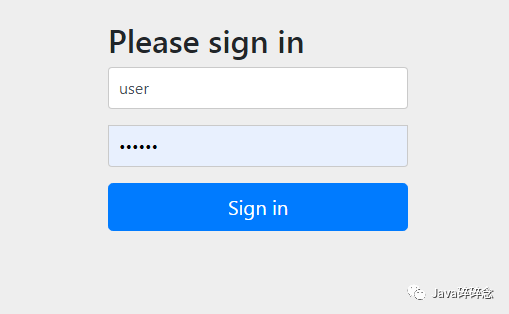
要登录系统,我们需要知道用户名和密码,Spring Security默认的用户名是user,项目启动的时候会生成默认密码(在启动日志中可以看到),输入用户名和密码后就可以访问/hello接口了。
当然也可以自定义用户名密码,在配置文件添加如下内容即可:
spring.security.user.name=java_suisui
spring.security.user.password=123456
四、自定义认证和授权
上面说过Spring Security的功能有“认证”和“授权”,下面通过一个简单的例子实现下自定义的认证和授权。
假设系统中有两个角色:
- ADMIN 可以访问/admin下的资源
- USER 可以访问/user下的资源
按照下面步骤操作即可。
- 新建一个配置类
对于用户名、密码、登录页面、访问权限等都可以在 WebSecurityConfigurerAdapter 的实现类中配置。
WebSecurityConfig代码如下:
/**
 * 配置类
 * @Author java_suisui
 *
 */
@EnableWebSecurity
@Configuration
public class WebSecurityConfig extends WebSecurityConfigurerAdapter {

    @Override
    protected void configure(AuthenticationManagerBuilder auth) throws Exception {
        //配置内存中的 用户名、密码和角色
        auth.inMemoryAuthentication().passwordEncoder(new MyPasswordEncoder()).withUser("user").password("123456").roles("USER");
        auth.inMemoryAuthentication().passwordEncoder(new MyPasswordEncoder()).withUser("admin").password("123456").roles("ADMIN");
    }

    @Override
    protected void configure(HttpSecurity http) throws Exception {
        http.authorizeRequests()
                .antMatchers("/login").permitAll()
                .antMatchers("/user").hasRole("USER") //访问 /user这个接口,需要有USER角色
                .antMatchers("/admin").hasRole("ADMIN")
                .anyRequest().authenticated() //剩余的其他接口,登录之后就能访问
                .and()
                .formLogin().defaultSuccessUrl("/hello");
    }
}
- 创建PasswordEncorder的实现类
内存用户验证时,Spring Boot 2.0以上版本引用的security 依赖是 spring security 5.X版本,此版本需要提供一个PasswordEncorder的实例。
MyPasswordEncoder代码如下:
public class MyPasswordEncoder implements PasswordEncoder {
    @Override
    public String encode(CharSequence rawPassword) {
        return rawPassword.toString();
    }

    @Override
    public boolean matches(CharSequence rawPassword, String encodedPassword) {
        return encodedPassword.equals(rawPassword);
    }
}
- 登录验证
浏览器打开http://localhost:8080/login,
- 使用user登录,可以访问/user
- 使用admin登录,可以访问/admin
如果使用user登录后访问/admin,会报403错误,具体错误信息如下:
Whitelabel Error Page
This application has no explicit mapping for /error, so you are seeing this as a fallback.

Tue Nov 19 16:26:28 CST 2019
There was an unexpected error (type=Forbidden, status=403).
Forbidden
结果和我们预期的一致,说明简单的自定义认证和授权功能已经实现了。
完整源码地址: https://github.com/suisui2019/springboot-study
推荐阅读
1.一分钟带你学会利用mybatis-generator自动生成代码!
3.SpringBoot系列-整合Mybatis(注解方式)
4.SpringBoot系列-整合Mybatis(XML配置方式)
Java碎碎念,一个坚持原创的公众号,为您提供一系列系统架构、微服务、Java、SpringBoot、SpringCloud等高质量技术文章。
如果觉得文章不错,希望可以随手转发或者”在看“哦,非常感谢哈!
关注下方公众号后回复「1024」,有惊喜哦!

本文由博客一文多发平台 OpenWrite 发布!

 浙公网安备 33010602011771号