
Android学习:自定义组件,DrawView
布局文件:
<LinearLayout xmlns:android="http://schemas.android.com/apk/res/android"
    xmlns:tools="http://schemas.android.com/tools"
    android:layout_width="match_parent"
    android:layout_height="match_parent"
    tools:context=".CustomViewActivity"
    android:id="@+id/root"
    android:orientation="vertical">
</LinearLayout>
自定义类:
这个类必须写在一个独立的java文件中
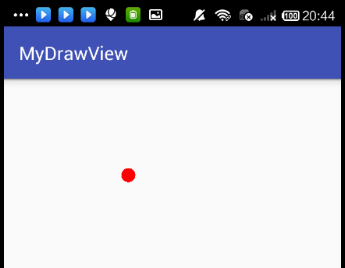
public class DrawView extends View
{
    public float currentX = 40;
    public float currentY = 50;
    // 定义、并创建画笔
    Paint p = new Paint();
    public DrawView(Context context)
    {
        super(context);
    }
    public DrawView(Context context , AttributeSet set)
    {
        super(context,set);
    }
    @Override
    public void onDraw(Canvas canvas)
    {
        super.onDraw(canvas);
        // 设置画笔的颜色
        p.setColor(Color.RED);
        // 绘制一个小圆(作为小球)
        canvas.drawCircle(currentX, currentY, 15, p);
    }
    // 为该组件的触碰事件重写事件处理方法
    @Override
    public boolean onTouchEvent(MotionEvent event)
    {
        // 修改currentX、currentY两个属性
        currentX = event.getX();
        currentY = event.getY();
        // 通知当前组件重绘自己
        invalidate();
        // 返回true表明该处理方法已经处理该事件
        return true;
    }
}
将组件添加到容器中去
public class MainActivity extends AppCompatActivity {

    @Override
    protected void onCreate(Bundle savedInstanceState) {
        super.onCreate(savedInstanceState);
        setContentView(R.layout.activity_main);

        LinearLayout root=(LinearLayout) findViewById(R.id.root);
        final myDrawView draw=new myDrawView(this);
        draw.setMinimumWidth(300);
        draw.setMinimumHeight(500);
        root.addView(draw);
    }
}
也可以在布局文件里加载自定义的组件。把布局文件修改如下:
Android studio在写布局文件的时候,代码补全可以侦测到自定义组件的名字,确实很智能。
<?xml version="1.0" encoding="utf-8"?>
<LinearLayout xmlns:android="http://schemas.android.com/apk/res/android"
    xmlns:tools="http://schemas.android.com/tools"
    android:layout_width="match_parent"
    android:layout_height="match_parent"
    tools:context="myDrawView"
    android:id="@+id/root"
    android:orientation="vertical">

    <allegro.mydrawview.myDrawView
        android:layout_width="match_parent"
        android:layout_height="match_parent" />
</LinearLayout>
这样在java代码中不必要额外写代码加载自定义的组件了。下面的代码已经注释了加载组件的代码。
public class MainActivity extends AppCompatActivity {

    @Override
    protected void onCreate(Bundle savedInstanceState) {
        super.onCreate(savedInstanceState);
        setContentView(R.layout.activity_main);

        /*LinearLayout root=(LinearLayout) findViewById(R.id.root);
        final myDrawView draw=new myDrawView(this);
        draw.setMinimumWidth(300);
        draw.setMinimumHeight(500);
        root.addView(draw);*/
    }
}
这个程序的效果是,随手指移动的小球。

 浙公网安备 33010602011771号