
MyCat—高可用+Haproxy+Keepalived
一、避免 MyCat 成为系统中的单点
整体架构(实例)
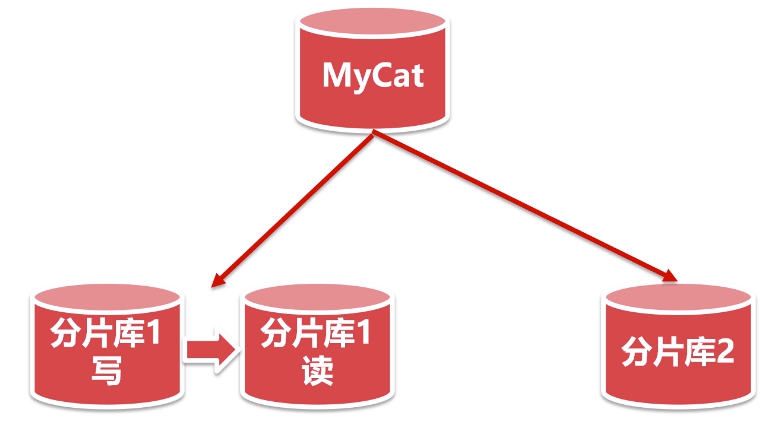
mycat 高可用
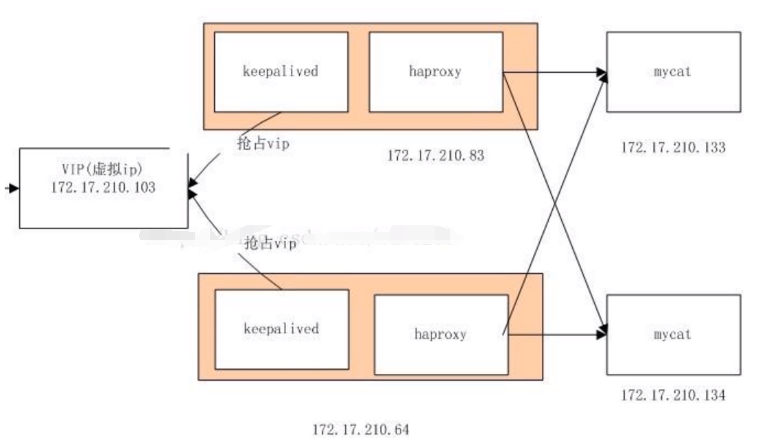
负载均衡有 Nginx 和 Haproxy。
Nginx 支持 http 协议的,做前端应用的代理。用它去做负载均衡。而 MyCat 不支持 http 协议。所以我们使用 Haproxy。
Haproxy 支持 TCP 层的代理。
Keepalied 双机热备功能,如果其中一台机器挂了,还有另一台机器继续服务。
二、准备环境
1、准备5台虚拟机

202:准备 MyCat 、MySQL。202为从数据库
203:准备 MyCat 、MySQL。203为主数据库,MyCat 配置与 202 一致
204:准备 MySQL
schema 配置
<?xml version="1.0"?> <!DOCTYPE mycat:schema SYSTEM "schema.dtd"> <mycat:schema xmlns:mycat="http://io.mycat/"> <schema name="user" checkSQLschema="true" sqlMaxLimit="100" randomDataNode="dn1"> <table name="t_user" primaryKey="id" dataNode="dn1,dn2" rule="mod-long"> </table> <table name="t_city" primaryKey="id" type="global" dataNode="dn1,dn2" rule="mod-long"> </table> <table name="t_order" primaryKey="id" dataNode="dn1,dn2" rule="mod-long"> <childTable name="t_order_item" primaryKey="id" joinKey="order_id" parentKey="id"> </childTable> </table> </schema> <dataNode name="dn1" dataHost="localhost203" database="user" /> <dataNode name="dn2" dataHost="localhost204" database="user" /> <dataHost name="localhost203" maxCon="1000" minCon="10" balance="2" writeType="0" dbType="mysql" dbDriver="jdbc" switchType="1" slaveThreshold="100"> <heartbeat>select user()</heartbeat> <writeHost host="hostM1" url="jdbc:mysql://192.168.1.203:3306?useSSL=false&serverTimezone=Asia/Shanghai&characterEncoding=utf8&useUnicode=true&zeroDateTimeBehavior=convertToNull" user="root" password="root"> <readHost host="hostS1" url="jdbc:mysql://192.168.1.202:3306?useSSL=false&serverTimezone=Asia/Shanghai&characterEncoding=utf8&useUnicode=true&zeroDateTimeBehavior=convertToNull" user="root" password="root" > </readHost> </writeHost> </dataHost> <dataHost name="localhost204" maxCon="1000" minCon="10" balance="0" writeType="0" dbType="mysql" dbDriver="jdbc" switchType="1" slaveThreshold="100"> <heartbeat>select user()</heartbeat> <writeHost host="hostM1" url="jdbc:mysql://192.168.1.204:3306?useSSL=false&serverTimezone=Asia/Shanghai&characterEncoding=utf8&useUnicode=true&zeroDateTimeBehavior=convertToNull" user="root" password="root"> </writeHost> </dataHost> </mycat:schema>
三、 准备 Haproxy
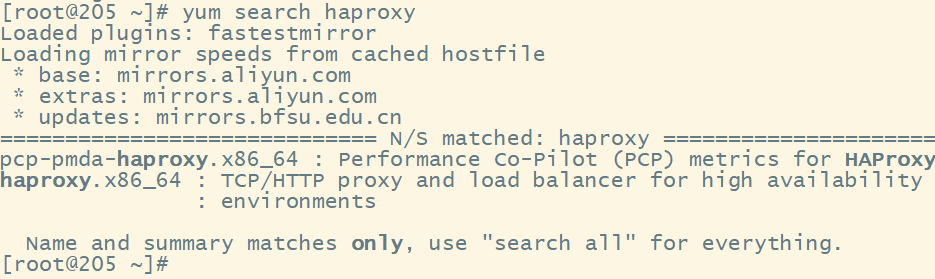
支持 TCP/HTTP 协议的
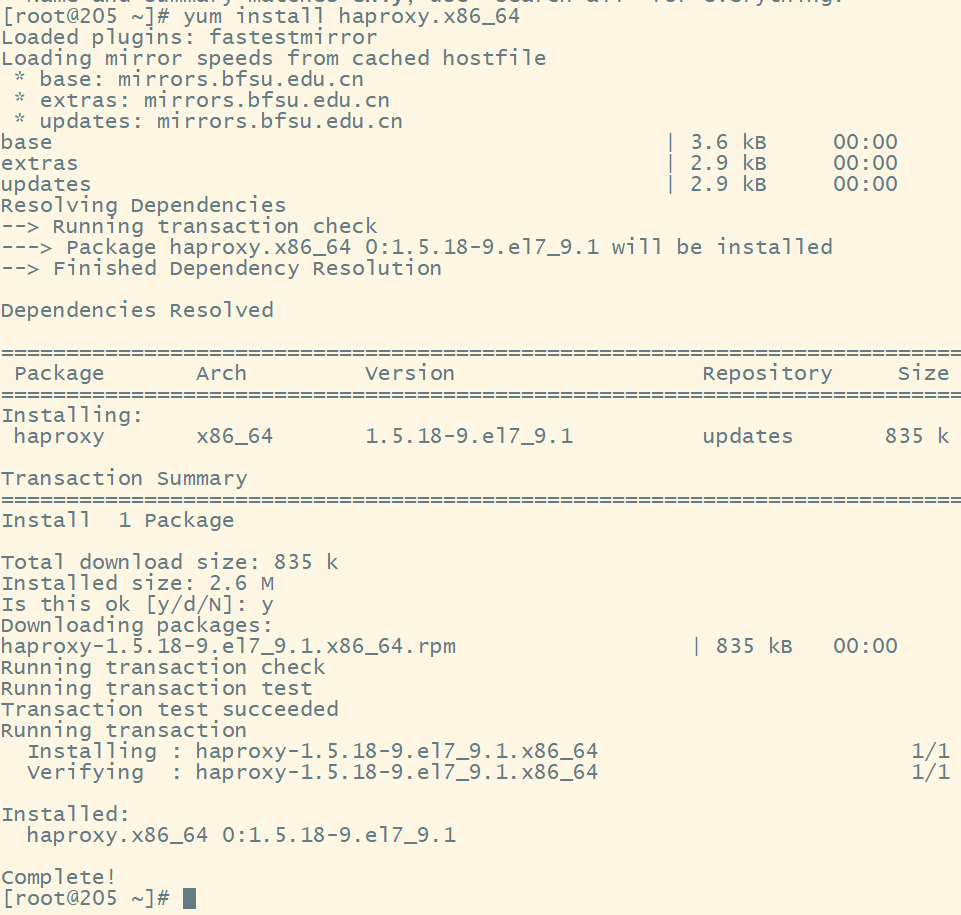
安装
yum install haproxy.x86_64
配置 Haproxy
进入 /etc/haproxy/ 目录
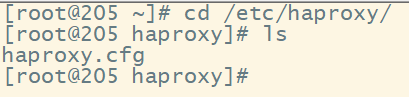
配置
#---------------------------------------------------------------------
# Example configuration for a possible web application.  See the
# full configuration options online.
#
#   http://haproxy.1wt.eu/download/1.4/doc/configuration.txt
#
#---------------------------------------------------------------------

#---------------------------------------------------------------------
# Global settings
#---------------------------------------------------------------------
global
    # to have these messages end up in /var/log/haproxy.log you will
    # need to:
    #
    # 1) configure syslog to accept network log events.  This is done
    #    by adding the '-r' option to the SYSLOGD_OPTIONS in
    #    /etc/sysconfig/syslog
    #
    # 2) configure local2 events to go to the /var/log/haproxy.log
    #   file. A line like the following can be added to
    #   /etc/sysconfig/syslog
    #
    #    local2.*                       /var/log/haproxy.log
    #
    log         127.0.0.1 local2

    chroot      /var/lib/haproxy
    pidfile     /var/run/haproxy.pid
    maxconn     4000
    user        haproxy
    group       haproxy
    daemon

    # turn on stats unix socket
    stats socket /var/lib/haproxy/stats

#---------------------------------------------------------------------
# common defaults that all the 'listen' and 'backend' sections will
# use if not designated in their block
#---------------------------------------------------------------------
defaults
# mode 修改成 tcp
    mode                    tcp
    log                     global
    option                  httplog
    option                  dontlognull
    option http-server-close
    option forwardfor       except 127.0.0.0/8
    option                  redispatch
    retries                 3
    timeout http-request    10s
    timeout queue           1m
    timeout connect         10s
    timeout client          1m
    timeout server          1m
    timeout http-keep-alive 10s
    timeout check           10s
    maxconn                 3000

#---------------------------------------------------------------------
# main frontend which proxys to the backends
#---------------------------------------------------------------------
# 端口号
frontend  main *:5000
    acl url_static       path_beg       -i /static /images /javascript /stylesheets
    acl url_static       path_end       -i .jpg .gif .png .css .js

    use_backend static          if url_static
    # 我们使用默认的 app,tcp 连接要走到 default_backend
    default_backend             app

#---------------------------------------------------------------------
# static backend for serving up images, stylesheets and such
#---------------------------------------------------------------------
backend static
    balance     roundrobin
    server      static 127.0.0.1:4331 check

#---------------------------------------------------------------------
# round robin balancing between the various backends
#---------------------------------------------------------------------
# 也就是这里
backend app
   # 负载均衡策略    默认:轮播
   # check 会定时检查 服务是否可用
    balance     roundrobin
    server  app1 192.168.1.202:8066 check
    server  app2 192.168.1.203:8066 check
   # server  app3 127.0.0.1:5003 check
   # server  app4 127.0.0.1:5004 check
启动 Haproxy
haproxy -f /etc/haproxy/haproxy.cfg

现在我们使用 Navicat 连接 Haproxy 端口号 5000


平繁刷新 t_user 表中的数据,有数据就说明成功了。这时我再关掉一台 MyCat 服务
关闭 202 这台机器的 MyCat,刷新表没有任何问题。 Haproxy 请求走的 203。
四、准备 keepalived 205、206(通过 keepalived 给 Haproxy 做高可用),keepalived 要和 Haproxy 在同一台机器上
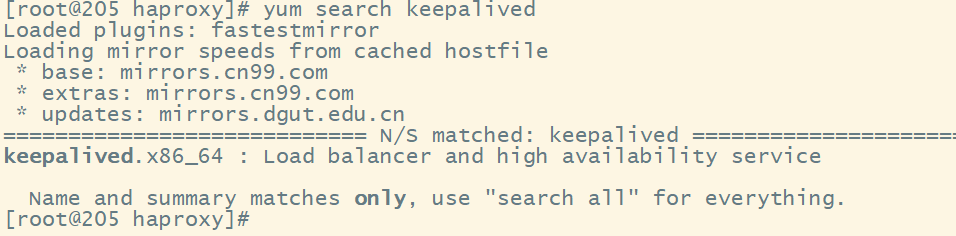
1、搜索 keepalived
yum search keepalived
2、安装
yum install -y keepalived.x86_64
3、配置 keepalived
vim /etc/keepalived/keepalived.conf
! Configuration File for keepalived
# 注意各种奇葩空格,有些地方少了就不生效了

global_defs {
   notification_email {
     acassen@firewall.loc
     failover@firewall.loc
     sysadmin@firewall.loc
   }
   notification_email_from Alexandre.Cassen@firewall.loc
   smtp_server 192.168.200.1
   smtp_connect_timeout 30
   router_id LVS_DEVEL
   vrrp_skip_check_adv_addr
  #  vrrp_strict
   vrrp_garp_interval 0
   vrrp_gna_interval 0
}

vrrp_script chk_haproxy {
   script "killall -0 haproxy"
   interval 2
}

vrrp_instance VI_1 {
    state MASTER
    interface ens33
    virtual_router_id 51
    priority 100
    advert_int 1
    authentication {
        auth_type PASS
        auth_pass 1111
    }
    virtual_ipaddress {
        192.168.1.207
    }
    track_script {
        chk_haproxy
    }
}

virtual_server 192.168.1.207 6000 {
    delay_loop 6
    lb_algo rr
    lb_kind NAT
    persistence_timeout 50
    protocol TCP

    real_server 192.168.1.206 5000 {
        weight 1
    }
}
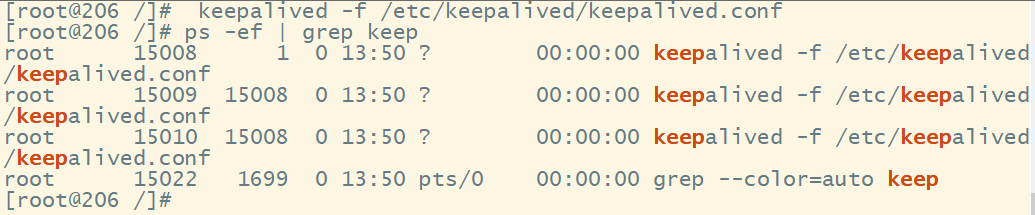
4、启动
keepalived -f /etc/keepalived/keepalived.conf
5、使用 Navicat 连接,使用 虚拟IP 连接


 浙公网安备 33010602011771号